
Subscribe to Our Youtube Channel
Related Manuals for Dynapac DRP45DX


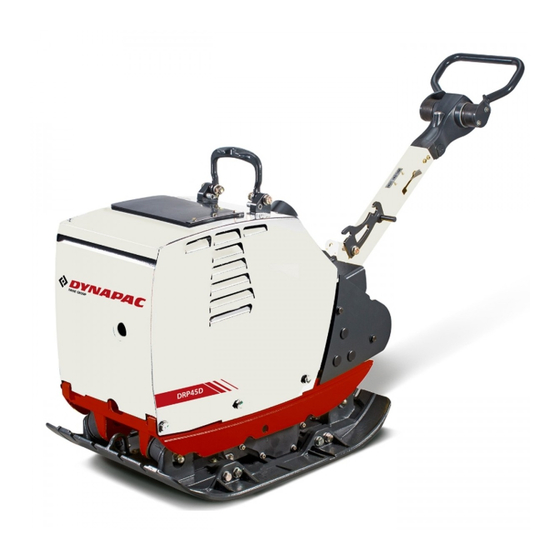
Summary of Contents for Dynapac DRP45DX
- Page 1 Operating Instruction/Maintenance Instruction Original Operating Instructions DRP45DX Reversible plate S/N 101 925 40 1001> DL8 206 39 EN © 01/2022...
- Page 2 WARNING: Breathing diesel engine exhaust exposes you to chemicals known to the State of California to cause cancer and birth defects or other reproductive harm. Always start and operate the engine in a well-ventilated area. If in an enclosed area, vent the exhaust to the outside. Do not modify or tamper with the exhaust system.
-
Page 3: Table Of Contents
3.6.2 Starting the engine........................30 3.7 Work mode........................... 31 3.7.1 Persons in the danger area......................31 3.7.2 Operation........................... 31 3.7.3 Parking the machine........................31 3.8 Refuelling............................. 32 3.9 Maintenance work........................33 3.9.1 Preliminary remarks........................33 3.9.2 Working on the engine....................... 33 DRP45DX... - Page 4 4.1.2 Oil pressure control light......................45 4.1.3 Engine control light........................45 4.1.4 Operating hour meter......................... 46 4.1.5 Recoil starter..........................46 4.1.6 Dynapac Compaction Indicator (DCI) display................46 4.2 Steering rod..........................47 4.2.1 Height adjustment........................47 4.2.2 Locking pawl lever........................48 4.2.3 Throttle lever..........................
- Page 5 9.2 Starting the engine with the recoil starter................109 9.3 Starting the engine with jump leads..................112 9.4 Fuse assignment........................113 9.5 Engine control light........................114 9.6 Engine malfunctions......................... 116 9.7 Malfunctions during operation....................118 9.8 DCI faults............................ 119 Disposal............................. 121 10.1 Final shut-down of machine....................122 DRP45DX...
- Page 6 Table of contents DRP45DX...
-
Page 7: Introduction
Introduction Introduction DRP45DX... -
Page 8: Foreword
For your own personal safety you should only use original parts from Dynapac. For your machine we offer service kits to make maintenance easier. In the course of technical development we reserve the right for technical modifications without prior notification. - Page 9 Introduction – Foreword The above notes do not constitute an extension of the warranty and liability conditions specified in the general sales and delivery conditions of Dynapac GmbH. We wish you successful work with your Dynapac machine. DRP45DX...
-
Page 10: Machine Type Plate And Engine Type Plate
Serial number (2): Nominal Power Operating Mass Year of Construction Serial-No. Ammerländer Str. 93 D-26203 Wardenburg Made in Germany B-924-0001 Fig. 1: Machine type plate (example) Please enter here: Engine type (1): Engine number (2): Fig. 2: Engine type plate (example) DRP45DX... -
Page 11: Technical Data
Technical data Technical data DRP45DX... - Page 12 Dimensions with “STONEGUARD” (special base plate for paving stones) 1360 1735 (31.5) (39) (53.5) (68.3) (38.2) (26.8) Dimensions in millimetres (Dimensions in inches) Weights Operating weight (W) (970) (lbs) Operating weight (W (1014) (lbs) Operating weight (W (1038) (lbs) DRP45DX...
- Page 13 Technical data Weights Basic weight (926) (lbs) Dynapac Compaction Indicator (DCI) (optional equipment) (+ 11) (lbs) Travel characteristics Max. working speed m/min (92) (ft/min) Max. working speed with “STONEGUARD” m/min (82) (ft/min) Max. gradeability (depending on soil; depending on weather)
-
Page 14: Noise And Vibration Data
£ 2.5 m/s Total vibration value a on crushed rock determined acc. to ISO 5349 and EN 500. Associated uncertainty K = 0.3 m/s , determined acc. to EN 12096. Observe the daily vibration load (work safety acc. to 2002/44/EC). DRP45DX... -
Page 15: Concerning Your Safety
Concerning your safety Concerning your safety DRP45DX... -
Page 16: Basic Prerequisites
WARNING! Danger to life or danger of severe injuries if failing to comply! Sections marked accordingly indicate a dangerous situation that could lead to fatal or severe injuries, if this warning is disregarded. DRP45DX... -
Page 17: Personal Protective Equipment
Safety shoes They protect against heavy falling parts and slipping on slippery ground. Protective gloves They protect the hands against scrapes, punctures or deeper injuries, irritating and caustic substances and burns. DRP45DX... -
Page 18: Intended Use
Compaction of all types of soils Repair work on all types of soil Paving of walkways Work in trenches Underfilling and compaction of hard shoulders Intended use also includes compliance with the specified oper- ating, maintenance and repair measures. DRP45DX... -
Page 19: Improper Use
Regular safety inspections by an expert / qualified person Performance of the prescribed maintenance work within the specified time Immediate performance of necessary repair work Exclusive use of original spare parts DRP45DX... -
Page 20: Definition Of Responsible Persons
Observe your local laws and regulations. Rights, obligations and rules of conduct for driver or operator: The driver or operator must: be instructed about his rights and obligations, wear protective equipment as appropriate for the application, have read and understood the operating instructions, DRP45DX... - Page 21 Persons under the influence of alcohol, medication or drugs are not allowed to operate, service or repair the machine. Maintenance and repair work requires specific knowledge and must therefore only be performed by trained specialists. DRP45DX...
-
Page 22: Basic Safety Regulations For Safe Operation
Machines which are not safe to operate or in traffic must be imme- diately taken out of service and shall not be used, until these defi- ciencies have been properly rectified. Safety installations and switches must neither be removed nor must they be made ineffective. DRP45DX... -
Page 23: Handling Fuels And Lubricants
/ personal protective equipment physical and chemical properties stability and reactivity toxicological data environmental data notes on waste disposal information on transport legislation other data DRP45DX... -
Page 24: Safety Regulations And Environmental Protection Regulations For Handling Diesel Fuel
Diesel fuel is an environmentally hazardous substance! – Always keep diesel fuel in proper containers. – Immediately bind spilled diesel fuel with an oil- binding agent and dispose of properly. – Dispose of diesel fuel and fuel filters according to regulations. DRP45DX... -
Page 25: Safety Regulations And Environmental Protection Regulations For Handling Oil
Immediately bind spilled oil with an oil-binding agent. ENVIRONMENT! Oil is an environmentally hazardous substance! – Always keep oil in proper containers. – Immediately bind spilled oil with an oil-binding agent. – Dispose of oil and oil filter according to regula- tions. DRP45DX... -
Page 26: Safety Regulations And Environmental Protection Regulations For Handling Hydraulic Oil
Immediately bind spilled oil with an oil-binding agent. ENVIRONMENT! Oil is an environmentally hazardous substance! – Always keep oil in proper containers. – Immediately bind spilled oil with an oil-binding agent. – Dispose of oil and oil filter according to regula- tions. DRP45DX... -
Page 27: Safety Regulations And Environmental Protection Regulations For Handling Battery Acid
Do not wear jewellery (watch, bracelets, etc.) when working on the battery. – Wear your personal protective equipment (pro- tective gloves, protective clothing, goggles). ENVIRONMENT! Battery acid is an environmentally hazardous substance! – Dispose of battery and battery acid according to regulations. DRP45DX... -
Page 28: Safety Regulations And Environmental Protection Regulations When Handling Lubrication Grease
Lubrication grease is an environmentally haz- ardous substance! – Always keep lubrication grease in proper con- tainers. – Collect excess lubrication grease and dispose of it according to regulations. – Dispose of cloths soiled with lubrication grease according to regulations. DRP45DX... -
Page 29: Loading/Transporting The Machine
Fasten the lifting gear only at the specified lifting points. Danger to the life of persons if they step or stand under a sus- pended load. When lifting the machine avoid uncontrolled movements of the load. If necessary hold the load with guide ropes. DRP45DX... -
Page 30: Start-Up Procedure
Do not inhale exhaust fumes, because they contain toxic sub- stances, which could cause damage to health, unconsciousness or even death. Avoid operation in closed or partly closed rooms, or ensure ade- quate ventilation when working in trenches. DRP45DX... -
Page 31: Work Mode
Before leaving the machine: shut down the engine, pull off the ignition key, Secure the machine against accidental tipping over, Secure the machine against unauthorized use. Mark machines, which could be in the way, with a clearly visible sign. DRP45DX... -
Page 32: Refuelling
Do not spill any fuel. Collect leaking fuel, do not let it seep into the ground. Wipe off spilled fuel. Keep dirt and water away from the fuel. A leaking fuel tank can cause an explosion. Ensure tight fit of the cover; if necessary, replace immediately. DRP45DX... -
Page 33: Maintenance Work
The connection cables of the battery must not touch or rub against machine parts. 3.9.4 Cleaning work Do not perform cleaning work while the motor is running. Allow the engine to cool down before starting cleaning work. Do not use gasoline or other easily inflammable substances for cleaning. DRP45DX... -
Page 34: Measures For Longer Shut-Down Periods
‘Measures prior to extended shut-down period’ on page 104. It is not necessary to define a maximum storage period if these measures have been performed. 3.9.6 After maintenance work Reassemble all guards and protections. DRP45DX... -
Page 35: Repair
Only operate the machine after it has been repaired. When replacing safety relevant components, only original spare parts must be used. Repairs must only be performed by an expert/qualified person. When performing welding work on the machine you should cover the fuel tank with insulating material. DRP45DX... -
Page 36: Signage
Keep stickers and signage in good and legible condition and comply with their meaning. Replace damaged and illegible stickers or signage immediately. START OPERATION Dynapac Engine Oil 200 STOP API CJ-4 / ACEA E9/E7 Part No.: 4812161855 (5 l) / 4812161856 (20 l) - Page 37 Do not use a defective starter rope. Fig. 11 Warning sticker – California Proposition 65 WARNING California Proposition 65 Warning This product contains chemicals that cause cancer + chemicals that are reproductive toxicants B-DEC-0316 Fig. 12 Information sticker - Lashing point Fig. 13 DRP45DX...
- Page 38 Information sticker - Guaranteed sound capacity level Fig. 15 Information sticker - Ultra-low sulphur fuel Fig. 16 Information sticker - Low ash engine oil Dynapac Engine Oil 200 API CJ-4 / ACEA E9/E7 Part No.: 4812161855 (5 l) / 4812161856 (20 l) B-924-0042 Fig.
- Page 39 Concerning your safety – Signage Operation sticker - Travel lever Fig. 18 Operation sticker - Throttle lever B-DEC-0374 Fig. 19 Brief operating instructions START Instruction sticker - Wear ear protection Instruction sticker - Observe operating instructions OPERATION STOP B-DEC-0375 Fig. 20 DRP45DX...
- Page 40 6 mois anualmente / 250 h cada 6 meses B-DEC-0273 Fig. 21 Machine type plate (example) Made by Designation Type Nominal Power Operating Mass Year of Construction Serial-No. Ammerländer Str. 93 D-26203 Wardenburg Made in Germany B-924-0002 Fig. 22 DRP45DX...
-
Page 41: Safety Components
Concerning your safety – Safety Components 3.12 Safety Components B-695-0036 Fig. 23 Protection hood Heat protection cover Belt guard DRP45DX... - Page 42 Concerning your safety – Safety Components DRP45DX...
-
Page 43: Indicators And Control Elements
Indicators and control elements Indicators and control elements DRP45DX... -
Page 44: Machine
Turn the ignition key back to position “I” when the engine starts. Fig. 25 The starter switch is designed with a re-start lock. The ignition key must first be turned back to posi- tion “0” before a new starting attempt can be made. DRP45DX... -
Page 45: Oil Pressure Control Light
B-695-0093 flashes yellow Control unit has detected a fault or main- tenance is necessary. Fig. 27 Evaluate the flashing interval and per- Ä Chapter 9.5 form troubleshooting ‘Engine control light’ on page 114. If necessary, contact our Customer Service. DRP45DX... -
Page 46: Operating Hour Meter
B-GEN-0114 Fig. 28 4.1.5 Recoil starter B-GEN-0084 Fig. 29 4.1.6 Dynapac Compaction Indicator (DCI) display The DCI displays the compaction status of the layer to be com- pacted. Ä Chapter 6.5 Description of display options ‘Dynapac Compaction Indicator (DCI)’... -
Page 47: Steering Rod
Indicators and control elements – Steering rod 4.2 Steering rod B-925-0015 Fig. 31 Height adjustment Locking pawl lever Throttle lever Handle 4.2.1 Height adjustment Setting the steering rod height to the operator’s level. B-695-0097 Fig. 32 DRP45DX... -
Page 48: Locking Pawl Lever
For locking and unlocking the steering rod. B-695-0096 Fig. 33 4.2.3 Throttle lever Position “MIN” Idle speed Engine start position Position “MAX” Maximum speed B-695-0095 Fig. 34 4.2.4 Handle Shift forward Forward travel “Middle” position Neutral position Pull back Reverse travel B-695-0094 Fig. 35 DRP45DX... -
Page 49: Checks Prior To Start Up
Checks prior to start up Checks prior to start up DRP45DX... -
Page 50: Notes On Safety
63. Ä Chapter 8.2.1.1 Open and secure the protection hood ‘Opening the protection hood’ on page 71. Close the protection hood again after work is completed Ä Chapter 8.2.1.2 ‘Closing the protection hood’ on page 72. DRP45DX... -
Page 51: Visual Inspections And Function Tests
Check the condition of the fuel tank and fuel lines and for leaks. Check the bolted connections are tight and secure. Check the machine for contamination and damage. Check the hydraulic oil cooler for dirt. Check the starter rope for chafing. DRP45DX... -
Page 52: Daily Maintenance
ð The oil level must be between the “MIN” and “MAX” marks. NOTICE! B-695-0117 Danger of engine damage! Fig. 37 – Do not overfill with engine oil. If the oil level is too low, top up oil to the “MAX” mark. Insert the dipstick. DRP45DX... -
Page 53: Checking The Fuel Level; Topping Up Fuel
After filling the fuel tank for the first time. After several unsuccessful starting attempts. After replacing the fuel filter. Protective equipment: Working clothes Safety shoes Protective gloves The fuel tank must be full when bleeding. Check the fuel level; top up if necessary. DRP45DX... - Page 54 Turn the ignition key to position “0”. Repeat the procedure several times to completely bleed the fuel system. ð The engine is ready for starting. If the engine does not start after bleeding, contact our customer service department. B-ELE-0080 Fig. 41 DRP45DX...
-
Page 55: Checking The Rubber Buffers
Ä Chapter 6.4 ‘Parking the machine Park the machine safely in secured condition’ on page 63. Allow the engine to cool down. Check all rubber buffers for tight fit, cracks and tear-offs. Replace damaged rubber buffers immediately. B-695-0040 Fig. 43 DRP45DX... - Page 56 Checks prior to start up – Daily maintenance DRP45DX...
-
Page 57: Operation
Operation Operation DRP45DX... -
Page 58: Folding Down And Adjusting The Steering Rod
Do not click the locking pawl lever into posi- tion again. The steering rod must be able to swing freely. B-695-0100 Fig. 44 Use the height adjustment to set the steering rod to the required height. B-695-0097 Fig. 45 DRP45DX... -
Page 59: Starting The Engine
Set the throttle lever to position “MIN”. Engine start is only possible in position “MIN”. If the throttle lever is not in this posi- tion, starting is blocked by the control system. B-695-0060 Fig. 46 Set the handle to position “0”. B-695-0056 Fig. 47 DRP45DX... - Page 60 Turn the ignition key to position “II”. ð The starter cranks the engine. The oil pressure control light goes out. NOTICE! Danger of engine damage! – Warm up engine for a short while before starting work. Do not operate the engine immediately under full load. DRP45DX...
-
Page 61: Work Mode
Make sure that nobody is in the danger zone. Set the throttle lever to position “MAX”. B-695-0059 Fig. 51 Shift the handle forwards. ð The machine vibrates forward with a speed which corre- sponds to the travel lever position. B-695-0057 Fig. 52 DRP45DX... - Page 62 Fig. 55 Help if the machine gets stuck Keep shifting the throttle lever between “MIN” and “MAX” positions. At the same time use the steering rod to pull the machine right and left, until it comes free. B-695-0061 Fig. 56 DRP45DX...
-
Page 63: Parking The Machine In Secured Condition
Do not shut down the engine all of a sudden from full load speed, but let it idle for about two minutes. Turn the ignition key to position “0”. ð The engine is shut down. B-ELE-0080 Remove the ignition key. Fig. 58 DRP45DX... -
Page 64: Dynapac Compaction Indicator (Dci)
Operation – Dynapac Compaction Indicator (DCI) 6.5 Dynapac Compaction Indicator (DCI) The DCI informs the driver about the compaction status of the sub- structure and enables the detection and selected re-compaction of weak spots. An acceleration sensor on the base plate measures the reaction of the subsoil to the base plate of the machine. -
Page 65: Loading/Transporting The Machine
Loading/transporting the machine Loading/transporting the machine DRP45DX... -
Page 66: Loading The Machine
Attach the lifting tackle to the designated lifting eye (1). DANGER! Danger to life caused by suspended loads! – Do not step or stand under suspended loads. Lift the machine carefully and set down again at the intended B-692-0246 location. Fig. 61 DRP45DX... -
Page 67: Lashing The Machine To The Transport Vehicle
Lifting tackle must not be damaged by machine parts. Protective equipment: Working clothes Safety shoes Protective gloves Pull the lashing belts crosswise over the marked lashing point (1). B-692-0064 Fig. 62 Lash the machine securely to the transport vehicle as shown. B-692-0244 Fig. 63 DRP45DX... - Page 68 Loading/transporting the machine – Lashing the machine to the transport vehicle DRP45DX...
-
Page 69: Maintenance
Maintenance Maintenance DRP45DX... -
Page 70: Preliminary Remarks And Safety Notes
After maintenance work has been completed, dispose of fuels and lubricants, filters, sealing elements and cleaning cloths in an envi- ronmentally friendly way. After all maintenance work is completed reinstall all guards and safety installations. DRP45DX... -
Page 71: Preparations/Concluding Work
Put the screws (2) and the matching washers to the side. Loosen the front screws (1) on both sides. Fold the protection hood forward. B-692-0203 Fig. 64 Secure the protection hood against accidental closing. For this tighten the screw (1) on both sides. B-692-0204 Fig. 65 DRP45DX... - Page 72 Working clothes Protective gloves Loosen the screw (1) on both sides. Close the protection hood. B-692-0204 Fig. 66 Tighten the screw (1) on both sides. Screw in screws (2) and washers on both sides and tighten them. B-692-0205 Fig. 67 DRP45DX...
-
Page 73: Fuels And Lubricants
Fuel quality The following fuel specifications are permitted: EN 590 ASTM D 975, grade no. 1-D S15 and 2-D S15 BS 2869 A1/A2 In order to fulfil national emission regulations, the legally required fuels must be used (e.g. sulphur content). DRP45DX... -
Page 74: Oil For Exciter Shaft Housing
32 mm /s at 40 °C (104 °F). When refilling or changing oil, use only hydraulic oil type HVLP according to DIN 51524, part 3, or hydraulic oil type HV according to ISO 6743/4. DRP45DX... - Page 75 – After the changeover check the hydraulic oil fil- ters increasingly for contamination. – Have regular oil analyses performed regarding the water content and mineral oil. – Replace the hydraulic oil filter at the latest after 500 operating hours. DRP45DX...
-
Page 76: List Of Fuels And Lubricants
SAE 10W-30 Steering rod Hydraulic oil (ISO), HV 32 0.4 l Ä Chapter 8.3.4 ‘Hydraulic oil’ Specification: (0.11 gal us) on page 74 or ester based biodegradable hydraulic oil Ä Chapter 8.3.4.2 ‘Bio-degradable Specification: hydraulic oil’ on page 75 DRP45DX... -
Page 77: Running-In Instructions
Retighten the bolted connections on the machine. Check the V-belt Ä Chapter 8.11.3 ‘Servicing the V-belt’ on page 103. Check the oil level in the exciter shaft housing Ä Chapter 8.11.4 ‘Checking the oil level in the exciter housing’ on page 104. DRP45DX... -
Page 78: Maintenance Table
Changing the hydraulic oil As required 8.11.1 Cleaning the machine 8.11.2 Cleaning the cooling fins and the cooling air intake openings 8.11.3 Servicing the V-belt 8.11.4 Checking the oil level in the exciter housing 8.11.5 Measures prior to extended shut-down period DRP45DX... -
Page 79: Weekly
Clean the cover. NOTICE! Danger of engine damage! – Prevent dirt from getting into the air intake opening. B-HAT-0006 – Do not clean the air filter housing with compressed air. Fig. 70 Clean the filter housing with a clean, lint-free cloth. DRP45DX... - Page 80 Insert the air filter (1) carefully into the filter housing and fasten it with the knurled nut (2). NOTICE! Danger of engine damage! – Ensure correct fit of air filter cover and seal. Close the cap (3). B-HAT-0006 Fig. 72 DRP45DX...
-
Page 81: Checking And Cleaning The Water Separator
Loosen the drain plug and drain the fluid until pure diesel fuel starts to run out. Collect the escaping fluid. Screw the drain plug back in tightly. Ensure leak tightness. Dispose of collected fluid in line with environmental regula- tions. B-HAT-0054 Fig. 74 DRP45DX... -
Page 82: Semi-Annually
Clean battery poles and pole clamps and grease them with pole grease (Vaseline). B-692-0066 On serviceable batteries check the acid level, if necessary top up to the filling mark with distilled water. Fig. 76 Install battery and vibration insulation mats. Install the bracket of the battery. DRP45DX... -
Page 83: Annually / Every 250 Operating Hours
Ä Chapter 6.4 ‘Parking the machine Park the machine safely in secured condition’ on page 63. Allow the engine to cool down. Unscrew the V-belt guard (1). B-692-0067 Fig. 77 Unscrew the guard (1). B-692-0206 Fig. 78 DRP45DX... - Page 84 Check the centre distance (x) between the centrifugal clutch (1) and the V-belt pulley (2). ð Nominal value: 384 ± 1 mm (15.1 ± 0.04 in) If the centre distance is incorrect, contact our customer service. B-692-0183 Fig. 82 DRP45DX...
- Page 85 Check the base plate’s frequency with a suitable measuring instrument (e.g. Sirometer). Ä Chapter 2 ‘Technical data’ on page 11 ð Nominal value: Park the machine safely Ä Chapter 6.4 ‘Parking the machine in secured condition’ on page 63. DRP45DX...
-
Page 86: Checking, Adjusting The Valve Clearance
63. Let the engine cool down to ambient temperature. Remove the air filter cover (2). Disassemble the covering (1). B-HAT-0010 Fig. 85 Unscrew the fastening screws (1). Remove the valve cover (2) with seal. B-HAT-0011 Fig. 86 DRP45DX... - Page 87 Adjust the hexagon nut (2), until the feeler gauge (1) can be inserted and pulled out with noticeable resistance after the screw (3) has been tightened. B-HAT-0013 Fig. 88 Concluding work Install the valve cover (2) with a new seal. Tighten the fastening screws (1) evenly. B-HAT-0011 Fig. 89 DRP45DX...
-
Page 88: Changing The Engine Oil And Cleaning The Oil Filter
Ä Chapter 6.4 ‘Parking the machine Park the machine safely in secured condition’ on page 63. Draining off engine oil Clean the area around the dipstick and pull the dipstick out. Clean the area around the drain hose. B-695-0118 Fig. 91 DRP45DX... - Page 89 CAUTION! Danger of eye injuries caused by particles flying around! – Wear your personal protective equipment (protective gloves, protective clothing, goggles). Use compressed air to blow the oil filter out from the inside to the outside. B-HAT-0049 Fig. 94 DRP45DX...
- Page 90 After a short test run check the oil level on the dipstick; if nec- essary, top up to the top dipstick mark. B-695-0117 Fig. 97 Concluding work Check oil filter and drain plug for leaks. Dispose of oil in line with environmental regulations. DRP45DX...
-
Page 91: Replacing The Fuel Filter
Pull the fuel line (3) off the fuel filter (2). Take the fuel filter out of the bracket (1) and replace it with a new one. Plug on the fuel line. Insert the fuel filter into the tank. Close the cap. B-HAT-0017 Fig. 99 DRP45DX... -
Page 92: Replacing The Air Filter
Danger of engine damage! – Prevent dirt from getting into the air intake opening. – Do not clean the air filter housing with compressed air. Fig. 101 Clean the filter housing with a clean, lint-free cloth. Replace the air filter. DRP45DX... -
Page 93: Changing The Oil In The Exciter Housing
Clean the area around the bleeding screw (1) and filling/drain plug (2). Tilt the machine slightly towards the oil drain side and secure it properly. Unscrew the bleeding screw. Unscrew the filling/drain plug and collect any oil running out. B-695-0179 Fig. 103 DRP45DX... - Page 94 ð Nominal value: Bottom edge of filling/drain bore. Clean the bleed screw and filling/drain plug and screw them in with a low-strength sealing agent (e.g. spare parts number: DL 009 700 16). Dispose of oil in line with environmental regulations. B-695-0180 Fig. 105 DRP45DX...
-
Page 95: Checking The Hydraulic Oil Level
Mark: approx. 40 mm (1.6 in) below the filler opening B-695-0141 Fig. 108 Fill in hydraulic oil, bleed the system NOTICE! Components may get damaged! – Use only oil of the permitted specification Ä Chapter 8.3.4 ‘Hydraulic oil’ on page 74. DRP45DX... - Page 96 Wait until all air has escaped and then tighten the bleeding screw. B-695-0182 Fig. 110 Fill in hydraulic oil up to the mark on the steering rod head. B-695-0142 Fig. 111 Concluding work Fasten the filler screw, tightening torque: 45 Nm (33.2 ft·lbf). B-695-0143 Fig. 112 DRP45DX...
-
Page 97: Replacing The Starter Rope
Loosen the knot (3) in the starter rope and remove the old starter rope. Carefully turn the coil back, until the recoil spring is relieved. Fig. 114 Thread in the new starter rope and fix it with knots on both ends . A = 15 mm (0.6 in) Fig. 115 DRP45DX... - Page 98 Slowly guide the starter handle back to initial position . Pull the starter handle to check the function and light move- ment of the recoil starter. Fig. 117 Assemble the recoil starter (2) with fastening screws (1). Fig. 118 DRP45DX...
-
Page 99: Lubricating The Machine
924 109 63) Grease Grease the mechanical parts between the fork head (1), lever B-692-0186 (2) and bolt (3). Fig. 120 Fasten the cover (2) with four fastening screws, tightening torque: 10 Nm (7.5 ft·lbf). B-692-0245 Fig. 121 DRP45DX... -
Page 100: Every 2 Years/Every 500 Operating Hours
Fig. 122 Press the handle forward against the stop and secure it in this position using suitable means. B-692-0070 Fig. 123 Unscrew the bleeding screw and collect any oil running out. Screw in the bleeding screw. B-695-0183 Fig. 124 DRP45DX... - Page 101 Fig. 126 Fill in hydraulic oil up to the mark on the steering rod head. B-695-0142 Fig. 127 Fasten the filler screw, tightening torque: 45 Nm (33.2 ft·lbf). Dispose of oil in line with environmental regulations. B-695-0143 Fig. 128 DRP45DX...
-
Page 102: As Required
Wear your personal protective equipment (protective gloves, protective clothing, goggles). Blow out the cooling fins and cooling air intake openings with Fig. 130 compressed air. In case of damp or oily contamination you should consult our customer service department. DRP45DX... -
Page 103: Servicing The V-Belt
The V-belt cannot be re-tightened. Replace the V-belt if it is damaged or if the compression measurement is exceeded Ä Chapter 8.9.1 ‘Replacing the V- B-GEN-0122 belt’ on page 83. Fig. 132 Fasten the V-belt guard (1). B-692-0067 Fig. 133 DRP45DX... -
Page 104: Checking The Oil Level In The Exciter Housing
Repair damaged paint; preserve bare areas thoroughly with anti-corrosive agent. Clean the water separator. Fill the fuel tank with diesel fuel to prevent the formation of condensation water in the tank. Change engine oil and oil filter. DRP45DX... - Page 105 For standstill periods of more than one month you should always disconnect the battery. Do not forget to perform reg- ular open-circuit voltage measurements. 8.11.5.3 Measures before restarting Replace the fuel filter. Replace the air filter. DRP45DX...
- Page 106 Check cables, hoses and lines for cracks and leaks. Check the service life of hydraulic hoses and replace if nec- essary. Start the engine and run it for 15 to 30 minutes with idle speed. Check the oil levels. Clean the machine thoroughly. DRP45DX...
-
Page 107: Troubleshooting
Troubleshooting Troubleshooting DRP45DX... -
Page 108: Preliminary Remarks
Whenever a fault occurs you should therefore thoroughly read these instructions on correct operation and maintenance. If you cannot locate the cause of a fault or rectify it yourself by fol- lowing the trouble shooting chart, you should contact our customer service department. DRP45DX... -
Page 109: Starting The Engine With The Recoil Starter
‘Folding down and adjusting the steering rod’ on page 58. Set the throttle lever to position “MIN”. Engine start is only possible in position “MIN”. If the throttle lever is not in this posi- tion, starting is blocked by the control system. B-695-0060 Fig. 135 DRP45DX... - Page 110 Always keep an eye on a running machine. NOTICE! B-GEN-0084 The starter rope may tear off! Fig. 139 – Do not pull the starter rope all the way against the end stop. Pull the starter handle quickly and with power. DRP45DX...
- Page 111 If the engine does not start during the first attempt, repeat the starting process. NOTICE! Danger of engine damage! – Warm up engine for a short while before starting work. Do not operate the engine immediately under full load. DRP45DX...
-
Page 112: Starting The Engine With Jump Leads
Ä Chapter 6.2 ‘Starting the engine’ Start the engine on page 59. After starting disconnect the minus poles first and the plus poles after. Install the bracket of the battery. Fig. 140 Close the protection hood. DRP45DX... -
Page 113: Fuse Assignment
Do not use fuses with higher ampere ratings and do not bridge fuses. B-695-0116 Fig. 141 Position Fuse Amperage Designation 25 A Potential 30 25 A Potential 30 (ECU) F103 15 A Potential 15 F275 DCI fuse (optional equipment) DRP45DX... -
Page 114: Engine Control Light
The engine is shut Lack of cooling air Clean the cooling fins and the down if the engine oil cooling air intake openings. temperature continues Check air guide plates and to rise. ducts for completeness and good sealing. DRP45DX... - Page 115 Have it checked by qualified expert personnel. Overspeed. Have it checked by qualified expert personnel. The engine is shut down. 9 x short Internal fault in control Engine diagnostic device is unit required. Have it checked by qualified expert personnel. DRP45DX...
-
Page 116: Engine Malfunctions
Check the fuel level; top up if necessary. power and speed. Fuel filter clogged Check the fuel filter; replace if necessary. Tank ventilation blocked Ensure sufficient ventilation of the tank. Air in the fuel system Check the fuel system for air ingress. Bleed the fuel system. DRP45DX... - Page 117 Insufficient pretension of the spring Check the pretension of the spring; adjust not return to initial if necessary. position Spring broken Replace the recoil starter. Engine runs with V-belt torn Replacing the V-belt high speed, but no vibration. DRP45DX...
-
Page 118: Malfunctions During Operation
Carefully loosen the filler screw (1). ð The air makes a slight hissing sound when escaping. Wait until all air has escaped and then tighten the filler screw, tightening torque: 45 Nm (33.2 ft·lbf). B-692-0092 Fig. 143 DRP45DX... -
Page 119: Dci Faults
Weak spots in the sub-base In unfavourable cases, an excessively varying material composition or moisture in the sub-base can influence the meas- uring results. On material which is too dry or moist, lower measuring values will be displayed. DRP45DX... - Page 120 Troubleshooting – DCI faults DRP45DX...
-
Page 121: Disposal
Disposal Disposal DRP45DX... -
Page 122: Final Shut-Down Of Machine
23. Protective equipment: Working clothes Safety shoes Protective gloves Safety goggles Remove the batteries. Empty the fuel tank. Drain engine oil from engine and exciter housing. Drain off hydraulic oil. DRP45DX...
Need help?
Do you have a question about the DRP45DX and is the answer not in the manual?
Questions and answers