Advertisement
Quick Links
INSTALLATION INSTRUCTIONS & HOMEOWNERS GUIDE FOR HEALTHY CLIMATE
HEAT RECOVERY VENTILATOR (HRV) & ENERGY RECOVERY VENTILATOR (ERV)
*HRV3−095
(Y2142)
*HRV3−095−GDX**
(Y2967)
ERV3−150
(Y2138)
ERV3−200
(Y2139)
THESE INSTRUCTIONS
MUST REMAIN WITH THE HOME-
OWNER FOR FUTURE REFERENCE
*These models have earned the ENERGY STAR® mark by meeting strict energy
efficiency guidelines set by Natural Resources Canada and the US EPA. These
models meet ENERGY STAR requirements only when used in Canada
WARNING
Risk of property damage, injury or death.
Installation, adjustments, alterations, service and
maintenance must be performed by a qualified
service technician.
Shipping and Packing List
Package 1 of 1 contains:
1 − Assembled ventilator
1 − Bag assembly containing:
2 − Drain spout assemblies (HRV units only)
1 − Drain tee (HRV units only)
4 − Hanging straps
1 − Installation manual
1 − Warranty card
1 − Wall−mounted remote control
General Information
These instructions are intended as a general guide and do
not supersede local codes in any way. Consult authorities
who have jurisdiction before installation.
12/12
*2P1212*
INDOOR AIR QUALITY
KITS AND ACCESSORIES
506239−01
12/12
Supersedes 05/12
*HRV4−150
*HRV3−195
(Y5443)
*HRV4−200
*HRV3−300
(Y5444)
*HRV4−150−GDX**
(Y5445)
*HRV4−200−GDX**
(Y5446)
**Available in
Canada only
All Units
Conform to
CSA & UL
Standards
Table of Contents
Shipping and Packing List
General Information
Terms & Definitions
Application
. . . . . . . . . . . . . . . . . . . . . . . . . . . . . . . . . . . . . . . . . . . . . . .
Required Tools
Ventilator Specifications & Performance Chart
Ventilator Dimensions and Flow Diagrams
Defrost Cycle (HRV)
HRV3−095 Port Configuration & Airflow
Requirements
Controlling the Ventilators
Electronics
. . . . . . . . . . . . . . . . . . . . . . . . . . . . . . . . . . . . . . . . . . . . . . .
Dehumidistat Operation
Ventilation Control
Optional Timers
Installation Methods
Installing HRV/ERV Unit
Installing Drain Connection and Grilles
Installing Weatherhoods
Installing Main Control
Activating Dry Contact Controls/Elect. Connections
Installing/Operating Fan Timers
Interlocking HRV/ERV to Furnace/Air Handler
Electrical Connections (Wiring Diagrams)
Airflow Balancing using Pitot Tube
Airflow Balancing using the Door Ports
Sequence of Operation
Troubleshooting
Replacement Part Summary
Homeowner Maintenance Information
Ventilator Application Map HRV/ERV Ventilators
Page 1
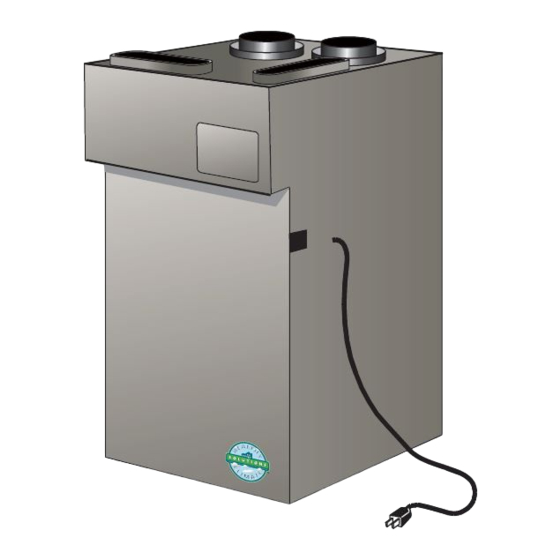
HEALTHY CLIMATE
HRV & ERV VENTILATORS
(Y2143)
(Y2144)
Dual-core
(door re-
moved)
. . . . . . . . . . . . . . . . . . . . . . . . . . . . . . . . . .
. . . . . . . . . . . . . . . . . . . . . . . . . . . . . . . . . . . . . . .
. . . . . . . . . . . . . . . . . . . . . . . . . . . . . . . . . . . . . . . .
. . . . . . . . . . . . . . . . . . . . . . . . . . . . . . . . . . . . . . . . . . .
. . . . . . . . . . . . . . . . .
. . . . . . . . . . . . . . . . . . . .
. . . . . . . . . . . . . . . . . . . . . . . . . . . . . . . . . . . . . . .
. . . . . . . . . . . . . . . . . . . . . . .
. . . . . . . . . . . . . . . . . . . . . . . . . . . . . . . . . . . . . . . . . . . .
. . . . . . . . . . . . . . . . . . . . . . . . . . . . . . . . . .
. . . . . . . . . . . . . . . . . . . . . . . . . . . . . . . . . . . .
. . . . . . . . . . . . . . . . . . . . . . . . . . . . . . . . . . . . . . . . .
. . . . . . . . . . . . . . . . . . . . . . . . . . . . . . . . . . . . . . . . . . .
. . . . . . . . . . . . . . . . . . . . . . . . . . . . . . . . . . . . . . .
. . . . . . . . . . . . . . . . . . . . . . . . . . . . . . . . . . . .
. . . . . . . . . . . . . . . . . . . . . . .
. . . . . . . . . . . . . . . . . . . . . . . . . . . . . . . . . . . .
. . . . . . . . . . . . . . . . . . . . . . . . . . . . . . . . . . . . .
. . . . . . . . . . . . . . . . . . . . . . . . . . . . .
. . . . . . . . . . . . . . . . .
. . . . . . . . . . . . . . . . . . . . .
. . . . . . . . . . . . . . . . . . . . . . . . . . .
. . . . . . . . . . . . . . . . . . . . . . .
. . . . . . . . . . . . . . . . . . . . . . . . . . . . . . . . . . . .
. . . . . . . . . . . . . . . . . . . . . . . . . . . . . . . . . . . . . . . . . .
. . . . . . . . . . . . . . . . . . . . . . . . . . . . . . . .
. . . . . . . . . . . . . . . . . . . . . . . .
*P506239-01*
Litho U.S.A.
®
®
HRV3−150−TPD
(Y5447)
HRV3−150−TPF
(Y5448)
1
1
2
2
2
3
5
6
6
7
8
8
8
9
12
13
17
19
20
22
. . . . . . . . . . . .
23
23
24
24
28
31
35
38
39
41
. . . . . . . . . . . . . .
42
506239−01
Advertisement

Related Manuals for Healthy Climate Solutions HEALTHY CLIMATE HRV3-095

Summary of Contents for Healthy Climate Solutions HEALTHY CLIMATE HRV3-095
- Page 1 INDOOR AIR QUALITY KITS AND ACCESSORIES Litho U.S.A. ® 506239−01 HEALTHY CLIMATE 12/12 HRV & ERV VENTILATORS Supersedes 05/12 ® INSTALLATION INSTRUCTIONS & HOMEOWNERS GUIDE FOR HEALTHY CLIMATE HEAT RECOVERY VENTILATOR (HRV) & ENERGY RECOVERY VENTILATOR (ERV) *HRV4−150 *HRV3−195 (Y5443) (Y2143) *HRV4−200 *HRV3−300...
- Page 2 Balancing Tools − Various Options Terms & Definitions Pitot Tube Balancing Kit (Case, 8 ft. vinyl tubing, Defrost Mode (HRV) to ensure reliable operation during Pitot tube, magnehelic gauge [0 − 0.25˜], & cold weather, the HRV will automatically cycle through its mounting plate) .
- Page 3 Single−Core ERV Single−Core HRV Units Dual−Core HRV Units Specifications Units HRV3 HRV3 HRV3 HRV4 HRV4 HRV3−195 HRV3−300 ERV3−150 ERV3−200 Model No. −150−TPD −150−TPF −095/−095−GDX −150/−150−GDX −200/−200−GDX (Y2143) (Y2144) (Y2138) (Y2139) (Y5447) (Y5448) (Y2142/Y2967) (Y5443/ Y5445) (Y5444/Y5446) ® Energy Star qualified (Canada Only) 14 x 17−1/4 x 14 x 17−1/4 x...
- Page 4 Single−Core ERV Single−Core HRV Units Dual−Core HRV Units Specifications Units HRV3 HRV3 HRV3 HRV4 HRV4 HRV3−195 HRV3−300 ERV3−150 ERV3−200 Model No. −150−TPD −150−TPF −095/−095−GDX −150/−150−GDX −200/−200−GDX (Y2143) (Y2144) (Y2138) (Y2139) (Y5447) (Y5448) (Y2142/Y2967) (Y5443/ Y5445) (Y5444/Y5446) OPTIONAL FAN CURVES SPEEDS (FACTORY TESTED) Speed 4−med high in.
- Page 5 Ventilator Dimensions and Flow Diagrams BALANCING DAMPER BALANCING DAMPER FILTER BLOWER FRESH STALE AIR AIR TO FROM INSIDE INSIDE *All Duct Connections MOTOR 6" (152 mm) NOTE − Front clearance of 25 inches (635 mm) is STALE FRESH AIR recommended for AIR TO CORE FROM OUTSIDE...
- Page 6 HRV3−095 Port Configuration & Airflow FRESH ADJUSTABLE HANGING STALE STRAPS WITH S HOOK (4) AIR TO FROM FRESH OUT- OUT- THREADED INSERTS AIR TO SIDE SIDE (4) at corners INSIDE STALE AIR FROM INSIDE TOP VIEW 18−1/2" FRESH AIR (470 mm) STALE AIR TO OUT- FROM SIDE (Exhaust) 5"...
- Page 7 Requirements Connecting appliances to the HRV/ERV unit The following appliances should not be connected to the HRV/ERV unit: clothes dryer range top stove top fan central vacuum system NOTE − Failure to follow this instruction will void the HRV/ERV unit warranty. DANGER Risk of Carbon Monoxide Poisoning and/or Explosion.
- Page 8 Controlling the HRV/ERV Today’s modern, air tight homes require fresh outdoor air HRV controls include a dehumidistat function which can be to maintain a healthy indoor air environment. The amount set to achieve a dehumidification effect from the HRV dur- of ventilation required in a home depends upon: ing the winter heating season.
- Page 9 Ventilation Controls (included) ERV Ventilation Control (Y2165) Service Indicator LED After 4 months, a SERVICE" in- dicator will appear. Refer to Homeowner Maintenance In- Home ventilation provided by the ERV unit is easily con- formation, page 41. Upon completion of maintenance, re- trolled with included ERV Ventilation System control.
- Page 10 Ventilation Controls (optional) * NOTE: Recirculation is available on HRV3−095, HRV3−150, Standby setting (Fan speed 0) HRV3−200 only. Electronic dehumidistat 4-Mode Descriptions Four selectable modes of operation (see 4−Mode De- The two optional digital controls have 4 operational modes scriptions" in left column of this page) and 2 or 5 speeds on each mode to adjust indoor ventila- Continuous Ventilation (VENT) tion levels.
- Page 11 Ventilation Controls (optional) − continued * NOTE: Recirculation is available on HRV3−095, HRV3−150, Running the Programmed Setting After the program- HRV3−200 only. ming has been completed, activate the program: Programmable 5-Speed/4-Mode Control (Y2172) Press the MODE button until PROGRAM" and RUN" are indicated.
- Page 12 Optional Timers The timer will override the Operational Mode (regardless of the setting) and initiate high-speed ventilation. Upon completion of the timer cycle, the HRV/ERV will return to preselected operational mode and speed setting. 20 Minute Timer (Y2168) 20/40/60 Minute Timer (Y2169) Initiates high-speed ventilation for 20, 40, or 60 minutes.
- Page 13 Installation Methods All duct joints must be fastened with screws, rivets or duct There are three methods of installation for the HRV ERV: sealant and wrapped with mastic or quality duct tape to Simplified installation (Page 14) prevent leakage. Mastic is preferred but if duct tape is used Partially dedicated installation (Page 15) it should be the aluminum foil type.
- Page 14 Installation Methods Simplified (Return/Return) Simplified Installation (Return/Return Method) The simplified method draws stale air from the cold air re- turn duct of the air handler/furnace and introduces an equal amount of fresh air farther downstream into the cold air return (see figures 8 and 9). Key points The HRV ERV unit must be balanced.
- Page 15 Installation Methods Partially Dedicated Partially Dedicated Installation Stale air ducts should be installed in areas of the home where the poorest indoor air quality exists (bathrooms and The partially dedicated installation draws stale air from kitchen). Each location with a stale air duct should have a specific points in the house and introduces an equal timer to initiate high−speed ventilation.
- Page 16 Installation Methods Fully Dedicated Fully Dedicated Installation Stale air ducts should be installed in areas of the home where the poorest indoor air quality exists (bathrooms and The fully dedicated installation draws stale air from specific kitchen). Each location with a stale air duct should have a points in the house and delivers fresh air to specific loca- timer to initiate high−speed ventilation.
- Page 17 Installing HRV/ERV unit conditioned space where it will be possible to conveniently WARNING service the unit. Typically the HRV ERV unit would be lo- cated in the mechanical room or an area close to the out- Electric Shock Hazard. side wall where the weather hoods will be mounted. If a Can cause injury or death.
- Page 18 Suspending the Unit using adjustable hanging straps Use 4 screws and 4 washers (field provided) to attach the hanging straps to the floor joists. The washer must be wider than the eyelet of the grommet on the hanging strap. By design, the adjustable hanging straps reduce the possibility of noise, resonance, and harmonics.
- Page 19 the "T" fitting to point upward, and connect the drain line. Installing Drain Connection (HRV unit only) Tape or fasten base to avoid any kinks. This creates a During a defrost cycle, the HRV unit may produce some ˆtrap˜ which will hold some condensate and prevent odors condensation.
- Page 20 Weatherhoods Installing Weatherhoods Fixed covered weatherhoods have a built−in bird screen Installing Ducting from Weatherhoods to the with a ¼" (6mm) mesh to prevent foreign objects from en- (HRV/ERV) Unit tering the ducting labeled SUPPLY and EXHAUST. The inner and outer liners of the flexible insulated duct 5"...
- Page 21 Units with Dual Hood Kit The Dual Hood Kit (Y3813) offers the benefit of requiring only one 6˜ hole in the exterior wall to complete the connec- tions for fresh air intake and stale air exhaust. The pres- sure drop/airflow charts should be referred to when match- ing the Dual Hood to the HRV / ERV.
- Page 22 6. Connect red, green and yellow to the wiring terminals Installing Main Control located on the back plate (detail C). The main control may be installed onto a 2" x 4" electrical 7. Secure a single wire to the wire retainer located on the switch box or it may be surface−mounted onto a wall.
- Page 23 Setting Standby" when using an Optional Main Control The HRV/ERV will be fully−off" when the OFF position is CAUTION selected on the optional Main Control. Timers and/or other controls will not function when the HRV/ERV is in the OFF Building codes in some areas re- position.
- Page 24 Lockout mode jumper wire must be connected between ON and RED. Connect the 2 timers wires to ON and HI (see figure 23). The timer can be set to lockout mode (timers disabled) as follows: press and hold SELECT for 5 seconds; then the Connect the 2 wires from the timer high−speed status light will flash;...
- Page 25 Figure 25. Residential Wiring Diagram HRV3−095, HRV4−150, HRV4−200, HRV3−195, HRV3−300, ERV3−150, ERV3−200 TERMINAL BLOCK THERMISTOR (Not on all units) GROUNDED PLUG DOOR SWITCH SEE AUTO− TRANS- FORMER DEFROST DETAIL DETAIL BELOW BELOW DIRECT MOUNTED CAPACITOR ® Page 25 Healthy Climate HRV/ERV Ventilators...
- Page 26 Figure 26. Residential Wiring Diagram HRV3−150−TPD Page 26 12/12...
- Page 27 Figure 27. Residential Wiring Diagram HRV3−150−TPF ® Page 27 Healthy Climate HRV/ERV Ventilators...
- Page 28 Installer Selectable High Speed Settings Airflow Balancing Using Pitot Tube The circuit board on this unit has adjustable DIP switches It is necessary to have balanced airflow in HRV/ERV units. to select the maximum air flow at high speed. Adjusting The volume of air brought in from the outside must equal high speed can be useful to accurately satisfy the calcu- the volume of air exhausted by the unit if the airflow is not...
- Page 29 Excessive negative pressure may have several undesir- reading. Repeat this procedure in the other (supply or able effects. In some geographic locations, soil gases such return) duct. as methane and radon may be drawn into the home though 6. Determine which duct has the highest airflow (highest basement/ground contact areas.
- Page 30 NOTE − Duct connections will vary, depending on model. Field−supplied balancing Outdoors damper (optional) Place Pitot tube a Place Pitot tube a minimum of 18" from minimum of 18" from blower or elbows. blower or elbows. Pitot tube Magnehelic High Pressure Side Gauge Low Pressure Side Figure 30.
- Page 31 Airflow balancing using the door ports Available on Selected Models Door balancing ports (available only for HRV4−150, 4. Close the HRV Door. Initiate power and operate the HRV4−200, HRV3−150−TPD, and HRV3−150−TPF) are de- HRV on high speed. Operate the forced air system on high speed (if the HRV is connected to the forced air signed to be used in conjunction with a Magnehelic Gauge system) .
- Page 32 Table 1. Airflow Balancing Reference HRV3−150−TPD & HRV3−150−TPF Speed 5 (factory setting) Speed 4 Speed 3 Pressure Drop Pressure Drop Pressure Drop Fresh Air Stale Air Fresh Air Stale Air Fresh Air Stale Air "w.g. "w.g. "w.g. 0.470 0.300 0.260 0.480 0.310 0.270...
- Page 33 Table 2. Airflow Balancing Reference HRV4−150 Speed 5 (factory setting) Speed 4 Speed 3 Pressure Drop Pressure Drop Pressure Drop Fresh Air Stale Air Fresh Air Stale Air Fresh Air Stale Air "w.g. "w.g. "w.g. 0.090 0.040 0.040 0.095 0.050 0.045 0.100 0.055...
- Page 34 Table 3. Airflow Balancing Reference HRV4−200 Speed 5 (factory setting) Speed 4 Speed 3 Pressure Drop Pressure Drop Pressure Drop Fresh Air Stale Air Fresh Air Stale Air Fresh Air Stale Air "w.g. "w.g. "w.g. 0.055 0.040 0.040 0.060 0.045 0.045 0.065 0.050...
- Page 35 Sequence of Operation Operational Operational SYSTEM SYSTEM Flowchart Flowchart POWER ON POWER ON Wall control 80% LED (top Wall control ON/OFF LED Check Check operation operation LED) flashes to indicate flashes to indicate revision, connections & connections & verified verified revision, then flashes until then flashes until confirm 12VAC...
- Page 36 Sequence of Operation (continued) Self−Test Operational Terminal Block Operation Flowchart SYSTEM POWER ON operation verified issue detected; Terminal action required Standby mode block LED flashes operation jumper ON toRED to indicate verified revision NOTES − Operation of HRV/ERV without external control: issue detected;...
- Page 37 Sequence of Operation (continued) Outdoor humidity sampling Dehumidistat Disable automatically runs HRV/ERV fan Complete Defrost in LOW speed ventilation for 3 mode. Refer to Defrost mode minutes every 6 hours. This defrost operation enabled commences and resets upon logic for schedule power up of HRV/ERV.
- Page 38 Troubleshooting Symptom Cause Solution Poor airflow(s) Mesh on outside hoods plugged Clean exterior hoods or vents Filters plugged Remove and clean filter Core obstructed Remove and clean core House grilles closed or blocked Check and open grilles Dampers closed (if installed) Open and adjust dampers Poor power supply at site Have electrician check supply voltage at house...
- Page 39 Replacement Parts Summary TRANSFORMER/ DAMPER MOTOR CIRCUIT BOARD FOAM FILTER TRANSFORMER/ CIRCUIT BOARD FOAM FILTER FOAM FILTER HRV CORE ASSEMBLY LEFT BLOWER HRV CORE HOUSING SET ASSEMBLY BLOWER ERV CORE BLOWER HOUSING SET WHEEL ASSEMBLY BLOWER WHEEL FOAM FILTER MOTOR WALL CAPACITOR MOTOR CAPACITOR...
- Page 40 Blower Assembly Service (Dealer Only) To Remove Blower Assembly (figure 33) WARNING Electric Shock Hazard. Can cause injury or death. Disconnect all remote electrical power supplies before servicing. Unit may have multiple power supplies. Unit must be connected to a grounded power supply in accordance with na- tional and local codes.
- Page 41 Homeowner Maintenance Information Carefully grip ends of core and pull evenly out- WARNING ward. Core may be snug, but will slide out of the channel. Risk of property damage, injury or death. Remove filters as above. Installation, adjustments, alterations, service and HRV Core wash core in warm soapy water (do maintenance must be performed by a qualified ser- not use dishwasher).
- Page 42 Application Map HRV/ERV Ventilators Page 42 12/12...
Need help?
Do you have a question about the HEALTHY CLIMATE HRV3-095 and is the answer not in the manual?
Questions and answers