Table of Contents
Advertisement
INSTALLATION INSTRUCTIONS AND HOMEOWNER GUIDE FOR HEALTHY CLIMATE
ENERGY RECOVERY VENTILATOR (ERV) AND HEAT RECOVERY VENTILATOR (HRV)
ERV5-130
HRV5-150
INDOOR AIR QUALITY
KIT AND ACCESSORIES
507363-04
2/2021
Supersedes 3/2020
THIS MANUAL MUST BE LEFT WITH THE OWNER
FOR FUTURE REFERENCE
HEALTHY CLIMATE
ERV AND HRV VENTILATORS
HRV3-150-TPD, HRV5-200-TPD,
HRV6-HEX095-TPD, HRV5-270-TPD-ECM,
ERV5-150-TPD, ERV5-175-TPD
HRV3-195
®
®
Advertisement
Table of Contents

Related Manuals for Healthy Climate Solutions ERV5-130

Summary of Contents for Healthy Climate Solutions ERV5-130
- Page 1 2/2021 ERV AND HRV VENTILATORS Supersedes 3/2020 ® INSTALLATION INSTRUCTIONS AND HOMEOWNER GUIDE FOR HEALTHY CLIMATE ENERGY RECOVERY VENTILATOR (ERV) AND HEAT RECOVERY VENTILATOR (HRV) ERV5-130 HRV3-150-TPD, HRV5-200-TPD, HRV6-HEX095-TPD, HRV5-270-TPD-ECM, ERV5-150-TPD, ERV5-175-TPD HRV5-150 HRV3-195 THIS MANUAL MUST BE LEFT WITH THE OWNER...
-
Page 2: Table Of Contents
Installation Methods - Partially Dedicated ......25 Installation Methods - Fully Dedicated .......26 Unit Installation Location .............27 Suspending the Unit .............27 Installing the ERV5-130 ............28 Installing the Drain Connection ..........28 Installing Optional Plug (ERV5-150-TPD and ERV5-175-TPD Unit Only) ............28 Installing Grilles and Diffusers..........29 Kitchen Grille ..............29... -
Page 3: Shipping And Packing List
Mounting brackets (included only with ERV5-130) sources Canada and the US EPA. This product meets ENERGY STAR requirements only when used in Can- ® Hanging straps (included with all models except ERV5-130) ada. • To ensure quiet operation of the ENERGY STAR certi- ®... -
Page 4: Terms And Definitions
Terms and Definitions Table 3. Field-Provided Materials Low voltage control wire Mastic tape • Defrost Mode (ERV/HRV) - to ensure reliable operation Fabric flexible or insulated rigid ducts − Zip ties during cold weather, the ERV/HRV will automatically cy- class II rated cle through its defrost mode as needed. -
Page 5: Specifications
Specifications Table 5. Specifications Dual − Core Specifications Single−Core HRV Units Single−Core ERV Units HRV Unit HRV5-270-TPD- HRV3−150−TPD HRV5−150 HRV5-200-TPD HRV6-HEX095- HRV3−195 ERV5-130 ERV5-150-TPD ERV5-175-TPD Model No. (17Y64) (17Y58) (17Y62) TPD (17Y52) (Y2143) (17Y54) (17Y55) (17Y57) (17Y53) Energy Star® certified... - Page 6 Table 5. Specifications Dual − Core Specifications Single−Core HRV Units Single−Core ERV Units HRV Unit HRV5-270-TPD- HRV3−150−TPD HRV5−150 HRV5-200-TPD HRV6-HEX095- HRV3−195 ERV5-130 ERV5-150-TPD ERV5-175-TPD Model No. (17Y64) (17Y58) (17Y62) TPD (17Y52) (Y2143) (17Y54) (17Y55) (17Y57) (17Y53) Number of speeds available with...
-
Page 7: Optional Fan Curve Speeds
All specifications are subject to change without notice. NOTE: Dual−Core Single−Core HRV Units Single−Core ERV Units HRV Units HRV3−150− HRV5-200- HRV6- HRV5-270- ERV5-150- ERV5-175- HRV5−150 HRV3−195 ERV5-130 Model No. HEX095-TPD TPD-ECM (17Y58) (17Y65) (17Y54) (17Y64) (17Y62) (17Y52) (17Y53) (17Y55) (17Y57) Speed 4 − Medium High inches w.g. -
Page 8: Dimensions - Unit - Inches (Mm)
Dimensions - Unit - Inches (MM) HRV5-150 HEAT RECOVERY VENTILATORS STALE AIR FROM INSIDE FRESH AIR FROM OUTSIDE FILTERS BALANCING DAMPER RECIRCULATING DEFROST NOTE - All Duct Connections DAMPER 6 in. (152 mm) BLOWER MOTOR NOTE - Front clearance of STALE CORE FRESH... - Page 9 STALE FRESH AIR STALE FRESH AIR TO FROM AIR FROM AIR TO OUTSIDE OUTSIDE INSIDE INSIDE All duct connections are oval collars for use with 6 in. (150 mm) ductwork, FILTERS balancing dampers are located on all collars. RECIRCULATING DEFROST DAMPER 18-3/4 (476)
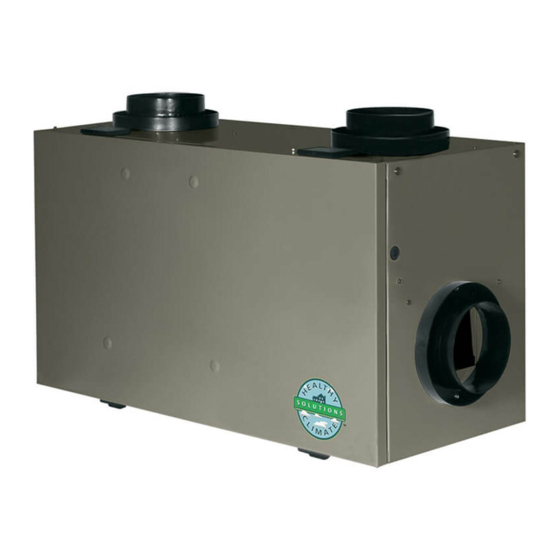
- Page 10 (492) 9-3/4 9-3/4 (248) (248) NOTE − Front clearance of 25 In. (636 mm) is recommended for servicing unit Figure 4. ERV5-130 8 (203) 13 (330) TOP VIEW 25 (635) Compatible with 5” or 21-1/2 (546) 6” diameter duct. 8-1/4 (210) SIDE VIEW Figure 5.
-
Page 11: Shaping Ducting To Fit Oval Ports
Figure 6. Shaping Ducting to Fit Oval Ports Applicable Units: Requirements HRV3−150−TPD, HRV5−150, HRV5-200-TPD, HRV6-HEX095-TPD, HRV5-270-TPD-ECM, ERV5-150-TPD, ERV5-175-TPD and ERV5-130) The following appliances should not be connected to the During defrost a motor driven damper door mechanism ERV/HRV unit: closes off the supply air from outside allowing exhaust air to •... - Page 12 • Recover the majority of the energy from the exhausted Table 7. Operational Modes stale air Mode Icon Description • Use the recovered energy to pre-heat or pre-cool out- This mode will operate the fan in side air that is drawn into the house high speed continuously at the se- Continuous lected operating mode (Ventilation...
-
Page 13: Icomfort E30 (15S63) Or S30 (12U67) Ventilation Control Installation And Setup Guide
iComfort E30 (15S63) or S30 (12U67) IMPORTANT Ventilation Control Installation and Setup The ERV/HRV may be used with an S30 and E30 control Guide system. The S30 will require a 2.0 smart hub, Do not connect the S30 or E30 to the ERV/HRV before confirming the thermostats have 03.50.XXX or higher software. -
Page 14: Erv And Hrv Wiring Diagrams
ERV AND HRV WIRING DIAGRAMS Single Speed ERV / HRV Wiring Use the applicable wiring diagram to connect your ventila- High Speed tion equipment. iComfort S30 with Lennox Communicating IMPORTANT Smart Hub 2.0 Indoor Unit HRV/ERV Interlocking is NOT required on ventilation equipment Terminal Block Lennox Communicating Outdoor Unit... -
Page 15: Determining Ventilation Rate
DETERMINING VENTILATION RATE • Use the calculated CFM rate in the S30 or E30 config- uration set up for both timed and ASHRAE Compliant The following information is used to set both the timed or CFM rate at high speed. ASHRAE compliant high and low speed ventilation rate for ERV or HRV single and two-speed units when using either the Ventilation Rate for Low Speed... - Page 16 Timed Table Method • When timed mode is selected, the system assures that The following table complies with ASHRAE Standard 62.2, low speed ventilation has run for at least the selected Table 4.1a, Continuous Whole-Building Ventilation rate in time per hour. cfm.
-
Page 17: Thermostat Ventilation Parameters
THERMOSTAT VENTILATION PARAMETERS Table 9. Smart Hub Parameters (Ventilation) Thermostat ventilation CFM parameters are to be adjusted Parameter Description only after the HRV/ERV set up is completed and the CFMs Parameter range is 60 to 115ºF. Default is are known. Once the thermostat’s CFMs are adjusted they 100ºF. - Page 18 Table 9. Smart Hub Parameters (Ventilation) Table 9. Smart Hub Parameters (Ventilation) Parameter Description Parameter Description Ventilation Rates Parameter range is 45 to 80ºF. Default is 55ºF. Can be adjusted in increments of 5ºF. Thermostat ventilation CFM parameters are to be adjusted only after the HRV/ ERV set up is completed and the CFMs are known.
-
Page 19: Icomfort E30 (15S63) Or S30 (12U67) Ventilation Control User Guide
REMINDERS iComfort E30 (15S63) or S30 (12U67) From the thermostat home page, go to menu > settings > Ventilation Control User Guide reminders. This screen allows you to set reminders as either disabled VENTILATION HOME SCREEN ICONS or 3, 6, 12 or 24 months and also custom by specific date. The ventilation icon that appears along the left side of the The other options on this screen is to trigger the reminder home screen will appear when a pre-defined system level... -
Page 20: H/C Erv/Hrv Ventilation Push Button Control (Y8249)
H/C ERV/HRV Ventilation Push Button Table 10. H/C ERV/HRV Ventilation Push Button Control (Y8249) Settings Control (Y8249) Settings Icon Description The control offers the following features to control your Press and release the Dehumidistat button until the Dehumidistat Light is at the desired home’s ventilation. -
Page 21: H/C 20/40/60 Minute Timer (Y2169) (Optional) And H/C Ventilation Wireless Timer (Y8251)
Table 11. Operational Modes Table 12. Digital Control Operations Icon Mode Icon Description Function A service indicator appears when the unit requires routine maintenance. Refer to Continuous Ventilation “Blower Assembly Service (Dealer Only)” on Service Indicator page 57“ in this instruction. Press and hold the ON/OFF button for 5 seconds to reset the service indicator once maintenance has been 20 Minutes On, 40 Minutes... -
Page 22: Replacing The Battery
feet (12 meters) with no obstructions. To increase the range of a Wireless 20/40/60 Minute Timer, a Repeater (Y8252) may be used. Multiple timers can be paired to a single main control. Designed to be mounted in a standard 2 x 4” (51 x 102 mm) electrical box or surface mounted to a wall. -
Page 23: Installation Methods - Simplified (Return/Return)
• It is mandatory (to eliminate recirculation) that either the Installation Methods - Simplified (Return/Return) furnace blower run continuously or ERV/HRV unit oper- ation be interlocked with the furnace blower. The simplified method draws stale air from the cold air re- •... -
Page 24: Installation Methods - Partially Dedicated
Installation Methods - Partially Dedicated The partially dedicated installation draws stale air from specific points in the house and introduces an equal amount of fresh air into the cold air return as illustrated in the following figures. Figure 20. Partially Dedicated System Stale air ducts should be installed in areas of the home where the poorest indoor air quality exists (bathrooms and kitch- en). -
Page 25: Installation Methods - Fully Dedicated
Installation Methods - Fully Dedicated The fully dedicated installation draws stale air from specific points in the house and delivers fresh air to specific locations of the house. This system is not connected to an air handler/furnace (see the following figures). Figure 22. -
Page 26: Unit Installation Location
2. Unscrew the four machine screws located on the upper Unit Installation Location side of the unit. Attach the S hooks and reinsert the machine screws. It is recommended that the ERV/HRV unit be located in a conditioned space where it will be possible to conveniently NOTE: The following illustration of the unit may vary from the unit you are installing. -
Page 27: Installing The Erv5-130
Trap and tubing must be located below the HRV door with a minimum of ¼” per foot downward slope away from unit. All ERV/HRV cabinets (except ERV5-130) have pre- punched holes for the drain as illustrated in “Figure 28. Drain Holes and P-Trap (ERV/HRV)”. -
Page 28: Installing Grilles And Diffusers
Table 14. Round Diffusers Sizes CAUTION Size Catalog Number A drain is required. However in climates where the outdoor 4” (102 mm) 92E54 temperature remains above 13ºF (25ºC) combined with 5” (127 mm) 92E55 an indoor humidity less than 30%, the use of a drain is 6”... -
Page 29: Weatherhoods
Airflow in CFM & L/S at Nominal External Static Pressure Model No. Compatible with dual hood (in. w.g.) (Pa) (in. w.g.) (Pa) (in. w.g.) (Pa) HRV3-150-TPD HRV3-195 HRV5-150 HRV5-200-TPD NO @ 0.3 in. w.g. HRV6-HEX095-TPD HRV5-270-TPD-ECM ERV5-130 ERV5-150-TPD ERV5-175-TPD NO @ 0.3 in. w.g. -
Page 30: Installing H/C Erv/Hrv Ventilation Push Button Control (Y8249)
4. For the Wall Mount Dehumidistat/ Ventilation Control, 0.40 (100) place the back plate of the control in the desired 0.35 (87.5) location on the wall and pencil mark the top and bottom 0.30 (75) screw holes (Figure 34, Boxes E or F). For mounting 0.25 (67.5) the control without a decorative plate, break off top and bottom tabs and refer to Figure 34, Box F for mounting. -
Page 31: Installation And Operation Of H/C Ventilation Wireless Timers (Y8251)
10. Attach the face plate to the back plate (Figure 34, Boxes Estimated range of the wireless timer is 40’ with no obstruc- B or C). tions. A ventilation wireless repeater may be installed to in- crease the range of the wireless timers. NOTE: Be careful to correctly align the face plate to avoid Test if pairing was successful by pressing the Select but- damaging the face plate contact pins. -
Page 32: Installation And Pairing Of H/C Ventilation Wireless Repeaters (Y8252)
3. Place the back plate of the control in the desired location When installed in its permanent location, the green LED will on the wall and pencil mark the top and bottom screw remain solid to indicate the best location and the Repeater holes (Figure 35, Boxes B or C). -
Page 33: Installation Of Mechanical Timers
Installation of Mechanical Timers Electrical Connections The Healthy Climate ERV/HRV is compatible with two wire, Plug the ERV/HRV directly into a standard designated “dry contact” mechanical timers. This may be useful for ret- 120VAC electrical outlet. Use of an extension cord is NOT rofit situations where only two wires are available for the RECOMMENDED for this appliance. -
Page 34: Activating Dry Contact Controls
CAUTION Building codes in some areas require fully−off functionality. Check with your local building authority before modifying the unit to standby−off. Unintentional operation of the ERV/HRV by the end user may occur if the unit is modified from fully−off to standby− off. -
Page 35: Unit Wiring Diagrams
PIN 1 - BLUE PIN 4 - RED PIN 1 - GREEN PIN 2 - YELLOW PIN 5 - WHITE PIN 2 - GREEN CAPACITOR PIN 3 - BROWN PIN 6 - BLACK Figure 42. Wiring Diagram (HRV3−150-TPD, HRV5-200-TPD, ERV5-130, ERV5-150-TPD and ERV5-175-TPD) - Page 36 Figure 43. Wiring Diagram HRV5-270-TPD-ECM...
-
Page 37: Installer Selectable High Speed Settings
Installer Selectable High Speed Settings ERV/HRV Connected with an Basic and Deluxe Control CAUTION Balance the HRV or ERV at High speed using door port balancing chart or pitot tube to required CFM making sure Risk of Carbon Monoxide Poisoning and/or Explosion. the system blower is on at high speed. -
Page 38: Airflow Balancing
• Flow Stations - These are installed into the duck work. Airflow Balancing Pitot Tube Recommendation It is necessary to have balanced airflow in ERV/HRV units. Use a field-provided pitot tube comparable to the Dwyer ® The volume of air brought in from the outside must equal Series 160 Stainless Steel Pitot Tubes. -
Page 39: Airflow Balancing Using The Pitot Tube (All Models)
Balancing dampers are required to be installed in the fresh towards the air stream. Minimum of 18” (457 mm) air and stale air ducting for HRV3-195, and ERV5-130. Re- from blower to elbows. fer to ducting illustrations located in the “Overview of Instal- lation Methods”... -
Page 40: Airflow Balancing Using The Door Ports (Available On Selected Models)
AIRFLOW BALANCING USING THE DOOR PORTS 3. Open the HRV Door. Remove the four Door Port Covers (AVAILABLE ON SELECTED MODELS) by carefully pushing them out from the back side of the door (use the blunt end of a large drill bit etc.). Applicable Units: 4. -
Page 41: Airflow Balancing Charts
Airflow Balancing Charts Table 19. Airflow Balancing - Reference HRV3-150-TPD Speed 5 (factory setting) Speed 4 Speed 3 Pressure Drop Fresh Air Stale Air Pressure Drop Fresh Air Stale Air Pressure Drop Fresh Air Stale Air in. w.g. cfm) in. w.g. in. - Page 42 Table 19. Airflow Balancing - Reference HRV3-150-TPD Speed 5 (factory setting) Speed 4 Speed 3 Pressure Drop Fresh Air Stale Air Pressure Drop Fresh Air Stale Air Pressure Drop Fresh Air Stale Air in. w.g. cfm) in. w.g. in. w.g. 0.96 0.77 0.78...
- Page 43 Table 20. Airflow Balancing - Reference HRV5-150 Speed 5 (factory setting) Speed 4 Speed 3 Pressure Drop Fresh Air Stale Air Pressure Drop Fresh Air Stale Air Pressure Drop Fresh Air Stale Air in. w.g. in. w.g. in. w.g. - - - - - - - - - - - -...
- Page 44 Table 20. Airflow Balancing - Reference HRV5-150 Speed 5 (factory setting) Speed 4 Speed 3 Pressure Drop Fresh Air Stale Air Pressure Drop Fresh Air Stale Air Pressure Drop Fresh Air Stale Air in. w.g. in. w.g. in. w.g. 0.240 0.240 - - - - - -...
- Page 45 Table 21. Airflow Balancing - Reference HRV5-200-TPD Speed 5 (factory setting) Speed 4 Speed 3 Pressure Drop Fresh Air Stale Air Pressure Drop Fresh Air Stale Air Pressure Drop Fresh Air Stale Air in. w.g. in. w.g. in. w.g. 0.500 0.400 0.300 0.510...
- Page 46 Table 21. Airflow Balancing - Reference HRV5-200-TPD Speed 5 (factory setting) Speed 4 Speed 3 Pressure Drop Fresh Air Stale Air Pressure Drop Fresh Air Stale Air Pressure Drop Fresh Air Stale Air in. w.g. in. w.g. in. w.g. 0.980 0.880 0.780 0 .990...
- Page 47 Table 22. Airflow Balancing - Reference HRV5-270-TPD-ECM Speed 5 (factory setting) Speed 4 Speed 3 Pressure Drop Fresh Air Stale Air Pressure Drop Fresh Air Stale Air Pressure Drop Fresh Air Stale Air (cfm) (cfm) (cfm) (cfm) (cfm) (cfm) w.g. w.g.
- Page 48 Table 22. Airflow Balancing - Reference HRV5-270-TPD-ECM Speed 5 (factory setting) Speed 4 Speed 3 Pressure Drop Fresh Air Stale Air Pressure Drop Fresh Air Stale Air Pressure Drop Fresh Air Stale Air (cfm) (cfm) (cfm) (cfm) (cfm) (cfm) w.g. w.g.
- Page 49 Table 23. Airflow Balancing - Reference HRV6-HEX095-TPD Speed 5 (factory setting) Speed 4 Speed 3 Pressure Drop Fresh Air Stale Air Pressure Drop Fresh Air Stale Air Pressure Drop Fresh Air Stale Air (cfm) (cfm) (cfm) (cfm) (cfm) (cfm) w.g. w.g.
- Page 50 Table 24. Airflow Balancing - Reference ERV5-150-TPD Speed 5 (factory setting) Speed 4 Speed 3 Pressure Drop Fresh Air Stale Air Pressure Drop Fresh Air Stale Air Pressure Drop Fresh Air Stale Air (“ w.g.) (Pa) (cfm) (cfm) (“ w.g.) (Pa) (cfm) (cfm)
- Page 51 Table 24. Airflow Balancing - Reference ERV5-150-TPD Speed 5 (factory setting) Speed 4 Speed 3 Pressure Drop Fresh Air Stale Air Pressure Drop Fresh Air Stale Air Pressure Drop Fresh Air Stale Air (“ w.g.) (Pa) (cfm) (cfm) (“ w.g.) (Pa) (cfm) (cfm)
- Page 52 Table 25. Airflow Balancing - Reference ERV5-175-TPD Speed 5 (factory setting) Speed 4 Speed 3 Pressure Drop Fresh AIr Stale Air Pressure Drop Fresh AIr Stale Air Pressure Drop Fresh AIr Stale Air “w.g. “w.g. “w.g. 0.750 0.640 0.470 0.760 0.650 0.480 0.770...
-
Page 53: Sequence Of Operations
Table 25. Airflow Balancing - Reference ERV5-175-TPD Speed 5 (factory setting) Speed 4 Speed 3 Pressure Drop Fresh AIr Stale Air Pressure Drop Fresh AIr Stale Air Pressure Drop Fresh AIr Stale Air 1.220 1.110 1.230 1.120 1.240 1.130 1.250 1.260 1.270 1.280... - Page 54 3 minutes once every 6 hours.) Fan HRV3−150−TPD, HRV5-150, HRV5-200-TPD, Thermistor cable not continues in current HRV5-HEX095-TPD, HRV5-270-TPD-ECM, connected into speed. ERV5-150-TPD, ERV5-175-TPD and ERV5-130). controller board Humidity sampling external or faulty thermistor may execute control operating during HIGH...
-
Page 55: Troubleshooting
Troubleshooting Prior to proceeding with troubleshoot, make certain the unit passes the self-test. Refer to “Figure 54. Self-Test Operational Flowchart” on page 54“. Follow these steps to initiate self-test: 1. Open the Access Door. (This will release the door switch). 2. -
Page 56: Replacement Parts Summary
MOTOR CORE ASSEMBLY FILTER FILTER CAPACITOR Figure 57. Parts Locations Table 27. Replacement Parts Summary HRV5-200- HRV5-270- HRV6- ERV5-150- ERV5-175- HRV3-150-TPD HRV3−195 HRV5-150 ERV5-130 Replacement TPD-ECM HEX095-TPD TPD) Parts (17Y64) (17Y65) (17Y58) (17Y54) (17Y62) (17Y53) (17Y52) (17Y55) (17Y57) Polyester Filter... -
Page 57: Blower Assembly Service (Dealer Only)
Blower Assembly Service (Dealer Only) IMPORTANT Note motor rotation before disassembling the motor BLOWER ASSEMBLY REMOVAL assembly. Mark rotation on blower divider panel with a WARNING marker. BLOWER MOTOR DISASSEMBLY Electric Shock Hazard. 1. Remove both blower end caps by applying pressure. Can cause injury or death. -
Page 58: Homeowner Maintenance Information
e. HRV Core - wash core in warm soapy water (do not Homeowner Maintenance Information use dishwasher). f. ERV Core - vacuum ONLY to clean core, do not get WARNING wet. g. Install clean filters. Electric Shock Hazard. h. Wipe down the inside of the cabinet with a damp Can cause injury or death. -
Page 59: Application Map - Erv/Hrv Ventilators
Application Map - ERV/HRV Ventilators Figure 60. Application Map - ERV/HRV Ventilators Table 28. Application Map Descriptions True North - Cold Winter and Dry Summer ZONE 1 HRV is best for a very cold and prolonged winter. HRV is best for a cold or prolonged winter. US - Canada Border - Cold Winter and Hot ZONE 2 Humid Summer - HRV or ERV...
Need help?
Do you have a question about the ERV5-130 and is the answer not in the manual?
Questions and answers