Table of Contents
Advertisement
Quick Links
Advertisement
Table of Contents

Related Manuals for IMPETUS ZEN 5800 Series

Summary of Contents for IMPETUS ZEN 5800 Series
-
Page 2: Table Of Contents
Testing specification : Low voltage Directive - EN60335 - 1 E&E Directive - EN62233 EMC Directive - EN55014 - 1 EN55014 - 2 EN61000 - 3 - 2 EN61000 - 3 – 3 Features of product with CE mark: Mechanical and electrical safety. Symbol of high quality. -
Page 3: In T R O D U C T Io N / S A F E T Y G U Id E Lin E
1.INTRODUCTION: Thank you very much for choosing our product. For your benefit and safety, please read the manual and follow the instructions carefully. You will certainly enjoy a great workout experience and a healthy body when you are well prepared after reading the manual. 2.SAFETY GUIDELINE:... - Page 4 B. Cleaning and Lubrication: Use a clean towel, slide it between the running belt and deck of the treadmill at the motor end, so that one end of the towel hangs over each side of the machine. Hold both ends of the towel, pull it back and forth under the belt, and move toward the other end of the running belt;...
-
Page 5: Accessories
Accessories c. part box Hex. screw M8*1.25-50 Allen bolt M6*1.0*16 Sound source cable d. tool box Description unit Q’ty Spec. Custom made wrench 13*17 T type wrench Hex wrench 6.Assembly:(Completion Drawing) A. Caution: a. Before the assembly is complete, do not tighten all the screws. b. -
Page 6: U P R Ig H T T U B
C. Upright Tube Place the right-side upright tube (302) to the right of the main frame (101); connect the flat cable (B06) and the power supply flat cable (B07) from the main frame to the flat cable (B08) and flat power supply cable (B09) from the upright tube. -
Page 7: Running Belt Tension Adjustment
7. Running Belt Adjustment A. Running Belt Tension Adjustment Factors affecting the running belt alignment: a. Whether the treadmill is on a level surface. b. Your feet impact the belt with uneven forces, so the belt may lose the alignment over time; the treadmill should be kept running for a short while after the workout, so that the belt may adjust itself back to its original alignment. -
Page 8: Incline Adjustment
C. Incline Adjustment To Increase the Incline: Press to increase the incline. To Decrease the Incline: Press to decrease the incline. Note: The incline device needs to be off for 20 minutes when it is used for over 5 minutes to keep it from being over-heated. -
Page 9: Monitor Operation
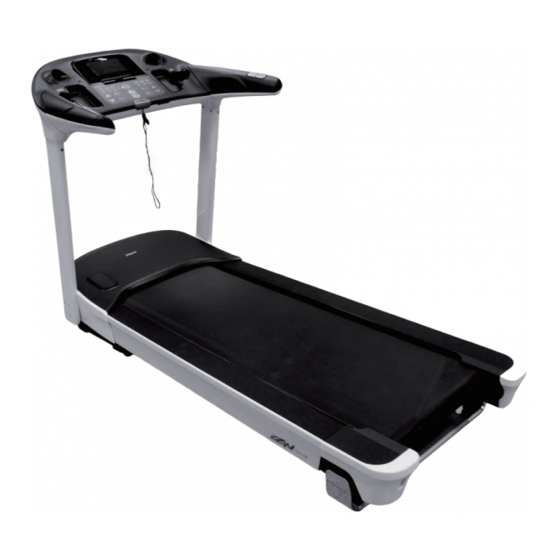
10.Monitor Operation The Monitor is specially designed for this treadmill, and the followings are its main functions - Black backlit LCD display Control key pad Tablet holder Speaker MP3 player slot USB slot Safety key Incline button(w/pulse sensor) Speed button (w/pulse sensor) (Monitor instruction ) Function Introduction There are 27 buttons, including 1 safety key, 22 function buttons and 4 handgrip buttons. - Page 10 A. Safety Key: a. Turn on the power and place the safety key to its position on the monitor to start. During the workout, the treadmill stops as soon as the safety key is removed. B.10 Main Function buttons: a. <Start>: Press the button to start the workout.
-
Page 11: Panel Displays
Handgrip Buttons: The function of hand pulse combines with speed/incline adjustment function: a. Change speed : use the buttons on the right to adjust the speed, press change the workout speed, you can easily change the speed during workout. b. Change incline : use the buttons on the left to change the incline, press change the incline, you can easily change the incline during workout. - Page 12 b. Use hand pulse sensor to check your heart rate, hold the hand pulse sensors with both hands, the window displays your heart rate after a short while. c. Wireless measuring, use chest belt to check heart rate, the monitor will check users's heart rate.
- Page 13 b.Workout time: Counting up: when the desired workout time is set to 0:00, the workout time counts up from Ÿ 0:00 to 99:59; when 99:59 is reached, it starts back from 0:00. Counting down: during the setup, use the <Speed Up> or <Speed Down> button to set the Ÿ...
- Page 14 c. In Body Fat mode, hold the hand pulse sensors with both hands, the window displays the heart rate diagram. d. In Recovery mode, the window displays the heart rate diagram. H.Incline/LOOP/Body Fat %/Heart Rate Recovery window: a. The window displays user's selected speed profile and divided to 20 columns. If the mode selected and not set the workout time, every 30 seconds change one column;...
- Page 15 J. Incline Half-Circle Diagram/Incline window: a. Incline half-circle diagram shows the workout incline level. b. The window displays the incline level. When workout starts, press <Incline Up> or <Incline Down> button to adjust the incline level between L2 to L15, where L2 is a minus 2 decline. Operation Guide: Start: before starting the treadmill, place the safety key on the safety key slot on the monitor.
- Page 16 C.Next, when the workout distance window flashes, use <Speed Up> or <Speed Down> button to set the desired workout distance. The available workout distance setting ranges from 0.1km to 999.9km. Press <Enter> to confirm the setting and move to the next setting. D.When the calories window flashes, use <Speed Up>...
- Page 17 Built-in Speed Modes (P1 - P16) A. During the treadmill's idled state, press <Speed Up> or <Speed Down> to select one of the built-in speed modes between P1 - P16. Press <Enter> to confirm. B. Then, the workout time window flashes. Press <Speed Up> or <Speed Down> to set the desired workout time.
- Page 18 H.When all settings is complete, press <Start> to begin the workout. I. During the workout, press <Speed Up> or <Speed Down> to change the speed. J.During the workout, press <Incline Up> or <Incline Down> to change the incline level. K. During the setup, press <Enter> to skip those settings you want to ignore or press <Start> to directly begin the workout.
- Page 19 D. When the calories window flashes, use <Speed Up> or <Speed Down> button to set the desired calories. Setting for the calories ranges from 0 to 9999 calories. Press <Enter> to confirm the setting and move on to the next setting. E.
- Page 20 K.During the workout, press <Incline Up> or <Incline Down> to adjust the incline level. L. During the setup, press <Enter> to skip those settings you want to ignore or press <Start> to directly begin the workout. Caution: a. If desired workout time, workout distance and calories are not set when the workout starts, the workout status counts up from 0;...
- Page 21 E. The desired workout distance window flashes. Press <Speed Up> or <Speed Down> to set the workout distance. The available workout distance setting ranges from 0.1km to 999.9km. Press <Enter> to confirm and move on to the next setting. F. When the calories window flashes, use <Speed Up> or <Speed Down> button to set the desired calories .
- Page 22 Body Fat Mode A. During the treadmill's idled state, press <Body Fat> button, then press <Enter> to start the setup. B. First, the gender window displays the male symbol. Press <Speed Up> or <Speed Down> to change the gender. Press <Enter> to confirm and move on to the next setting, C.
-
Page 23: Function Instruction
Heart Rate Recovery Mode A. During the treadmill's idled state, press <Recovery> button, then hold the hand pulse sensors with both hands, or use the wireless chest belt; the window displays the heart rate recovery rate after a short while. Press <Stop> anytime to exit the detection. B. - Page 24 C. When “Cd:02” is selected, it is to set the distance of each loop. Press <Enter> to start and use <Speed Up> or <Speed Down> to set the desired distance ; the loop distance ranges from 100m to 900m. Press <Enter> to confirm the selection. D.
-
Page 25: Built-In Mode Profile
Built-in mode profile P1 Speed Profile P2 Speed Profile P3 Speed Profile P4 Speed Profile P5 Speed Profile P6 Speed Profile P7 Speed Profile P8 Speed Profile P9 Speed Profile P10 Incline Profile P11 Incline Profile P12 Incline Profile P13 Incline Profile P14 Incline Profile... - Page 26 Built-in mode profile P15 Speed Profile P15 Incline Profile P16 Speed Profile P16 Incline Profile...
-
Page 27: Troubleshooting
Troubleshooting Problems Possible Reasons Solutions 1. Safety key not plugged In 1. Plug in; 2. The plug or wires got loose 2. Well plug in the plug and wires No Display; 3. Power supply not well connected or No Graphics 3. Re-turn on the power supply not power on 4. Controller damaged 4. ... -
Page 28: W A R M U
Warm Up Warm up is an important part of every workout. It prepares the body for more strenuous exercise and reduces the chance of joint and body injuries by increasing your blood flow to the muscles, delivering more oxygen to the muscles, and increasing the body temperature. Suggested Stretches The following stretches provide a good warm-up and cool-down. -
Page 29: Operaton Instruction And Caution
Operaton instruction and caution Without our authorization, any contents of this manual are not allowed to be copied, saved or transferred. We reserve rights to revise specification, equipment, and maintenance information for our R&D team keeps improving our product quality. We have done the best efforts on this manual to be more comprehensible for all users.