Table of Contents
Advertisement
Quick Links
Advertisement
Table of Contents

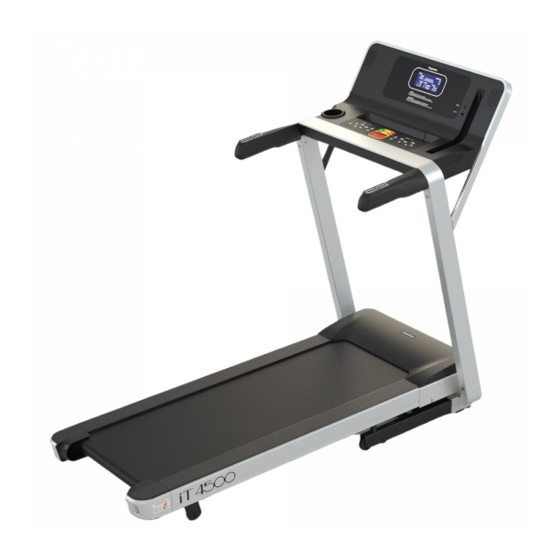
Summary of Contents for IMPETUS iT 4500
- Page 1 USER MANUAL...
-
Page 2: Table Of Contents
TABLE OF CONTENTS INRODUCTION/SAFETY GUIDELINE MAINTENANCE ASSEMBLY FOLDING AND UNFOLDING RUNNING BELT TENSION ADJUSTMENT SAFETY KEY AND PULSE OPERATION QICKSPEED KEY OPERATION WARUP MONITOR INSTRUCTION DEALER INFORMATION... -
Page 3: Inroduction/Safety Guideline
1.INTRODUCTION: Thank you very much for choosing our product. For your benefit and safety, please read the manual and follow the instructions carefully. You will certainly enjoy a great workout experience and a healthy body when you are well prepared after reading the manual. 2.SAFETY GUIDELINE:... - Page 4 B. Cleaning and Lubrication: a. Use a clean towel, slide it between the running belt and deck of the treadmill at the motor end, so that one end of the towel hangs over each side of the machine. b. Hold both ends of the towel, pull it back and forth under the belt, and move toward the other end of the running belt;...
-
Page 5: Assembly
ASSEMBLY A. Caution: a. Before the assembly is complete, do not tighten all the screws. b. Before the assembly is complete, do not connect to any power source. c. After the assembly is complete, make sure all the screws are tightened. B. - Page 6 D. monitor Assembly: 1.Bring out the monitor assembly set, flip the monitor top cover to its proper position and tighten it with (#934) M4*10 x (4 pcs.) screws. 2.Have the upper flat cables (B05) and the upper power supply flat cable (B06) to connect the middle flat cables (B03) and power supply middle flat cables (B04).
- Page 7 Attach the left console stand support plate (418) to the monitor assembly set and the left upright tube (301), and tighten it with the screw(#944) M4*8 x (1pcs). Repeat the same step on the right side. Press down the monitor as the arrow shown making sure the monitor is at its right position.
-
Page 8: Folding And Unfolding
5.As shown in figure, press down the monitor along the monitor stand plate, then tighten the screw (#944) M4*8 x (2 pcs). 6.Tighten all the screws (#948) M8*20 x (6 pcs) on both sides. Press down the monitor as the arrows shown making sure there is no excessive gaps between parts. - Page 9 8. Running Belt Adjustment: A. Running Belt Tension Adjustment Factors affecting the running belt alignment: a. Whether the treadmill is on a level surface? b. Since your foot impacts the belt with uneven forces, the belt may lose the alignment over time; the treadmill should be kept running for a while after the workout, so that the belt may adjust itself back to its original alignment;...
-
Page 10: Running Belt Tension Adjustment
C. Incline Adjustment To Increase the Incline: Press to increase the incline. To Decrease the Incline: Press to decrease the incline. Note: The incline device needs to be off for 20 minutes when it is used for over 5 minutes to keep it from being over-heated. -
Page 11: Warup
11.Warm Up Warm up is an important part of every workout. It prepares the body for more strenuous exercise and reduces the chance of joint and body injuries by increasing your blood flow to the muscles, delivering more oxygen to the muscles, and increasing the body temperature. Suggested Stretches The following stretches provide a good warm-up and cool-down. -
Page 12: Monitor Instruction
MONITOR INSTRUCTION 1. Feature Introduction Blue Backlit Screen 130 x 60mm AUX audio in Bluetooth Connection (optional) USB port Quick Speed Key with Hand Pulse Speaker Safety Key Control Keypad Wireless Pulse Sensor (optional) Quick Incline Key with Hand Pulse 2. - Page 13 4. Function Introduction There are 1 MANUAL MODE, 9 SPEED MODES, 5 INCLINE MODES, 2 MIXED MODES, 4 Ÿ USER MODES, 4 PULSE MODES, and 1 BODY FAT MODE. Use <MP3 Player> port to play music through the speaker; please note the overly loud music Ÿ...
- Page 14 Operation Instruction: 1. Press <Start/Stop> to start workout, press <Start/Stop> again to stop 2. Press Speed <+> to increase the speed, press Speed <-> to slow down; Use <Quick Speed> key to quickly select the pre-set speed. 3. Press Incline <+> to increase the incline, press Incline <-> to reduce the incline; Use <Quick incline>...
- Page 15 6.3 Body Fat Mode Profile Mode Indicator Mode Selection: Type Body Fat Percentage BODY FAT MODE: Press < Mode> three times, mode code is 'FAT'. Operation Instruction: 1. Press <Enter> to set gender, age, height, and weight; the console display blinking during the setup, use <Speed +>...
-
Page 16: Dealer Information
DEALER INFORMATION Dealer Name: Telephone: FAX: Email: Web Page: Without our authorization, any contents of this manual are not allowed to be copied, saved or transferred. We reserve rights to revise specification, equipment, and maintenance information for our R&D team keeps improving our product quality.

Need help?
Do you have a question about the iT 4500 and is the answer not in the manual?
Questions and answers