
Related Manuals for Ai-Thinker nRF24L01


Summary of Contents for Ai-Thinker nRF24L01
- Page 1 Local Connectivity nRF24L01+ Eueung Mulyana https://eueung.github.io/012017/nrf24 CodeLabs | Attribution-ShareAlike CC BY-SA 1 / 51...
- Page 2 Outline Introduction Getting Started - Preparation Getting Started - Code & Play Simple Remote Control Gateway 2 / 51...
- Page 3 3 / 51...
- Page 4 Introduction 4 / 51...
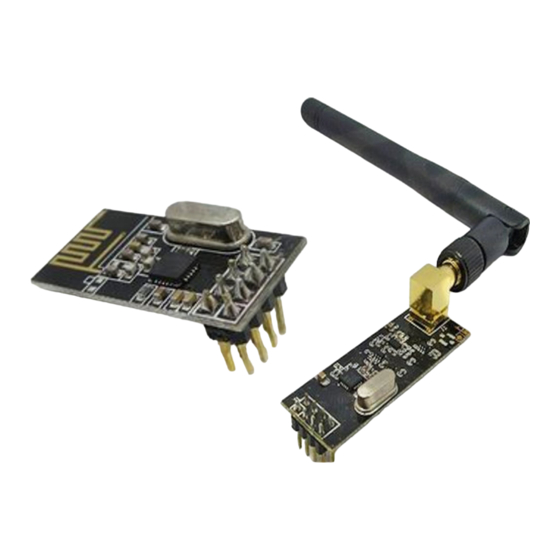
- Page 5 IC for the 2.4GHz down mode, advanced power management, and a 3.6V (Industrial, Scienti c and Medical) supply range, the nRF24L01+ provides a true ULP solution band 2.400 - 2.4835GHz. enabling months to years of battery life from coin cell or AA/AAA batteries.
- Page 6 GHz (Spacing at 1 or 2 MHz, GFSK) RF Channels 3. Air Data Rate Con gurable to 2 Mbps (Options: 250 kbps, 1 nRF24L01+ Mbps) 4. 4-Pin Hardware SPI 5. 5V Tolerant Inputs Data Pipe MultiCeiver for star networks Notes: Power still at 3.3V!
- Page 7 Pin Map 7 / 51...
- Page 8 Important Notes Radio is sensitive to Noises! Make sure that the circuit (wire, solder, etc.) is stable. Anything uxtuates is bad! 8 / 51...
-
Page 9: Getting Started
Preparation Getting Started 9 / 51... - Page 10 Getting Started 1. Install RF24 Library 2. Prepare the First Node - NodeMCU 3. Prepare the Second Node - Arduino Nano Arduino IDE, NodeMCU & Nano This setup is for demo purpose only. Can be any MCUs. 10 / 51...
- Page 11 RF24 Library 11 / 51...
- Page 12 RF24 Library 12 / 51...
- Page 13 First Node - NodeMCU 13 / 51...
- Page 14 First Node - NodeMCU 14 / 51...
- Page 15 Second Node - Nano 15 / 51...
- Page 16 Second Node - Nano 16 / 51...
- Page 17 Code & Play Getting Started 17 / 51...
- Page 18 Simple Transmit & Receive NodeMCU - Transmit | Nano - Receive Ref: Example Sketches 18 / 51...
- Page 19 #include <SPI.h> #include "nRF24L01.h" #include "RF24.h" RF24 myRadio 15); byte addresses[][6] = {"1Node"}; dataTransmitted; void setup() Serial.begin(115200); delay(1000); Serial.println(F("RF24/Simple Transmit data Test")); dataTransmitted = 100; NodeMCU myRadio.begin(); myRadio.setChannel(108); myRadio.setPALevel(RF24_PA_MIN); myRadio.openWritingPipe( addresses[0]); delay(1000); void loop() myRadio.write( &dataTransmitted, sizeof(dataTransmitted) ); Serial.print(F("Data Transmitted = "));...
- Page 20 1384, room 16 NodeMCU tail 8 chksum Data Transmitted = 100 No Acknowledge expected Data Transmitted = 101 No Acknowledge expected Data Transmitted = 102 No Acknowledge expected Serial Data Transmitted = 103 No Acknowledge expected Data Transmitted = 104 No Acknowledge expected Data Transmitted = 105 No Acknowledge expected 20 / 51...
- Page 21 #include <SPI.h> #include "nRF24L01.h" #include "RF24.h" RF24 myRadio byte addresses[][6] = {"1Node"}; dataReceived; void setup() Serial.begin(115200); delay(1000); Serial.println(F("RF24/Simple Receive data Test")); myRadio.begin(); myRadio.setChannel(108); Nano myRadio.setPALevel(RF24_PA_MIN); myRadio.openReadingPipe(1, addresses[0]); myRadio.startListening(); void loop() (myRadio.available()) while (myRadio.available()) myRadio.read( &dataReceived, sizeof(dataReceived) ); Serial.print("Data received = ");...
- Page 22 Nano RF24/Simple Receive data Test Data received = 100 Data received = 101 Data received = 102 Data received = 103 Serial Data received = 104 Data received = 105 22 / 51...
-
Page 23: Sample Code
RF24 Sample Code 23 / 51... - Page 24 RF24 Sample Code - GettingStarted 24 / 51...
- Page 25 #include <SPI.h> #include "nRF24L01.h" #include "RF24.h" byte addresses[][6] = {"1Node","2Node"}; RF24 radio(2,15); bool radioNumber = 0; bool role = 1; /**********************************************************/ void setup() Serial.begin(115200); Serial.println(F("RF24/examples/GettingStarted")); Serial.println(F("*** PRESS 'R' to begin receiving from the other node")); NodeMCU radio.begin(); radio.setChannel(108); radio.setPALevel(RF24_PA_MIN); if(radioNumber){ radio.openWritingPipe(addresses[1]);...
- Page 26 NodeMCU Now sending failed Failed, response timed out. Now sending failed Serial Failed, response timed out. Now sending failed Failed, response timed out. ^$#%$#@*&%)# Why?? Now sending failed Failed, response timed out. Now sending failed Nevermind for now! Failed, response timed out. Now sending Unplug NodeMCU, Plug-In Nano ..
- Page 27 #include <SPI.h> #include "nRF24L01.h" #include "RF24.h" byte addresses[][6] = {"1Node","2Node"}; RF24 radio(7,8); bool radioNumber = 1; bool role = 0; /**********************************************************/ void setup() Serial.begin(115200); Serial.println(F("RF24/examples/GettingStarted")); Serial.println(F("*** PRESS 'T' to begin transmitting to the other node")); Nano radio.begin(); radio.setChannel(108); radio.setPALevel(RF24_PA_MIN); if(radioNumber){ radio.openWritingPipe(addresses[1]);...
- Page 28 Nano RF24/examples/GettingStarted ** PRESS to begin transmitting to the other node # After NodeMCU Switched ON Serial Sent response 9284083 Sent response 10286475 Sent response 11288847 Sent response 12291268 Get Back to NodeMCU, Switch It On! Sent response 13293653 28 / 51...
- Page 29 NodeMCU Now sending Sent 18612291, Got response 18612291, Round-trip delay 1828 microseconds Now sending Sent 19614686, Got response 19614686, Round-trip delay 1840 microseconds Serial - Take 2 Now sending Sent 20617552, Got response 20617552, Round-trip delay 1803 microseconds Now sending Sent 21619866, Got response 21619866, Round-trip delay 1800 microseconds Find Another Serial Console..
-
Page 30: Simple Remote Control
Simple Remote Control 30 / 51... - Page 31 NodeMCU - Remote Controller 31 / 51...
- Page 32 Nano - Local Controller 32 / 51...
- Page 33 Simple Remote Control 33 / 51...
- Page 34 #include <SPI.h> #include "nRF24L01.h" #include "RF24.h" RF24 myRadio 15); const int SW1 = 5; byte addresses[][6] = {"1Node"}; dataTransmitted; button; void setup() pinMode(SW1, INPUT); dataTransmitted = 10; button = 0; NodeMCU Serial.begin(115200); delay(1000); myRadio.begin(); myRadio.setChannel(108); myRadio.setPALevel(RF24_PA_MIN); myRadio.openWritingPipe( addresses[0]); delay(1000); void loop() newButton = digitalRead(SW1);...
- Page 35 NodeMCU 1384, room 16 tail 8 chksum Data Transmitted = 20 Serial Data Transmitted = 10 Data Transmitted = 20 Data Transmitted = 10 Data Transmitted = 20 After Some ON-OFFs Data Transmitted = 10 Data Transmitted = 20 35 / 51...
- Page 36 #include <SPI.h> #include "nRF24L01.h" #include "RF24.h" RF24 myRadio const int LED = 2; byte addresses[][6] = {"1Node"}; dataReceived; void setup() pinMode(LED, OUTPUT); Serial.begin(115200); delay(1000); Nano myRadio.begin(); myRadio.setChannel(108); myRadio.setPALevel(RF24_PA_MIN); myRadio.openReadingPipe(1, addresses[0]); myRadio.startListening(); void loop() (myRadio.available()) while (myRadio.available()) myRadio.read( &dataReceived, sizeof(dataReceived) );...
- Page 37 Nano Data received = 20 Data received = 10 Data received = 20 Data received = 10 Serial Data received = 20 Data received = 10 Data received = 20 Data received = 10 After Some ON-OFFs Data received = 20 Data received = 10 37 / 51...
- Page 38 Simple Remote Control 38 / 51...
- Page 39 Nano - Attach a Device 39 / 51...
- Page 40 Nano - Attach a Device 40 / 51...
- Page 41 Connecting to Blynk Cloud Gateway 41 / 51...
- Page 42 Notes This is only an example of integration of local-connected sensors and actuators to other (cloud-based) services. This is applicable not only for Blynk or Firebase, but also for other services. 42 / 51...
- Page 43 #include <SPI.h> #include "nRF24L01.h" #include "RF24.h" #include <ESP8266WiFi.h> #include <BlynkSimpleEsp8266.h> RF24 myRadio 15); const int SW1 = 5; byte addresses[][6] = {"1Node"}; dataTransmitted; button; char auth[] = "c5d0dea217cd49539d7bed14d1234567"; char ssid[] = "emAP-01"; char pass[] = "1010101010"; NodeMCU BLYNK_WRITE(V1) pinValue = param.asInt();...
- Page 44 Blynk Button with Virtual Pin 44 / 51...
- Page 45 1384, room 16 Data Transmitted = 20 Data Transmitted = 10 pinValue = 1 Data Transmitted = 20 pinValue = 0 NodeMCU Data Transmitted = 10 pinValue = 1 Data Transmitted = 20 pinValue = 0 Data Transmitted = 10 Serial pinValue = 1 Data Transmitted = 20...
- Page 46 Refs/Resources 46 / 51...
- Page 47 Refs/Resources Nordic Semiconductor Example Sketches @arduino-info Connecting the Radio | MySensors nRF24/RF24: Optimized fork of nRF24L01 for Arduino & Raspberry Pi/Linux Devices 47 / 51...
- Page 48 NodeMCU V1.0 Pin Map 48 / 51...
- Page 49 Nano V3.0 Pin Map 49 / 51...
- Page 50 Nano V3.0 Pin Map 50 / 51...
- Page 51 Eueung Mulyana https://eueung.github.io/012017/nrf24 CodeLabs | Attribution-ShareAlike CC BY-SA 51 / 51...
Need help?
Do you have a question about the nRF24L01 and is the answer not in the manual?
Questions and answers