Table of Contents
Advertisement
Advertisement
Table of Contents

Related Manuals for Dell XPS D03M


Summary of Contents for Dell XPS D03M
- Page 1 SETUP GUIDE...
-
Page 3: Setup Guide
SETUP GUIDE Regulatory model: D03M Regulatory type: D03M004... - Page 4 © 2010-2011 Dell Inc. All rights reserved. Reproduction of these materials in any manner whatsoever without the written permission of Dell Inc. is strictly forbidden. Trademarks used in this text: Dell™, the DELL logo, XPS™, Solution Station™, and DellConnect™ are trademarks of Dell Inc.; Intel is a registered trademark and Core™...
-
Page 5: Table Of Contents
Software Features....28 Dell Dock ......29 Dell DataSafe Online Backup. - Page 6 Hardware Troubleshooter ... . 42 Dell Diagnostics ....42 Restoring Your Operating System .
-
Page 7: Setting Up Your Xps Desktop
Setting Up Your XPS Desktop This section provides information about setting up your Dell XPS 8300 desktop. WARNING: Before you begin any of the procedures in this section, read the safety information that shipped with your computer. For additional safety best practices information, see the... -
Page 8: Lifting Your Computer
Setting Up Your XPS Desktop Lifting Your Computer To ensure safety and to avoid any damage to your computer, lift it by holding the lift points in the front and back of your computer. -
Page 9: Before Setting Up Your Computer
Setting Up Your XPS Desktop Before Setting Up Your Computer When positioning your computer, ensure that you allow easy access to a power source, adequate ventilation, and a level surface to place your computer. Restricting airflow around your computer may cause it to overheat. To prevent overheating ensure that you leave at least 10.2 cm (4 inches) at the back of the computer and a minimum of 5.1 cm (2 inches) on all other sides. -
Page 10: Connect The Display
You can purchase the DVI‑to‑VGA adapter, HDMI‑to‑DVI adapter, and additional HDMI or DVI cables at www.dell.com. NOTE: When connecting to a single display, connect the display to ONLY ONE of the connectors on your computer. - Page 11 Setting Up Your XPS Desktop See the following table to identify the connectors on your computer and display. Connection Type Computer Cable Display VGA‑to‑VGA (VGA cable) DVI‑to‑DVI (DVI cable) DVI‑to‑VGA (DVI‑to‑VGA adapter + VGA cable) HDMI‑to‑HDMI (HDMI cable) HDMI‑to‑DVI (HDMI‑to‑DVI adapter + DVI cable)
-
Page 12: Connect The Keyboard And Mouse
Setting Up Your XPS Desktop Connect the Keyboard and Mouse Connect the USB keyboard and mouse to the USB connectors on the back panel of your computer. -
Page 13: Connect The Network Cable
Connect the Network Cable (Optional) A network connection is not required to complete your computer setup, but if you have an existing network or Internet connection that uses a cable connection (such as a broadband device or Ethernet jack), you can connect it now. NOTE: Use only an Ethernet cable (RJ45 connector) to connect to the network connector. -
Page 14: Connect The Power Cable
Setting Up Your XPS Desktop Connect the Power Cable Press the Power Button... -
Page 15: Set Up The Operating System
Set Up the Operating System Your Dell computer is preconfigured with the Microsoft Windows operating system. To set up Windows for the first time, follow the instructions on the screen. These steps are mandatory and may take some time to complete. The Windows setup screens... -
Page 16: Create System Recovery Media
• Dell DataSafe Local Backup • USB key with a minimum capacity of 8 GB or DVD‑R/DVD+R/Blu‑ray Disc NOTE: Dell DataSafe Local Backup does not support rewritable discs. To create a system recovery media: 1. Insert the disc or USB key in the computer. -
Page 17: Set Up The Tv Tuner (Optional)
Internet Service Provider (ISP). If an external USB modem or WLAN adapter is not a part of your original order, you can purchase one from www.dell.com. Setting Up a Wired Connection • If you are using a dial‑up connection, connect the telephone line to the optional... -
Page 18: Setting Up A Wireless Connection
Setting Up a Wireless Connection NOTE: To set up your wireless router, see the documentation that shipped with your router. Before you can use your wireless Internet connection, you need to connect to your wireless router. To set up your connection to a wireless router: 1. - Page 19 To set up your Internet connection: 1. Save and close any open files, and exit any open programs. → Control Panel. 2. Click Start 3. In the search box, type network, and then click Network and Sharing Center→ Set up a new connection or network→...
-
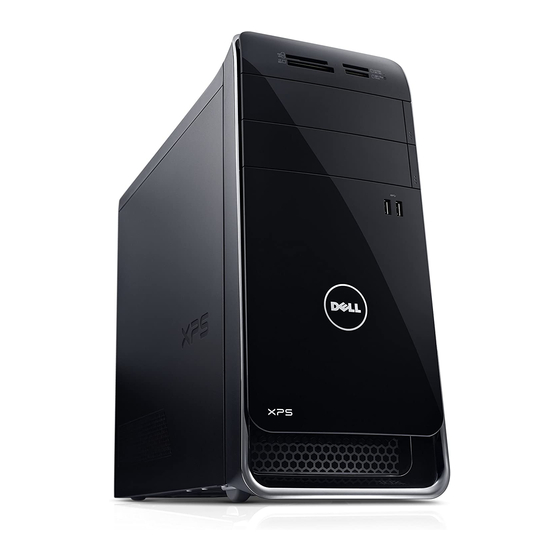
Page 20: Using Your Xps Desktop
Using Your XPS Desktop This section provides information about the features available on your XPS desktop. Front View Features... - Page 21 4 Optical drive bay (optional) — Can contain an additional optical drive. 5 FlexBay slot — Can support an optional Dell FlexBay compatible device such as a front panel USB 3.0 compliant interface. 6 FlexBay cover — Covers the FlexBay slot.
-
Page 22: Top View Features
Top View Features... - Page 23 • Solid amber — The computer is in sleep/standby mode or there might be a problem with the system board or the power supply. Contact Dell (see “Contacting Dell” on page 61) for assistance. • Blinking amber — There may be a problem with either the system board or the power supply.
- Page 24 USB 2.0 connector — Connects to USB devices, such as a mouse, keyboard, printer, external drive, or MP3 player. USB 2.0 connector with USB PowerShare — The USB PowerShare feature (disabled by default) allows you to charge portable devices that support USB charging even while your computer is powered on/off or in sleep state.
- Page 25 Using Your XPS Desktop...
-
Page 26: Back View Features
Back View Features... - Page 27 1 Power connector — Connects to the power cable. The appearance of this connector may vary. 2 Power supply light — Indicates power availability of the power supply. NOTE: The power supply light may not be available on all computers. 3 Back panel connectors —...
-
Page 28: Back Panel Connectors
Back Panel Connectors S/PDIF connector — Connects to amplifiers, speakers, or TVs for digital audio output through optical cables. HDMI connector — Connects to the HDMI connector on your display or TV. eSATA connector — Connects to external SATA storage devices. VGA connector —... - Page 29 Rear L/R surround connector — Connects to rear L/R surround speakers. Microphone connector — Connects to a microphone for voice or to an audio cable for audio input. Front L/R line-out connector — Connects to front L/R speakers. Line-in connector — Connects to recording or playback devices such as a microphone, cassette player, CD player, or VCR.
-
Page 30: Software Features
Software Features Productivity and Communication You can use your computer to create presentations, brochures, greeting cards, fliers, and spreadsheets. You can also edit and view digital photographs and images. Check your purchase order for software installed on your computer. After connecting to the Internet, you can access websites, setup an e‑mail accout, and upload or download files. -
Page 31: Dell Dock
Dell Dock The Dell Dock is a group of icons that provides easy access to frequently‑used applications, files, and folders. You can personalize the Dock by: • Adding or removing icons • Grouping related icons into categories Add a Category 1. Right‑click the Dock, click Add→... -
Page 32: Dell Datasafe Online Backup
Dell DataSafe Online Backup NOTE: Dell DataSafe Online may not be available in all regions. NOTE: A broadband connection is recommended for fast upload/download speeds. Dell DataSafe Online is an automated backup and recovery service that helps protect your data and other important files from catastrophic incidents like theft, fire, or natural disasters. -
Page 33: Solving Problems
This series of beeps, called a beep code, identifies a problem. If this occurs, write down the beep code and contact Dell (see “Contacting Dell” on page 61) for assistance. NOTE: To replace parts, see the Service Manual at support.dell.com/manuals. -
Page 34: Network Problems
Network Problems Wireless Connections If the network connection is lost — The wireless router is offline or wireless has been disabled on the computer. • Check your wireless router to ensure it is powered on and connected to your data source (cable modem or network hub). • Re‑establish your connection to the wireless router (see “Setting Up a Wireless Connection”... -
Page 35: Power Problems
If the light is off there may be a possible problem with the power supply or the power cable. • If the problem persists, contact Dell (see “Contacting Dell” on page 61). If the power light is solid white and the computer is not responding —... -
Page 36: Memory Problems
(see the Service Manual at support.dell.com/manuals). • Reseat the memory modules (see the Service Manual at support.dell.com/manuals) to ensure that your computer is successfully communicating with the memory. • If the problem persists, contact Dell (see “Contacting Dell” on page 61). -
Page 37: Lockups And Software Problems
• Reseat the memory modules (see the Service Manual at support.dell.com/manuals) to ensure that your computer is successfully communicating with the memory. • If the problem persists, contact Dell (see “Contacting Dell” on page 61). Solving Problems Lockups and Software Problems If the computer does not start up — Ensure that the power cable is firmly connected to the computer and to the electrical outlet. - Page 38 If the computer stops responding or a solid blue screen appears — CAUTION: You might lose data if you are unable to perform an operating system shutdown. If you are unable to get a response by pressing a key on your keyboard or moving your mouse, press and hold the power button for at least 8 to 10 seconds until the computer turns off and then restart your computer.
- Page 39 – Ensure that the program is installed and configured properly. – Verify that the device drivers do not conflict with the program. – If necessary, uninstall and then reinstall the program. – Write down any error message that is displayed to help in troubleshooting when contacting Dell.
-
Page 40: Using Support Tools
All the support you need – one convenient location. The Dell Support Center provides system alerts, performance improvement offers, system information, and links to other Dell tools and diagnostic services. To launch the application, click Start Programs→ Dell→ Dell Support Center→... -
Page 41: My Dell Downloads
NOTE: My Dell Downloads may not be available in all regions. Some of the software pre‑installed on your new Dell computer do not include a backup CD or DVD. This software is available on the My Dell Downloads website. From this... -
Page 42: System Messages
RTC battery low. Replace the battery (see the Service Manual at support.dell.com/manuals) or Contact Dell (see “Contacting Dell” on page 61) for assistance. CPU fan failure — CPU fan has failed. CPU fan needs replacement. See the Service Manual at support.dell.com/manuals. - Page 43 No timer tick interrupt — A chip on the system board might be malfunctioning or there might be a system board failure (see the Service Manual at support.dell.com/manuals) or Contact Dell (see “Contacting Dell” on page 61) for assistance. Using Support Tools USB over current error — Disconnect the USB device.
-
Page 44: Hardware Troubleshooter
Dell Diagnostics If you experience a problem with your computer, perform the checks in “Lockups and Software Problems” on page 35 and run Dell Diagnostics before you contact Dell for technical assistance. NOTE: Dell Diagnostics works only on Dell computers. - Page 45 2. Turn on (or restart) your computer. 3. When the DELL logo appears, press <F12> immediately to access the Boot Menu. NOTE: If you wait too long and the...
- Page 46 “Pre-boot System Assessment complete. Please select OK to reboot your system.” 9. To exit the Dell Diagnostics and to restart the computer, select OK. Starting Dell PC Checkup Dell PC Checkup scans and tests your computer hardware. It provides automated fixes for common configuration issues.
-
Page 47: System
You can restore the operating system on your computer using any of the following options: CAUTION: Using Dell Factory Image Restore or the Operating System disc to restore your operating system permanently deletes all data files on your computer. If possible, backup your data files before using these options. -
Page 48: System Restore
System Restore The Microsoft Windows operating systems provide a System Restore option which allows you to return your computer to an earlier operating state (without affecting data files) if changes to the hardware, software, or other system settings have left the computer in an undesirable operating state. -
Page 49: Dell Datasafe Local Backup
Local Backup is designed to preserve the data files on your computer, it is recommended that you backup your data files before using the Dell DataSafe Local Backup. NOTE: Dell DataSafe Local Backup may not be available in all regions. - Page 50 Factory Image Restore (see “Dell Factory Image Restore” on page 51) to restore your operating system. You can use Dell DataSafe Local Backup to restore your hard drive to the operating state it was in when you purchased your computer, while preserving the data files.
- Page 51 • Backup and restore your computer based on file types • Backup files to a local storage device • Schedule automated backups To upgrade to Dell DataSafe Local Backup Professional: 1. Double‑click the Dell DataSafe Local Backup icon in the notification area of your desktop.
-
Page 52: System Recovery Media
1. Insert the system recovery disc or USB key and restart the computer. 2. When the DELL logo appears, press <F12> immediately. NOTE: If you wait too long and the operating system logo appears, continue to wait until you see the Microsoft Windows desktop;... -
Page 53: Dell Factory Image Restore
DataSafe Local Backup” on page 47) to restore your operating system. Restoring Your Operating System Use Dell Factory Image Restore only as the last method to restore your operating system. This option restores your hard drive to the operating state it was in when you purchased the computer. - Page 54 5. To access the recovery options, log on as a local user. To access the command prompt, type administrator in the User name field, then click OK. 6. Click Dell Factory Image Restore. The Dell Factory Image Restore welcome screen appears. NOTE: Depending upon your...
-
Page 55: Getting Help
1. See “Solving Problems” on page 31 for information and procedures that pertain to the problem your computer is experiencing. 2. See “Dell Diagnostics” on page 42 for procedures on how to run Dell Diagnostics. 3. Fill out the “Diagnostic Checklist” on page 60. -
Page 56: Technical Support And Customer
DellConnect DellConnect is a simple online access tool that allows a Dell service and support associate to access your computer through a broadband connection, diagnose your problem and repair it all under your supervision. -
Page 57: Online Services
Online Services You can learn about Dell products and services on the following websites: • www.dell.com • www.dell.com/ap (Asian/Pacific countries only) • www.dell.com/jp (Japan only) • www.euro.dell.com (Europe only) • www.dell.com/la (Latin American and Caribbean countries) • www.dell.ca (Canada only) You can access Dell Support through the following websites and e‑mail addresses:... -
Page 58: Automated Order-Status Service
Automated Order-Status Service To check on the status of any Dell products that you have ordered, you can go to support.dell.com, or you can call the automated order‑status service. A recording prompts you for the information needed to locate and report on your order. -
Page 59: Returning Items For Repair Under
Prepare all items being returned, whether for repair or credit, as follows: NOTE: Before you return the product to Dell, ensure that you back up any data on the hard drive(s) and on any other storage device in the product. Remove... - Page 60 Dell. Collect On Delivery (C.O.D.) packages are not accepted. NOTE: Returns that are missing any of the preceding requirements will be refused at Dell’s receiving dock and returned to you.
-
Page 61: Before You Call
Before You Call NOTE: Have your Express Service Code ready when you call. The code helps Dell’s automated‑support telephone system direct your call more efficiently. You may also be asked for your Service Tag (located at the top of your computer). - Page 62 Remember to fill out the following Diagnostics Checklist. If possible, turn on your computer before you call Dell for assistance and call from a telephone at or near the computer. You may be asked to type some commands at the keyboard, relay detailed...
-
Page 63: Contacting Dell
Availability varies by country and product, and some services may not be available in your area. To contact Dell for sales, technical support, or customer service issues: 1. Go to www.dell.com/ContactDell. 2. Select your country or region. -
Page 64: Resources
See: “System Recovery Media” on page 50 “Dell Diagnostics” on page 42 “My Dell Downloads” on page 39 support.dell.com the Service Manual at support.dell.com/manuals NOTE: In some countries, opening and replacing parts of your computer may void your warranty. - Page 65 End User License Agreement find your Service Tag/Express Service Code — You must use the service tag to identify your computer on support.dell.com or to contact technical support find drivers and downloads; readme files access technical support and product help...
-
Page 66: Specifications
NOTE: Offerings may vary by region. For more information regarding the configuration of your computer, see the Detailed System Information section in the Dell Support Center. To launch the Dell Support Center, click Start Dell Support Center→ Launch Dell Support Center. - Page 67 Possible memory 3 GB, 4 GB, 6 GB, 8 GB, configurations 12 GB, and 16 GB NOTE: For instructions on upgrading the memory, see the Service Manual at support.dell.com/manuals. Audio Audio controller Integrated 7.1 channel; High Definition Audio with S/PDIF (optical)
-
Page 68: Internal Connectors
Internal Connectors Mini‑PCIe one mini slot PCI Express x1 three 36‑pin connectors PCI Express x16 one 164‑pin connector SATA four 7‑pin connectors External Connectors Audio: Top panel one stereo headphones/ speakers connector and one microphone‑in connector Back panel six connectors for 7.1 channel support S/PDIF one digital S/PDIF... - Page 69 Battery Type 3 V CR‑2032 lithium coin‑cell Power DC Power Supply Wattage 460 W Input voltage 115/230 VAC Input frequency 50/60 Hz Output current 8 A/4 A Communication Network adapter 10/100/1000 Ethernet LAN on system board Wireless Wi‑Fi and Bluetooth (optional) wireless technology Physical...
- Page 70 20% to 80% (maximum) (noncondensing) Maximum shock (for operating — measured with Dell Diagnostics running on the hard drive and a 2‑ms half‑sine pulse; for non‑operating — measured with the hard drive in head‑parked position and a 2‑ms half‑sine pulse):...
-
Page 71: Appendix
11950 México, D.F. Regulatory Model Number Regulatory Type D03M D03M004 For details, read the safety information that shipped with your computer. For additional safety best practices information, see www.dell.com/regulatory_compliance. Input Input Voltage Frequency 115/230 VAC 50/60 Hz Rated Output Current... -
Page 72: Index
Internet 15 Contacting Dell online 61 customer service 54 DataSafe Local Backup 47 DellConnect 54 Dell Diagnostics 42 Dell Factory Image Restore 51 Diagnostic Checklist 60 drivers and downloads 63 DVDs, playing and creating 28 eject button 19 e‑mail addresses... - Page 73 hard drive activity light 19 hardware problems diagnosing 42 Hardware Troubleshooter 42 HDMI connector 26 help getting assistance and support 53 Internet connection 15 Internet Service Provider 15 memory problems solving 34 network connection fixing 32 network connector location 27 problems, solving 31 products information and purchasing 56...
- Page 74 shipping products for return or repair 57 software features 28 software problems 35 solving problems 31 specifications 64 support e‑mail addresses 55 support sites worldwide 55 System Messages 40 System Recovery Media 50 system reinstall options 45 System Restore 46 TV tuner 15 USB 2.0 back connectors 26...
- Page 76 Printed in the U.S.A. www.dell.com | support.dell.com www.dell.com | support.dell.com...
Need help?
Do you have a question about the XPS D03M and is the answer not in the manual?
Questions and answers