
Subscribe to Our Youtube Channel
Related Manuals for Gessi 39581


Summary of Contents for Gessi 39581
- Page 1 BATH MIXING PROGRAM PROGRAMME DU MITIGEUR POUR LA SALLE DE BAIN PROGRAMA MEZCLADORES BAÑO Art. 39581 Gessi SpA - Parco Gessi 13037 Serravalle Sesia (Vercelli) - Italy Phone +39 0163 454111 - Facsimile +39 0163 459273 www.gessi.com - gessi@gessi.it...
-
Page 2: Caution - Warning
CAUTION - WARNING 1 - WARNING!! PLEASE TAKE NOTICE THAT the suggested maximum pressure and/or temperature (see technical data) MUST NEVER BE EXCEEDED, as it may damage and/or cause ruptures and/or leakages and/or even break the product, and present a potential hazard and danger to safety, health and/or property. 2 - WARNING!! PLEASE TAKE NOTICE THAT the product should never be used as a tool, hammer or for any purposes other than the one it has been designed for. - Page 3 ATTENTION - AVERTISSEMENT 1 - ATTENTION!! NOUS VOUS PRIONS DE TENIR COMPTE QUE la pression et/ou la température maximum suggérée (voir données techniques) NE DOIT JAMAIS ETRE DEPASSEE, car elle pourrait abîmer et/ou provoquer des ruptures et/ou des fuites et/ou des pannes du produit et, donc, représenter un risque et danger potentiel pour la sécurité, la santé...
- Page 4 CUIDADO - ADVERTENCIA 1 - ¡CUIDADO!! LES ROGAMOS QUE TENGAN EN CUENTA QUE NUNCA la presión y/o la temperatura máxima aconsejada (mirar datos técnicos) NO TIENE QUE SER SUPERADA, ya que podría dañar y/o causar rupturas y/o pérdidas y/o averías del producto y, por lo tanto, representar un riesgo y un peligro potencial para la seguridad, la saludad y/o la propiedad.
- Page 5 Index - Index - Indice Package content............................Technical features............................. Installation preliminaries........................... Installation..............................10/25 Contenu de l’emballage..........................Caractéristiques techniques........................Préliminaires d’installation........................Installation..............................10/25 Contenido de la caja..........................Características técnicas........................... Preliminares de instalación........................Instalación..............................10/25...
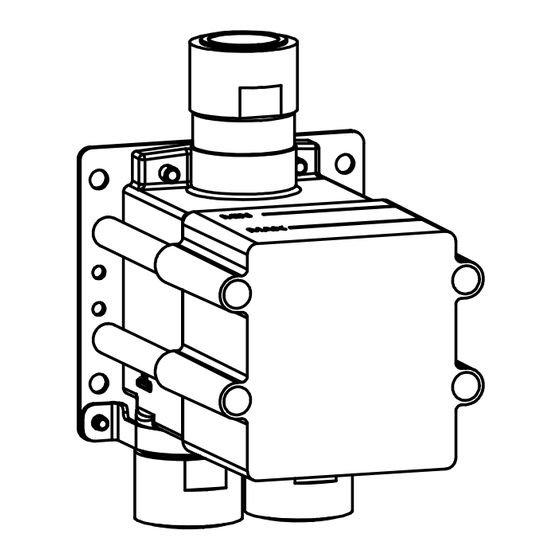
- Page 6 Package content - Contenu de l’emballage - Contenido de la caja Package content: A - Built-in body B - Stirrups for wall mount C - Fastening set for stirrups D - Installation and maintenance manuals Contenu de l’emballage: A - Corps encastrement B - Etriers pour fixation murale C - Jeu de fixation pour étriers D - Manuels d’installation et entretien...
- Page 7 Technical features - Caractéristiques techniques - Características técnicas Outlet - Sortie - Salida [l/min] Pressure - Pression - Presión [bar] 1° Technical data: - Minimum working pressure 7,25 psi [0,5 bar] - Maximum working pressure 72 psi [5 bar] - Recommended working pressure 43,5 psi [3 bar] (in case of water pressure higher than 72 psi [5 bar] it is recommended to install pressure reducers) - Maximum test installation pressure 116 psi [8 bar] - Avoid major pressure differences between hot and cold water supply.
- Page 8 Technical features - Caractéristiques techniques - Características técnicas - Système de sécurité avec le bloc de la distribution en cas de manque d’une des deux eaux Fonctionnement: - Soit avec des chauffe-eaux à gaz, électriques à accumulation - Installations centrales - Chaudières au mur - Filtres en acier inox pour le traitement des impuretés Attention: consulter le plombier pour le choix du dispositif de réchauffement de l’eau le plus approprié.
- Page 9 Pre-installation information - Préliminaires - Preliminares Before installation and setting to work Attention! The feeding pipes have to be rinsed thoroughly before the installation of the product, so that no shavings, welding or hemp residual or other dirt can be found in the pipes. Foreign bodies can enter the product through the rinsed pipes or the general water plant and could damage the washers/ring washers.
- Page 10 Installation - Installation - Instalación Art. 39581 3/4” NPT f. OUTLET 3/4” NPT f. 3/4” NPT f. COLD...
- Page 11 Installation - Installation - Instalación Fig. 1 Fig. 2 1/8” [2,5mm] Getting ready for Installation Fig. 1 - Remove protection plugs of threads to allow connection to the water network. Fig. 2 - Fasten on the built-in body the stirrups for wall mount (B) using the screws inserted in the package. The use of stirrups is recommended to facilitate the installation of the built-in body.
- Page 12 Installation - Installation - Instalación Fig. 3 Fig. 4 Fig. 5 Fig. 6 3/4” NPT m. OUTLET 3/4” NPT m. 3/4” NPT m. COLD...
- Page 13 Installation - Installation - Instalación Built-in body installation (continues...) Before starting make sure the water network is off. Fig. 3-4 - To create the proper seat for the built-in body check the actual overall sizes and consider the minimum and maximum built-in depths shown on the plastic protection pre-installed on the body. Fig.
- Page 14 Installation - Installation - Instalación Fig. 7 Fig. 8...
- Page 15 Installation - Installation - Instalación Built-in body installation (continues...) Fig. 7 - Stabilize the body inside the wall identifying with the help of a spirit level, the proper positioning. Fig. 8 - Mark at the center of loops, the points in which holes should be made for wall mount. Installation corps encastrement (continue...) Fig.
- Page 16 Installation - Installation - Instalación Fig. 9 Fig. 10 Fig. 11 Fig. 12...
- Page 17 Installation - Installation - Instalación Built-in body installation (continues...) Fig. 9 - Keep the built-in body away from the wall. Fig. 10 - Drill for wall fastening in the points previously marked with a bit D.5/16” [8mm] for the indicated depths.
- Page 18 Installation - Installation - Instalación Fig. 13...
- Page 19 Installation - Installation - Instalación Built-in body installation (continues...) Fig. 13 - Fasten the body to the wall using the specific screws supplied. WARNING! Check the perfect alignment of the built-in body before fastening it definitely to the wall. Installation corps encastrement (continue...) Fig.
- Page 20 Installation - Installation - Instalación Fig. 14 Fig. 15 Use hemp or teflon Employer chanvre ou teflon Usar cáñamo o teflón 1/8” [3mm]...
- Page 21 Installation - Installation - Instalación Built-in body installation (continues...) Fig. 14 - Connect the supply pipes to the body following the indications in the figure. We recommend using hemp to guarantee tightness on the threads. Fig. 15 - Remove the plastic protection to carry out the test of the built-in body. WARNING: do not lose or dispose of the protective plastic and the respective fastening screws since they have to be installed again on the built-in body at the end of the test.
- Page 22 Installation - Installation - Instalación Fig. 16 Fig. 17 OPEN Fig. 18...
- Page 23 Installation - Installation - Instalación Built-in body test Fig. 16 - Open the supply water network. Fig. 17-18 - Check the absence of leakages in the areas of water network connection. Test du corps encastrement Fig. 16 - Ouvrir le réseau hydrique d’alimentation. Fig.
- Page 24 Installation - Installation - Instalación Fig. 19 Fig. 20 1/8” [3mm] CLOSE Fig. 21 Fig. 22...
- Page 25 Installation - Installation - Instalación Built-in body installation (continues...) Fig. 19 - Close the water supply network. Fig. 20 - Install again the plastic protection, previously removed, on the built-in body. Fig. 21-22 - Fully embed the built-in body in the wall as much as possible adhering to its plastic protection.
- Page 26 NOTES - NOTES - NOTAS: ..............................................................................................................................................................................................................................................................................................................................................................................................................................................................................................................................................................................................................................................................................................................................................................................................................................................................................................................................................................................
- Page 28 ET 41116 - R0...
Need help?
Do you have a question about the 39581 and is the answer not in the manual?
Questions and answers