Table of Contents
Advertisement
Advertisement
Table of Contents

Subscribe to Our Youtube Channel
Related Manuals for Atom Infa Warmer i


Summary of Contents for Atom Infa Warmer i
- Page 6 Equipment for neonatal and premature infants: Infant Warmer Atom Infant Warmer 103 Operation Manual TO THE OPERATOR AND THE PERSON IN CHARGE OF MAINTENANCE AND CARE OF THE UNIT: ● Read this Manual carefully before operating the unit. ● Keep this Manual where it is readily accessible for reference when needed.
-
Page 8: Introduction
The Infa Warmer i has the capability to control the infant’s skin temperature as well as the pulse oximeter to measure SpO... - Page 9 3. Never use the unit if it is found to be defective. If any damage or malfunction of the unit should be noticed, stop using it immediately and contact your local Atom representative. 4. Follow the EMC information given in this Manual.
- Page 10 Definition of Symbols 1. Symbols to indicate danger, warning or caution Symbol Title and indication General attention Indicates unspecified general danger, warning or caution. Caution: Hot surface Indicates that the surface can be dangerously hot under certain conditions. 2. Symbols to prohibit action Symbol Title and indication General prohibition...
- Page 11 Symbol Title and indication Bell silenced Indicates either a control switch to silence the bell permanently or temporarily or that the bell is silenced. Caution Indicates that the user needs to see a relevant accompanying document before operating the unit. Caution against electrostatic discharge Indicates that appropriate precautions must be taken against electrostatic discharge.
- Page 12 Symbol Title and indication Alarm Indicates that a system of the unit is in an abnormal condition. Alarm 1. In manual control (when monitoring the skin temperature): Indicates that the skin temperature has become 40°C or higher. 2. In servo control: Indicates that the skin temperature deviates from the set temperature by 1.0°C or by 0.5°C.
- Page 13 Symbol Title and indication Indicates the sensitivity selector switch. (Masimo) Indicates the patient cable connecting port. Indicates that the SpO lower alarm limit is set to lower than 85%. Indicates that the current sensitivity is "APOD." (Masimo) Indicates that the current sensitivity is "NORM." (Masimo) Indicates that the current sensitivity is "MAX."...
- Page 14 Atom. 8. Trouble or damage due to using the unit connected to a peripheral device which is not specified by Atom, which does not meet the applicable requirements of IEC-60601-1 and IEC-60601-1-1, or which is not...
- Page 15 If any abnormal condition or trouble should occur to the unit, indicate on the unit that it is out of order and contact your local Atom representative or service engineer immediately. See the end of this Operation Manual for whom to contact.
-
Page 16: Table Of Contents
CONTENTS INTRODUCTION ............ 1 5-7. Turning on/off the Pulse Oximetry Function ........37 PLEASE READ WITHOUT FAIL Tilting the Mattress Platform ....38 Operating the Mattress Platform ... 38 6-1. Operating Precautions ......10 Other Operation Procedures ....39 DANGER ........... 10 1-1. -
Page 17: Operating Precautions
Operating Precautions Operating Precautions Please follow the operating instructions described in this Manual for the safe use of the unit. The unit should be operated only by those who have been trained and instructed properly in its operation under the supervision of qualified medical personnel familiar with the currently known risks and benefits associated with the use of a radiant warmer. -
Page 18: Warning
Operating Precautions Ground the unit securely. Otherwise, a leakage current may cause an electric shock. In order to complete the ground connection, connect the power cord only to a properly grounded 3P power outlet including a ground terminal. Do not operate the unit if you have any doubt about its ground connection. Do not use a device generating high frequency near the unit. - Page 19 Operating Precautions Avoid damaging the power cord. A damaged power cord may cause a fire or an electric shock. • Do not get the power cord caught between the unit and the wall, a shelf or the floor. • Do not place the power cord near a heating apparatus or heat it. •...
-
Page 20: Caution
Anybody who connects additional equipment to the signal input or signal output configures a medical system, and therefore should make the medical system comply with the requirements of 60601-1-1 on his or her own responsibility. If in doubt, consult your local Atom representative. 1-3. - Page 21 Do not place anything heavy on the unit. Do not let the unit hit anything, fall, or drop inadvertently. Do not attach any peripheral device that is not specified by Atom to the unit. Check the operation of the peripheral devices.
-
Page 22: Parts Identification
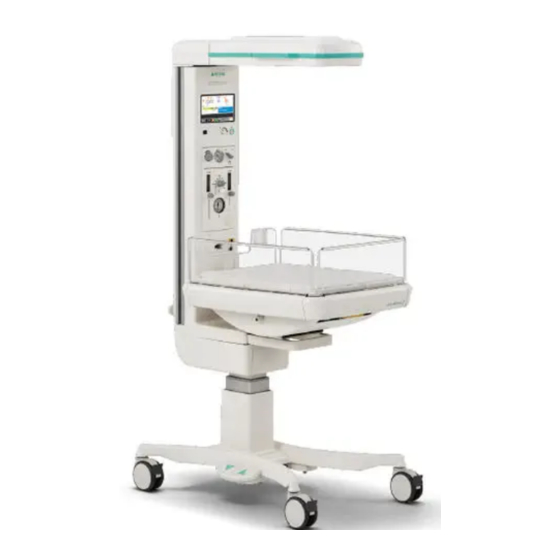
Parts Identification Parts Identification 2-1. Main Body ① ⑭ ⑬ ② ⑫ ⑪ ⑩ ✽ ⑮ ⑨ ③ ④ ⑯ ⑧ ⑦ BREAKER ⑰ 120V~ 60Hz ⑤ ⑤ ⑱ ⑥ Name Name ① ⑩ Canopy Resuscitator ② ⑪ Lighting lamp Operation panel ③... -
Page 23: Support Column
Parts Identification 2-2. Support Column ① ② ✽ ③ ④ ⑤ Name ① Operation panel ② Resuscitator ③ Skin temperature probe connecting port 1 ④ Skin temperature probe connecting port 2 ⑤ Connector for SpO * The figure shows the unit in which a commercially available resuscitation unit and a commercially available blender unit are installed. -
Page 24: Operation Panel
Parts Identification 2-3. Operation Panel Alarm Temperature Timer Pulse oximeter Others (Masimo) (Nellcor) Alarm Symbol Function Symbol Function External alarm indicator Set temperature alarm indicator Comes on when a high priority alarm Comes on when a displayed skin occurs, except for a power failure temperature deviates from the set alarm. - Page 25 Parts Identification Temperature Timer to p.25 to p.39 Symbol Function Symbol Function Operation mode indicator (servo control mode) Timer display The servo control mode indicator is Displays up to 60 minutes 00 seconds. on in servo control operation. (It Second counter flashes when the skin temperature is Counts up 6 seconds twice every 30 being set.)
- Page 26 Parts Identification Pulse oximeter Others to p.32 Symbol Symbol Function Function Alarm limit selector switch Setting up/down switch Press this switch to select one of the Press this switch to set the skin four alarms: the SpO upper limit temperature, the heater output, and alarm, the SpO lower limit alarm, the the upper/lower alarm limits to a...
-
Page 27: Preparation Before Use
Preparation before Use Preparation before Use 3-1. Where to install the Unit Install the unit on a horizontal surface in a convenient location. Avoid installing it near a heating apparatus, by the window, or where fire is used. Since the radiant temperature on the bed of the unit is affected by the ambient temperature, the unit should be used in a room whose temperature is 18∼30°C. -
Page 28: Adjusting The Hi-Low Stand
Preparation before Use 3-3. Adjusting the Hi-Low Stand (1) The height of the Hi-Low stand can be adjusted if necessary by stepping on an appropriate side of the foot switch. Foot switch To raise the Hi-Low stand, step continuously on the right side (△) of the foot switch until a desired height is achieved. -
Page 29: Power Outlet And Grounding
Preparation before Use 3-4. Power Outlet and Grounding WARNING The power outlet should be located near the unit to prevent accidental contact with a trailing power cord. Use a separate power outlet for each unit. Do not put many loads on one power outlet. In order to complete the ground connection, connect the power cord only to a properly grounded 3P power outlet. -
Page 30: Power Failure Alarm
If a power failure alarm does not sound when the power switch is turned on with the power cord disconnected after recharging, contact your local Atom representative. The unit contains a rechargeable battery for generating an alarm when the power supply has stopped. The battery needs charging in any of the following cases: •... -
Page 31: Daily Inspection
Preparation before Use 3-7. Daily Inspection Before using the unit, check it carefully for any faults, contamination, missing parts or defective parts to make sure that it can be operated safely. DANGER Stop using the unit immediately if the locking mechanism of the baby guards should be found faulty. -
Page 32: Heat Control
Heat Control Heat Control Two modes of heat control are available in using the unit: the manual control mode and the servo control mode. In the manual control mode, the heater output is controlled to achieve a preselected output level (%); in the servo control mode, a skin temperature probe is attached to the infant and the heater output is controlled to maintain the infant’s skin temperature at a preselected level. -
Page 33: Setting Preheating (Manual Control)
Heat Control WARNING ● Monitor the infant’s temperature continuously on the skin temperature display. Pay special attention to the fluctuations in the skin temperature. ● If too much heat is supplied from the start, the infant’s skin temperature may rise above a target level. -
Page 34: Skin Temperature Monitoring (Skin Temperature Probe: Yellow And White)
Heat Control To cancel preheating, follow the steps for setting the manual control mode or the servo control mode. WARNING ● A baby check alarm does not occur during preheating. Do not place the infant on the mat- tress. ● Before placing the infant on the mattress, make sure that the mattress platform is warm enough. - Page 35 Heat Control WARNING ● Do not place the skin temperature probe under the infant. Do not use it as a rectal probe. ● Attach the skin temperature probe securely to the infant’s abdominal wall. The skin temperature can- not be detected accurately if the skin temperature probe should be dislodged accidentally from the infant’s abdominal wall or otherwise attached improperly to the infant’s abdominal wall.
-
Page 36: Heater Output Indicator
Heat Control ■ Monitoring the skin temperature at two different sites Connect the yellow skin temperature probe to the skin temperature probe connecting port 1. Connect the white skin temperature probe (option) to the skin temperature probe connecting port 2. Attach the white skin temperature probe (option) to the infant in the same way as the yellow skin tem- perature probe. - Page 37 Heat Control In the servo control mode, the heater output is controlled by giving priority to the maintenance of the infant’s skin temperature. It detects the infant’s skin temperature with a skin temperature probe attached to the infant’s abdomen and maintains the optimum thermal environment through feedback control. In the servo control mode, the heater output is controlled automatically to maintain the infant’s skin temperature at a constant level (i.e.
- Page 38 Heat Control WARNING ● Attach the skin temperature probe securely to the infant’s abdominal wall. The skin temperature can- not be detected accurately if the skin temperature probe should be dislodged accidentally from the infant’s abdominal wall or otherwise attached im- properly to the infant’s abdominal wall.
-
Page 39: Pulse Oximeter
The sensor is for single patient use only. The sensor is not sterile when shipped from the factory. The sensor is intended for pulse oximetry specified by Atom. Failure to attach the sensor properly to the patient may result in inaccurate measurements. -
Page 40: Connecting The Patient Cable To The Main Body
The SIQ bar graph on the display is not proportional to the size of the detected pulse. CAUTION Use only the sensors and the patient cables specified by Atom to connect to the pulse oximeter in this unit. Using any other sensor or patient cable may injure the patient. -
Page 41: Setting The Sensitivity (Masimo)
Pulse Oximeter (2) Press . The unit enters the SpO lower alarm limit setting mode and the SpO lower limit alarm indicator will flash. While the indicator is flashing, press to set the SpO lower alarm limit to a desired level. The alarm limit can be set in the range of 45~95% in 1% increments. -
Page 42: Setting The Synchronizing Pulse Beep Volume And The Averaging Time
Pulse Oximeter (1) Each time is pressed, a different sensitivity indi- cator will come on. Continue operating the switch until the indicator of desired sensitivity comes on. 5-4. Setting the Synchronizing Pulse Beep Volume and the Averaging Time * The averaging time feature is available only with a unit equipped with the Masimo type SpO function. -
Page 43: Setting The Fast Response (Nellcor)
Pulse Oximeter After setting the synchronizing pulse beep volume, press for one second while pressing again. “ ” will appear on the SpO display and a current setting of the SatSeconds limit will appear on the pulse rate display: “ ”... -
Page 44: Turning On/Off The Pulse Oximetry Function
Pulse Oximeter 5-7. Turning on/off the Pulse Oximetry Function The pulse oximetry function is off when the power switch is turned on without connecting a patient cable or a sensor. The pulse oximetry function will turn on when both a patient cable and a sensor are connected. The pulse oximetry function is on when the power switch is turned on with a patient cable and a sensor con- nected. -
Page 45: Tilting The Mattress Platform
Operating the Mattress Platform DANGER When the Weight Monitor Unit for Infa Warmer i (option) is connected, be careful not to pull the cable by force in tilting the mattress platform. After returning the mattress platform to its former position, make sure that the cable is not caught in the mattress platform or in any gap. -
Page 46: Other Operation Procedures
Other Operation Procedures Other Operation Procedures 7-1. Timer The unit is provided with a count-up timer, which counts up from 0 minute to 60 minutes 00 second. A chime rings at 1,3,5 and 10 minutes, so that it will serve as an Apgar timer (the Apgar mode). On the other hand, if you use it as a CPR timer (the CPR mode), an alert for evaluating resuscitation will sound every 30 seconds in addition to the above-mentioned chimes. -
Page 47: I/O Port (Communication Connector)
When using the communication function, do not depend on the information given by the external computer but monitor the infant’s condition and that of the unit continuously. * If you need the “External Communication Specifica- tions,” contact your local Atom representative. I/O port (communication... -
Page 48: Lighting
Other Operation Procedures 7-3. Lighting WARNING Since lighting can impose an excessive burden on the infant’s eyes, take appropriate measures to protect them, for example, covering them. The lighting lamp is provided in the canopy assembly. Use the light control switch on the operation panel to turn on/off the lighting lamp. -
Page 49: Baby Guard
Other Operation Procedures 7-5. Baby Guard DANGER Check periodically that the baby guards are locked securely. When you pull up and lock the baby guards in position, be sure to check that no mattress or linen is caught between any of the baby guards and the mattress platform. Make sure that the baby guards are locked securely. -
Page 50: X-Ray Cassette Tray
Other Operation Procedures A rail is attached to either side of the support column. The optional tray set, the I.V. pole, etc. can be mounted to either support column rail. Support column rail 7-7. X-ray Cassette Tray CAUTION If the baby guards are left open, the infant may fall out. Be sure to close and lock them securely when taking radiographs. -
Page 51: Setting The Alarm Volume
Other Operation Procedures 7-8. Setting the Alarm Volume The alarm volume can be adjusted as desired. Press for one second while pressing when the power is on, and the current setting of the alarm volume will appear on the setting display. The alarm volume is adjustable in 8 levels from “... -
Page 52: Enabling/Disabling The Key Click
Other Operation Procedures 7-10. Enabling/Disabling the Key Click The key click can be enabled or disabled. Press for one second while pressing , and the current setting of the key click (enabled or disabled) will appear on the setting display. “... -
Page 53: Cleaning And Disinfection
Cleaning and Disinfection Cleaning and Disinfection CAUTION Before cleaning and disinfecting the unit, be sure to turn the power off, remove the power plug from the power outlet, and allow the heater to cool down sufficiently. This product is shipped without being disinfected. Be sure to clean and disinfect the unit before using it for the first time after purchase. -
Page 54: Others
Cleaning and Disinfection • Baby guard CAUTION Do not use ethyl alcohol (ethanol) to clean the baby guards. Clean the baby guards with a soft cloth dampened with a disinfectant solution. • Lighting lamp CAUTION Do not use ethyl alcohol (ethanol) to clean any other parts than the heater reflector. Be sure to turn the light off before cleaning the lighting lamp and its surroundings. -
Page 55: Maintenance Inspection
Quarterly inspection Check the operation of each function of the unit every three months. • Periodical inspection Periodical inspection needs to be performed annually. Contact your local Atom representative for periodical inspection. • Parts requiring periodical replacement Some parts need to be replaced periodically depending on their period of use. -
Page 56: Inspection Before Use
CAUTION If you should notice any strange smell, strange noise, overheating, strange vibration, missing parts, or defective function in the inspection, stop using the unit immediately and contact your local Atom representative. Check the following points every time you are going to use the unit. - Page 57 Maintenance Inspection Check the following points after connecting the power cord. Item to check Description The mains on indicator should come on. Mains on indicator The mechanism should operate smoothly without making a strange Height adjustment mechanism sound. All the indicators on the operation panel, except for the power failure alarm indicator and the battery operation indicator, should come on and Operation panel an audible alarm should sound when the power switch is turned on.
-
Page 58: Quarterly Inspection
Maintenance Inspection 9-2. Quarterly Inspection Check the following points every three months. If any trouble is detected, indicate on the unit that it is out of order and contact your local Atom representative immediately. Item to check Procedure Description Warm the skin temperature probe and check that Set the skin temperature to 36.0°C... -
Page 59: Inspection Checklist
If any trouble is detected in any inspection, indicate on the unit that it is out of order and seek repair without fail. Contact your local Atom representative for further information on repairs. Serial No. ( Date of Inspection (... -
Page 60: Disposal
Maintenance Inspection 9-5. Disposal The medical institution concerned is responsible for proper disposal of the main body, old parts past their expected life span and disposables in accordance with applicable waste disposal laws and regulations. A rechargeable NiMH battery (button type) is used in this unit. Dispose of the battery properly. -
Page 61: Alarms
This unit is provided with the following alarms. If an alarm condition should occur, check for a possible cause of the alarm and take the proper measures. If the unit seems to be defective, it is in need of repairs. Indicate on the unit that it is out of order and contact your local Atom representative. Cate-... - Page 62 Alarms Cate- Alarm name Condition causing the Indication of the Resetting the Priority Alarm gory alarm alarm alarm (*1) silence The alarm will be This alarm will occur if the reset automatically “ ” on the left of Pulse rate upper pulse rate upper alarm limit is when the pulse rate Medium...
- Page 63 Alarms Cate- Alarm name Condition causing the Indication of the Resetting the Priority Alarm gory alarm alarm alarm (*1) silence “E03” will be dis- Replace the wrong Warning This alarm will occur if a non- played on the SpO sensor or the wrong informa- Incompatible specified sensor or a non-spec-...
- Page 64 Alarms Cate- Alarm name Condition causing the Indication of the Resetting the Priority Alarm gory alarm alarm alarm (*1) silence Turn the power off. If the alarm should This alarm will occur if a wire The system failure recur when the pow- System failure of the heater has snapped or alarm indicator will...
-
Page 65: Troubleshooting
[11] Troubleshooting WARNING If the unit seems to be defective, indicate on the unit that it is out of order, stop using it immediately, and contact your local Atom representative. CAUTION Check the following points before requesting repair service. Trouble Action to take •... -
Page 66: Technical Data
Technical Data [12] Technical Data ■ Main body Rating: AC120V; power consumption 700VA; frequency 60Hz Power requirements Operating voltage range: AC120V±10% Type of protection: Class 1 equipment Classification Degree of protection: Type BF applied part Not for use in an air and flammable anesthetic gas mixture or an oxygen/ nitrous oxide and flammable anesthetic gas mixture Mode of operation: Continuous operation The Hi-Low stand is designed for intermittent operation. - Page 67 Technical Data Skin temperature probe......1 Accessories Mattress sheet ........1 Dust cover ..........1 Operation Manual .......1 ■ Pulse oximeter * (Masimo) 1,5,6,7 • Measurement 1~100% Display range: ±3 digits (during no motion conditions)* Accuracy (in 70~100%): ±3 digits (during motion conditions)* ±3 digits (during low perfusion conditions)* 1 second Update cycle: • Alarm function...
- Page 68 *9 The above specifications apply when the sensor and the patient cable specified by ATOM are used. For information on the sensor and the patient cable specified by ATOM, contact your local Atom representa- tive.
- Page 69 Technical Data *1 Subjects used to validate SpO measurement accuracies were healthy and recruited from the local popula- tion. Comprised of both men and women, subjects spanned a range of skin pigmentations and ranged in age from 18-50 years old. Accuracy specifications are based on controlled hypoxia studies with healthy non-smoking adult volunteers over the specified SpO range(s).
- Page 70 Technical Data...
- Page 72 • Reproduction of all or part of this Manual without permission from Atom Medical Corporation is strictly prohibited. • The contents of this Manual are subject to change without notice due to technical improvement. • All possible measures have been taken to ensure the accuracy of the contents of this Manual. However, if any...
- Page 73 C68MH003 3-18-15, Hongo, Bunkyo-ku, Tokyo, Japan Tel: +81 3 38152311 Fax: +81 3 38123144...
Need help?
Do you have a question about the Infa Warmer i and is the answer not in the manual?
Questions and answers