
Subscribe to Our Youtube Channel
Related Manuals for South Bend Tools SB1122


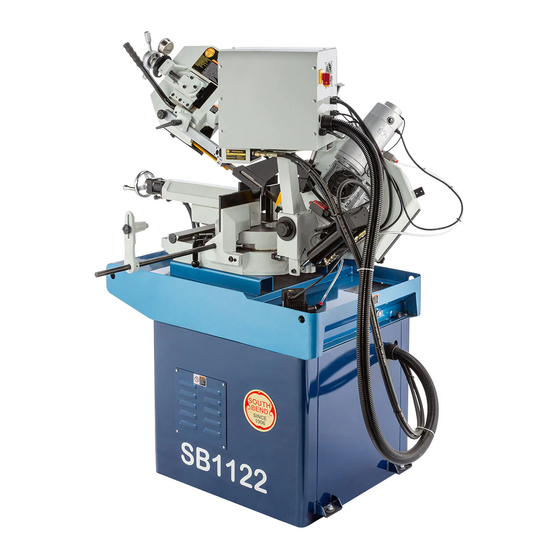
Summary of Contents for South Bend Tools SB1122
- Page 1 9" X 12" 1-1/2 HP METAL-CUTTING BANDSAW MODEL SB1122 OWNER'S MANUAL South Bend Tools ® A Tradition of Excellence © November, 2021 by South Bend Tools For Machines Mfd. Since 10/21 (V1.11.21)
- Page 2 We highly value customer feedback on our manuals. If you have a moment, please share your experience using this manual. What did you like about it? Is there anything you would change to make it better? Did it meet your expectations for clarity, professionalism, and ease-of-use? South Bend Tools Technical Documentation Manager P.O. Box 2027 Bellingham, WA 98227 Email: manuals@southbendtools.com...
-
Page 3: Table Of Contents
Table of Contents ACCESSORIES .............. 39 INTRODUCTION ...............2 Identification ............2 MAINTENANCE ............. 40 Description of Controls & Components ....3 Maintenance Schedule ........40 Product Specifications ......... 5 Cleaning ............. 40 Lubrication ............41 SAFETY ................7 Machine Storage ..........42 Understanding Risks of Machinery .... -
Page 4: Introduction
I N T R O D U C T I O N Model SB1122 For Machines Mfd. Since 10/21 INTRODUCTION Identification Headstock Headstock Power Power Switch Handle Handle Blade Tension Blade Tension Control Panel Control Panel Handwheel Handwheel Cutting Fluid... -
Page 5: Description Of Controls & Components
I N T R O D U C T I O N For Machines Mfd. Since 10/21 Model SB1122 Description of Controls D. AUTO CUTTING Button : Starts automatic cutting cycle: vise closes, blade starts, headstock lowers so blade can cut down into &... - Page 6 I N T R O D U C T I O N Model SB1122 For Machines Mfd. Since 10/21 Vise Table U. Vise Quick-Release Handle: Tightens to release vise leadscrew so vise can be adjusted open or closed quickly without vise handwheel;...
-
Page 7: Product Specifications
I N T R O D U C T I O N For Machines Mfd. Since 10/21 Model SB1122 Product Specifications P.O. Box 2027, Bellingham, WA 98227 U.S.A. © South Bend Tools PHONE: (360) 734-1540 • www.southbendtools.com Model SB1122 9" x 12" 11/2 HP MetalCutting Bandsaw Product Dimensions Weight................................ - Page 8 I N T R O D U C T I O N Model SB1122 For Machines Mfd. Since 10/21 Cutting Fluid Pump Horsepower............................1/8 HP Phase............................Single-Phase Amps................................0.3A Speed..............................3440 RPM Type................................. TEFC Power Transfer ............................Direct Bearings....................Shielded & Permanently Lubricated...
-
Page 9: Safety
S A F E T Y For Machines Mfd. Since 10/21 Model SB1122 Understanding Risks of Machinery Operating all machinery and machining equipment can be dangerous or relatively safe depending on how it is installed and maintained, and the operator's experience, common sense, risk awareness, working conditions, and use of personal protective equipment (safety glasses, respirators, etc.). - Page 10 S A F E T Y Model SB1122 For Machines Mfd. Since 10/21 Entanglement: Loose clothing, gloves, neckties, Chuck Keys or Adjusting Tools: Tools used to jewelry or long hair may get caught in adjust spindles, chucks, or any moving/...
-
Page 11: Additional Horizontal Metal Bandsaw Safety
S A F E T Y For Machines Mfd. Since 10/21 Model SB1122 Additional Horizontal Metal Bandsaw Safety Serious injury or death can occur from getting fi ngers, hair, or clothing entangled in rotating or moving parts or making direct contact with the moving blade. To minimize risk of injury, anyone operating this machine MUST completely heed hazards and warnings below. -
Page 12: Additional Hydraulic System Safety
S A F E T Y Model SB1122 For Machines Mfd. Since 10/21 Additional Hydraulic System Safety Infection, amputation, or death can result from contact with leaking hydraulic fl uid under high pressure. Additionally, leaking hydraulic fl uid is a serious slip hazard and fi re hazard. To reduce these risks, anyone operating this machine MUST completely heed the hazards and warnings below. -
Page 13: Preparation
P R E P A R A T I O N For Machines Mfd. Since 10/21 Model SB1122 Preparation Overview Required for Setup The purpose of the preparation section is to help The items listed below are required to you prepare your machine for operation. The list successfully set up and prepare this machine for below outlines the basic process. -
Page 14: Power Supply Requirements
P R E P A R A T I O N Model SB1122 For Machines Mfd. Since 10/21 Power Supply Requirements Serious injury could occur if you connect machine to power before completing setup process. DO NOT connect to power until Availability instructed later in this manual. - Page 15 P R E P A R A T I O N For Machines Mfd. Since 10/21 Model SB1122 Grounding Requirements Improper connection of the equipment-grounding wire can result in a risk of electric shock. The This machine must be grounded! In the event...
-
Page 16: Unpacking
P R E P A R A T I O N Model SB1122 For Machines Mfd. Since 10/21 Unpacking Cleaning & Protecting This item was carefully packaged to prevent The unpainted surfaces are coated at the factory damage during transport. If you discover any... -
Page 17: Location
P R E P A R A T I O N For Machines Mfd. Since 10/21 Model SB1122 Location Weight Load Refer to the Machine Specifi cations for the Physical Environment weight of your machine. Make sure that the surface upon which the machine is placed will... -
Page 18: Assembly
Figure 10, then use forklift (or other lifting equipment) to lift machine just enough to remove pallet. The Model SB1122 requires the use of lifting equipment such as a forklift, engine hoist, or boom crane. DO NOT attempt to lift or move machine without necessary assistance from other people. -
Page 19: Initial Lubrication
P R E P A R A T I O N For Machines Mfd. Since 10/21 Model SB1122 Install (1) M12-1.75 x 50 hex bolt and (2) 10. Position drip tray on cabinet edge, as shown M12-1.75 hex nuts at each lag screw hole in Figure 13. -
Page 20: Test Run
P R E P A R A T I O N Model SB1122 For Machines Mfd. Since 10/21 Test Run Items Needed Safety Glasses (For Each Person) ....1 Pr. Respirator (For Each Person) .......1 After all preparation steps have been completed, Test Workpiece (Between 2"–3... - Page 21 P R E P A R A T I O N For Machines Mfd. Since 10/21 Model SB1122 Connect machine to power source. 11. Raise headstock as high as it will go. Turn power switch from OFF (0) to ON (1) 12.
- Page 22 P R E P A R A T I O N Model SB1122 For Machines Mfd. Since 10/21 14. Open (2) cutting fluid valves (see Figure 19). 17. Press manual OFF button O (see Figure 20). Cutting fluid pump and blade should stop.
-
Page 23: Inspections & Adjustments
P R E P A R A T I O N For Machines Mfd. Since 10/21 Model SB1122 Inspections & — If downfeed rate slows when workpiece is contacted, and blade shuts off and headstock raises after cut is complete,... -
Page 24: Operation
Regardless of the content in this section, 15. Selects automatic operation mode. South Bend Tools will not be held liable for accidents caused by lack of training. 16. Completes cut. 17. Once machine has stopped, turns machine OFF, then removes workpiece. -
Page 25: Disabling Switches
O P E R A T I O N For Machines Mfd. Since 10/21 Model SB1122 Disabling Switches Operation Tips Both the power switch and the man/auto key The following tips will help you safely and switch can be disabled. The power switch can be... -
Page 26: Workpiece Inspection
O P E R A T I O N Model SB1122 For Machines Mfd. Since 10/21 Workpiece Inspection Selecting Blades Before cutting, inspect the material for any of Selecting the right blade for the cut requires a knowledge of various blade characteristics. - Page 27 HSS blades. However, for exact specifications Model Blade Length of bandsaw blades that are correct for your SB1122 ............108 ⁄ " operation, contact the blade manufacturer. Blade Width To select correct blade pitch: Measure the material thickness.
-
Page 28: Blade Breakage
O P E R A T I O N Model SB1122 For Machines Mfd. Since 10/21 Blade Breakage Blade Care & Break-In Blade Care Many conditions may cause a bandsaw blade to break. Some of these conditions are unavoidable To prolong blade life, always use a blade with... -
Page 29: Setting Downfeed Rate
For Machines Mfd. Since 10/21 Model SB1122 Setting Changing Blade Speed Downfeed Rate Model SB1122 Blade Speeds: 85–265 FPM. To change blade speed: The speed at which the saw blade will cut through the workpiece is determined by blade Press HYD ON button to turn hydraulic type, downfeed rate, and feed pressure. -
Page 30: Blade Speed Chart
O P E R A T I O N Model SB1122 For Machines Mfd. Since 10/21 Blade Speed Chart The chart in Figure 28 offers blade speed guidelines for various metals, given in feet per minute (FPM) and meters per minute (M/Min). Choose the closest available speed on the machine, then adjust the downfeed rate as necessary, using the appearance of the chips produced as a guide. -
Page 31: Changing Blade
O P E R A T I O N For Machines Mfd. Since 10/21 Model SB1122 Changing Blade Put on safety glasses, then clean out all chips and shavings with brush and shop vacuum. Remove (2) button head cap screws and All saw blades are dangerous and may cause blade guard shown in Figure 31. - Page 32 O P E R A T I O N Model SB1122 For Machines Mfd. Since 10/21 10. Decrease blade tension by turning blade Note: It is sometimes possible to flip the tension handwheel counterclockwise (see blade inside out, in which case the blade will Figure 33).
-
Page 33: Tensioning Blade
O P E R A T I O N For Machines Mfd. Since 10/21 Model SB1122 Tensioning Blade Check blade placement by sliding fingernail between end of blade and wheel shoulder. Proper blade tension is essential to avoid blade — If there is just enough space to fit vibration, twist, or slippage on the wheels. -
Page 34: Adjusting Blade Guides
Blade Guides Controls The top blade guide should be as close to the The Model SB1122 has two operation modes: workpiece as possible during cutting operations. automatic and manual. Manual mode includes all This will help ensure straight cuts by keeping... - Page 35 O P E R A T I O N For Machines Mfd. Since 10/21 Model SB1122 Performing a Cut Press HYD ON button to turn hydraulic pump ON (see Figure 42). Automatic mode eliminates many steps required by the user to complete a cut, but only if the...
-
Page 36: Angled Cuts
O P E R A T I O N Model SB1122 For Machines Mfd. Since 10/21 Angled Cuts 15° ° Stop Stop Scale Scale To avoid serious injury, always turn saw OFF and allow blade to come to complete stop before adjusting headstock angle or adjustable vise position. - Page 37 O P E R A T I O N For Machines Mfd. Since 10/21 Model SB1122 Cutting to the Left — If angle is set to 15°, 30°, or 45°, push 15° stop into scale notch and tighten knurled Raise headstock as high as it will go.
-
Page 38: Opening & Closing Vise
Vise Opening & Closing Vise The Model SB1122 vise has a handwheel to secure a workpiece in the jaws before clamping it DISCONNECT MACHINE FROM POWER! tightly with the hydraulic system. The vise also... -
Page 39: Adjusting Work Stop
Adjusting Work Stop Using Cutting Fluid System The Model SB1122 is equipped with a work stop that can be used to quickly position a workpiece during repetitive cutting operations. This work Cutting fluid is a mixture of cutting fluid and stop can only be installed when cutting to the water. - Page 40 O P E R A T I O N Model SB1122 For Machines Mfd. Since 10/21 You can also install the drip tray on the cabinet edges (see Figure 57) to catch cutting fluid when an operation creates runoff. FIRE HAZARD!
-
Page 41: Accessories
A C C E S S O R I E S For Machines Mfd. Since 10/21 Model SB1122 Accessories Accessories T20501—Face Shield Crown Protector 4" T20502—Face Shield Crown Protector 7" T20503—Face Shield Window This section includes the most common T20451—“Kirova” Clear Safety Glasses accessories available for your machine, which T20452—“Kirova”... -
Page 42: Maintenance
M A I N T E N A N C E Model SB1122 For Machines Mfd. Since 10/21 Maintenance Maintenance Schedule Cleaning Use a brush and shop vacuum to remove chips and other debris from the working surfaces. Periodically remove the blade and thoroughly... -
Page 43: Lubrication
M A I N T E N A N C E For Machines Mfd. Since 10/21 Model SB1122 Lubrication T26419—Syn-O-Gen Synthetic Grease Formulated with 100% pure synthesized hydrocarbon basestocks that are compounded An essential part of lubrication is cleaning the with special thickeners and additives to components before lubricating them. -
Page 44: Machine Storage
M A I N T E N A N C E Model SB1122 For Machines Mfd. Since 10/21 Machine Storage Vise Leadscrew Lubrication Type .. T26419 or NLGI#2 Equivalent All machinery will develop serious rust problems Amount ....1–2 Pumps from Grease Gun and corrosion damage if it is not properly Frequency ............Weekly... -
Page 45: Hydraulic System Maintenance
M A I N T E N A N C E For Machines Mfd. Since 10/21 Model SB1122 Hydraulic System Loosen blade tension or remove blade so it does not stretch or rust while machine is stored. Maintenance Place a few moisture-absorbing dessicant packs inside control box. - Page 46 M A I N T E N A N C E Model SB1122 For Machines Mfd. Since 10/21 Remove (4) button head cap screws and flat Remove (4) button head cap screws and flat washers shown in Figure 68 to remove rear washers shown in Figure 70 to remove access panel.
- Page 47 M A I N T E N A N C E For Machines Mfd. Since 10/21 Model SB1122 Checking Hydraulic Fluid Remove tank cap (see Figure 72) and inspect for burnt-smelling or tan-colored, The hydraulic fluid level and temperature should water-contaminated hydraulic fluid.
- Page 48 M A I N T E N A N C E Model SB1122 For Machines Mfd. Since 10/21 Changing Hydraulic Fluid The hydraulic fluid should be changed and the fluid tank cleaned after the first 50 hours of use, then every 6 months.
-
Page 49: Cutting Fluid System Maintenance
M A I N T E N A N C E For Machines Mfd. Since 10/21 Model SB1122 Cutting Fluid System Maintenance BIOLOGICAL & POISON HAZARD! correct personal The cutting fluid system consists of a reservoir, protective equipment when pump, and hoses with valves. The pump pulls handling cutting fluid. - Page 50 M A I N T E N A N C E Model SB1122 For Machines Mfd. Since 10/21 Changing Cutting Fluid Cutting Fluid Cutting Fluid Items Needed Pump Pump Safety Wear ....See Hazards on Page 47 Wrench or Socket 21mm ........1...
-
Page 51: Service
Travel Limits Open-End Wrench 8mm ........1 Phillips Head Screwdriver #2 ....... 1 The Model SB1122 is equipped with a limit switch that stops the blade motor when a cut To adjust downfeed limit switch: is finished, a downfeed stop bolt that stops the... - Page 52 S E R V I C E Model SB1122 For Machines Mfd. Since 10/21 Raising Downfeed Travel Limit Refer back to Testing Downfeed Travel Limit on Page 49 to check adjustment. Tools Needed Wrench or Socket 17mm ........1 Lowering Downfeed Travel Limit Open-End Wrenches 8, 14mm .......
-
Page 53: Squaring Blade To Table
S E R V I C E For Machines Mfd. Since 10/21 Model SB1122 Squaring Blade to Adjusting Full-Height Stop Bolt When the hydraulic cylinder fully raises Table the headstock, the full-height stop bolt (see Figure 84) should contact the underside of the headstock. - Page 54 S E R V I C E Model SB1122 For Machines Mfd. Since 10/21 — If blade is square to vise table, no adjustment is required. — If blade is not square to vise table, proceed to Step 5. On bottom blade guide, loosen (2) button head cap screws shown in Figure 86 to remove blade brush assembly.
-
Page 55: Adjusting Blade Guides & Bearings
S E R V I C E For Machines Mfd. Since 10/21 Model SB1122 Tighten screws loosened in Step 6. Remove (2) button head cap screws and top blade guard shown in Figure 90. Repeat Steps 4–7 as necessary until the blade is perfectly square to the table. - Page 56 S E R V I C E Model SB1122 For Machines Mfd. Since 10/21 On top blade guide, verify back of blade On bottom blade guide, verify back of blade lightly contacts blade guide (see Figure 92). lightly contacts blade guide (see Figure 94).
- Page 57 S E R V I C E For Machines Mfd. Since 10/21 Model SB1122 10. On each blade guide, loosen button head cap On top blade guide, loosen set screw shown screw shown in Figure 96. in Figure 97. 11. On top blade guide, loosen hex nut shown in Turn eccentric shaft clockwise to adjust Figure 96.
-
Page 58: Replacing Motor Brushes
S E R V I C E Model SB1122 For Machines Mfd. Since 10/21 Replacing Motor Brushes Brush Brush (1 of 2) (1 of 2) This bandsaw is equipped with a universal motor that uses two carbon brushes to transmit electrical current inside the motor. -
Page 59: Calibrating Headstock Angle Scale
S E R V I C E For Machines Mfd. Since 10/21 Model SB1122 Calibrating Headstock Loosen (2) button head cap screws shown in Figure 102. Angle Scale Adjust indicator (see Figure 102) until it displays 0°, then tighten button head cap For accurate cutting results, ensure the screws to secure. - Page 60 S E R V I C E Model SB1122 For Machines Mfd. Since 10/21 Adjust headstock to 0° (see Figure 103) then flip 0° stop up. 60° Stop 60° Stop — If stop bolt prevents stop from flipping up, loosen jam nut and tighten bolt (see Figure 103) until it can, then proceed to Step 4.
-
Page 61: Adjusting Workpiece Contact Safety Switch
(see Contact Safety Switch Figure 107). The Model SB1122 features a workpiece contact Note: Safety switch button should still be safety switch to prevent the blade from feeding close enough to workpiece arm that when too quickly into a workpiece. -
Page 62: Adjusting Vise Gib
Tools Needed Open-End Wrench 10mm ........1 Adjusting Blade Brush Hex Wrench 2.5mm ..........1 The Model SB1122 has a blade brush to help To adjust vise gib: keep metal chips off the blade wheels. It will DISCONNECT MACHINE FROM POWER! wear over time and require re-adjustment when it no longer contacts the blade. -
Page 63: Troubleshooting
TROU B LESHOOTI NG For Machines Mfd. Since 10/21 Model SB1122 TROUBLESHOOTING If you need replacement parts, or if you are unsure how to do any of the solutions given here, feel free to call us at (360) 734-1540. Symptom... - Page 64 TROU B LESHOOTI NG Model SB1122 For Machines Mfd. Since 10/21 Symptom Possible Cause Possible Solution 1. Adjust downfeed travel limit (Page 49)/replace Blade keeps 1. Downfeed limit switch not engaged/ moving or at fault. limit switch if at fault.
- Page 65 TROU B LESHOOTI NG For Machines Mfd. Since 10/21 Model SB1122 Symptom Possible Cause Possible Solution Cutting fluid pump 1. Cutting fluid valves are closed. 1. Open cutting fluid valves. starts but no fluid 2. Cutting fluid level is low/reservoir 2.
- Page 66 TROU B LESHOOTI NG Model SB1122 For Machines Mfd. Since 10/21 Symptom Possible Cause Possible Solution Ticking sound 1. Blade weld contacting blade guides. 1. Grind weld down flush with blade. when saw is 2. Blade weld may be failing.
-
Page 67: Electrical
E L E C T R I C A L For Machines Mfd. Since 10/21 Model SB1122 ELECTRICAL Electrical Safety Instructions These pages are accurate at the time of printing. In the constant effort to improve, however, we may make changes to the electrical systems of future machines. Study this section carefully. If you see differences between your machine and what is shown in this section, call Technical Support at (360) 734-1540 for assistance BEFORE making any changes to the wiring on your machine. -
Page 68: Electrical Overview
E L E C T R I C A L Model SB1122 For Machines Mfd. Since 10/21 Electrical Overview Downfeed Limit Switch (Page 72) Main Motor (Page Control Panel & Box (Page 67–70) Cutting Fluid Pump Motor (Page 71) Power Supply... -
Page 69: Control Box
E L E C T R I C A L For Machines Mfd. Since 10/21 Model SB1122 Control Box Figure Figure 110. Side of control box wiring. . Side of control box wiring. Figure Figure 111. Bottom of control box wiring. -
Page 70: Control Box Wiring Diagram
E L E C T R I C A L Model SB1122 For Machines Mfd. Since 10/21 Control Box Wiring Diagram Control Box VDD Holl Limit LED VDD Speed PUMP OPEN2 AC 24V (To Main OPEN1 OPEN3 Motor) Circuit Board Pg. -
Page 71: Control Panel
E L E C T R I C A L For Machines Mfd. Since 10/21 Model SB1122 Control Panel Man/Auto Man/Auto POWER POWER Key Switch Key Switch Lamp Lamp Manual ON Manual ON Button Button Manual OFF Manual OFF AUTO... -
Page 72: Control Panel Wiring Diagram
E L E C T R I C A L Model SB1122 For Machines Mfd. Since 10/21 Control Panel Wiring Diagram Control Panel Man/Auto Key Switch POWER Lamp NHD NSS22-K210B NHD NLD-22 24V (To Control Box) Pg. 68 Manual Manual... -
Page 73: Motor Wiring Diagrams
E L E C T R I C A L For Machines Mfd. Since 10/21 Model SB1122 Motor Wiring Diagrams Main Motor 220V Circuit Board JM01-03 (To Control Box) Pg. 68 Figure Figure 113. Main motor wiring. . Main motor wiring. -
Page 74: Electrical Component Wiring Diagrams
E L E C T R I C A L Model SB1122 For Machines Mfd. Since 10/21 Electrical Component Wiring Diagrams Downfeed Limit Switch CANLIE AZD-1122 (To Control Box) Pg. 68 Figure Figure 116. Downfeed limit switch wiring. . Downfeed limit switch wiring. -
Page 75: Hydraulics
H Y D R A U L I C S For Machines Mfd. Since 10/21 Model SB1122 Hydraulics Hydraulic System Diagram DOWNFEED RATE SAW BOW CONTROL VALVE HYDRAULIC CYLINDER PRESSURE RELIEF VALVE SUCTION FILTER PUMP MOTOR PUMP Copper Tube HYDRAULIC... -
Page 76: Parts
P A R T S Model SB1122 For Machines Mfd. Since 10/21 PARTS Headstock 71-2 71-3 71-1 214-1 214-2 214-18 214-3 214-4 214-17 214-5 214-16 214-6 214-15 214-7 214-14 214-8 214-9 214-10 214-11 214-6 214-13 214-12 294-3 294-5 294-6 294-7... - Page 77 P A R T S For Machines Mfd. Since 10/21 Model SB1122 Headstock Parts List REF PART # DESCRIPTION PART # DESCRIPTION PSB1122001 BODY FRAME PSB1122053 MAIN MOTOR CORD 24G 3W 30" PSB1122002 ANCHOR BRACKET PSB1122054 BLADE GUIDE MOUNTING BLOCK (RIGHT)
- Page 78 P A R T S Model SB1122 For Machines Mfd. Since 10/21 Headstock Parts List (Cont.) PART # DESCRIPTION PART # DESCRIPTION PSB1122109 CAP SCREW M8-1.25 X 12 214-15 PSB1122214-15 CONTROL PANEL PSB1122112 FLAT WASHER 7 X 30 X 2.2MM...
-
Page 79: Base
P A R T S For Machines Mfd. Since 10/21 Model SB1122 Base 266 269 340-6 340-7 340-8 340-3 340-4 340-2 340-21 340-10 340-1 340-20 350-1 340-5 350-3 350-2 340-12 340-17 340-11 350-6 340-16 350-5 350-4 340-9 340-14 340-15 340-13... - Page 80 P A R T S Model SB1122 For Machines Mfd. Since 10/21 Base Parts List PART # DESCRIPTION REF PART # DESCRIPTION PSB1122055 CUTTING FLUID PUMP CORD 18G 3W 67" 206 PSB1122206 SWIVEL BASE CAP COVER PSB1122061 HYDRAULIC MOTOR CORD 18G 4W 205"...
- Page 81 P A R T S For Machines Mfd. Since 10/21 Model SB1122 Base Parts List (Cont.) PART # DESCRIPTION PART # DESCRIPTION PSB1122267 ANGLE STOP BLOCK 340-7 PSB1122340-7 LOCK WASHER 4MM PSB1122268 BLOCK MOUNTING BRACKET 340-8 PSB1122340-8 HEX NUT M4-.7 PSB1122269 CAP SCREW M5-.8 X 6...
-
Page 82: Control Panel Electrical Components
P A R T S Model SB1122 For Machines Mfd. Since 10/21 Control Panel Electrical Components REF PART # DESCRIPTION REF PART # DESCRIPTION PSB1122401 MAN/AUTO KEY SWITCH NHD NSS22-K210B PSB1122407 OVERLOAD LAMP KEYON KB1-K170 16MM RED 402 PSB1122402 POWER LAMP NHD NLD-22 24V WHITE... -
Page 83: Control Box Electrical Components
P A R T S For Machines Mfd. Since 10/21 Model SB1122 Control Box Electrical Components 13NO 14NO 13NO 14NO South Bend Tools -81-... - Page 84 P A R T S Model SB1122 For Machines Mfd. Since 10/21 Control Box Parts List REF PART # DESCRIPTION REF PART # DESCRIPTION PSB1122501 CIRCUIT BOARD RF MBS-2-125 510 PSB1122510 POWER SWITCH AUSPICIOUS 600V 20A 502 PSB1122502 FUSE 10A 250V...
-
Page 85: Machine Labels (Front)
P A R T S For Machines Mfd. Since 10/21 Model SB1122 Machine Labels (Front) SB1122 Machine Labels A SB11 • 1:1 Scale (unless otherwise noted) • Labels must be made of (07.21.21) chemical-resistant material MODEL SB1122 9" X 12" 1½ HP... -
Page 86: Machine Labels (Rear)
The owner of this machine MUST maintain the original location and readability of these safety labels. If any label is removed or becomes unreadable, REPLACE that label before using the machine again. Contact South Bend Tools at (360) 734-1540 or www.southbendtools.com to order new labels. -
Page 87: Warranty
WARRANTY Warranty This quality product is warranted by South Bend Tools to the original buyer for 2 years from the date of purchase. This warranty does not apply to consumable parts, or defects due to any kind of misuse, abuse, negligence, accidents, repairs, alterations or lack of maintenance. We do not reimburse for third party repairs. - Page 88 southbendtools.com Printed In Taiwan #CS22069...
Need help?
Do you have a question about the SB1122 and is the answer not in the manual?
Questions and answers