Table of Contents
Advertisement
Quick Links
Advertisement
Table of Contents
Troubleshooting

Related Manuals for Hologic Cenova C Series


Summary of Contents for Hologic Cenova C Series
- Page 3 Cenova ™ Image Analytics Server Installation and Service Manual For Software Version 3.0 Part Number MAN-05205 Revision 003 September 2019...
- Page 4 Hologic, Cenova, ImageChecker, Quantra, DigitalNow, and associated logos are trademarks and/or registered trademarks of Hologic, Inc., and/or its subsidiaries in the United States and/or other countries. All other trademarks, registered trademarks, and product names are the property of their respective owners.
- Page 5 Upgrades can also be purchased separately. The Cenova T-Series server is required to run ImageChecker 3D Calc CAD. Check with your Hologic Product Specialist to find out which applications are available in the US. MAN-05205 Revision 003...
- Page 6 Cenova Image Analytics Server 3.0 Installation & Service Manual MAN-05205 Revision 003...
-
Page 7: Table Of Contents
3.4.5 Verifying License Settings ........................49 3.4.6 Configuring Algorithm Processing Options ..................51 3.4.7 Configuring Processing – DigitalNow HD ..................61 3.4.8 Configuring the Hologic Connect Service ................... 65 Configuring the Site’s Workstations and PACS Devices................. 69 MAN-05205 Revision 003... - Page 8 Cenova Image Analytics Server 3.0 Installation & Service Manual Table of Contents Completing the Installation ..........................69 4: Administrative Functions _____________________________________________________71 Shutting Down and Restarting the System ....................... 72 Starting and Stopping DICOM and Processing Services ................. 75 Backing Up and Restoring the Server Settings ....................77 Configuring a Redundant Server ........................
-
Page 9: 1: Introduction
DICOM (Digital Imaging and Communications in Medicine) is an international standard used for developing, transmitting, printing, and archiving medical imaging information. Hologic uses the following DICOM standard designations for digital mammography images: DICOM Digital Mammography X-Ray Image – For Processing •... -
Page 10: Using This Manual
Chapter 1: Introduction Using This Manual This service manual is written for use solely by Field Engineers from Hologic and Hologic’s service partners. Only individuals trained and certified by Hologic to repair, maintain, and install Hologic products are qualified to perform the procedures described in this manual. -
Page 11: Service Policies And Procedures
On-Site Service Protocol Field Engineers work closely with Hologic’s TAC representatives, who can gain access to the systems directly from the factory by way of the system Hologic Connect™ connection. In this way, they can recognize and diagnose complicated software or faulty hardware components, and direct you, the local Field Engineer, in the best course of action to repair the system. -
Page 12: Warnings And Precautions
Hologic intranet site. Communicate any issues. If you cannot verify that the system is running correctly, contact the TAC at sctechsupport@hologic.com. In your e-mail, briefly describe the issue and provide the clinic name and location (city, state, zip). -
Page 13: General Precautions
Do not use the instrument in a way other than specified in this manual. Failure to do so may cause injury or equipment damage. Training and certification. Only individuals trained and certified by Hologic to • repair, maintain, and install Hologic products are qualified to perform the procedures described in this manual. - Page 14 Internal voltages. Do not disassemble or modify the computer unless you are • authorized to do so by Hologic. The components incorporate parts that can cause electrical shock as well as other hazardous parts that if touched, can cause death or serious injury.
-
Page 15: Electromagnetic Emissions
Cenova Image Analytics Server 3.0 Installation & Service Manual Chapter 1: Introduction 1.3.3 Electromagnetic Emissions Important Observe the following instructions provided to ensure correct results and optimal performance: • This equipment has been tested and found to comply with the limits for a Class A digital device, pursuant to Part 15 of the FCC Rules. -
Page 16: Warranty Statement
Hologic specifications or instructions, including Customer’s refusal to allow Hologic recommended Software upgrades; or (d) designated as supplied subject to a non-Hologic warranty or on a pre- release or “as-is” basis. Page 8... -
Page 17: 2: System Description
Cenova Image Analytics Server 3.0 Installation & Service Manual Chapter 2: System Description Chapter 2 System Description Overview on page 10 System Inputs and Outputs on page 11 Clinical Workflow on page 14 Data Flows on page 15 System Components on page 19 Control Panel Overview on page 20... -
Page 18: Overview
Overview The Cenova Image Analytics Server is a high-performance application server that provides proprietary software applications to assist radiologists in the analysis of digital mammography images. Hologic has developed the following software applications for use with the server: • ImageChecker CAD (2D), computer-aided detection software used to identify and... -
Page 19: System Inputs And Outputs
Hologic and non-Hologic FFDMs using the same Cenova server need a new Cenova 3.0 server for Quantra 2.2 software, and all necessary licenses for Hologic FFDMs need to be migrated to the Cenova 3.0 server. Customers can also choose to leave the non-Hologic FFDMs and licenses on the existing Cenova server. -
Page 20: Results From The Cenova Server
The DICOM header for each image includes an identifier that indicates the device from which the image originated. In addition, images from an FFDM or Hologic film-scanner can be sent to the Cenova server from a Picture Archiving and Communication System (PACS). - Page 21 Chapter 2: System Description For workstations and PACS devices that do not support ImageChecker CAD (2D) Mammography CAD SR objects but do support DICOM 6000 overlays, Hologic’s DICOM 6000 Interface solution can be used to convert the ImageChecker CAD (2D) results.
-
Page 22: Clinical Workflow
For this step… The radiologist… Preliminary Review Reviews the mammography images to get a preliminary sense of the patient’s status. Hologic Imaging Reviews and notes the Biomarker findings. Biomarkers DigitalNow HD Compares prior digitized film images to the new mammography images. -
Page 23: Data Flows
Cenova Image Analytics Server 3.0 Installation & Service Manual Chapter 2: System Description Data Flows 2.4.1 Data Flow with ImageChecker CAD (2D) and Biomarkers The diagram below shows the flow of images to the server and results from the server. Depending upon the needs of the facility, other pathways can be configured. -
Page 24: Data Flow With Imagechecker Cad (2D) For Synthesized 2D And Biomarkers
Cenova Image Analytics Server 3.0 Installation & Service Manual Chapter 2: System Description 2.4.2 Data Flow with ImageChecker CAD (2D) for Synthesized 2D and Biomarkers The diagram below shows the flow of images to the server and results from the server. Depending upon the needs of the facility, other pathways can be configured. -
Page 25: Data Flow With Imagechecker 3D Calc Cad
Cenova Image Analytics Server 3.0 Installation & Service Manual Chapter 2: System Description 2.4.3 Data Flow with ImageChecker 3D Calc CAD The diagram below shows the flow of images to the server and results from the server. Depending upon the needs of the facility, other pathways can be configured. ImageChecker 3D Calc CAD Data Flow MAN-05205 Revision 003 Page 17... -
Page 26: Data Flow With Digitalnow Hd
Cenova Image Analytics Server 3.0 Installation & Service Manual Chapter 2: System Description 2.4.4 Data Flow with DigitalNow HD The diagram below shows the flow of images to the server and results from the server. Depending upon the needs of the facility, other pathways can be configured. DigitalNow HD Data Flow Page 18 MAN-05205 Revision 003... -
Page 27: System Components
Note Quantra 2.2 software supports only Hologic FFDMs. Mixed environments of Hologic and non-Hologic FFDMs using the same Cenova server need a new Cenova 3.0 server for Quantra 2.2 software, and all necessary licenses for Hologic FFDMs need to be migrated to the Cenova 3.0 server. -
Page 28: Control Panel Overview
Cenova Image Analytics Server 3.0 Installation & Service Manual Chapter 2: System Description Control Panel Overview The server has a web-based application used to interface with the system. The Cenova Control Panel shows a menu of service options on the left side. Each Control Panel screen has fields or options used to configure the system. -
Page 29: Status Indicators
All bundles are No configured bundles. • • configured. Site Details Hologic Connect service is Hologic Connect service is not configured. configured. Control Hologic Connect service is Hologic Connect service is • running. not running. Hologic Connect service •... -
Page 31: 3: Installing The System
Chapter 3 Installing the System Caution: The server must be installed by technically qualified service personnel trained by Hologic. Installation by untrained personnel can void the warranty. Installing the Server Hardware on page 24 • Unpack and set up server. -
Page 32: Installing The Server Hardware
• Laptop and network cable (or monitor, keyboard, and mouse) • Hologic service password for access to the Cenova Control Panel. The password is provided to everyone who completes Hologic’s service training. Note The Windows sign-in password is the same as the Cenova Control Panel password. -
Page 33: Unpacking The System
Network cable The shipping container also contains the server with mouse, keyboard, and power cord. In addition to these items, with each order, Hologic ships a USB dongle preprogrammed with the licensed features selected by site personnel. MAN-05205 Revision 003... -
Page 34: Setting Up The New Server Hardware
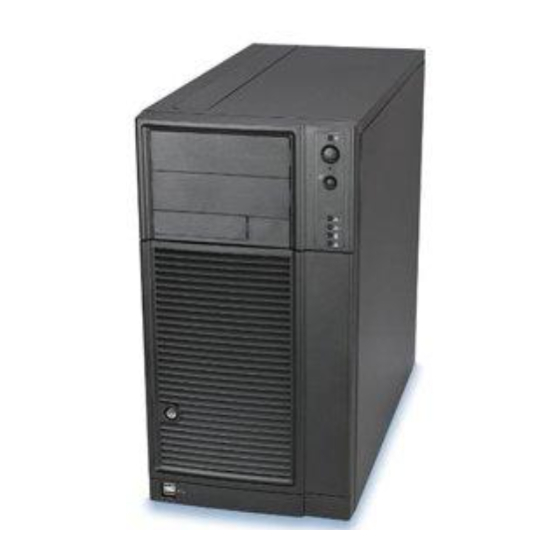
Warning: The server computers are heavy! If you have concerns about lifting or positioning the computer, request assistance. Use the following procedure to set up the server hardware at the site. Hologic offers these server options: • The Cenova server is the latest model computer to support the Cenova software, available in the following two configurations: •... -
Page 35: Entering The Server Network Identifiers
Network Connections option of the Windows Control Panel. Use this procedure to enter the server host name, DNS server, IP address, subnet mask, and default gateway. Consult with the site’s IT administrator and review the Hologic Digital Pre-Installation Form for the required entries. -
Page 36: Installing The Server Software
Cenova Image Analytics Server 3.0 Installation & Service Manual Chapter 3: Installing the System Installing the Server Software When shipped, the Cenova server is configured with a Microsoft Windows operating system. However, the server’s application software must be installed at the site. Use the Cenova Application Installation removable media to install the Cenova software. -
Page 37: Configuring The System Settings
• Choose between processing options. • Configure Value of Interest Look-Up Tables (VOI LUTs), window width / window center values, and image size. Configuring the Hologic Connect Service on page 65 • Identify Hologic Connect setup. • Enter contact information for the site. -
Page 38: Starting Up The Cenova Control Panel
The Cenova software installer automatically places two shortcuts on the Windows local desktop. • Use the Hologic Cenova Server Control shortcut to log in and start at the Home – About screen. • Use the Hologic Connect Control shortcut to log in and start at the Hologic Connect –... - Page 39 Cenova Image Analytics Server 3.0 Installation & Service Manual Chapter 3: Installing the System To continue the configuration procedure, use the menu options provided on the left side of the screen (see next section). Caution: Do not open a second browser window pointed at the server IP address. Although the system allows multiple connections to the Control Panel, using a second window can lead to an unintended configuration.
-
Page 40: Entering The Connectivity Settings
Cenova Image Analytics Server 3.0 Installation & Service Manual Chapter 3: Installing the System 3.4.2 Entering the Connectivity Settings The System Settings – Connectivity screen lets you view networking and enter DICOM information for the Cenova server. Any new entries or edits on this page will result in an automatic restart of the DICOM and Processing services. - Page 41 Chapter 3: Installing the System Enter system serial number. Enter the Cenova serial number, which appears on a silver Hologic label on the side of the server. Enter server SCP AE Title and Port. The title must be 16 characters or fewer. By default this is the host name of the computer followed by _SCP.
-
Page 42: Configuring Dicom Destination And Source Devices
Cenova Image Analytics Server 3.0 Installation & Service Manual Chapter 3: Installing the System 3.4.3 Configuring DICOM Destination and Source Devices The System Settings – DICOM screen lets you configure the server to accept input from and send results to various DICOM devices, in particular, workstations and PACS devices. - Page 43 Host Name/IP Enter either the device host name or IP address. (See the Hologic Digital Pre-Installation Form.) If using the host name, make sure the DNS server settings were entered correctly (see Entering the Server Network Identifiers on page 27).
- Page 44 Cenova Image Analytics Server 3.0 Installation & Service Manual Chapter 3: Installing the System Note The C-Echo and Ping status of any existing destination will clear after deleting, editing, or adding a destination. Select the check box to the left of the device and click Test to view the latest C-Echo and Ping status.
- Page 45 Store SCU) device on the network must be unique. Host Name/IP Enter either the device host name or IP address. (See the Hologic Digital Pre-Installation Form.) Max Case Timeout Set to 120 seconds unless otherwise instructed by the TAC. (See (sec) Setting the Maximum End of Case Timeout on page 38.)
- Page 46 Do not change the default value without first consulting the TAC. To prevent multiple CAD result objects, Hologic recommends that you configure the image source to send images to the Cenova server in rapid succession.
- Page 47 Cenova Image Analytics Server 3.0 Installation & Service Manual Chapter 3: Installing the System Understanding the Default Source Device The Default source acts as an input for all unspecified source devices. The Default is like a funnel for multiple anonymous source devices. Multiple Devices Mapped to the Default Source When you click the Default link on the DICOM screen, the Edit DICOM Source window appears.
- Page 48 Cenova Image Analytics Server 3.0 Installation & Service Manual Chapter 3: Installing the System You cannot edit the fields for AE Title and Host Name/IP because they are populated with the ‘Default’ setting. You can change the Max Timeout (sec) and Priority settings – however, contact the TAC before changing these settings.
- Page 49 Cenova Image Analytics Server 3.0 Installation & Service Manual Chapter 3: Installing the System For each destination device, select the result formats for the selected source (see Result Formats on page 42). If you are configuring DigitalNow HD, enter the image resolution for each destination device (see Image Processing Options on page 62).
- Page 50 SR – CAD. This Structured Report (SR) format provides only ImageChecker CAD (2D) results. • SR– BM. This Structured Report (SR) format provides only Hologic Imaging Biomarker results. • SR – CAD+BM. This format provides both ImageChecker CAD (2D) and Biomarker results.
- Page 51 Chapter 3: Installing the System • SC – TOMO. This Secondary Capture (SC) image format provides proprietary ImageChecker 3D Calc CAD results for display on Hologic SecurView workstations only. • Printer – CAD. This format provides a printout of the four case-processed views with ImageChecker CAD (2D) results similar to the SC - CAD layout.
-
Page 52: Configuring Licensing
USB port on the computer. License dongle serial number: ________________________________ Email the license dongle serial number and site information to sctechsupport@hologic.com. Confirm the TAC emailed the requested license file to you. To install the license file: Log into the Control Panel, if not already logged in. Ensure that the license dongle is installed in a USB port on the back of the server. - Page 53 Model, Device Tag, and Device ID (e.g., Device Serial Number, Detector ID)) that corresponds to one of the site’s image acquisition gantries. These values should be available on the Hologic Digital Pre-Installation Form. Review the guidelines in Obtaining the Source Device IDs on page 46 to understand how these identifying numbers work in conjunction with the licensed input ports.
- Page 54 Cenova Image Analytics Server 3.0 Installation & Service Manual Chapter 3: Installing the System Enter the source device information. In the Mfg/Model drop-down list, select the manufacturer and model. Note When you select a value from the Mfg/Model drop-down, the Device Tag drop-down field automatically populates the default device tag.
- Page 55 Cenova Image Analytics Server 3.0 Installation & Service Manual Chapter 3: Installing the System Selenia Systems For each Selenia system, enter the Device Serial Number. You can acquire it from the acquisition workstation as described below. Device Serial Number Example: H1KRHR835b6e0f •...
- Page 56 Cenova Image Analytics Server 3.0 Installation & Service Manual Chapter 3: Installing the System Siemens Systems Device Serial Number Example (for ‘DROC’ workstations): YourSerial#83302fe6 • The first characters are usually ‘YourSerial#’. • The last eight characters are hexadecimal digits and must be lowercase. Only 0–9 and a–f are allowed.
-
Page 57: Verifying License Settings
The Licensing page is disabled when a dongle cannot be detected. To complete a site installation, you will verify the current license settings as shown below, then sign, date, and fax or e-mail the License File Verification Report to Hologic. Field Engineers should either: •... - Page 58 Cenova Image Analytics Server 3.0 Installation & Service Manual Chapter 3: Installing the System To verify current license settings: Click Licensing. The License Contents screen appears. In the Bundle (ID) column, click the Bundle ID link. The Bundle Features window appears.
-
Page 59: Configuring Algorithm Processing Options
Cenova Image Analytics Server 3.0 Installation & Service Manual Chapter 3: Installing the System 3.4.6 Configuring Algorithm Processing Options The Processing screens allow you to specify processing settings used by the Cenova software applications. The settings on these screens complement the license options purchased by the site. - Page 60 Cenova Image Analytics Server 3.0 Installation & Service Manual Chapter 3: Installing the System b. Select the appropriate settings for the ImageChecker CAD (2D) application. Click Apply to confirm the settings. For detailed information about the Processing – 2D CAD screen, see the following sections: •...
- Page 61 Operating Point 2 – Increased Sensitivity Image Processing Timeout: This setting determines how long the server will attempt to process an image (for ImageChecker CAD (2D) and Hologic Imaging Biomarkers). If the server cannot complete the processing within the specified time, it stops processing the image and reports a failure (and records it in the Mammography CAD SR if that result format has been specified).
- Page 62 Cenova Image Analytics Server 3.0 Installation & Service Manual Chapter 3: Installing the System Output Contents These settings specify the data compiled into the Mammography CAD SR objects, assuming that the feature is licensed through the USB dongle. This setting… Enables or Disables the…...
- Page 63 Cenova Image Analytics Server 3.0 Installation & Service Manual Chapter 3: Installing the System [THIS TOPIC INTENTIONALLY HAS NO HEADING. IT EXIST S A S A SEPA RATE TO PIC SO THAT AN EA RLIER TOPI C CAN CROSS-RE FE RENCE BY PAGE NUM BER THE CON TENT INSIDE THE BOX.] Combining Images in a Case The Combine Images In Processed Case setting affects how the server uses the Maximum End of Case Timeout to manage the inflow of images.
- Page 64 Cenova Image Analytics Server 3.0 Installation & Service Manual Chapter 3: Installing the System If the box is checked, the Cenova server adds the new image to the earlier case and reprocesses the entire case (including ImageChecker CAD (2D) case processing). The new results are based on all images that have the same study instance UID.
- Page 65 Cenova Image Analytics Server 3.0 Installation & Service Manual Chapter 3: Installing the System CAD SC Output Options The CAD SC Output Options allow you to set the layout, size, and position of the SC-CAD images, if they have been requested by site personnel. The SC-CAD image output consists of a single montage image containing a downsized version of up to four images.
- Page 66 Cenova Image Analytics Server 3.0 Installation & Service Manual Chapter 3: Installing the System Size (W × H): Specify the size for the SC-CAD montage image. You can select from three size settings to suit the preferences of the site. Size Setting Montage Image Large: 2048 x 2456...
- Page 67 Cenova Image Analytics Server 3.0 Installation & Service Manual Chapter 3: Installing the System Configuring Processing – Tomo CAD Use the Processing – Tomo CAD screen to specify processing settings for the ImageChecker 3D Calc CAD application. The settings must be determined through consultation with clinical staff when you install the application.
- Page 68 Cenova Image Analytics Server 3.0 Installation & Service Manual Chapter 3: Installing the System Configuring Processing – Biomarkers Use the Processing – Biomarkers screen to specify processing settings for the Quantra application. The settings must be determined through consultation with clinical staff when you install the application.
-
Page 69: Configuring Processing - Digitalnow Hd
Cenova Image Analytics Server 3.0 Installation & Service Manual Chapter 3: Installing the System Note Whenever the Cenova server receives both conventional digital mammography and Raw Projection images for the same case, this setting determines which Quantra results will be output (2D or 3D). Click Apply to confirm the settings. - Page 70 Cenova Image Analytics Server 3.0 Installation & Service Manual Chapter 3: Installing the System Note The default DigitalNow HD Processing settings for new installations are illustrated above (NORMAL Contrast, Apply VOI LUTs, WC 3216/WW 2658, 150 Seconds DigitalNow HD Processing Timeout). Select the appropriate settings for the DigitalNow HD application.
- Page 71 The film scanner type is encoded in the header of the source DICOM image. Workstations such as Hologic SecurView DX initially display DigitalNow HD images with the Normal VOI LUT. To improve the appearance of the images, the reader can apply an alternative VOI LUT to the study.
- Page 72 Cenova Image Analytics Server 3.0 Installation & Service Manual Chapter 3: Installing the System Note DigitalNow HD always removes any VOI LUTs present in the original images. The only exception to this rule occurs when image processing fails; in that case, DigitalNow HD passes the original image through to the destination.
-
Page 73: Configuring The Hologic Connect Service
3.4.8 Configuring the Hologic Connect Service The Hologic Connect service provides RDP to the server through the Internet, which gives Hologic the ability to troubleshoot, upgrade, and repair systems without having to dispatch a service engineer to a site. Hologic recommends deploying the Hologic Connect service at every site. - Page 74 Configuring Hologic Connect Setup Click Control from the Hologic Connect option to display the following screen: Select ‘Cenova’ from the Model drop-down menu in the Hologic Connect Setup area. Uncheck the ‘Use MAC Address’ check box. Then enter the Cenova system serial number in the Hologic Connect Serial Number field.
- Page 75 If the site requires a proxy server for Internet access, you will need to configure a proxy server for the Hologic Connect service on the Cenova server. Consult the Digital Pre- Installation Form and work with the site’s IT administrator to determine the required...
- Page 76 The ‘Allow LAN access over VNC’ option allows users to remotely connect and control the Hologic system from the local network. Verifying Hologic Connect Access Point Internet Explorer to a secure external URL (i.e., https://connect.hologic.com) to verify internet connection. Using the example URL, you should see a sign-in web page. Page 68...
-
Page 77: Configuring The Site's Workstations And Pacs Devices
When all devices have been configured, use the following procedure to verify that the server is working properly. To complete the installation: Restart services (CAD, DICOM, Hologic Connect) as needed (see Starting and Stopping DICOM and Processing Services on page 75). (You can also clear the ‘Restart services’... - Page 78 Hologic intranet site. 12. Communicate any issues. If you cannot verify that the system is running correctly, contact the TAC at sctechsupport@hologic.com. In your e-mail, briefly describe the issue and provide the clinic name and location (city, state, zip).
-
Page 79: 4: Administrative Functions
Cenova Image Analytics Server 3.0 Installation & Service Manual Chapter 4: Administrative Functions Chapter 4 Administrative Functions Shutting Down and Restarting the System on page 72 Starting and Stopping DICOM and Processing Services on page 75 Backing Up and Restoring the Server Settings on page 77 Configuring a Redundant Server on page 79... -
Page 80: Shutting Down And Restarting The System
Cenova Image Analytics Server 3.0 Installation & Service Manual Chapter 4: Administrative Functions Shutting Down and Restarting the System Use the Control Panel’s Administration - System Control screen to shut down or restart the server. • You must shut down the Cenova server when you need to disassemble components or disconnect a cable (see General Precautions on page 5). - Page 81 Cenova Image Analytics Server 3.0 Installation & Service Manual Chapter 4: Administrative Functions Click OK. This feature logs you out of your current session and halts the server by performing a Windows shutdown of the complete system. Important You cannot power up the Cenova server remotely, so take precaution when using the Shutdown feature.
- Page 82 Cenova Image Analytics Server 3.0 Installation & Service Manual Chapter 4: Administrative Functions Click OK. This feature logs you out of your current session and restarts the server by performing a Windows restart of the complete system. Page 74 MAN-05205 Revision 003...
-
Page 83: Starting And Stopping Dicom And Processing Services
Cenova Image Analytics Server 3.0 Installation & Service Manual Chapter 4: Administrative Functions Starting and Stopping DICOM and Processing Services The Services section of the System Control screen allows you to start and stop the DICOM and Processing services. • The DICOM service controls the transfer of images from the DICOM sources into the server and the transfer of results to the destination devices. - Page 84 Cenova Image Analytics Server 3.0 Installation & Service Manual Chapter 4: Administrative Functions When ready, restart the services by clicking the Start buttons. Page 76 MAN-05205 Revision 003...
-
Page 85: Backing Up And Restoring The Server Settings
Cenova Image Analytics Server 3.0 Installation & Service Manual Chapter 4: Administrative Functions Backing Up and Restoring the Server Settings The Settings section of the System Control screen includes all system configuration parameters set with the Control Panel when you install the server. By backing up the settings to the server, you will make it possible to restore the system configuration quickly if it is necessary to reinstall the application later. - Page 86 Cenova Image Analytics Server 3.0 Installation & Service Manual Chapter 4: Administrative Functions Note If you are downloading the system configuration settings, Internet Explorer may block sites from downloading files to your computer. To download the file, right-click the Information Bar and click Download File.… In the Save As window, navigate to the removable media drive on the server.
-
Page 87: Configuring A Redundant Server
This server is a good solution for sites that must have a backup to process digital mammography images if the primary Cenova system fails. The redundant server includes the Hologic Connect service. Note License dongles, port licenses, and other feature licenses are not included with the redundant server. -
Page 88: Managing Disk Space
Cenova Image Analytics Server 3.0 Installation & Service Manual Chapter 4: Administrative Functions Managing Disk Space The Disk Space Cleanup settings allow you to control the amount of free space available on the server’s hard drive. • The Cleanup Threshold setting is normally set to 25GB. As the server processes cases, it stores them until the hard drive has 25GB of space left. -
Page 89: Updating The Licenses
Cenova Image Analytics Server 3.0 Installation & Service Manual Chapter 4: Administrative Functions Updating the Licenses There are situations where updates to an existing license (such as additions, changes, or transfers) may be needed. For example, if a site purchases new features or ports, the license file must be updated. - Page 90 Cenova Image Analytics Server 3.0 Installation & Service Manual Chapter 4: Administrative Functions Click Run Test. The server begins the Self Test, checking each step of the process as it completes successfully. Important When the Self Test is actively running, do not stop the server DICOM or Processing services.
- Page 91 Cenova Image Analytics Server 3.0 Installation & Service Manual Chapter 4: Administrative Functions optimize the processing results for up to four views in the case that best match the screening views. • Tomosynthesis Detect Calc – OK. The server was able to process the images using the licensed application.
-
Page 92: Configuring Access Control
Cenova Image Analytics Server 3.0 Installation & Service Manual Chapter 4: Administrative Functions Configuring Access Control The Access Control page allows you to configure user authentication settings. Authentication Options Choose one of the following two options: • Local Machine – Users are authenticated using local Windows accounts. •... -
Page 93: Using Case Manager
Cenova Image Analytics Server 3.0 Installation & Service Manual Chapter 4: Administrative Functions Using Case Manager Case Manager allows you to display, analyze, and troubleshoot cases from within the Cenova Control Panel. You can use Case Manager to: • Browse and sort cases •... - Page 94 You can collect Biomarker results and export them to a .csv file, which can be opened using a spreadsheet application. To use this feature, the server must be configured with a valid Hologic Imaging Biomarkers license. Select one or more cases using the Case Manager search function. If you do not select any cases, then the server will export all Biomarker results.
- Page 95 Cenova Image Analytics Server 3.0 Installation & Service Manual Chapter 4: Administrative Functions Click Save. In the Save As window, navigate to the location where you wish to save the file and click Save. To delete cases: Display the case you want to delete and click the check box next to the case: Then, click Delete.
-
Page 96: Case Manager Options
Cenova Image Analytics Server 3.0 Installation & Service Manual Chapter 4: Administrative Functions Process State – Aborted • Process State – Cancelled • Case Manager Options on page 88 for more details regarding these results. Alerts occur when the image results in any of the following states: Image State –... - Page 97 Cenova Image Analytics Server 3.0 Installation & Service Manual Chapter 4: Administrative Functions Case Manager Columns / Options Function Case Result ABORTED – This setting will display the cases aborted by the Cenova server. FAILURE – This setting will display cases in which the algorithm has failed to run.
- Page 98 Cenova Image Analytics Server 3.0 Installation & Service Manual Chapter 4: Administrative Functions Case Manager Columns / Options Function Study Date NoFilter – To remove specific values that you have typed into column heading boxes, click NoFilter. Contains– When you click Contains, only the specific patient information you type in will be displayed.
-
Page 99: 5: Service Procedures
Cenova Image Analytics Server 3.0 Installation & Service Manual Chapter 5: Service Procedures Chapter 5 Service Procedures Maintaining the Server on page 92 Reinstalling the Server Application on page 94 Recovering a Server on page 96 Replacing the Computer on page 99 This chapter provides procedures for maintaining the Cenova server, reinstalling the Cenova server software, recovering a server, and replacing the computer. -
Page 100: Maintaining The Server
Cenova Image Analytics Server 3.0 Installation & Service Manual Chapter 5: Service Procedures Maintaining the Server This section provides detailed instructions for annually maintaining the Cenova server. Before starting the maintenance procedure, make sure you have the following materials: • Removable media •... - Page 101 Cenova Image Analytics Server 3.0 Installation & Service Manual Chapter 5: Service Procedures Send a case from the AWS. Verify the case is received, processed, and results are sent to the configured output destination(s). MAN-05205 Revision 003 Page 93...
-
Page 102: Reinstalling The Server Application
To uninstall the server software: Uninstall the application. Select Control Panel > Uninstall a program and remove the Cenova server application. Uninstall the Hologic Connect application. Select Control Panel > Uninstall a program and remove the Hologic Connect application. Restart the system. - Page 103 Backing Up and Restoring the Server Settings on page 77), then step through all configuration screens to verify the settings are correct. Restart the Hologic Connect service (see Configuring the Hologic Connect Service page 65). Running the Self Test Run the Self Test (see on page 81).
-
Page 104: Recovering A Server
Cenova Image Analytics Server 3.0 Installation & Service Manual Chapter 5: Service Procedures Recovering a Server Important Contact the TAC to determine whether performing this procedure is the only way to correct a problem. Use the following procedures to recover a Cenova server: •... - Page 105 Navigate to the drive and double-click SystemUpdater.exe. The Hologic OS Updates window appears. 10. Click Start. The Hologic OS Updates installer copies files to disk and updates system files. During this process, which can take up to 20-30 minutes, the installer automatically reboots the system once.
- Page 106 Backing Up and Restoring the Server Settings on page 77), then step through all configuration screens to verify the settings are correct. Restart the Hologic Connect service (see Configuring the Hologic Connect Service page 65). Run the Self Test (see Running the Self Test on page 81).
-
Page 107: Replacing The Computer
Warning: Do not disassemble or modify the computer unless you are authorized to do so by Hologic. The computer incorporates parts that can cause electrical shock as well as other hazardous parts which, if touched, can cause death or serious injury. - Page 108 Cenova Image Analytics Server 3.0 Installation & Service Manual Chapter 5: Service Procedures Re-enter network identifiers (see Entering the Server Network Identifiers on page 27. Install server software (see Installing the Server Software on page 28). Restore server Control Panel settings (see Backing Up and Restoring the Server Settings on page 77).
-
Page 109: 6: Troubleshooting Procedures
Cenova Image Analytics Server 3.0 Installation & Service Manual Chapter 6: Troubleshooting Procedures Chapter 6 Troubleshooting Procedures Sending and Receiving Results on page 102 Reviewing License Dongle Messages on page 106 Reviewing Log Files on page 107 DICOM Troubleshooting on page 108 Printer Troubleshooting on page 109 This chapter explains how to troubleshoot the server for issues you might encounter in... -
Page 110: Sending And Receiving Results
Cenova Image Analytics Server 3.0 Installation & Service Manual Chapter 6: Troubleshooting Procedures Sending and Receiving Results Results Do Not Appear at Review Workstation This problem can arise due to a number of causes. The table below provides a list of conditions, potential reasons, and possible solutions. - Page 111 Cenova Image Analytics Server 3.0 Installation & Service Manual Chapter 6: Troubleshooting Procedures Fault Condition Reason Solution Device configuration or Review the Edit DICOM • • Results sent to wrong Mappings window on the mapping is incorrect destination DICOM page Cenova server is powered off •...
- Page 112 Cenova Image Analytics Server 3.0 Installation & Service Manual Chapter 6: Troubleshooting Procedures Results Not as Expected The following table provides possible explanations for this behavior. Fault Condition Reason Solution Feature disabled Verify the license dongle • • Partial Mammography CAD contents on the License •...
- Page 113 DICOM Breast Tomosynthesis synthesized 2D images to an displayed on synthesized 2D Image, SecurView version 8.3 or earlier SecurView version as images on Hologic later is required for display of DICOM Digital Mammography SecurView workstation. ImageChecker CAD results from X-Ray Image – For Presentation.
-
Page 114: Reviewing License Dongle Messages
Cenova Image Analytics Server 3.0 Installation & Service Manual Chapter 6: Troubleshooting Procedures Reviewing License Dongle Messages There will be various dongles in circulation with different programming and permissions. The License Contents page displays dates and status messages while the Processing page displays various check box options depending on the type of dongle inserted in the USB port. -
Page 115: Reviewing Log Files
C:\Program Files (x86)\Hologic\Connect\Connector\ • Ekernel.log – The Hologic Connect server log. This log file cannot be opened at its default location because the file is locked by the Hologic Connect service. However, you can copy the log file to another location and then open it. -
Page 116: Dicom Troubleshooting
Go to the non-Hologic device, and Ping the Cenova server. Then go to the server and ping the other device. If you cannot Ping, check IP addresses, cables, and gateways. -
Page 117: Printer Troubleshooting
Cenova Image Analytics Server 3.0 Installation & Service Manual Chapter 6: Troubleshooting Procedures Printer Troubleshooting If you’re having trouble printing ImageChecker CAD (2D) results: Check the status of the printer queue. Check the printer to make sure it is powered on and ready for use. -
Page 119: 7: Configuration Procedures
Cenova Image Analytics Server 3.0 Installation & Service Manual Chapter 7: Configuration Procedures Chapter 7 Configuration Procedures Configuring the Laptop IP Settings on page 112 Configuring an HTTPS Port on page 113 Configuring a Printer on page 114 Adding a Cenova Server to a Domain on page 116 Bypassing the Proxy Server for Local Addresses on page 117... -
Page 120: Configuring The Laptop Ip Settings
Cenova Image Analytics Server 3.0 Installation & Service Manual Chapter 7: Configuration Procedures Configuring the Laptop IP Settings To configure the laptop IP settings (Windows 7): Connect a network cable from the laptop computer to the NIC 2 Ethernet service port on the back of the server. -
Page 121: Configuring An Https Port
Open the Windows Firewall program by selecting Start > Control Panel > Windows Firewall. Select the Exceptions tab, then click Add Port. The Add a Port window appears. In the Name field, enter ‘Hologic Control Panel HTTPS Port’. In the Port number field, enter ‘443’. Click the TCP option, then click OK. -
Page 122: Configuring A Printer
Cenova Image Analytics Server 3.0 Installation & Service Manual Chapter 7: Configuration Procedures Configuring a Printer The server can print ImageChecker CAD (2D) results if a printer has been configured in Windows. You must configure a printer port and set the printer as the default before it will display as an output path in the Edit DICOM Mappings screen. - Page 123 Cenova Image Analytics Server 3.0 Installation & Service Manual Chapter 7: Configuration Procedures To configure a printer (Windows 7) Select Start > Devices and Printers. Click Add a Printer. The Add Printer dialog appears. Select the ‘Add a Local Printer’ option. The Choose a Printer Port window appears. Select the ‘Create a new port’...
-
Page 124: Adding A Cenova Server To A Domain
IT administrator before adding a Cenova server to a domain. Precautions: • Check password policies • Disable automatic Windows updates ‘pushed’ to the Cenova server. Firewall exceptions: PING: Allowed Port 80: Open Firewall exception created for ‘Hologic R2 – DICOM Service’ Page 116 MAN-05205 Revision 003... -
Page 125: Bypassing The Proxy Server For Local Addresses
Cenova Image Analytics Server 3.0 Installation & Service Manual Chapter 7: Configuration Procedures Bypassing the Proxy Server for Local Addresses Internet Explorer may display a ‘File not found’ error message when accessing the Cenova Control Panel from a local host. The error occurs when the Internet Options setting is configured to use a proxy server on the Cenova server, and the ‘Bypass proxy server for local addresses’... -
Page 127: Index
FFDM systems - 11 of Biomarkers - 60 entering device IDs on server - 45 of Hologic Connect - 65 of ImageChecker 3D Calc CAD - 59 of ImageChecker CAD (2D) - 51 of input from Default source device - 39... - Page 128 - 68 IP address - 69, 108 server log - 107 Default source device - 39 Hologic Imaging Biomarkers - 10, 12, 14 DICOM destinations - 34 configuring - 60 DICOM source devices - 36 data flow - 15...
- Page 129 - 3 TCP/IP for DICOM destination devices - 34 shutting down the server - 72 precautions - 4 Siemens AG Pre-Installation Form, Hologic Digital - 24, 34, 36, detector ID - 48 FFDM systems - 11 printer software kit - 25...
- Page 130 Cenova Image Analytics Server 3.0 Installation & Service Manual Index warnings - 4 window center and width CAD SC images - 57 DigitalNow HD images - 64 workstations, review - 36, 40 applying VOI LUTs - 63 brightness and contrast - 57, 64 Page 122 MAN-05205 Revision 003...
Need help?
Do you have a question about the Cenova C Series and is the answer not in the manual?
Questions and answers