Advertisement
Quick Links
Installation Guide
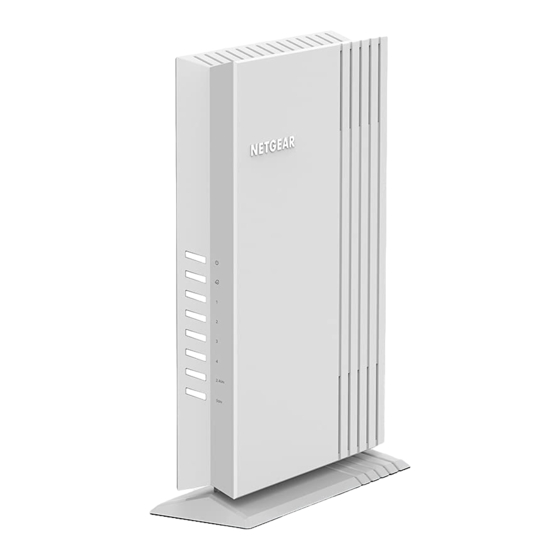
WiFi 6 AX3200 Dual Band Access Point
WAX206
Package contents
•
NETGEAR WAX206 WiFi access point
•
DC power adapter (varies by region)
•
Ethernet cable
•
Installation guide
Start here: What WiFi setup do you want?
What you have
What you want
Operation mode
Broadband/cable/DSL
Add WiFi 6 to your home
Change to access
device with WiFi (router)
or office.
point mode
Broadband/cable/DSL
Add WiFi 6 and a wired
Keep default router
device without WiFi
network to your home or
mode
(modem only)
office.
Set up a WiFi 6 hotspot
Change to access
on an existing network.
point mode
Ethernet wall outlet with
Internet service
Set up a private WiFi 6
Keep default router
network.
mode
Step 1. Connect the WAX206
Follow the steps for the setup that you want.
A. You have a broadband/cable/DSL device
Internet
Broadband, cable, or DSL
WAX206
WiFi-enabled computer
device with or without WiFi
1.
Unplug the power of the broadband, cable, or DSL device, but leave the device
connected to the wall jack for your Internet service. If the device uses a battery
backup, remove the battery.
2.
Connect the Ethernet cable to the yellow WAN port on the WAX206.
3.
Connect the other end of the cable to a LAN port on your broadband, cable, or DSL
device.
4.
If the broadband, cable, or DSL device uses a battery backup, put the battery back in.
Plug in and turn on the device.
5.
Power on the WAX206 and check that the LEDs are lit.
Follow
Steps 1A, 2,
B. You have an Ethernet wall outlet with Internet service
and 3
Steps 1A, 2,
and 3
Ethernet
outlet with
Steps 1B, 2,
Internet
and 3
service
Steps 1B, 2,
and 3
WAX206
WiFi-enabled computer
1.
Connect an Ethernet cable from the wall outlet to the yellow WAN port on the
WAX206.
2.
Power on the WAX206 and check that the LEDs are lit.
Step 2. Join the WAX206's WiFi network
1.
On the WiFi-enabled computer that you want to connect to the WAX206, open the
software utility that manages the WiFi connections.
This utility scans for all WiFi networks in your area.
2.
Find and select the WAX206's WiFi network name (SSID), which is printed on the
access point's label, and connect to the WAX206's WiFi network.
3.
Type the WiFi password that is printed on the access point's label.
Step 3. Log in to the WAX206
1.
If the Setup Wizard does not start automatically after you join the WAX206's WiFi
network, launch a web browser and type routerlogin.net in the address field.
Your browser might display a security warning because of the self-signed
certificate on the WAX206, which is expected behavior. You can proceed,
or add an exception for the security warning. For more information, see
https://kb.netgear.com/000062980.
The Setup Wizard starts.
Follow the prompts onscreen.
2.
During the Setup Wizard process, set up the WAX206 in one of the following modes:
•
Select the Access Point Mode radio button for the following setups:
Broadband/cable/DSL device with WiFi
Add WiFi 6 to your home or office.
(router)
Set up a WiFi 6 hotspot on an existing
Ethernet wall outlet with Internet service
network.
•
Select the Router Mode radio button for the following setups:
Broadband/cable/DSL device without WiFi
Add WiFi 6 and a wired network to
(modem only)
your home or office.
Ethernet wall outlet with Internet service
Set up a private WiFi 6 network.
3.
Continue to follow the prompts onscreen to do the following:
a.
Set a new admin password (local device password) for local login, and set
security questions and answers.
b.
As an option for greater security, you can set a new WiFi network name (SSID)
and WiFi password.
c.
If a new firmware version is available, follow the prompts to update the firmware.
When the Setup Wizard finishes, the WAX206 restarts.
Note: Do not close your browser window!
Continued on the next page.
December 2021
Advertisement

Related Manuals for NETGEAR WiFi 6 AX3200


Summary of Contents for NETGEAR WiFi 6 AX3200
- Page 1 Keep default router Steps 1A, 2, https://kb.netgear.com/000062980. device without WiFi network to your home or mode and 3 WiFi 6 AX3200 Dual Band Access Point Ethernet The Setup Wizard starts. (modem only) office. outlet with Follow the prompts onscreen. Set up a WiFi 6 hotspot...
- Page 2 Your settings are saved and the WAX206 is configured for the new country or region. By using this device, you are agreeing to NETGEAR’s Terms and Conditions at If your WiFi connection is terminated, reconnect to the WAX206. https://www.netgear.com/about/terms-and-conditions. If you do not agree, return the device to your place of purchase within your return period.
Need help?
Do you have a question about the WiFi 6 AX3200 and is the answer not in the manual?
Questions and answers