
Related Manuals for MasterCraft 068-0002-6


Summary of Contents for MasterCraft 068-0002-6
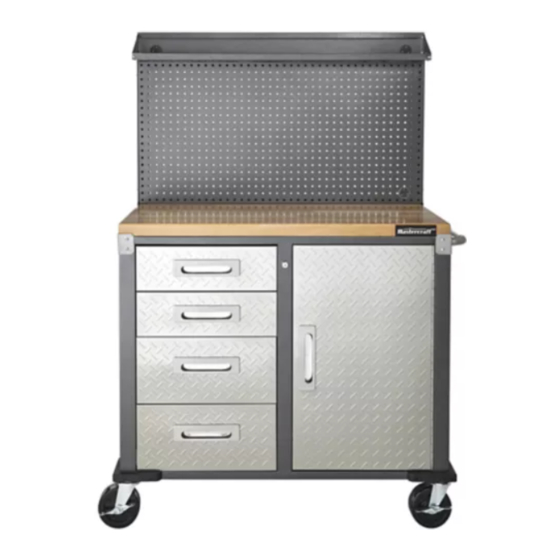
- Page 1 Model no. 068-0002-6 BUTCHER BLOCK TOP WORK CENTRE tion tabs IMPORTANT: INSTRUCTION Please read this manual carefully before assembling MANUAL and using this work centre and save it for reference.
- Page 2 headline bars headline bars model no. 062-3582-8 | contact us 1-800-689-9928 continuation tabs continuation tabs notes notes warnings warnings...
- Page 3 TABLE OF CONTENTS Safety Parts List Exploded View Assembly Instructions Warranty NOTE: If any parts are missing or damaged, or if you have any questions, please call our toll-free helpline at 1-800-689-9928. SAVE THESE INSTRUCTIONS This manual contains important safety and operating instructions. Read all instructions and follow them with use of this product.
- Page 4 062-3582-8 | contact us 1-800-689-9928 model no. 068-0002-6 | contact us 1-800-689-9928 • To reduce the risk of serious injury, read the following safety instructions before assembling and using the cabinet. • This cabinet is intended for domestic, indoor use only.
- Page 5 PARTS LIST Description Qty. Description Qty. Solid Hardwood Top Push Bar Front Frame Corner Protector Back Frame Screwdriver Left Side Panel Key (attached to the front frame) Right Side Panel Drawer Mat Middle Shelf Wrench Base Panel Magnet Middlle Panel Pegboard Door 29-1...
- Page 6 062-3582-8 | contact us 1-800-689-9928 model no. 068-0002-6 | contact us 1-800-689-9928 M4 x 10L M8 x 18L continuation tabs continuation tabs continuation tabs continuation tabs M4 x 8L M4 x 30L...
- Page 8 062-3582-8 | contact us 1-800-689-9928 model no. 068-0002-6 | contact us 1-800-689-9928 ASSEMBLY PREPARATION • Begin the assembly of this cabinet on a clean, level surface. • Remove all items from the box and ensure that all parts listed on page 3 are present.
- Page 9 3. Install Right Side Panel (Part 5) Fig. C Attach Right Side Panel (Part 5) to Back Frame (Part 3) making sure the "Top" of Right Side Panel (Part 5) is on the Solid Hardwood Top (Part 1). Use three Screws (Part 16) and Screwdriver (Part 21) to fasten (Fig.
- Page 10 062-3582-8 | contact us 1-800-689-9928 model no. 068-0002-6 | contact us 1-800-689-9928 5. Install Left Side Panel (Part 4) Fig. E Attach Left Side Panel (Part 4) to Back Frame (Part 3), making sure the "Top"...
- Page 11 7. Install the Base Panel (Part Fig. G 7) and Wheels (Part 12 13) A: Fit the Bottom Panel (Part 7) between the Back Frame (Part 3) and Front Frame (Part 2) as shown in Fig G. Line up the screw holes and use eight Screws (Part 16) and Screwdriver (Part 21) to fasten it.
- Page 12 062-3582-8 | contact us 1-800-689-9928 model no. 068-0002-6 | contact us 1-800-689-9928 9. Install the Corner Protectors Fig. I (Part 20), Push Bar (Part 19) and Magnet (Part 26) A: Attach the Corner Protectors...
- Page 13 11. Assemble Large Drawer Side Fig. M Panels (Part 11C and 11B) Fit and attach Large Drawer Side Panels (Part 11C and 11B) one at a time, into the back of the stainless steel Large Drawer Front (Part 11A). Make sure the Drawer Side Panels are placed in all the way making contact with the rear of the Large Drawer Front Panel (Part 11A).
- Page 14 062-3582-8 | contact us 1-800-689-9928 model no. 068-0002-6 | contact us 1-800-689-9928 14. Place the Drawers Fig. P A: Pull out the sliders completely, then attach the drawer to the sliders.
- Page 15 15. Install the Middle Shelf Fig. S (Part 6) Place the Middle Shelf (Part 6) in the unit at the desired height and ensure that all four corners are secured on the hooks on the Front and Back Frames (Part 2 and 3) (Fig.
- Page 16 062-3582-8 | contact us 1-800-689-9928 model no. 068-0002-6 | contact us 1-800-689-9928 Fig. U continuation tabs continuation tabs continuation tabs continuation tabs 17. Install the Top Cantilever Shelf A: Attach the Top Cantilever Shelf Left Panel (Part 29-3) and the Top Cantilever Shelf...
- Page 17 19. Install Pegboard (Part 28) Fig. W Attach the Pegbord (Part 28) to the support bars by lining up the screw holes, and use six Screws (Part 16) and Screwdriver (Part 21) to tighten (Fig. W). 20. Install Top Cantilever Shelf (Part 29) A: Please take off left and right back side of Top Cantilever Shelf...
- Page 18 062-3582-8 | contact us 1-800-689-9928 model no. 068-0002-6 | contact us 1-800-689-9928 21. Install Mounting Straps Fig. Y (Part 60) A: Remove two Screws (Part 16) from the Pegboard Support Bars (Part 18-A and 18-B).
- Page 19 This Mastercraft ® product carries a one (1) year warranty from the date of the original retail purchase, against defects in material and workmanship. Subject to the condi- tions and limitations described below, this product, if returned to us with proof of purchase within the stated warranty period and if covered under this warranty, will be repaired or replaced (with the same model, or one of equal value or specification), at...
- Page 20 Made in China notes Imported by Mastercraft Canada Toronto, Canada M4S 2B8 warnings...
- Page 21 Modèle nº 068-0002-6 POSTE DE TRAVAIL À DESSUS DE TYPE BLOC DE BOUCHER tion tabs IMPORTANT : GUIDE Veuillez lire attentivement ce guide avant d’assembler D’UTILISATION et d’utiliser cette armoire haute et le conserver à titre de référence.
- Page 22 headline bars headline bars model no. 062-3582-8 | contact us 1-800-689-9928 continuation tabs continuation tabs notes notes warnings warnings...
- Page 23 TABLE DES MATIÈRES Sécurité Liste des pièces Vue éclatée Instructions d'assemblage Garantie REMARQUE : Si des pièces sont manquantes ou endommagées, ou si vous avez des questions, veuillez contacter notre service de soutien téléphonique sans frais au 1 800 689-9928. CONSERVEZ CES INSTRUCTIONS Le présent guide d’utilisation contient un mode d’emploi et des consignes de sécurité...
- Page 24 062-3582-8 | contact us 1-800-689-9928 Modèle n° 068-0002-6 | Contactez-nous au 1 800 689-9928 • Pour réduire les risques de blessures graves, lisez les consignes de sécurité suivantes avant d’assembler et d’utiliser l’armoire. • Cette armoire est conçue pour un usage domestique, à l’intérieur seulement.
- Page 25 LISTE DES PIÈCES Nº Description Qté Nº DescriptionPr Qté otecteur de Plan de travail en bois massif Clé (attachée au devant du cadre) Châssis avant Tapis de tiroir Châssis arrière Clé (attachée au devant du cadre) Panneau latéral gauche Aimant Panneau latéral droit Panneau perforé...
- Page 26 062-3582-8 | contact us 1-800-689-9928 Modèle n° 068-0002-6 | Contactez-nous au 1 800 689-9928 M4 x 10L M8 x 18L continuation tabs continuation tabs continuation tabs continuation tabs M4 x 8L...
- Page 28 062-3582-8 | contact us 1-800-689-9928 Modèle n° 068-0002-6 | Contactez-nous au 1 800 689-9928 PRÉPARATION DE L’ASSEMBLAGE • Commencez l’assemblage de cette armoire sur une surface propre et plane. • Retirez tous les articles de la boîte et assurez-vous que toutes les pièces énumérées à la page 3 sont présentes.
- Page 29 3. Installez le panneau latéral Fig. C droit (5) Fixez le panneau latéral droit (5) au châssis arrière (3) en veillant à ce que le haut du panneau latéral droit (5) se trouve sur le dessus en bois massif (1). Utilisez 3 vis (16) et le tournevis (21) pour fixer (Fig.
- Page 30 062-3582-8 | contact us 1-800-689-9928 Modèle n° 068-0002-6 | Contactez-nous au 1 800 689-9928 5. Installez le panneau latéral Fig. E gauche (4) Fixez le panneau latéral gauche (4) au châssis arrière (3), en veillant à...
- Page 31 7. Fixez le panneau inférieur Fig. G (7) et les roulettes (12 et 13) A : Insérez le panneau inférieur (7) entre le châssis arrière (3) et le châssis avant (2), comme indiqué à la figure G. Alignez les trous de vis et fixez-le au moyen de huigt vis (16) à...
- Page 32 062-3582-8 | contact us 1-800-689-9928 Modèle n° 068-0002-6 | Contactez-nous au 1 800 689-9928 9. Installez le protecteur de coin Fig. I (18) et les barres de tirage 19) et l'aimant (26) A : Fixez les protecteurs d'angle (20) aux coins supérieurs avant et...
- Page 33 11. Assemblez les panneaux Fig. M latéraux du grand tiroir Fixez un à un les panneaux latéraux du grand tiroir (11C et 11B) à l'arrière du panneau avant du grand tiroir en inox (11A). Vérifiez que les panneaux latéraux du tiroir touchent l'arrière du panneau avant du grand tiroir (11A).
- Page 34 062-3582-8 | contact us 1-800-689-9928 Modèle n° 068-0002-6 | Contactez-nous au 1 800 689-9928 14. Placez les tiroirs Fig. P A : Sortez complètement les coulisses, puis fixez le tiroir aux coulisses.
- Page 35 15. Installez la tablette Fig. S intermédiaire (6) Placez la tablette intermédiaire (6) dans l’armoire, à la hauteur désirée, et vérifiez que les quatre coins sont retenus par les crochets des châssis avant et arrière (2 et 3) (Fig. S). 16.
- Page 36 062-3582-8 | contact us 1-800-689-9928 Modèle n° 068-0002-6 | Contactez-nous au 1 800 689-9928 Fig. U continuation tabs continuation tabs continuation tabs continuation tabs 17. Installez la tablette supérieure en porte-à-faux A : Fixez le panneau gauche de la tablette supérieure en porte-à-faux (29-3) et le...
- Page 37 19. Installez le panneau Fig. W perforé (28) Assemblez le panneau perforé (28) à la barre de support en alignant les trous de vis, puis fixez au moyen de six vis (16) à l'aide du tournevis (21) (Fig. W). 20. Installez la tablette supérieure en porte-à-faux (29) A : Enlevez les vis arrière gauche et...
- Page 38 062-3582-8 | contact us 1-800-689-9928 Modèle n° 068-0002-6 | Contactez-nous au 1 800 689-9928 21. Installez les sangles de Fig. Y fixation (60) A : Enlevez deux vis (16) des barres de support du panneau perforé...
- Page 39 Ce produit Mastercraft est garanti pour une période de un (1) an à compter de la date d'achat au détail d'origine, contre les défauts de matériaux et de fabrication. Sous réserve des conditions et limitations décrites ci-dessous, ce produit, s’il nous est retourné avec une preuve d’achat au cours de la période de garantie indiquée et s’il est couvert par cette garantie, sera...
- Page 40 Les dispositions qui figurent dans la présente garantie ne visent pas à limiter, à modifier, à réduire ou à exclure une quelconque garantie prévue dans les lois provinciales ou fédérales applicables. Fabriqué en Chine notes Importé par Mastercraft Canada Toronto, Canada M4S 2B8 warnings...
Need help?
Do you have a question about the 068-0002-6 and is the answer not in the manual?
Questions and answers