
Subscribe to Our Youtube Channel
Related Manuals for Snell Vega 2U


Summary of Contents for Snell Vega 2U
- Page 1 User Manual Vega Video Router 96 and 192 port fully asymmetric Video Routers snellgroup.com...
- Page 2 Vega Video Router www.snellgroup.com Issue 2 Rev 2 Page 2 © 2013 Snell Limited...
-
Page 3: Table Of Contents
1.4 Rack Mounting ..........13 1.4.1 Vega 2U Router Rack Mounting....... 13 1.4.2 Vega 4U Router Rack Mounting. - Page 4 10.3 Set and Test a Route..........65 Issue 2 Rev 2 Page 4 © 2013 Snell Limited...
- Page 5 C.10 Vega 2U Dimensions ........
- Page 6 Vega Video Router www.snellgroup.com Contents Issue 2 Rev 2 Page 6 © 2013 Snell Limited...
-
Page 7: Information And Notices
Information and Notices About this Manual This manual describes the Vega 2U and 4U Video Routers and the configuration of the various modules that can be added to them. Refer to the Vega Installation Manual for details on how to unpack and install the Vega Video Routers. -
Page 8: Copyright And Disclaimer
Information in this manual and software are subject to change without notice and does not represent a commitment on the part of Snell Ltd. The software described in this manual is furnished under a license agreement and may not be reproduced or copied in any manner without prior agreement with Snell Ltd. -
Page 9: Safety
Attention si l'appareil a 2 alimentations, s'assurer que les cordons Advertencia Si la unidad tuviera dos tomas de alimentación, asegurarse soient branchés sur la même phase. de que ambos cables de alimentación están conectados a la misma fase. © Issue 2 Rev 2 Page 9 2013 Snell Limited... - Page 10 Huom! Jos laitteessa on kaksi verkkojännitteen tuloliitäntää, niiden johdot Varning! Om enheten har två huvudsakliga elförsörjningar, säkerställ att on liitettävä verkkopistorasioihin, joissa on sama vaiheistus. båda strömkablarna som är inkopplade i enheten arbetar från samma fas. © Issue 2 Rev 2 Page 10 2013 Snell Limited...
- Page 11 Condutor CASTANHO ligado a L (Vivo). Ficha Livre Tomada Livre Atenção: Se a unidade tem duas fontes de alimentação assegurar que os dois cabos de alimentação estão ligados a tomadas pertencentes à mesma fase. © Issue 2 Rev 2 Page 11 2013 Snell Limited...
-
Page 12: Mains Power Supplies
Dispose of used batteries according to the manufacturers instructions. Batteries shall only be replaced by trained service technicians The Vega Video Routers contain a Lithium battery to provide non-volatile memory. © Issue 2 Rev 2 Page 12 2013 Snell Limited... -
Page 13: Rack Mounting
Do not rack-mount the Vega router using only the front rack ears. • The Vega 2U router weighs 10 kg (22 lbs) for a full frame (without packaging). When lifting the Vega 2U router into a 19" rack use the correct local Health and Safety lifting guidelines. •... -
Page 14: Front Panel Lock
Front Panel Fastening Screw (1 of 2) Fig 1. Front Panel Lock (Vega 2U shown) • The router must be locked in normal operation to ensure that it complies with safety Important: standards. -
Page 15: Transit Brackets
Transit Bracket screw x 1 Vega 4U Router Fig 2. Vega 2U & 4U Router Transit Brackets Loosen but do not remove the four Crosspoint transit bracket screws and slide the transit bracket to the right to remove it. Tighten the crosspoint transit bracket screws back up again and keep the bracket somewhere safe in case the Vega router needs transporting in the future. -
Page 16: Safety Standards
“EMC Performance Information/Environment.” 1.9.2 EMC Performance of Cables and Connectors Snell products are designed to meet or exceed the requirements of the appropriate European EMC standards. In order to achieve this performance in real installations it is essential to use cables and connectors with good EMC characteristics. -
Page 17: Product Overview
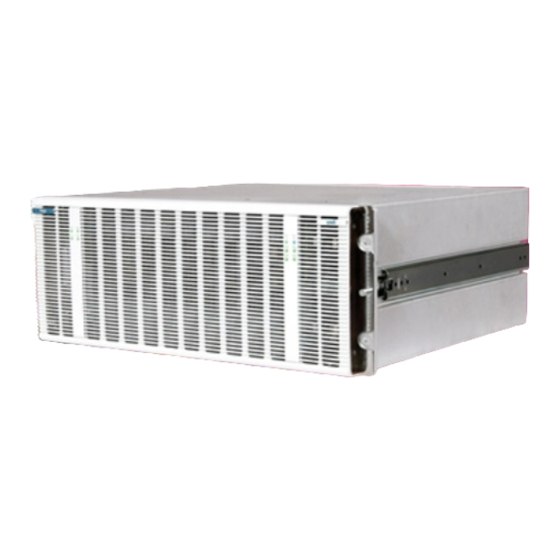
1 input to All outputs through to All inputs to 1 output and anything in between. Vega 2U Router Vega 4U Router Fig 3. Vega 2U & 4U Video Routers Front View © Issue 2 Rev 2 Page 17 2013 Snell Limited... -
Page 18: Features And Benefits
1U and 2U control panels. • Ultra compact router frame with up to 50% more ports than a conventional BNC router. • Future system expansion or simply ‘no need for a bigger router’. © Issue 2 Rev 2 Page 18 2013 Snell Limited... -
Page 19: Vega Order Code
VG-MF192H - Vega Frame, up to 192 port input/output, 4 x HD-BNC reference inputs 2.2.1 Vega 2U Optional Redundant Parts The Vega 2U Vega frame is supplied with 1 x PSU, 1 x crosspoint card and 1 x Vega controller card. -
Page 20: Input/Output Rear Modules
Product Overview 2.3 Input/Output Rear Modules The Vega 2U video router can be fitted with up to eight 12 port input/output video modules and the Vega 4U video router can be fitted with up to sixteen 12 port input/output video modules. -
Page 21: Front Panel Leds
Vega 4U Router Fig 4. Vega 2U & 4U Asymmetric Video Router Front View 2.5.1 PSU and PSU Fan Status LEDs The PSU and fan status LEDs are on the left of the front panel, see Figure 4 for location and Table 1. - Page 22 **Note: If the associated PSU has failed or has no mains signal the fan will still run from the common 48 Vdc output. Table 1. PSU and PSU Fan Status LEDs © Issue 2 Rev 2 Page 22 2013 Snell Limited...
-
Page 23: Controller, Crosspoint And Rear Fan Status Leds
The ERR LED will go Red to indicate that the router has experienced an error. See the RollCall Status page for the error details. Table 2. Vega Controller, Crosspoint and Rear Fan Status LEDs © Issue 2 Rev 2 Page 23 2013 Snell Limited... - Page 24 Vega Video Router www.snellgroup.com Product Overview © Issue 2 Rev 2 Page 24 2013 Snell Limited...
-
Page 25: Card Locations
(48 Vdc single rail) (component side up) Main and Redundant Main and Redundant Main and Redundant Fig 5. Vega 2U Card Positions Shown, Door Open Dual PSUs Crosspoint cards Buffer cards (48 Vdc single rail) (component side up) Main and Redundant... -
Page 26: Rear View
RS485 serial ports (x 4) via a 37 way D-Type connector, see Appendix A.3 for details. Fig 7. Vega 2U Rear Connectors 192 Input/Output ports in 8 rows of 12 on each side Main (upper) and of the router. Redundant... -
Page 27: Network, Relay And Video Reference Rear
HD-BNC (Video Ref x 4) details 2 x 10/100 Base-T Ethernet control ports (auto-sensing). Fig 9. Vega 2U Network, Relay and Video Reference Rear Panel Analog video references. Looped, 75 Ohm termination can be switched in. HD-BNC (Video Ref x 4) Relay Connector Appendix A.2 for... -
Page 28: Relay Connector
SMPTE RP168-2009 for that video standard. The video references are Looped and a 75 termination can be selected by setting a separate switch (see Figure 9 or Figure 10) for each of the video references. © Issue 2 Rev 2 Page 28 2013 Snell Limited... -
Page 29: Video Reference Inputs
Note: derived video reference signals for use in the router. • Each router has a maximum of four video references in total in any mix of physical and derived references. © Issue 2 Rev 2 Page 29 2013 Snell Limited... -
Page 30: Video Switching Point References
720 progressive 59 Hz 720p50 720 progressive 50 Hz 1080i60 1080 interlaced 60 Hz 1080i59 1080 interlaced 59 Hz 1080i50 1080 interlaced 50 Hz Table 3. Switching Point Video References © Issue 2 Rev 2 Page 30 2013 Snell Limited... -
Page 31: Auto Selected
The timing must be adjusted to make sure the switch happens at the correct point. • If the signal on the specified reference input (physical or derived) is not valid the router will crash switch. © Issue 2 Rev 2 Page 31 2013 Snell Limited... - Page 32 Vega Video Router www.snellgroup.com Card Locations © Issue 2 Rev 2 Page 32 2013 Snell Limited...
-
Page 33: Input And Output Modules
See sections 4.3 and 4.4 for details. Port 1 Port 12 Port 49 Port 60 Port 37 Port 48 Port 85 Port 96 Fig 12. Vega 2U Rear View Showing the Input and Output Cards © Issue 2 Rev 2 Page 33 2013 Snell Limited... - Page 34 See sections 4.3 and 4.4 for details. Port 1 Port 12 Port 97 Port 108 Port 85 Port 96 Port 181 Port 192 Fig 13. Vega 4U Rear View Showing the Input and Output Cards © Issue 2 Rev 2 Page 34 2013 Snell Limited...
-
Page 35: Inserting And Removing Input And Output Modules
To remove an input/output card from the router un-screw the captive screws at the left and right ends of the input/output card being removed. Captive Screws Captive Screws Fig 14. Vega 2U & 4U Rear Connectors • Blanking plates (VG-RMBP) must be fitted to any vacant slot on the rear of the Important: Vega Video Router to ensure that the Vega Video Router continues to conform to EMC standards. -
Page 36: Vg-Rm6Sfp-Sdi - 12 Port, 6 Cage Input/Output Sfp Rear Panel
SM-T55R-3G 1550nm Tx 1260-1620nm Rx SM-RR-3G 1260-1620nm Rx 1260-1620nm Rx Table 4. SFP Fiber Modules SM = Single Mode. For Multi Mode (MM) fiber applications please contact your Snell representative. © Issue 2 Rev 2 Page 36 2013 Snell Limited... -
Page 37: Sfp Cwdm Fiber Modules
Blanking plugs must also be fitted to ensure adequate cooling, see section 4.3.4 for details. • The risk of non-compliance and overheating is with the user if the blanking plugs are not fitted. © Issue 2 Rev 2 Page 37 2013 Snell Limited... -
Page 38: Vg-Rm12H-Sdi - 12 Port Input/Output Hd-Bnc Rear Panel
Blanking plates must also be fitted to ensure adequate cooling, see section 4.5 for details. • The risk of non-compliance and overheating is with the user if the blanking plates are not fitted. Fig 17. VG-RMBP - Blanking Plate Rear Module © Issue 2 Rev 2 Page 38 2013 Snell Limited... -
Page 39: Catsii Led Functionality
Signal Detected Signal Detected Long Short Long Short Flash Flash Flash Flash See item 1 in Table 10. Green Input Blue Yellow Output Table 8. Signal Present but Not Recognized © Issue 2 Rev 2 Page 39 2013 Snell Limited... -
Page 40: Catsii Colors: Vega Port Configured But Port Connector Not Fitted
Vega port is configured as an Input but an Output port connector is fitted Vega Port is configured as an Output but an Input port connector is fitted Table 10. Error Color Sequence © Issue 2 Rev 2 Page 40 2013 Snell Limited... -
Page 41: Crosspoint Card
• One main and one optional, redundant crosspoint card • Maximum configuration of 192 crosspoints (96 for the Vega 2U router) configured as a mix of inputs and outputs as required • Failed crosspoints are automatically switched from the main to the redundant crosspoint card if fitted ©... -
Page 42: Crosspoint Card Led Information
Off - Normal state this crosspoint module On Solid - At least one Route Fail route failure has been detected on this crosspoint module Table 12. Crosspoint Card LED Information © Issue 2 Rev 2 Page 42 2013 Snell Limited... -
Page 43: Redundant Video Crosspoint Operation
All routes must be moved back to the main crosspoint card once the fault is fixed because if a route fails on the redundant crosspoint card the failed route is not automatically moved to the main crosspoint card. © Issue 2 Rev 2 Page 43 2013 Snell Limited... -
Page 44: Replacing A Failed Main Crosspoint Card
Remove the failed main crosspoint card and replace it with a working one (see section 5.5 for details). Click on the Fault Fixed button and all of the routes will be moved back to the main crosspoint card (Crosspoint A). This reinstates crosspoint redundancy. © Issue 2 Rev 2 Page 44 2013 Snell Limited... -
Page 45: Inserting And Removing Crosspoint Cards
Push the crosspoint card in until the levers locate in the router frame. Push the levers to fully lock the crosspoint card in place. © Issue 2 Rev 2 Page 45 2013 Snell Limited... - Page 46 Vega Video Router www.snellgroup.com Crosspoint Card © Issue 2 Rev 2 Page 46 2013 Snell Limited...
-
Page 47: Vega Controller Card
For details on changing the IP address of the Vega controller see section B.2.3.1 or section B.2.6. • For details on updating the firmware in the Vega controller see “Vega Upgrades” on page 73. © Issue 2 Rev 2 Page 47 2013 Snell Limited... -
Page 48: Vega Controller Leds
Green = Master Controller • Blue = Slave Controller Watchdog Status • Flashing Green = Watchdog enabled and running • Flashing Orange = Watchdog disabled Table 13. Vega Controller LEDs © Issue 2 Rev 2 Page 48 2013 Snell Limited... -
Page 49: Usb Memory Stick
The supplied USB stick(s) can be used to upgrade the Vega router firmware and specify IP addresses without the need to use RollCall (see Appendix B. for details) although this is for advanced users only. © Issue 2 Rev 2 Page 49 2013 Snell Limited... -
Page 50: Inserting And Removing Vega Controller Cards
(Figure 22) and carefully pull the card out of the frame. To insert a controller card locate the card in the upper and lower frame slots and carefully push it in until it clicks firmly into place. © Issue 2 Rev 2 Page 50 2013 Snell Limited... -
Page 51: Vega Buffer Card (Vega 4U Only)
Control signals including system and fan control signals • Status signals including system and fan status Reset Button Pull Tab for Card Removal LEDs, see section Fig 24. Vega Buffer Card © Issue 2 Rev 2 Page 51 2013 Snell Limited... -
Page 52: Vega Buffer Card Leds
To manually change the active buffer card to idle press the Reset button on the front edge of the active buffer card (see Figure 25). Table 14. Vega 4U Buffer Card LEDs © Issue 2 Rev 2 Page 52 2013 Snell Limited... -
Page 53: Inserting And Removing Vega Buffer Cards
(Figure 24) and carefully pull the card out of the frame. To insert a buffer card locate the card in the upper and lower frame slots and carefully push it in until it clicks firmly into place. © Issue 2 Rev 2 Page 53 2013 Snell Limited... - Page 54 Vega Video Router www.snellgroup.com Vega Buffer Card (Vega 4U only) © Issue 2 Rev 2 Page 54 2013 Snell Limited...
-
Page 55: External Control
Up to four 9 way D-type RS-422 serial connections can be connected to the 37 way D-type connector on the rear of the router by using a breakout cable (VG-CA37D9-4) purchased from Snell. For breakout cable details see Appendix •. The full specification for this protocol is available from the Customer Support section of the Snell web site. - Page 56 Vega Video Router www.snellgroup.com External Control © Issue 2 Rev 2 Page 56 2013 Snell Limited...
-
Page 57: Configuration
Open a browser window and enter the IP address of the router into the address bar of the browser. By default the Vega controller IP address is http://172.19.39.150/ Fig 28. Snell Controller Home Page Click on the Connect button. If a dialogue box displays indicating that a newer version of Java should be installed, then click the Download button in the browser window and a security warning screen displays. - Page 58 Matrix unit in the Network Browser, then double-click on the Level 1 unit to open the Routing template. Use this template to control the setting of routes via the XY panel. See Testing on page 63. © Issue 2 Rev 2 Page 58 2013 Snell Limited...
-
Page 59: Vega Controller Setup
In the Redundant peer section enter the IP address for the redundant controller, if fitted. Click on the Restart Unit button for the entered details to take effect. © Issue 2 Rev 2 Page 59 2013 Snell Limited... -
Page 60: Port Configuration
Enter a port name in the Name field. From the Configured Type drop-down list, select Input, Output, Off (default). From the Reference drop-down list, select the input reference (default is Auto). See Reference Signal on page 61. © Issue 2 Rev 2 Page 60 2013 Snell Limited... - Page 61 To see the status of modules on the rear of the router click the Status radio button. See “Catsii LED Functionality” on page 39. for details of the Catsii colors. • To locate a port on the rear panel click on the Locator radio button. © Issue 2 Rev 2 Page 61 2013 Snell Limited...
-
Page 62: Port Modules
Output port of an HD BNC Fixed Module SFP Unknown SFP fitted but type unknown SFP Not Fitted Empty cage in the SFP module Not Available No module fitted Table 18. Port Hardware Types © Issue 2 Rev 2 Page 62 2013 Snell Limited... -
Page 63: Testing
The Undo button is available whether routing immediately or when using a Take button. © Issue 2 Rev 2 Page 63 2013 Snell Limited... -
Page 64: Navigating The Xy Panel
Navigating to another page of sources or destinations, displays a button indicating on which page the currently selected source or destination is on. • Click on the button to navigate directly to the page of the currently selected source or destination, as applicable. © Issue 2 Rev 2 Page 64 2013 Snell Limited... -
Page 65: Set And Test A Route
To set another route, click on another destination button. Clicking on the currently selected destination deselects the destination and returns the display to the default state. Deselecting a destination does not affect its routing. Note: © Issue 2 Rev 2 Page 65 2013 Snell Limited... - Page 66 Vega Video Router www.snellgroup.com Testing © Issue 2 Rev 2 Page 66 2013 Snell Limited...
-
Page 67: Maintenance
Vega router. Main (upper) and Redundant (lower) Power Supply Filtered IEC Connectors. Fig 38. Vega 2U Router IEC Power Supply Connectors Main (upper) and Redundant (lower) Power Supply Filtered IEC Connectors. Fig 39. Vega 4U Router IEC Power Supply Connectors ©... - Page 68 The router supports dual power supplies for redundancy. This is an option and so there may not be a second PSU fitted to your router. Fig 40. Vega Router IEC Power Supply Schematic © Issue 2 Rev 2 Page 68 2013 Snell Limited...
-
Page 69: Power Supply Replacement
(Figure 41 and Table 19.). PSU and Fan Status LEDs Front Panel Fastening Screw (1 of 2) Fig 41. Router PSU Status Indication (Vega 2U shown as an example) Status LEDs Function • Green = PSU 1 +48 Vdc output working... - Page 70 Power Supply Vega 2U Vega Power Supply Vega 4U Fig 42. Vega 2U & 4U Router PSU Replacement • Caution: Double Pole/Neutral Fusing. • The fan will continue to run for 10 to 20 seconds after the power supply is removed from the router as 48 Vdc remains present for a short time.
-
Page 71: Ventilation
11.2 Ventilation The Vega 2U router has two fans at the rear (one behind the other) and the Vega 4U router has two fans at the rear (one above the other). For both routers the rear fans pull air in through the front of the unit and exhaust the air out of the rear of the router. - Page 72 Vega 4U Fig 43. Vega 2U and 4U Router Rear Fans Vega 4U only: remove the two port number retaining plates shown in Figure 43 to free the fan assemblies. Pull the failed fan assembly straight back from the Vega router and support it from underneath.
-
Page 73: Vega Upgrades
Maintenance 11.3 Vega Upgrades The Vega router software and the router controller firmware can be upgraded through the RollCall Control Panel applet. Upgrade packages are supplied by Snell in the form of a .zip file. 11.3.1 Importing Vega Software Packages Save the supplied upgrade package to a folder on the PC that will be used to upgrade the router. -
Page 74: Upgrade The Vega System Software
Ensure the software upgrade package has been imported before performing this upgrade (see section 11.3.1 for details). Right-click on Vega in the Network tree, and select Unit Upgrade from the menu. Fig 47. Network Tree © Issue 2 Rev 2 Page 74 2013 Snell Limited... - Page 75 Once the upgrade is complete the router is automatically restarted. Confirm that the router is working correctly. The System node will continue to report the original version number until the Controller Note: upgrade has been completed. © Issue 2 Rev 2 Page 75 2013 Snell Limited...
-
Page 76: Upgrade The Vega Controller
11.3.3.1 Upgrade the Inactive Controller Connect to the inactive secondary controller. To do this, click on the Build Network button ( ) in the main toolbar. Build Network Fig 49. Build Network © Issue 2 Rev 2 Page 76 2013 Snell Limited... - Page 77 For example, the default IP address for the controller is: 172.19.39.151@2051 The inactive controller displays in the network tree. Right-click on the controller and select Unit Upgrade from the menu. Fig 51. Network Tree © Issue 2 Rev 2 Page 77 2013 Snell Limited...
- Page 78 Once the upgrade is complete the controller is automatically restarted. Reset the other (active controller) making this upgraded controller active. 10. Confirm that the router is working correctly. 11. Repeat the process above for the now inactive pre-upgraded controller. © Issue 2 Rev 2 Page 78 2013 Snell Limited...
- Page 79 The controller will now be upgraded. Follow the on screen prompts. Once the upgrade is complete the controller is automatically restarted. Confirm that the router is working correctly. © Issue 2 Rev 2 Page 79 2013 Snell Limited...
-
Page 80: Upgrading The Vega Router Firmware Without Rollcall
LED 7 problem. If further help is required please contact Customer Support Reset Button (see “Customer Support” on page 7 for contact details). Table 20. Controller LED Status After Software Update © Issue 2 Rev 2 Page 80 2013 Snell Limited... -
Page 81: Reset The Second Vega Controller To Factory Defaults
Saves the details configured from the Vega section of the network tree such as; Port configuration and References. Right-click on Vega in the Network tree, and select Save from the menu. Fig 55. Network Tree Browse a location and save the Vega backup file. © Issue 2 Rev 2 Page 81 2013 Snell Limited... -
Page 82: Vega Router Restore
Saves the Crosspoint Routes and Name information from the Level 1 section of the network tree. Right-click on Level 1 in the Network tree, and select Save from the menu. Fig 57. Network Tree Browse a location and save the Level 1 backup file. © Issue 2 Rev 2 Page 82 2013 Snell Limited... -
Page 83: Vega Level Restore
Right-click on Vega in the Network tree, and select Restore from the menu. Fig 58. Network Tree Browse to the location of the Level 1 backup file and follow the on screen instructions to restore the backup file to the Vega router. © Issue 2 Rev 2 Page 83 2013 Snell Limited... - Page 84 Vega Video Router www.snellgroup.com Maintenance © Issue 2 Rev 2 Page 84 2013 Snell Limited...
-
Page 85: Appendix A. Connectors
Automation and Control (SW-P-02) RS485 serial ports (x 4) via a 37 way D-Type connector, see Appendix A.3 for details. Relay Connector Vega 4U Fig 59. Vega 2U & 4U Router Rear Panels © Issue 2 Rev 2 Page 85 2013 Snell Limited... -
Page 86: Relay 9 Way Female D-Type Connector
Pins Signals Relay Common Not connected Not connected Relay Normally Closed Relay Normally Open Not connected Not connected Table 21. Relay 9 Way Female D-Type Connector Details © Issue 2 Rev 2 Page 86 2013 Snell Limited... -
Page 87: 37 Way Female D-Type Connector
A.3 37 Way Female D-Type Connector A 37 way D-type to four 9 way D-type breakout cable is available to purchase from Snell and gives access to the four serial (RS-422) ports on the rear of the Vega router. -
Page 88: Rs422 9 Way Female D-Type Connectors
The RS-422 pin outs for Vega serial ports 1 to 4 are shown in Table 23. Pins General Switcher (SW-P-02) Protocol Chassis Chassis Table 23. RS422 9 Way D-Type Female Connector © Issue 2 Rev 2 Page 88 2013 Snell Limited... -
Page 89: Appendix B. Vega Controller Advanced Operations
The procedures described in Appendix B should only be carried out by advanced Important: users and only when no PC connection is available. If a PC connection is available it should be used. See the Vega Router Control manual for details. © Issue 2 Rev 2 Page 89 2013 Snell Limited... -
Page 90: Update Vega Controller Software Using Pbak Deploy
• The Dat and On Time tools are not required for the Vega Video Router. Because other Snell products use the Pbak Deploy tool, the Dat and On Time tools are not required on the Vega Video Router. To open Pbak Deploy Tool, from the Windows Start menu browse to: Start | All Programs | Snell | MCM | Utilities | Pbak Deploy Tool Fig 60. - Page 91 C:\Program Files\Snell\MCM\Controllers\Centra\ to the USB memory stick using Microsoft Windows Explorer. 10. See Table 24. for details of other files that need to be manually added to the USB memory stick. © Issue 2 Rev 2 Page 91 2013 Snell Limited...
-
Page 92: Usb Memory Stick Files
Pbak Deploy Tool. This is a system file and must be on the USB memory stick. Do not edit or delete this file. Table 24. USB Memory Stick Files © Issue 2 Rev 2 Page 92 2013 Snell Limited... - Page 93 Do not change the IP address section between <IP> and </IP> as the ControllerLoader application uses this to populate the controller IP Address details from the IP.list.txt file. Table 24. USB Memory Stick Files © Issue 2 Rev 2 Page 93 2013 Snell Limited...
- Page 94 (x86)” directory. The Vega controller firmware will only be updated if the PROG-FPGA action is included in the Actions.txt file (see section B.2.3.4 for details). Table 24. USB Memory Stick Files © Issue 2 Rev 2 Page 94 2013 Snell Limited...
- Page 95 When installed a web browser can be used to update the Vega RTB file and to connect to the router using RollCall. A Diagnostics tab is also available for use by Snell customer support. The Web Content files only need to be updated when a newer version is released.
-
Page 96: Controllerloader Application Actions
The Vega controller drive letter is C: • Empty lines are allowed in the Actions.txt file but lines with just a space or other white-space characters will be processed and rejected. © Issue 2 Rev 2 Page 96 2013 Snell Limited... - Page 97 Used to delete the config.xml file from the Vega controller. If the config.xml file is not present this action will still report success in the RunLog.txt text file. Optional parameter: NON-FATAL Example: PURGE-CONFIG-XML NON-FATAL Table 25. Actions and Parameters © Issue 2 Rev 2 Page 97 2013 Snell Limited...
- Page 98 Overwrite file if present - Default if parameter not used. Optional parameter: FALSE Don’t overwrite file if present. Optional parameter: NON-FATAL Example: COPY-FILE “D:\testing\info\test file1.txt” C:\testdir\testfile.txt FALSE NON-FATAL Table 25. Actions and Parameters © Issue 2 Rev 2 Page 98 2013 Snell Limited...
- Page 99 Specifies the IP address of the replicated peer controller. Optional Parameter: Port Specifies the Port of the replicated peer controller. Example: SET-REPLICATED-PEER 123.456.78.9 2007 NON-FATAL Table 25. Actions and Parameters © Issue 2 Rev 2 Page 99 2013 Snell Limited...
- Page 100 Used to enable the Watchdog on the Vega Controller. Optional Parameter: NON-FATAL Example: ENABLE-WATCHDOG NON-FATAL DISABLE-WATCHDOG Used to disable the Watchdog on the Vega Controller. Optional Parameter: NON-FATAL Example: DISABLE-WATCHDOG NON-FATAL Table 25. Actions and Parameters © Issue 2 Rev 2 Page 100 2013 Snell Limited...
- Page 101 FPGA. You should only upgrade the firmware if instructed to do so by a Snell representative who will then supply you with the latest version of the Bin file. See section B.2.3.4 for details on running this upgrade.
- Page 102 FPGA Buffer card. You should only upgrade the firmware if instructed to do so by a Snell representative who will then supply you with the latest version of the Bin file. See section B.2.3.6 for details on running this upgrade.
- Page 103 FPGA on the IO modules in a Vega frame. You should only upgrade the firmware if instructed to do so by a Snell representative who will then supply you with the latest version of the Bin file. See section B.2.3.8 for details on running this upgrade.
- Page 104 Fig 62. Example Actions.txt File to Change the Controller IP Address Fig 63. Example IP.list.txt Text File Update the Vega controller as described in section B.2.4. When the Vega controller has been reset it will have the new IP address. © Issue 2 Rev 2 Page 104 2013 Snell Limited...
- Page 105 When the Vega controller has reset it will be running the new software. If two Vega controllers are installed they must both be running the same version of software so the second Vega controller will also need updating. © Issue 2 Rev 2 Page 105 2013 Snell Limited...
- Page 106 The RunLog.txt file will contain multiple entries as each entry is associated with a Note: controller reboot. When the Vega controller has reset it will be running the new FPGA firmware. © Issue 2 Rev 2 Page 106 2013 Snell Limited...
- Page 107 When the Vega controller has reset it will be running the new Fan controller software. If two Vega controllers are installed they must both be running the same version of Fan controller software so the second Vega controller will also need updating. © Issue 2 Rev 2 Page 107 2013 Snell Limited...
- Page 108 Fig 68. Example Actions.txt File to Update the Buffer Software Update the Buffer card as described in section B.2.4. When the Buffer cards have reset they will be running the new buffer software. © Issue 2 Rev 2 Page 108 2013 Snell Limited...
- Page 109 Fig 69. Example Actions.txt File to Update the Crosspoint Software Update the Crosspoint card(s) as described in section B.2.4. When the Crosspoint card(s) have reset they will be running the new software. © Issue 2 Rev 2 Page 109 2013 Snell Limited...
- Page 110 Fig 70. Example Actions.txt File to Update the Crosspoint Software Update the Input/Output module(s) as described in section B.2.4. When the Input/Output module(s) have reset they will be running the new software. © Issue 2 Rev 2 Page 110 2013 Snell Limited...
- Page 111 Vega software (.RTB file) and to connect to the router using RollCall. A Diagnostics tab is also available for use by Snell customer support. The Web Content files only need to be updated when a newer version is released.
-
Page 112: Updating The Software In The Vega Controller
When LEDs 3 to 7 (see Table 26.) on the controller flash green the process is complete. Remove the USB memory stick and press the reset button to reboot the Vega controller. The Vega controller will be rebooted. © Issue 2 Rev 2 Page 112 2013 Snell Limited... -
Page 113: Updating The Software In The Second Vega Controller
Plug a USB memory stick into the computer. Open the command prompt by clicking the Start button and typing “cmd” into the Search box. Select cmd.exe from the results window and the command window will open. © Issue 2 Rev 2 Page 113 2013 Snell Limited... - Page 114 For this reason it is also recommended that the USB memory stick is removed from the computer when not in use in case the computer is rebooted accidentally, due to a power failure or due to automatic updates being installed. © Issue 2 Rev 2 Page 114 2013 Snell Limited...
-
Page 115: Creating And Restoring An Image Of A Bootable Usb Memory Stick
Any lost space can be recovered by formatting the memory stick when you have finished using it. Follow the instructions for your chosen Imaging tool to restore the image to the USB memory stick. © Issue 2 Rev 2 Page 115 2013 Snell Limited... - Page 116 Vega Video Router www.snellgroup.com © Issue 2 Rev 2 Page 116 2013 Snell Limited...
-
Page 117: Appendix C. Specifications
Vega 2U: See “Vega 2U Dimensions” on page 124 Dimensions Vega 4U: See “Vega 4U Dimensions” on page 125 Weight Vega 2U: 10 kg (22 lb) maximum, fully loaded (all options) Vega 4U: 18 kg (40 lbs) maximum, fully loaded (all options) Power Connector IEC (x 2 –... -
Page 118: Vg-Rm6Sfp-Sdi - 12 Port 6 Cage Input/Output Sfp Rear Panel
Link Distance Up to 30 km @ 2.97 Gb/s Worst Case 10 km maximum @ 2.97 Gb/s Test Pattern: SDI Pathological Matrix Table 30. Standard SFP Fiber Module Transmitter Specifications © Issue 2 Rev 2 Page 118 2013 Snell Limited... -
Page 119: Receiver Specification
1571 nm (±6.5 nm) Orange - not shown on clasp Power (each laser) -2 dBm typical (-5 dBm minimum, 0 dBm maximum) Extinction Ratio 7 dB typical Table 34. CWDM SFP Fiber Module Transmitter Specifications © Issue 2 Rev 2 Page 119 2013 Snell Limited... - Page 120 1331 nm (±6.5 nm) Yellow Ocher - not shown on clasp Power (each laser) -2 dBm typical (-5 dBm minimum, 0 dBm maximum) Extinction Ratio 7 dB typical Table 40. CWDM SFP Fiber Module Transmitter Specifications © Issue 2 Rev 2 Page 120 2013 Snell Limited...
-
Page 121: Coaxial Copper Sfp Modules - General Specification
120 m (365 ft) @ 2.97 Gb/s (Belden 1694A) 200 m (655 ft) @ 1.485 Gb/s 400 m (1310 ft) @ 270 Mb/s Table 44. SFP Coaxial Copper Module Receiver Specifications © Issue 2 Rev 2 Page 121 2013 Snell Limited... -
Page 122: Coaxial Copper Sfp Module Part Numbers
120 m (365 ft) @ 2.97 Gb/s (Belden 1694A) 200 m (655 ft) @ 1.485 Gb/s 400 m (1310 ft) @ 270 Mb/s Table 48. Dedicated Coaxial Copper Module Receiver Specifications © Issue 2 Rev 2 Page 122 2013 Snell Limited... -
Page 123: Reference Inputs
Serial Connection Connector Types 4 x RS422 on 37 way female D type with screw lock by use of breakout cable purchased separately from Snell. See Appendix A.3 for RS422 pin out details. Breakout cable length 270 mm (10.5 inches) approximately... -
Page 124: Vega 2U Dimensions
You must allow at least 100 mm (4 inches) of space at the rear of the router for cables, connections and ventilation. The router dimensions are as follows: Dimensions are in millimeters (inches) Fig 72. Vega 2U Router Dimensions © Issue 2 Rev 2 Page 124... -
Page 125: Vega 4U Dimensions
You must allow at least 100 mm (4 inches) of space at the rear of the router for cables, connections and ventilation. The router dimensions are as follows: Dimensions are in millimeters (inches) Fig 73. Vega 4U Router Dimensions © Issue 2 Rev 2 Page 125 2013 Snell Limited... - Page 126 Vega Video Router www.snellgroup.com © Issue 2 Rev 2 Page 126 2013 Snell Limited...
Need help?
Do you have a question about the Vega 2U and is the answer not in the manual?
Questions and answers