
Related Manuals for oneConcept Baltic Blue


Summary of Contents for oneConcept Baltic Blue
- Page 1 Baltic Blue Luftkühler Air Cooler Enfriador de aire Refroidisseur d‘air Raffreddamento dell‘aria 10029734 10029737 10029738...
-
Page 3: Table Of Contents
Sehr geehrter Kunde, wir gratulieren Ihnen zum Erwerb Ihres Gerätes. Lesen Sie die folgenden Hinweise sorgfältig durch und befolgen Sie diese, um möglichen Schäden vorzubeugen. Für Schäden, die durch Missachtung der Hinweise und unsachgemäßen Gebrauch entstehen, übernehmen wir keine Haftung. Scannen Sie den QR-Code, um Zugriff auf die aktuellste Bedienungsanleitung und weitere Informationen rund um das Produkt zu erhalten. -
Page 4: Sicherheitshinweise
SICHERHEITSHINWEISE • Prüfen Sie vor der Benutzung die Spannungsangabe auf dem Typenschild. Schließen Sie das Gerät nur an Steckdosen an, die der Spannung des Geräts entsprechen. • Halten Sie das Kabel fern von heißen Oberflächen und scharfkantigen Gegenständen. • Verlegen Sie das Kabel nicht unter einem Teppich und decken Sie es auch nicht mit anderen Gegenständen oder Stoffen ab. - Page 5 • Während des Betriebs befeuchtet das Gerät die Umgebungsluft. Vermeiden Sie jedoch zu hohe Luftfeuchtigkeit. Wir empfehlen Ihnen eine Luftfeuchtigkeit zwischen 40-50 %. Zu hohe Luftfeuchtigkeit kann zu Schimmel oder gesundheitlichen Problemen führen. • Stellen Sie das Gerät nur auf Untergründe, die unempfi ndlich gegenüber Nässe und hoher Luftfeuchtigkeit sind.
-
Page 6: Übersicht Und Fernbedienung
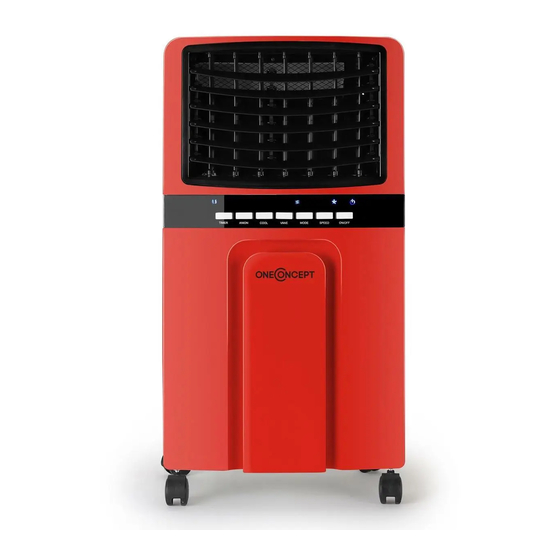
ÜBERSICHT UND FERNBEDIENUNG Abdeckplatte Vorderplatte Seitenplatte Lüftungsgitter Griff Vorderrad Bedienfeld... - Page 7 Rückplatte Verriegelung Staubfilter Tankdeckel Kabel Eisfach Wassertank Kühlpad...
-
Page 8: Befüllung
BEFÜLLUNG 1. Verriegelung öffnen 3. Wasser in den Tank füllen 4. Eis oder Kühlakku hinzufügen 2. Wassertank herausziehen BEDIENUNG Taste ON/OFF Schaltet das Gerät ein und aus. Taste SPEED Drücken Sie diese Taste mehrfach, um zwischen den 3 Geschwindigkeitsstufen zu wechseln. Taste VANE Drücken Sie diese Taste, um die Ausrichtung der Lamellen zu variieren. - Page 9 Taste COOL Schaltet die Kühlfunktion zu. Das Lämpchen leuchtet bei unzureichender Befüllung des Wassertanks. Taste ION Schaltet die Ionisierungsfunktian an und aus. So entfernen Sie die Filter zur Reinigung 1. Nehmen Sie den Staubfilter ab. 2. Drehen Sie die Filterknöpfe nach außen (siehe rechte Abbildung). 3.
-
Page 10: Reinigung Und Pflege
REINIGUNG UND PFLEGE Vor der Reinigung • Schalten Sie das Gerät aus und ziehen Sie das Netzkabel ab. Ziehen Sie vor der Reinigung immer den Netzstecker, um Stromschläge oder mechanische Beschädigungen zu vermeiden. • Verwenden Sie zur Reinigung handelsübliches Reinigungsmittel und eine weiche Bürste. -
Page 11: Fehlerbehebung
FEHLERBEHEBUNG Problem Mögliche Ursache Lösungsansatz Das Gerät läuft nicht. Der Stecker wurde Stecken die den Stecker nicht richtig fest in die Steckdose. eingesteckt. Die Verneblereinheit Bauen Sie die wurde nicht richtig Verneblereinheit eingebaut. korrekt ein. Das Gerät ist Schalten Sie das Gerät ausgeschaltet. -
Page 12: Hinweise Zur Entsorgung
HINWEISE ZUR ENTSORGUNG Wenn es in Ihrem Land eine gesetzliche Regelung zur Entsorgung von elektrischen und elektronischen Geräten gibt, weist dieses Symbol auf dem Produkt oder auf der Verpackung darauf hin, dass dieses Produkt nicht im Hausmüll entsorgt werden darf. Stattdessen muss es zu einer Sammelstelle für das Recycling von elektrischen und elektronischen Geräten gebracht werden. - Page 13 Dear customer, Congratulations on the purchase of your unit. Please read the following instructions carefully and follow them to prevent potential damage. We accept no liability for damage caused by disregarding the instructions and improper use. Please scan the QR code to access the latest operating instructions and further information about the product.
-
Page 14: Safety Instructions
SAFETY INSTRUCTIONS • Check the voltage specification on the type plate before use. Ensure that you only connect the appliance to sockets with the appropriate voltage. • Keep the cable away from hot surfaces and sharp objects. • Do not lay the cable under a carpet or cover it with other objects or fabrics. - Page 15 • During operation, the unit humidifi es the ambient air. However, avoid too high humidity. We recommend a humidity of between 40-50%. Excessive humidity can lead to mould or health problems. • Only place the unit on surfaces that are insensitive to moisture and high humidity.
-
Page 16: Overview And Remote Control
OVERVIEW AND REMOTE CONTROL Cover plate Front plate Side plate Ventilation grille Handle Front wheel Control panel... - Page 17 Rear panel Lock Dust filter Fuel filler cap Cable Ice compartment Water tank Cooling pad...
-
Page 18: Filling
FILLING 1. Open lock 3. Fill water into the tank 4. Add ice or ice pack 2. Pull out the water tank OPERATION ON/OFF button Switches the unit on and off. SPEEDbutton Press this button several times to switch between the 3 speed levels. VANE button Press this button to vary the orientation of the slats. - Page 19 COOL button Switches on the cooling function. The light comes on when the water tank is insufficiently filled. ION button Switches the ionisation function on and off. To remove the filters for cleaning 1. Remove the dust filter. 2. Turn the filter knobs outwards (see illustration on the right). 3.
-
Page 20: Cleaning And Care
CLEANING AND CARE Before cleaning • Switch off the device and unplug the power cord. Always disconnect the mains plug before cleaning to avoid electric shocks or mechanical damage. • Use a commercially available cleaning agent and a soft brush for cleaning. Do not use chemical cleaners for cleaning. -
Page 21: Troubleshooting
TROUBLESHOOTING Problem Possible cause Solution approach The appliance does not The plug has not been Plug the power plug work. inserted correctly. securely into the wall socket. The nebuliser unit Install the nebuliser has not been installed unit correctly. correctly. The unit is switched off. -
Page 22: Disposal Considerations
DISPOSAL CONSIDERATIONS If there is a legal regulation in your country regarding the disposal of electrical and electronic equipment, this symbol on the product or on the packaging indicates that this product must not be disposed of with household waste. Instead, it must be taken to a collection point for the recycling of electrical and electronic equipment. -
Page 23: Datos Técnicos
Estimado cliente: Le felicitamospor la compra de este aparato. Lea atentamente el siguiente manual y siga cuidadosamente las instrucciones de uso con el fin de evitar posibles daños. No aceptamos ninguna responsabilidad por los daños causados por el incumplimiento de las instrucciones y el uso inadecuado. -
Page 24: Indicaciones De Seguridad
INDICACIONES DE SEGURIDAD • Antes de utilizar el aparato, compruebe la tensión en la placa técnica del mismo. Conecte el aparato a tomas de corriente que se adecuen a su tensión. • Mantenga el cable alejado de superficies calientes y objetos afilados. •... - Page 25 • Durante el funcionamiento, el aparato humidifi ca el aire ambiente. Sin embargo, hay que evitar el exceso de humedad. Recomendamos una humedad entre 40-50 %. Un exceso de humedad puede provocar moho o problemas de salud. • Coloque la unidad sólo en superfi cies que no sean sensibles a la humedad. Siempre es posible que se pierdan algunas gotas al instalar o retirar el depósito de agua.
-
Page 26: Visión General Y Control Remoto
VISIÓN GENERAL Y CONTROL REMOTO Carcasa de la cubierta Placa frontal Placa lateral Rejilla de ventilación Rueda delantera Panel de control... - Page 27 Panel trasero Cierre Filtro de polvo Tapa del depósito Cable Hielera Depósito de agua Almohadilla de enfriamiento...
-
Page 28: Llenado
LLENADO 1. Abrir el cierre 3. Llenar de agua el depósito 4. Añadir hielo o una bolsa de hielo 2. Sacar el depósito FUNCIONAMIENTO Tecla ON/OFF Enciender y apagar el aparato Botón de VELOCIDAD Pulse este botón varias veces para cambiar entre los 3 niveles de velocidad. Tecla VANE Pulse este botón para variar la orientación de las lamas. - Page 29 Botón COOL Conecta la función de refrigeración. El piloto se enciende cuando el depósito de agua está insuficientemente lleno. Clave ION Activa y desactiva la función de ionización. Para retirar los filtros para su limpieza 1. Desmonte el filtro del polvo. 2.
-
Page 30: Limpieza Y Cuidado
LIMPIEZA Y CUIDADO Antes de limpiarlo • Apague el aparato y desconecte el cable de alimentación. Desconecte siempre el enchufe antes de la limpieza para evitar descargas eléctricas o daños mecánicos. • Utilice un producto de limpieza comercial y un cepillo suave para la limpieza. -
Page 31: Reparación De Anomalías
REPARACIÓN DE ANOMALÍAS Anomalía Posible causa Propuesta de solución El aparato no funciona. El enchufe no Conecte el enchufe se ha conectado correctamente a la correctamente. toma de corriente. La unidad nebulizadora Instale correctamente no se ha instalado la unidad nebulizadora. correctamente. -
Page 32: Indicaciones Sobre La Retirada Del Dispositivo
INDICACIONES SOBRE LA RETIRADA DEL DISPOSITIVO Si en su país existe una disposición legal relativa a la eliminación de aparatos eléctricos y electrónicos, este símbolo estampado en el producto o en el embalaje advierte de que no debe eliminarse como residuo doméstico. - Page 33 Cher client, chère cliente, Toutes nos félicitations pour l’acquisition de ce nouvel appareil. Lisez attentivement les indications suivantes et suivez-les pour éviter d'éventuels dommages. Nous déclinons toute responsabilité pour les dommages dus au non-respect des consignes et à la mauvaise utilisation de l’appareil.
-
Page 34: Consignes De Sécurité
CONSIGNES DE SÉCURITÉ • Avant utilisation, vérifiez la tension sur la plaque signalétique de l'appareil. Connectez l'appareil uniquement à des prises qui correspondent à sa tension. • Tenez le câble éloigné des surfaces chaudes et des objets pointus. • Ne faites pas passer le cordon sous un tapis et ne le recouvrez pas d'autres objets ou tissus. - Page 35 • L'appareil humidifi e l'air ambiant pendant le fonctionnement. Cependant, évitez une humidité excessive. Nous recommandons une humidité entre 40 et 50 %. Une humidité excessive peut entraîner des problèmes de moisissure ou de santé. • Placez l'appareil uniquement sur des surfaces insensibles à l'eau et à une humidité...
-
Page 36: Vue D'ensemble Et Télécommande
VUE D'ENSEMBLE ET TÉLÉCOMMANDE Panneau de recouvrement Panneau frontal Panneau latéral Grille d'aération Poignée Roue avant Panneau de commande... - Page 37 Panneau arrière Serrure Filtre à poussière Bouchon du réservoir Câble Compartiment à glace Réservoir d'eau Tampon de refroidissement...
-
Page 38: Remplissage
REMPLISSAGE 1. Ouvrir la serrure 3. Remplir le réservoir d'eau 4. Ajoutez de la glace ou une poche de glace 2. Retirer le réservoir d'eau UTILISATION Touche ON/OFF Permet d'allumer et d'éteindre l'appareil . Touche de VITESSE Appuyez plusieurs fois sur cette touche pour passer d'une vitesse à l'autre. Touche AILETTES Appuyez sur cette touche pour modifier l'orientation des lamelles. - Page 39 Touche COOL Permet d'activer la fonction de refroidissement. Le voyant s'allume lorsque le réservoir d'eau n'est pas suffisamment rempli. Touche ION Permet d'activer et de désactiver la fonction d'ionisation. Pour retirer les filtres afin de les nettoyer 1. Retirez le filtre à poussière. 2.
-
Page 40: Nettoyage Et Entretien
NETTOYAGE ET ENTRETIEN Avant le nettoyage • Éteignez l'appareil et débranchez le câble d'alimentation. Débranchez toujours la fiche secteur avant de nettoyer pour éviter les chocs électriques ou les dommages mécaniques. • Utilisez des produits de nettoyage du commerce et une brosse douce pour le nettoyage. -
Page 41: Résolution Des Problèmes
RÉSOLUTION DES PROBLÈMES Problème Cause possible Solution L'appareil ne fonctionne L'appareil n'est pas Branchez bien la fiche pas. branché correctement. dans la prise. L'unité de nébulisation Installez correctement n'a pas été installée l'unité de nébulisation. correctement. L'appareil est éteint. Allumez l'appareil. Le câblage à... -
Page 42: Informations Sur Le Recyclage
INFORMATIONS SUR LE RECYCLAGE Si la mise en rebut des appareils électriques et électroniques est réglementée dans votre pays, ce symbole sur le produit ou sur l'emballage indique qu'il ne doit pas être éliminé avec les ordures ménagères. Vous devez l'acheminer vers un point de collecte pour le recyclage des appareils électriques et électroniques. - Page 43 Gentile cliente, La ringraziamo per aver acquistato l´apparecchio. La preghiamo di leggere attentamente le seguenti istruzioni per l’uso e di seguirle per evitare possibili danni. Non ci assumiamo alcuna responsabilità per danni scaturiti da una mancata osservanza delle avvertenze di sicurezza e da un uso improprio dell´apparecchio.
-
Page 44: Avvertenze Di Sicurezza
AVVERTENZE DI SICUREZZA • Prima dell'utilizzo, controllare la tensione indicata sulla targhetta del dispositivo. Collegarlo solo a prese elettriche con tensione corrispondente a quella del dispositivo. • Tenere il cavo lontano da superfici calde e da oggetti con spigoli vivi. •... - Page 45 • Durante il funzionamento il dispositivo inumidisce l'aria nell'ambiente. Evitare un livello di umidità dell'aria troppo elevato. Consigliamo un'umidità dell'aria tra il 40 e il 50%. Un'umidità dell'aria eccessiva può causare muffa o problemi di salute. • Posizionare il dispositivo solo su superfi ci resistenti al bagnato e all'umidità...
-
Page 46: Panoramica E Telecomando
PANORAMICA E TELECOMANDO Pannello di copertura Pannello frontale Pannello laterale Griglia di ventilazione Impugnatura Ruota anteriore Pannello di controllo... - Page 47 Pannello posteriore Blocco Filtro per la polvere Coperchio serbatoio Cavo Vano per il ghiaccio Serbatoio dell'acqua Siberino...
-
Page 48: Riempimento
RIEMPIMENTO 1. Aprire il blocco. 3. Riempire d'acqua il serbatoio 4. Aggiungere ghiaccio o siberino 2. Estrarre il serbatoio UTILIZZO Tasto ON/OFF Accende e spegne il dispositivo . Tasto SPEED Premere più volte questo pulsante per passare tra i 3 livelli di velocità. Tasto VANE Premere questo tasto per variare l'orientamento delle lamelle. - Page 49 Tasto COOL Attiva la funzione di raffreddamento. La spia si accende quando il serbatoio dell'acqua non è sufficientemente pieno. Tasto ION Attiva e disattiva la funzione di ionizzazione. Rimuovere i filtri per la pulizia 1. Togliere il filtro della polvere. 2.
-
Page 50: Pulizia E Manutenzione
PULIZIA E MANUTENZIONE Prima della pulizia • Spegnere il dispositivo e staccare la spina dalla presa. Scollegare sempre la spina prima della pulizia per evitare scosse elettriche o danni meccanici. • Per la pulizia, usare un normale detergente e una spazzola morbida. Non usare detergenti chimici. -
Page 51: Correzione Degli Errori
CORREZIONE DEGLI ERRORI Problema Possibile causa Soluzione Il dispositivo non La spina non è collegata Inserire correttamente funziona. correttamente. la spina nella presa elettrica. L'unità di Installare nebulizzazione non correttamente l'unità di è stata installata nebulizzazione. correttamente. Il dispositivo è spento. Accendere il dispositivo. -
Page 52: Avviso Di Smaltimento
AVVISO DI SMALTIMENTO Se nel vostro Paese sono vigenti regolamenti legislativi relativi allo smaltimento di dispositivi elettrici ed elettronici, questo simbolo sul prodotto o sull'imballaggio indica che non è consentito smaltire questo prodotto nei rifiuti casalinghi. Il dispositivo deve invece essere portato in un centro di raccolta per il riciclaggio di apparecchi elettrici ed elettronici.
Need help?
Do you have a question about the Baltic Blue and is the answer not in the manual?
Questions and answers