Table of Contents
Advertisement
Quick Links
Advertisement
Table of Contents

Related Manuals for Akuvox X933H


Summary of Contents for Akuvox X933H
- Page 1 Version: 1.0 | Date: Feb.2021 Version: 1.0 | Date: Mar.2022...
- Page 2 About This Manual Thank you for choosing the Akuvox Smart Panel X933H. This manual is intended for the administrators who need to properly configure the smart panel. This manual applies to the 933.30.107.140 version, and it provides all the configurations for the functions and features of the X933H. Please visit the Akuvox official website or consult technical support for any new information or the latest firmware.
- Page 3 Introduction of Icons and Symbols Warning: Always abide by this information in order to prevent the persons from injury. Caution: Always abide by this information in order to prevent the damages to the device. Note: Informative information and advice from the efficient use of the device.
- Page 4 Related Documentation You are advised to refer to the related documents for more technical information via the link below: https://knowledge.akuvox.com...
-
Page 5: Table Of Contents
Table of Contents 1. Product Overview....................1 2. Change Log......................2 3. Model Difference.....................3 4. Introduction to Configuration Menu..............5 5. Access the Device....................6 5.1. Device Start-up Selection................6 5.2. Accessing the Device Setting on the Device...........9 5.2.1. Accessing Device Basic Setting............ 9 5.2.2. - Page 6 7.7.2. Icon Screen Display Configuration for More Page....28 8. Sound and Volume Configuration..............29 8.1. Intercom Volume Setting................. 29 8.2. Screensaver Video Tone Setting.............31 8.3. Doorbell Sound Setting................32 8.4. Alarm Ringtone Setting................32 9. Home Automation....................33 9.1. Scenes......................33 9.2.
- Page 7 11.4. Device Bluetooth Setting............... 47 11.4.1. Device Bluetooth Pairing............47 11.5. Device Wi-Fi Setting................48 11.6. Device Local RTP configuration............48 12. Intercom Call Configuration................50 12.1. IP call & IP Call Configuration............... 50 12.1.1. Make IP Calls................50 12.1.2. IP Call Configuration..............51 12.2.
- Page 8 14.1. Audio Codec Configuration..............69 14.2. Video Codec Configuration..............70 15. Security........................72 15.1. Monitor and Image..................72 15.1.1. Monitor Setting................72 15.1.2. Monitor Windows.................73 15.1.3. Display Monitor................73 15.1.4. Video Image Capturing............... 74 15.2. Alarm and Arming Configuration............74 15.2.1. Configure Alarm and Arming on the Device......75 15.2.2.
- Page 9 16.3. Web Relay Setting................... 87 16.4. Door Unlock Configuration..............88 16.4.1. Door Unlock by DTMF Code............88 16.4.2. Door Unlock via HTTP Command..........88 17. Lift Control......................89 17.1. Configure Lift Control................90 17.2. Configure Lift Control Prompt...............90 18. Firmware Upgrade....................91 19.
- Page 10 25.3. Modify Browser Password..............113 25.4. Modify Device Web Interface Password........... 114 26. System Reboot&Reset..................115 26.1. Reboot....................115 26.1.1. Reboot on the Device..............115 26.1.2. Reboot on the Web Interface........... 116 26.2. Reset....................... 116 27. Abbreviations....................118 28. Contact Us......................120...
-
Page 11: Product Overview
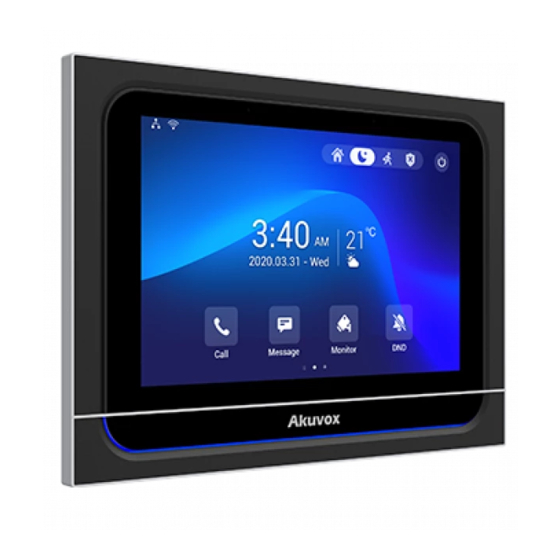
X933H can help you realize whole home automation via Akuvox completed smart home system. You can control anything on the smart panel. X933H are often applied to scenarios such as villas, apartments, and buildings. AKUVOX SMART INTERCOM www.akuvox.com... -
Page 12: Change Log
X933H Administrator Guide 2.Change Log The change log will be updated here along with the changes in the new software version. AKUVOX SMART INTERCOM www.akuvox.com... -
Page 13: Model Difference
X933H Administrator Guide 3.Model Difference Model X933H Feature 4 core A55 Android 9.0 Color Black Display 7 inches IPS LCD Resolution 1280 x 800 Dual microphones, -26dB Wi-Fi IEEE802.11b/g/n, @2.4G Bluetooth Bluetooth 4.2 Speaker Dual speakers, 4Ω / 3W Zigbee Zigbee 3.0... - Page 14 X933H Administrator Guide Operation Humidity -20°C ~ +70°C Dimensions 205x148x27.5(mm) (W x H x D) AKUVOX SMART INTERCOM www.akuvox.com...
-
Page 15: Introduction To Configuration Menu
X933H Administrator Guide 4.Introduction to Configuration Menu Homepage: This section gives you basic information such as product information, Network Information, and account information, etc. Account: This section concerns SIP account, SIP server, proxy server, transport protocol type, audio&video codec, DTMF, session timer, etc. -
Page 16: Access The Device
X933H Administrator Guide 5.Access the Device Akuvox X933H settings can be either accessed on the device directly or on the device web interface. 5.1. Device Start-up Selection When you first start up X933H, you need to perform start-up initialization, which include a series of settings, such as language, time zone, network, adding home automation devices, and running devices and scene test. - Page 17 X933H Administrator Guide AKUVOX SMART INTERCOM www.akuvox.com...
- Page 18 X933H Administrator Guide AKUVOX SMART INTERCOM www.akuvox.com...
-
Page 19: Accessing The Device Setting On The Device
X933H Administrator Guide Note: Please refer to the home automation devices user manual for pairing them with X933H. 5.2. Accessing the Device Setting on the Device 5.2.1.Accessing Device Basic Setting. You can access the device's basic setting and advance setting where you can configure different types of functions as needed. -
Page 20: Accessing Device Advanced Setting
X933H Administrator Guide 5.2.2.Accessing Device Advanced Setting To access the advanced setting, press Setting then press Advanced Settings icon. Press password 123456 to enter the advanced setting. AKUVOX SMART INTERCOM www.akuvox.com... -
Page 21: Access The Device Setting On The Web Interface
X933H Administrator Guide 5.3. Access the Device Setting on the Web Interface You can also enter the device IP address on the web browser in order to log in the device web interface by user name and password admin/admin where you can configure and adjust parameter etc. - Page 22 X933H Administrator Guide AKUVOX SMART INTERCOM www.akuvox.com...
- Page 23 X933H Administrator Guide Note Google Chrome browser is strongly recommended. The initial username and password are “admin” and please be case-sensitive to the user names and passwords entered. AKUVOX SMART INTERCOM www.akuvox.com...
-
Page 24: Language And Time Setting
X933H Administrator Guide 6.Language and Time Setting 6.1. Language Setting When you first set up the device, you might need to set the language to your need or you can do it later if needed. Language setting can be configured on the device that allows you to select or change the language for screen display to your preference. - Page 25 X933H Administrator Guide Time setting on the web Device >Time interface also allows you to set up the NTP server address that you obtained to automatically synchronize your time and date. And when your time zone is selected, the device will automatically notify the NTP server of its time zone so that the NTP server can synchronize the time zone setting in your device.
- Page 26 X933H Administrator Guide Parameter Set-up: Automatic Dates&Time: you can choose automatically gain the time or manually configure the date and time. Time Format: select the time format as you like among the two format options. The two formal options are 24-Hour Format, 12-Hour Format.
- Page 27 X933H Administrator Guide Note: When the Automatic Date&Time toggle switch is toggled off then parameters related to NTP server will become uneditable. And when the switch is toggled on, then time and date will be denied editing. AKUVOX SMART INTERCOM www.akuvox.com...
-
Page 28: Screen Display Configuration
X933H Administrator Guide 7.Screen Display Configuration X933H allows you to enjoy a variety of screen displays to enrich your visual and operational experience through the customized setting to your preference. 7.1. Theme Setting X933H offers you four types of screen display mode for the application scenarios: Intercom Classic Mode, Intercom Call list Mode, Home Automation Mode, and Security Mode. - Page 29 X933H Administrator Guide Security Mode Intercom Classic AKUVOX SMART INTERCOM www.akuvox.com...
- Page 30 X933H Administrator Guide Home Automation Intercom Call List Simple List AKUVOX SMART INTERCOM www.akuvox.com...
-
Page 31: Lcd Screen Brightness Setting
X933H Administrator Guide 7.2. LCD Screen Brightness Setting If you want to brighten up the screen in order to see the screen at greater ease in an environment with higher light intensity, you need to set up the related parameters. You can configure on the device More > Settings >... -
Page 32: Upload Screen Saver
X933H Administrator Guide Parameter Set-up: Sleep Time: set the timing for the device screen to be turned off. You can select the timing among eight options: 15 seconds, 30 seconds, 1 minute, 2 minutes, 5 minutes, 10 minutes, 30 minute. For example, if you set it as 1 minute then the screen will be turned off if there is no operation on the device for 1 minute. -
Page 33: Font Setting
X933H Administrator Guide device web interface Device > Display Setting > Screen Saver Setting. Parameter Set-up: Screen Saver Pictures/Video: choose the picture or video you like from your PC. Each picture size is 2M, JPG/JPEG/PNG. The recommended resolution is 1280x800. The total video size is 500M, video format is mp4/wmv/avi. -
Page 34: Wallpaper Setting
X933H Administrator Guide Parameter Set-up: Font Size: select the font size among four options “Small”, “Normal”,” Large”,” Huge” according to your need. 7.5. Wallpaper Setting You customize the screen background picture according to user preferences. You can choose wallpaper on the device More > Settings > Display. -
Page 35: Upload Wallpaper
X933H Administrator Guide 7.5.1.Upload Wallpaper You can upload and modify the customized wallpaper on the web Device > Display Setting > Wallpaper. Parameter Set-up: Wallpaper: choose the image from your PC for wallpaper. recommended wallpaper image size is 2M, 1280 x 800, jpg/png/jpeg. -
Page 36: Booting Image Setting
JPG, JPEG, PNG format with 2M maximum. 7.7. Icon Screen Display Configuration X933H allows you to customize icon display on the home screen and one more screen for the convenience of your operation on device web interface or on device side. - Page 37 Device: It will show all devices you had added like smart sensor, etc under each room. You can choose the device to the home page. Scene: it will show all scenes created by Akuvox Cloud or the App. You AKUVOX SMART INTERCOM www.akuvox.com...
-
Page 38: Icon Screen Display Configuration For More Page
X933H Administrator Guide can choose the favorite scenes to display in the home page. 7.7.2.Icon Screen Display Configuration for More Page You can configuration the More Page icon display on web Device > Display Setting > More Page Display. Parameter Set-up: ... -
Page 39: Sound And Volume Configuration
X933H Administrator Guide 8.Sound and Volume Configuration X933H provides you with various types of ringtones and volume configuration ranging from Mic volume, Ring volume, Talk volume, Tone volume and Media volume. You can configure them on the device directly or on the web interface. - Page 40 X933H Administrator Guide You can also configure the intercom volume on the device web Device > Audio > Volume Control. Parameter Set-up: Ring Volume: adjust the incoming call ringtone volume. Talk Volume: adjust the speaker volume during the call.
-
Page 41: Screensaver Video Tone Setting
X933H Administrator Guide 8.2. Screensaver Video Tone Setting If you choose the video for screensaver, you can configure the video volume on the device More > Settings > Sound. You can also configure the screensaver video volume on the device web Device >... -
Page 42: Doorbell Sound Setting
X933H Administrator Guide 8.3. Doorbell Sound Setting If you connect a door bell with X933H, you can configure the doorbell sound by yourself on the web Device > Audio > Doorbell Sound Upload. Parameter Set-up: Doorbell Sound Upload: choose the doorbell audio file from your PC. -
Page 43: Home Automation
X933H Administrator Guide 9.Home Automation 9.1. Scenes scene is pre-configured in the cloud platform or Apps and is designed to automatically or manually carry out a specific task based on your configurations that involves scene activation conditions, time settings, task setting. -
Page 44: Device Management
X933H Administrator Guide 9.2. Device Management You can check, add, modify and delete the sub devices on the device More > Home Automation. 9.2.1.Check Device Status You can check the devices status including location, working status, battery power and alarm log on the device More > Home Automation > Devices/All Devices. - Page 45 Parameter Set-up: Device Name: you can click to rename the sub device name which will be display on the X933H. Device Location: you can change the device location if you set it wrong in the beginning. Device Version: display the sub device version.
-
Page 46: Phone Book Configuration
X933H Administrator Guide 10. Phone Book Configuration 10.1.Phone Book Configuration on the Device You can configure the contacts list in terms of adding and modifying contact groups or contacts on the device Contact > Local Contacts directly. 10.1.1. Add contact Parameter Set-up: ... -
Page 47: Edit Contact
X933H Administrator Guide Note: Akuvox devices RTSP URL format is rtsp://device IP/live/ch00_0. if you use the third-party device, please confirm the URL format with their company. 10.1.2. Edit Contact You can check and edit the existed contacts in the phonebook list. Choose one and click Edit key to modify. -
Page 48: Block List Setting On The Device
X933H Administrator Guide 10.1.3. Block List setting on the device Choose which contact on the contact list you want to be added to the blocklist. Note: You can delete contacts regardless of whether it is on the All Contacts screen or the Blocklist screen 10.2.Phone Book Configuration on the Web... -
Page 49: Contact Management
X933H Administrator Guide To conduct contact configuration on web Contacts > Local Contacts > Contacts List Setting interface. Parameter set-up: Name: enter the contact’s name to be saved. Number: enter the contact number (SIP or IP number) to be saved. -
Page 50: Block List Setting On The Web Interface
X933H Administrator Guide web Contacts > Local Contacts > Contacts List Setting interface. You can dial out using the contact phone number on Contacts > Local Contacts > Dial Number interface. 10.2.3. Block List Setting on the Web Interface You can set the blocklist directly in the contact list on the web Contacts >... -
Page 51: Contacts Import And Export On The Web Interface
X933H Administrator Guide Note: If you want to remove the contact from the blocklist on the web interface, you can change the group to the "Default" when editing the contact. 10.2.4. Contacts Import and Export on the Web Interface... - Page 52 X933H Administrator Guide Note: The contact file can only be imported or exported in .xml or .csv format. AKUVOX SMART INTERCOM www.akuvox.com...
-
Page 53: Network Setting & Other Connection
X933H Administrator Guide 11. Network Setting & Other Connection 11.1.Device Network Configuration You can check for the door phone’s network connection info and configure the default DHCP mode (Dynamic Host Configuration Protocol) and static IP connection for the device either on the device or on the device web interface. -
Page 54: Configuring Device Network Connection On The Web Interface
X933H Administrator Guide IP address, subnet mask, default gateway, and DNS server address automatically. Static IP: select the static IP mode by checking off the DHCP check box. When static IP mode is selected, then the IP address, subnet mask, default gateway, and DNS servers address have to be manually configured according to your actual network environment. -
Page 55: Device Deployment In Network
DNS server when the preferred DNS server is unavailable. 11.2.Device Deployment in Network X933H should be deployed before they can be properly configured in the network environment in terms of their location, operation mode, address and extension numbers as opposed to other devices for device control and the convenience of the management. -
Page 56: Device Nat Setting
X933H Administrator Guide Parameter Set-up: Connect Mode: It is automatically set up according to the actual device connection with a specific server in the network such as SDMC or Cloud and None. None is the default factory setting indicating the device is not in any server type, therefore you are allowed to choose Cloud, SDMC in discovery mode. -
Page 57: Device Bluetooth Setting
RPort: check the RPort when the SIP server is in WAN (Wide Area Network). 11.4. Device Bluetooth Setting 11.4.1. Device Bluetooth Pairing After X933H turns on Bluetooth on the device More > Settings > Bluetooth screen, it can be paired with other devices via Bluetooth. AKUVOX SMART INTERCOM www.akuvox.com... -
Page 58: Device Wi-Fi Setting
X933H Administrator Guide Note: After successful Bluetooth pairing, data transmission can be carried out. 11.5.Device Wi-Fi Setting In addition to wired connection, the device also supports Wi-Fi connection. To set the Wi-Fi on device More > Settings > WIFI screen. - Page 59 X933H Administrator Guide exclusive range of data transmission in the network. To set up device local RTP on web Network > Advanced > Local RTP interface. Parameter set-up: Starting RTP Port: enter the Port value in order to establish the start point for the exclusive data transmission range.
-
Page 60: Intercom Call Configuration
X933H Administrator Guide 12. Intercom Call Configuration 12.1.IP call & IP Call Configuration IP calls and SIP calls can be made directly on the intercom device by entering the IP number on the device. And you can also disable the direct IP call if you allow no IP call to be made on the device. -
Page 61: Ip Call Configuration
X933H Administrator Guide 12.1.2. IP Call Configuration To configure the IP call feature and port on the device web Phone > Call Feature > Others interface. Parameter Set-up: AKUVOX SMART INTERCOM www.akuvox.com... -
Page 62: Sip Call &Sip Call Configuration
12.3.SIP Account Registration Akuvox X933H supports two SIP accounts that can all be registered according to your applications. For example, you can switch between the two SIP accounts. The SIP account can be configured on the device and on the device interface. - Page 63 X933H Administrator Guide The parameter settings for SIP account registration can be configured on the Account setting screen and they can also be configured on the device web Account > Basic > SIP Account interface. Parameter setup: Status: check to see if the SIP account is registered or not.
-
Page 64: Sip Server Configuration
X933H Administrator Guide Display Label: configure the device label to be shown on the device screen. Display Name: configure the name, for example, the device’s name to be shown on the device being called to. Register Name: enter the SIP account register Name obtained from the SIP account administrator. -
Page 65: Outbound Proxy Server Configuration
X933H Administrator Guide Parameter Set-up: Server IP/Server Address: enter the Server’s IP address number or its URL. SIP Port/SIP Server Port: set up SIP server port for data transmission. Registration Period: set up SIP account registration time pan. SIP re-registration will start automatically if the account registration fails during the registration time span. -
Page 66: Sip Call Dnd & Return Code Configuration
X933H Administrator Guide Alternate Outbound Proxy Server: set up Backup Server IP for the backup outbound proxy server. Alternate Outbound Proxy Port: enter the Port number for establish call session via the backup outbound proxy server. 12.6.SIP Call DND & Return Code Configuration DND (Do not disturb) setting allows you not to be disturbed by any unwanted incoming SIP calls. -
Page 67: Data Transmission Type Configuration
X933H Administrator Guide Parameter Set-up: DND: check Whole Day or Schedule to enable the DND function. DND function is disabled by default. Return Code When DND: select what code should be sent to the calling device via SIP server. 404 for “Not found”; 480 for “Temporary unavailable”;... -
Page 68: Call Setting
X933H Administrator Guide 12.8.Call Setting X933H will auto answer all incoming calls if call auto-answer is enabled and receive live stream if live stream is enabled. 12.8.1. Call Auto-answer Configuration X933H will auto answer all incoming calls if call auto-answer is enabled and receive live stream if live stream is enabled. -
Page 69: Auto-Answer Allow List Setting
Device > Call Feature > Auto Answer AllowList interface. SIP/IP numbers can be imported to or exported out of X933H in batch on web Device > Call Feature > Whitelist Import/Export interface. -
Page 70: Live Stream Setting
X933H will not be sent to the calling devices in order to protect your privacy. To do the configuration on web Device > Call Feature >Audio Call Settings interface. -
Page 71: Intercom Call Configuration (Intercom Preview, Mute)
X933H Administrator Guide 12.9. Intercom Call Configuration (intercom preview, mute) If you want to see the image at the door station before answering the incoming call, you can enable the intercom preview function on web Device > Intercom > Intercom interface. -
Page 72: Multicast Configuration
Call Number: To setup 3 SOS numbers. Once users press SOS key on the home page (SOS display key shall be set on the web manually) or emergency button, X933H will call out the number in order. Call Timeout: Setup the timeout for each number. Once users call out, if the other side will not answer within the timeout, smart panel will continue to call the next number. -
Page 73: Call Forwarding Setting
X933H Administrator Guide Parameter Set-up: Enabled: to set the indoor monitor in one of the groups or disable this function. Multicast Address: to fill in the parameters of multicast group. Indoor monitor will establish multicast calls to other indoor monitors which are set in multicast group. - Page 74 X933H Administrator Guide You can also set up forward function on web Device > Call Feature > Call Forward interface. Parameter Set-up: Always Transfer: To enable always forwarding function; all incoming calls will be automatically forward to a specific number.
- Page 75 X933H Administrator Guide Target/Designated Call Forward Number: To enter the specific forwarding number if X933H enables always forwarding / call forwarding busy / no answer forwarding. No Answer Ring/No Answer Call Transfer Duration(Sec):to set the no answer time interval from 0-120 seconds before the call is transferred to a designated number.
-
Page 76: Intercom Message Setting
Message function do not show by default, you need to enable and display this function on the web Device > Display Setting > More Page Display. 13.2.Manage Messages You can check, create and clear messages as needed on the X933H Message screen. AKUVOX SMART INTERCOM www.akuvox.com... -
Page 77: Configure Voice Message (Mwi)
Parameter Set-up: Notification: the message from property manager, this feature is only available when using Akuvox Cloud. Text MSG: to send or receive or manage the text message here. Owner MSG: if you enable this feature, and nobody answer the incoming call within the pre-configure ring time, the visitor will hear the owner audio message. - Page 78 X933H Administrator Guide Parameter Set-up: MWI Subscribe: Tick the check box to enable MWI function. Voice Mail Number : Enter the voice mail number for accessing your voice mail messages. MWI Subscribe Period : Set up interval between the MWI Subscribe ...
-
Page 79: Audio& Video Codec Configuration For Sip Calls
SIP Calls 14.1.Audio Codec Configuration X933H supports seven types of Codec (iLBC_13_3, iLBC_15_2, L16, PCMU, PCMA, G729, G722 for encoding and decoding the audio data during the call session. Each type of codec varies in terms of sound quality. You can select the specific codec with different bandwidth and sample rate flexibly according to the actual network environment. -
Page 80: Video Codec Configuration
14.2.Video Codec Configuration X933H supports VP8, H263, H264, H265 codec that provides a better video quality at a much lower bit rate with different video quality and payload. To do the configuration on web Account > Advanced > Video Codecs interface. - Page 81 X933H Administrator Guide Parameter Set-up: Name: Check to select the H264 video codec format for the door phone video stream. H264 is the video codec by default. Resolution: select the code resolution for the video quality among four options: ”QCIF”, “CIF”, “VGA”, “4CIF”...
-
Page 82: Security
You can configure the monitor setting on the web Device > Monitor interface. Enter IP/SIP number of door phone in Device number and fill in device name. Then set up the RTSP address. The RTSP format of the Akuvox door phone is rtsp://deviceIP/live/ch00_0. Enable or disable display in the call. If enabled, when there is an incoming call from the monitor, the video will be displayed. -
Page 83: Monitor Windows
X933H Administrator Guide 15.1.2. Monitor Windows You can configure how many monitor windows shows in the X933H screen on the web Device > Monitor > Monitor Setting. Parameter Set-up: Monitor Display : there are two options -Multiple Window and Single Window. -
Page 84: Video Image Capturing
For example, connecting a gas sensor in your kitchen to detect if the gas leak, X933H will ring up and send the alarm message to the target, like community property. -
Page 85: Configure Alarm And Arming On The Device
X933H Administrator Guide 15.2.1. Configure Alarm and Arming on the Device In the arming state, if you want to clear the alarm triggered by sensor-enabled emergencies or to switch arming status like changing from Away to Home , you need to disarm the arming state by entering the disarm code, which is 123456 by default. -
Page 86: Configure Alarm And Arming On The Web Interface
X933H Administrator Guide 15.2.2. Configure Alarm and Arming on the Web Interface To set up a location-based alarm sensor on the device web Arming > Zone Setting > Zone Setting interface. Parameter Set-up: Location: set up the location according to where the alarm sensor is installed. -
Page 87: Configure Location-Based Alarm
X933H Administrator Guide Zone Type: set up the alarm sensor types. You can select among six sensor types: Gas Sensor, Door/Window Sensor, Emergency Button、 Motion Sensor, Smoke Sensor, Flood Sensor. Trigger Mode: set sensor trigger mode between “NC” and “NO” according to your need. -
Page 88: Configure Alarm Text
X933H Administrator Guide Parameters Set-up: Any Device Activated: To select which type of detection device is, including CO Sensor, Gas Sensor, Door/Window Sensor, Emergency Button, Motion Sensor, Smoke Sensor, Flood Sensor, etc. Alarm Siren: switch on or off the alarm siren according to your need. -
Page 89: Configure Arming Mode
X933H Administrator Guide 15.2.5. Configure Arming mode To switch arming mode on Arming screen by pressing their respective icons. Press Disarmed icon if you want to cancel the Arming Mode. AKUVOX SMART INTERCOM www.akuvox.com... -
Page 90: Alarm Action Configuration
X933H Administrator Guide 15.2.6. Alarm Action Configuration The triggering of the alarm sensor can be accompanied by the actions you configured in forms of HTTP command, SIP Message, Local Relay for different security purposes. 15.2.6.1. Select Alarm Action Types To select and set up actions on web Arming > Alarm Action > Alarm Action interface. -
Page 91: Configure Alarm Action Via Sip Message
X933H Administrator Guide 15.2.6.3. Configure Alarm Action via SIP Message To set up the SIP message action receiver on the same web interface. Enter the SIP account to which you want to send the configured SIP message as an action when the alarm is triggered. -
Page 92: Check Alarm Log
X933H Administrator Guide 15.2.7. Check Alarm Log To check alarm log on device Settings > Arming Log screen. 15.3.Screen Unlock Setting You can enable Screen Lock function directly on the device Settings > Display Setting screen. The device screen will be locked over the sleep time. -
Page 93: Screen Unlock By Pin Code
X933H Administrator Guide 15.3.1. Screen Unlock by PIN code You can unlock X933H screen by entering the pre-configured PIN code when the screen is locked. AKUVOX SMART INTERCOM www.akuvox.com... -
Page 94: Voice Encryption
X933H Administrator Guide Note: Default unlock PIN is 123456. 15.4.Voice Encryption The encryption function provides you with greater security for the intercom call. X933H supports three modes voice encryption: SRTP(compulsory), SRTP(Optional), ZRTP(Optional) on web Account > Advanced > Encryption interface. -
Page 95: Remote Control
SRTP session key. 15.5.Remote Control Remote control function supports configuring a specific server to send HTTP commands or request to X933H to do some specific action on web Device > Relay > Remote Control interface. AKUVOX SMART INTERCOM www.akuvox.com... -
Page 96: Door Access Control Configuration
16.1.Relay Switch Setting 16.1.1. Local Relay Setting Local relays in X933H can be used to trigger relay for the door access and trigger Chime bell as needed in different scenarios. You can do this configuration on web Device > Relay > Relay Setting > Local Relay interface. -
Page 97: Dtmf Type Setting
DTMF Payload: select the payload 96-127 for data transmission identification. 16.3.Web Relay Setting In addition to the relay that is connected to X933H, you can also control the door access using the network-based web relay. To do this configuration on web Device > Relay > Web Relay interface. -
Page 98: Door Unlock Configuration
X933H Administrator Guide Parameter Set-up: IP address: enter the web relay IP address. User Name: enter the User name provided by the web relay manufacturer. Password: enter the password provided by the web relay manufacturer. The password is authenticated via HTTP and you can define the passwords using “http get”... -
Page 99: Lift Control
X933H Administrator Guide You can unlock the door remotely without approaching the device physically for the door access by typing the created the HTTP command (URL) on the web browser to trigger the relay when you are not available by the door for the door access. -
Page 100: Configure Lift Control
X933H Administrator Guide 17.1.Configure Lift Control To enable and set the display status Lift icon on device web Device > Lift> Lift Control interface. Parameter set-up: Status: click to enable or disable the lift button. Icon: click to select icon for the button. -
Page 101: Firmware Upgrade
X933H Administrator Guide 18. Firmware Upgrade Firmwares of different versions for smart panel can be upgraded on the device web Upgrade > Basic interface. AKUVOX SMART INTERCOM www.akuvox.com... -
Page 102: Backup
X933H Administrator Guide Note: Firmware files should be .zip format for upgrade. 19. Backup Configuration files can be imported to or exported out of the device to your local PC on the device web Upgrade > Advanced > Others interface if needed. -
Page 103: Auto-Provisioning
X933H Administrator Guide 20. Auto-provisioning 20.1.Provisioning Principle AKUVOX SMART INTERCOM www.akuvox.com... -
Page 104: Introduction To The Configuration Files For Auto-Provisioning
Auto-provisioning is a feature used to configure or upgrade the devices in batch via third party servers. DHCP, PNP, TFTP, FTP, HTTPS are the protocols used by the Akuvox intercom devices to access the URL of the address of the third-party server which stores configuration files and firmwares, which will then be used to update the firmware and the corresponding parameters on the door phone. -
Page 105: Autop Schedule
MAC-based configuration files. 20.3.AutoP Schedule Akuvox provides you with different AutoP methods that enable the smart panel to perform provisioning for itself in a specific time according to your schedule. To set up the schedule on device web Upgrade > Advanced >... -
Page 106: Pnp Provisioning Configuration
X933H Administrator Guide Parameter Set-up: Power On: select “Power on”, if you want the device to perform AutoP every time it boots up. Repeatedly: select “Repeatedly”, if you want the device to perform AutoP according to the schedule you set up. - Page 107 X933H Administrator Guide you want to use Custom Option as defined by users with option code range from 128-255), you are required to configure DHCP Custom Option on the web Upgrade > Advanced > Automatic AutoP interface. Note: The custom Option type must be a string. The value is the URL of TFTP server.
-
Page 108: Static Provisioning Configuration
X933H Administrator Guide Parameter Set-up: Custom Option: enter the DHCP code that matched with corresponding URL so that device will find the configuration file server for the configuration or upgrading. DHCP Option 66: If none of the above is set, the device will automatically use DHCP Option 66 for getting the upgrade server URL. - Page 109 X933H Administrator Guide auto provisioning on a specific timing according to AutoP schedule you set up. In addition, TFTP, FTP, HTTP, and HTTPS are the protocols that can be used for upgrading the device firmware and configuration. Parameter set-up: URL: set up tftp,http,https,ftp server address for the provisioning ...
-
Page 110: Voice Assistant
(use other ports, such as 8080) HTTPS: https://192.168.0.19/ (use the default port 443) Tip: Akuvox do not provide user specified server. Please prepare TFTP/FTP/HTTP/HTTPS server by yourself. 21. Voice Assistant You can configure voice assistant named "Albert" to perform a variety of functions related to intercom call, open-door, arming modes etc. - Page 111 X933H Administrator Guide Parameter Set-up Language Type: select the language according to your need. Recognition Sensitivity: adjust the voice assistance recognition sensitivity among "Low", " Normal" and " High" according to your need. Talk Mode: move the toggle switch to the right if you want to enable the talk mode.
- Page 112 X933H Administrator Guide required enter disarm password in the pop-out window initiated by the voice assistant) Clear ibid ibid arming night mode Use it when you want to Started sweet change the arming mode dreams! to night mode Made it, good night ...
- Page 113 X933H Administrator Guide open door Use it when you want to Sure, the door is open open the door The door is open for No problem, open the door Opened, always here for you Yep, door is opened now...
- Page 114 X933H Administrator Guide emergency right now Take it easy, calling emergency right now 12 help me ibid ibid 13 call use it when you want to Please choose one for manager call "manager" calling name sorry I didn't get that ...
-
Page 115: Call Log
X933H Administrator Guide to hear you. Yes, closed it for you 22 shut Use it when you want to See you down/canc turn off the voice assistant See you later function Good bye See you next time ... - Page 116 X933H Administrator Guide You can also check call logs on the device web Contact > Call Logs interface and export the call log from the device if needed. Parameter Set-up: Capture Delay: set the image capturing starting time when the device goes into video preview.
-
Page 117: Debug
X933H Administrator Guide Call History: select call history among four options: “All”, “Dialed”, “Received”, “Missed” for the specific type of call log to be displayed. 23. Debug AKUVOX SMART INTERCOM www.akuvox.com... -
Page 118: System Log For Debugging
23.2. PCAP for Debugging PCAP in Akuvox smart panel is used to capture the data package going in and out of the devices for debugging and troubleshooting purpose. You can set up the PCAP on the device web Upgrade > Advanced > PCAP interface properly before using it. -
Page 119: User Agent
X933H Administrator Guide Parameter set-up: Specific Port: select the specific ports from 1-65535 so that only the dat a packet from the specific port can be captured. You can leave the field bl ank by default. PCAP: click”Start” tab and ”Stop” tab to capture a certain range of data p ackets before clicking Export tab to export the data packets to your Local ... -
Page 120: Enter Applications Screen
X933H Administrator Guide 24.1.Enter Applications Screen The content of this part mainly teaches you how to enter the APK interface through hidden operations. To do the configuration on device More > Settings > System Info interface. you can press on User Mode for 10 times and press “Admin Mode”... -
Page 121: Password Modification
X933H Administrator Guide To configure the installed the third-party app, you can click App Name field to select the specific name of the installed APK files for configuration. Then tick the check boxes of each field for specific configuration you need. -
Page 122: Modify Device Basic Setting Password
X933H Administrator Guide 25.1.Modify Device Basic Setting Password To do the configuration on device More > Settings > Advanced Settings > Protecte Code screen to choose System Code to change a new password. The default password is 123456. 25.2.Modify Device Advanced Setting Password This password is used to enter the advanced settings of the device, including password settings, account numbers, SOS numbers, network settings, etc. -
Page 123: Modify Browser Password
X933H Administrator Guide 25.3.Modify Browser Password This password is used to open browser. To modify the password on device More > Settings > Advanced Settings > Protect Code > Browser Code screen. The default password is null. AKUVOX SMART INTERCOM www.akuvox.com... -
Page 124: Modify Device Web Interface Password
X933H Administrator Guide 25.4.Modify Device Web Interface Password To modify web interface password, you can do it on device web Security > Basic > Web Password Modify interface. Select "Admin" for the administrator account and " User" for the User Account. Click the Change Password tab to change the password. -
Page 125: System Reboot&Reset
X933H Administrator Guide 26. System Reboot&Reset 26.1.Reboot 26.1.1. Reboot on the Device If you want to restart the system setting of the device, you can operate it directly on the device setting screen or on the device web interface. To restart to the system setting on device More >... -
Page 126: Reboot On The Web Interface
X933H Administrator Guide 26.1.2. Reboot on the Web Interface If you want to restart the device system, you can operate it on the device web Upgrade > Basic interface as well. Moreover, you can set up schedule for the device to be restarted. - Page 127 X933H Administrator Guide Device system can also be reset on device web Upgrade > Basic interface without approaching the device. Parameter Set-up: Reset Intercom Settings: reset all intercom feature configurations. Restore Factory Settings: reset all data completely. Clear User Data: reset screensaver/logo/capture/wallpaper images, screensaver/record videos, uploaded audio files, audio/text messages, call/alarm logs.
-
Page 128: Abbreviations
X933H Administrator Guide 27. Abbreviations ACS: Auto Configuration Server Auto: Automatically AEC: Configurable Acoustic and Line Echo Cancelers ACD: Automatic Call Distribution AutoP: Automatically Provisioning AES: Advanced Encryption Standard BLF: Busy Lamp Field COM: Common CPE: Customer Premise Equipment CWMP: CPE WAN Management Protocol... - Page 129 X933H Administrator Guide PCMA: Pulse Code Modulation A-Law PCMU: Pulse Code Modulation µ-Law PCAP: Packet Capture PNP: Plug and Play RFID: Radio Frequency Identification RTP: Real-time Transport Protocol RTSP: Real Time Streaming Protocol MPEG: Moving Picture Experts Group MWI: Message Waiting Indicator...
-
Page 130: Contact Us
X933H Administrator Guide 28. Contact Us For more information about the product, please visit us at www.akuvox.com or feel free to contact us by Sales email: sales@akuvox.com Technical support email: support@akuvox.com Telephone: +86-592-2133061 ext.7694/8162 We highly appreciate your feedback about our products.
Need help?
Do you have a question about the X933H and is the answer not in the manual?
Questions and answers