Table of Contents

Subscribe to Our Youtube Channel
Summary of Contents for Oxford Instruments Mercury iTC
- Page 1 Handbook Oxford Instruments NanoScience Mercury iTC cryogenic environment controller Issue 01 November 2011 Original Instructions www.oxford-instruments.com ©2011. Oxford Instruments Nanotechnology Tools Limited. All rights reserved.
- Page 2 Handbook Mercury iTC This page is intentionally blank. November 2011 59-UMC0071 Issue 01 Page 2 Original Instructions...
-
Page 3: Table Of Contents
Use of this manual ..........................9 Customer support..........................9 Health and safety information ......................10 Intended users ........................... 10 Statement of intended use of the Mercury iTC ................10 Typographical conventions ......................11 Disclaimers............................11 Copyright notice ..........................11 Acknowledgements ........................... 12 Acronyms, abbreviations and special terms................... - Page 4 4.2.4.1 Connecting thermocouples ..................61 4.2.5 Communications interfaces .................... 61 4.2.5.1 Serial RS232 interface ....................62 4.2.5.2 Oxford Instruments NanoScience ISOBUS ............... 63 4.2.5.3 USB interface......................63 4.2.5.4 Ethernet interface ....................... 63 Daughter boards ....................... 63 4.3.1 Expansion slots ......................64 4.3.2...
- Page 5 Handbook Mercury iTC 4.6.1 Temperature measurement circuit ................. 69 4.6.1.1 Description of voltage measurement mode..............69 4.6.1.2 Description of constant current measurement mode..........70 4.6.1.3 Description of constant voltage measurement mode ..........71 4.6.1.4 Calibrating the temperature measurement circuit ............. 73 4.6.2...
- Page 6 Handbook Mercury iTC 6.4.3 To exit the plot ........................ 90 Configuring external interfaces ..................90 6.5.1 Configuring the ethernet interface (if required) ............... 90 6.5.2 Configuring the RS232 serial interface (if required) ............91 6.5.3 Configuring the GPIB (if required) .................. 91 6.5.4...
- Page 7 Handbook Mercury iTC 10.1 Nomenclature used in this section ................105 10.2 SCPI and legacy command sets ..................105 10.3 SCPI command messages ..................... 105 10.3.1 SCPI protocol conventions ................... 105 10.3.2 Command structure ..................... 106 10.3.3 Verbs ..........................106 10.3.4...
- Page 8 Handbook Mercury iTC 14.2 Installing a heater board ....................129 14.2.1 Fitting the board ......................129 14.2.2 Connecting the heater ....................130 14.2.3 Configuring the heater board ..................130 14.2.4 Configuring the control loop..................130 AUXILIARY I/O DAUGHTER BOARD ................131 15.1...
-
Page 9: Preface
Mercury iTC PREFACE Welcome to the Operator’s Handbook for the Oxford Instruments NanoScience Mercury iTC cryogenic environment controller unit. The Mercury iTC is a high performance laboratory temperature controller, with a number of features specifically intended for use in cryogenic applications. -
Page 10: Health And Safety Information
The Mercury iTC is intended to be installed, used and operated only for the purpose for which the Mercury iTC was designed, and only in accordance with the instructions given in this manual and other accompanying documents. -
Page 11: Typographical Conventions
Although every effort has been made to ensure that the information in this manual is accurate and up to date, errors may occur. Oxford Instruments NanoScience shall have no liability arising from the use of or reliance by any party on the contents of this manual and, to the fullest extent permitted by law, excludes all liability for loss or damages howsoever caused. -
Page 12: Acknowledgements
Revision history This is issue of the Mercury iTC Handbook, as shown in the footer at the bottom of each page. The changes made to this document and a summary of previous issues are listed in the table below. Always use the latest issue of the manual. -
Page 13: Certification Compliance Statements
Handbook PREFACE Mercury iTC Certification compliance statements The Mercury iTC cryogenic environment controller complies with the following standards and certifications: EN61010.1: Safety requirements for electrical equipment for measurement, control and laboratory use. EN61326: Electrical equipment for measurement, control and laboratory use: EMC ... - Page 14 Handbook PREFACE Mercury iTC This page is intentionally blank. November 2011 59-UMC0071 Issue 01 Page 14 Original Instructions...
-
Page 15: Health And Safety
Mercury iTC HEALTH AND SAFETY This chapter describes all health and safety considerations relating to the Oxford Instruments NanoScience Mercury iTC cryogenic environment controller. The following safety precautions must be observed during the operation, service and repair of this instrument. -
Page 16: Maintenance And Adjustment
Handbook HEALTH AND SAFETY Mercury iTC 1.1.3 Maintenance and adjustment Only qualified and authorised persons must service or repair this equipment. Under no circumstances must the user adjust or repair this equipment while the electrical power supply is connected. Ensure that the equipment is disconnected from the AC electrical power supply before the covers are removed or fuses are removed or fitted. -
Page 17: Cooling Caution
Handbook HEALTH AND SAFETY Mercury iTC 1.2.2 Cooling caution Internal components in this equipment are air-cooled. Ensure that the side and rear ventilation spaces are not obstructed. EQUIPMENT VENTILATION If the Mercury unit is to be rack mounted, to ensure an adequate airflow around the unit it is important that the back of the rack is open and the rack is not placed less than 30 cm from a back wall. - Page 18 Handbook HEALTH AND SAFETY Mercury iTC This page is intentionally blank. November 2011 59-UMC0071 Issue 01 Page 18 Original Instructions...
-
Page 19: Overview Of The Itc
Handbook OVERVIEW OF THE iTC Mercury iTC OVERVIEW OF THE ITC The Integrated Temperature Controller (iTC) is a high-performance laboratory temperature-controller designed for use in cryogenic applications. The unit accommodates up to eight optional daughter boards to allow additional features to be added. -
Page 20: System Description
Handbook OVERVIEW OF THE iTC Mercury iTC System description Figure 2-1 is a block diagram of the iTC. Figure 2-1 Block diagram of the iTC November 2011 59-UMC0071 Issue 01 Page 20 Original Instructions... -
Page 21: Temperature Sensor Circuits
Handbook OVERVIEW OF THE iTC Mercury iTC 2.1.1 Temperature sensor circuits The iTC can interface with a wide variety of temperature sensors. A high-accuracy measurement circuit amplifies, scales and filters the voltage produced by the sensor. This conditioned voltage is then passed to a 24-bit analogue to digital converter (ADC). -
Page 22: Electrical Power Supply
Handbook OVERVIEW OF THE iTC Mercury iTC 2.1.6 Electrical power supply The iTC automatically configures itself to match the supplied electrical power, as long as the voltage and frequency are within the specified ranges. No user intervention is required. The iTC powers all sensors, heaters, and stepper motors that are connected to it. -
Page 23: User Interface
Handbook USER INTERFACE Mercury iTC USER INTERFACE The iTC is controlled from the front panel (see Figure 3-1). Figure 3-1 iTC front panel Front and rear panel controls The <On/Off> button on the front panel switches the unit into STANDBY mode. When the switch is OFF, electrical power is still supplied to the switch-mode power-supply inside the unit. -
Page 24: Scrolling
Handbook USER INTERFACE Mercury iTC Tap once, anywhere in the field, to display the drop-down menu. It is not necessary to tap the arrow. If necessary drag the scroll bar up or down to reveal more menu items. Tap the desired menu item to select it. The menu item is highlighted. -
Page 25: Soft Keypads
Handbook USER INTERFACE Mercury iTC 3.2.1.4 Soft keypads Certain fields in the GUI require the user to enter alpha-numeric characters. Tap the field to display a keypad. There are two types of keypad that may be displayed. If a field requires numeric data... - Page 26 Handbook USER INTERFACE Mercury iTC If a field requires alpha-numeric data, an alpha-numeric keypad is displayed (see Figure 3-6). Figure 3-6 Alpha-numeric keypad The keypad has a field in the top-right corner that displays the text that has been entered so far.
-
Page 27: Using Arrows To Adjust Integer Values
Handbook USER INTERFACE Mercury iTC 3.2.1.5 Using arrows to adjust integer values Some numeric fields use up and down arrows to adjust their value. Figure 3-7 A numeric field with up and down arrows Tap once to decrease the displayed value. -
Page 28: Common Screen Features
Handbook USER INTERFACE Mercury iTC 3.2.2 Common screen features The following features appear on several pages of the GUI. To avoid repetition, these features are described once in this section. 3.2.2.1 Home and Apply buttons Figure 3-9 Home and Apply buttons Home ... -
Page 29: Channel Summary Panel
Handbook USER INTERFACE Mercury iTC 3.2.3.1 Channel summary panel Figure 3-11 shows a typical channel-summary panel on the Home page. Figure 3-11 Channel-summary panel The channel-summary panel displays the following information: Channel identifier or nickname. The main display value for the channel (e.g. measured temperature). -
Page 30: Channel Display Configuration Page
Handbook USER INTERFACE Mercury iTC 3.2.4 Channel display configuration page This page allows the user to configure inputs and outputs associated with a panel on the Home page. Figure 3-12 shows the page when the panel is unconfigured. Figure 3-12... -
Page 31: Device Pair Configuration Page
Handbook USER INTERFACE Mercury iTC 3.2.5 Device pair configuration page This page allows the user to pair a temperature sensor with a heater or gas flow controller in a control loop. For example, a temperature sensor can be paired with a heater. -
Page 32: Sensor Details
Handbook USER INTERFACE Mercury iTC 3.2.6 Sensor details pages There are several alternative sensor details pages. The page that displays depends on which Channel Summary panel was selected. 3.2.6.1 Temperature Sensor Details page This page displays detailed information about the selected temperature sensor. -
Page 33: Generic Sensor Adjustment Page
Handbook USER INTERFACE Mercury iTC Excitation Magnitude Tap once to display a numeric keypad. If Sensor Type is set to PTC, enter an excitation current in μ If Sensor Type is set to Diode, enter an excitation current in μ... -
Page 34: Level Meter Sensor Details Page
Handbook USER INTERFACE Mercury iTC The following expression explains the effect of scale and offset: Scaled Parameter= (Measured Parameter * Scale) + Offset 3.2.6.3 Level Meter Sensor Details page This page displays detailed information about the selected level sensor. There are two tabs. Select either the Helium tab (see... - Page 35 Handbook USER INTERFACE Mercury iTC Nitrogen tab Figure 3-17 Level Meter Sensor Details page - Nitrogen tab The page contains the following fields and controls: Frequency at 0% (Hz) Enter the frequency of the sensor when the level is 0%.
-
Page 36: Plot Configuration Page
Handbook USER INTERFACE Mercury iTC 3.2.7 Plot Configuration page The Plot Configuration page allows the user to select one or more signals to be plotted against time. To access the page: If no plots have been configured, tap the Plot button on the Home page. -
Page 37: Plot Page
Handbook USER INTERFACE Mercury iTC 3.2.8 Plot page Figure 3-19 Typical Signal Monitor Plot page The Plot page can display up to six different values plotted against time. If a plot has been configured, the trace updates in real time. -
Page 38: Control Loop Configuration Page
Handbook USER INTERFACE Mercury iTC Figure 3-20 illustrates how to adjust the scaling of a plot. Figure 3-20 Scaling a plot 3.2.9 Control Loop Configuration page This page allows the user to configure a control loop. A control loop uses a temperature sensor to measure the sample temperature, and an associated heater or gas controller to control the sample temperature. - Page 39 Handbook USER INTERFACE Mercury iTC The page contains the following fields and controls: Sensor Select a sensor from a drop-down menu. Selecting a sensor enables other controls on the page. Figure 3-22 Control Loop Configuration page with a sensor selected Heat (%) ...
-
Page 40: Gas Flow Configuration Page
Handbook USER INTERFACE Mercury iTC Gas Cfg Tap once to access the Gas Flow Configuration page (see Section 3.2.10). PID Table Tap once to access the PID Table Editor page (see Section 3.2.11). This button is only active if PID is set to Auto. -
Page 41: Pid Table Editor Page
Handbook USER INTERFACE Mercury iTC Valve Gearing Enter a value between 0 and 7 to adjust the relationship between stepper-motor movement and valve movement. If the entered value is x, the number of stepper- motor steps that correspond to a valve movement from fully-closed to fully-open is For example, to set 2 steps for 0 to 100% valve opening, enter a value of 0, i.e. - Page 42 Handbook USER INTERFACE Mercury iTC The page displays a PID table. If the table is empty, only the first cell is displayed (see Figure 3-24). If the table contains data, one or more rows of values are displayed (see Figure 3-25).
-
Page 43: General Settings Tab
Handbook USER INTERFACE Mercury iTC 3.2.12 General Settings tab Figure 3-26 General Settings tab The page contains the following fields and controls: Home Screen Revert Option If Home Screen Revert mode is set On, the interface reverts to the Home page after a wait period, if no user activity is detected. -
Page 44: Display Settings Tab
Handbook USER INTERFACE Mercury iTC 3.2.12.1 Display Settings tab The page contains the following fields and controls: Auto Dim Option When User is displayed, the auto-dim feature is turned off. When Sensor is Section 4.1.1). displayed, the auto-dim feature is active (see Timeout value (sec) ... -
Page 45: Card Settings Tab
Handbook USER INTERFACE Mercury iTC 3.2.12.2 Card settings tab Each row of this table corresponds to an expansion slot in the iTC. The table lists which boards are fitted in which slot. The columns show: Row number The number of the slot. -
Page 46: Rs232 Settings Tab
Handbook USER INTERFACE Mercury iTC 3.2.12.3 RS232 Settings tab The page contains the following fields and controls: Baud Select a baud rate for the RS232 interface from the drop-down menu. Data Select the number of data bits for the RS232 interface from the drop-down menu. -
Page 47: Ethernet Settings Tab
Handbook USER INTERFACE Mercury iTC 3.2.12.4 Ethernet Settings tab The page contains the following fields and controls: IP Address If DCHP is set Off, enter the ip address that has been assigned to the iTC ethernet connection. Subnet ... -
Page 48: Isobus Settings Tab
Handbook USER INTERFACE Mercury iTC 3.2.12.5 ISOBus Settings tab The page contains the following fields and controls: ISOBus Address Select an ISOBUS address for this instrument from the drop-down menu. The page contains the following buttons: Alarm Tap once to access the Alarm Logs page (see Section 3.2.13). -
Page 49: Clock Settings Tab
Handbook USER INTERFACE Mercury iTC 3.2.12.7 Clock Settings tab The page contains the following fields and controls: Date time Displays the date and time that are currently set in the iTC. Parameter Select a date or time parameter to be changed (e.g. Hour). -
Page 50: Cal Update Settings Tab
Handbook USER INTERFACE Mercury iTC 3.2.12.8 Cal Update settings tab This page allows the user to load calibration files into the controller from a USB memory stick. The page contains the following fields: Select Calibration Type Select the type of calibration file to be loaded. -
Page 51: F/W Update Settings Tab
Handbook USER INTERFACE Mercury iTC 3.2.12.9 F/W Update settings tab The page allows the user to update the firmware on a daughter board. The new firmware must be located on a USB memory stick. The page contains the following fields and controls: Firmware Device ... -
Page 52: 3.2.12.10 Engmode Tab
Handbook USER INTERFACE Mercury iTC 3.2.12.10 EngMode tab This page allows the user to enter ENGINEERING mode, to access features that are not available to normal users. The default engineering password is abc123. The user can change this password, if required. -
Page 53: 3.2.12.11 Factory Settings Tab
Handbook USER INTERFACE Mercury iTC 3.2.12.11 Factory Settings tab The page contains the following fields and controls: Revert to factory defaults Tap Save to save the present configuration as a restore point. This allows the present configuration to be restored at some future date. Each restore point is identified by an integer. -
Page 54: Alarm Logs Page
Handbook USER INTERFACE Mercury iTC 3.2.13 Alarm Logs page This page displays a table of alarms that have been generated on the system. Figure 3-27 Alarm Logs page This table has the following columns: Date/Time The date and time when the alarm was raised. -
Page 55: Heater Configuration Page
Handbook USER INTERFACE Mercury iTC 3.2.14 Heater configuration page Figure 3-28 Heater configuration page This page displays a set of values for each heater that is configured. The following fields and values are displayed for each heater: Heater # ... -
Page 56: Sweep Table Page
Handbook USER INTERFACE Mercury iTC 3.2.15 Sweep Table page Allows the user to configure a temperature sweep profile. Figure 3-29 Sweep Table page with an empty table Figure 3-30 Sweep Sequence Editor page with two rows of data The page displays a sweep table. If the table is empty, only the first row is displayed... -
Page 57: Save File Pages
Handbook USER INTERFACE Mercury iTC The table contains the following columns: Final T (K) Enter the required temperature setpoint in K. Time to Final T (mins) Enter the time in minutes required to reach the temperature setpoint. Hold at Final T (mins) ... -
Page 58: Load File
Handbook USER INTERFACE Mercury iTC Save Tap once to save the file. Cancel Tap once to exit without saving the file. 3.2.17 Load File pages There are several pages used to load files. All these pages function in the same way, so only one is described in this section. -
Page 59: Functional Description
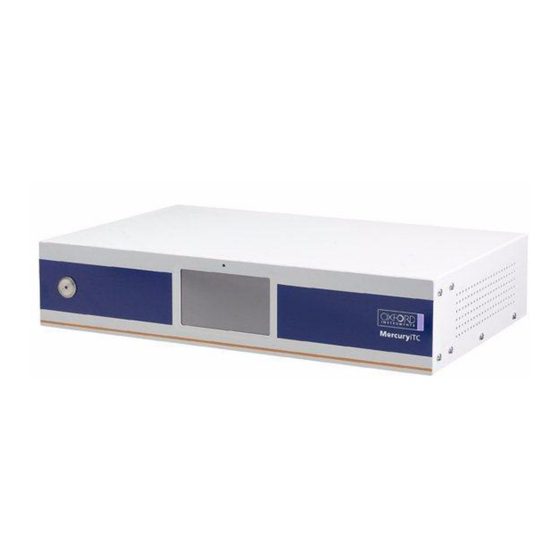
Handbook FUNCTIONAL DESCRIPTION Mercury iTC FUNCTIONAL DESCRIPTION Main components Figure 4-1 General view of the iTC The unit consists of: a 2U high 19 inch rack or desktop enclosure a user interface (see Section 4.1.1) a power supply ... -
Page 60: User Interface
Handbook FUNCTIONAL DESCRIPTION Mercury iTC 4.1.1 User interface The user interface consists of a 420 x RGB x 272 pixel LCD-TFT display and touch- screen. A opto-sensor is fitted above the display to detect ambient light levels. The temperature controller can be configured to vary the display brightness to match the ambient light level (auto-dim feature). -
Page 61: Heater And Sensor Connections
Handbook FUNCTIONAL DESCRIPTION Mercury iTC The iTC uses a PID loop to control each heater (see Chapter 12 for information on PID loops). The control system includes a dead-man’s-handle timer to confirm that the control loop is operating. If the control loop stalls, the heater output is disabled. -
Page 62: Serial Rs232 Interface
Handbook FUNCTIONAL DESCRIPTION Mercury iTC 4.2.5.1 Serial RS232 interface The RS232 interface is connected via a 25-way D-socket on the rear panel. The iTC is configured as Data Circuit-terminating Equipment (DCE), with the standard pin- assignations listed in Table 4-3. -
Page 63: Oxford Instruments Nanoscience Isobus
FUNCTIONAL DESCRIPTION Mercury iTC 4.2.5.2 Oxford Instruments NanoScience ISOBUS ISOBUS allows a single RS232 port on a computer to control a number of instruments independently. This arrangement requires an ISOBUS cable, which carries a single Master connector (25-way D-socket) and up to eight Slave connectors (25-way D-plug). -
Page 64: Expansion Slots
Handbook FUNCTIONAL DESCRIPTION Mercury iTC 4.3.1 Expansion slots The daughter boards fit into expansion slots that are located on the mother board. There are eight expansion slots in the iTC, and a dedicated slot for a GPIB board (see Figure 4-2). -
Page 65: Interconnecting Heater And Temperature-Sensor Boards
Handbook FUNCTIONAL DESCRIPTION Mercury iTC 4.3.2.1 Interconnecting heater and temperature-sensor boards A heater board is always associated with a temperature sensor board. The output of a heater board is hard-wired to the 9-way D-connector on an associated temperature controller board. These connections are listed in... -
Page 66: Overview Of Temperature Measurement
Handbook FUNCTIONAL DESCRIPTION Mercury iTC Overview of temperature measurement 4.4.1 Measurement principles The iTC uses a highly accurate measurement circuit to measure the voltage produced by a sensor. Types of temperature sensor The iTC can use several types of temperature sensor: Thermocouples ... - Page 67 Handbook FUNCTIONAL DESCRIPTION Mercury iTC Table 4-6 Sensor range data Code Sensor Range TG 5 AuFe 0.03/Chr 2 to 500K TG_57 AuFe 0.07/Chr 2 to 500K TG_57 AuFe 0.07/Chr 2 to 500K TG_57 AuFe 0.07/Chr 2 to 500K CN 3 Cernox resistor 1.5 to 300K...
-
Page 68: Thermocouples
Handbook FUNCTIONAL DESCRIPTION Mercury iTC 4. This is for a platinum element that is ballasted to BS1904/ DIN43760. This element is more readily available than a pure platinum element, but its performance is unspecified below 73K (the data between 50K and 70K is based on BS1904:964 rather than BS1904:1984). -
Page 69: Circuit Descriptions
Handbook FUNCTIONAL DESCRIPTION Mercury iTC Circuit descriptions 4.6.1 Temperature measurement circuit Depending on the sensor, the circuit can be configured to measure either resistance or voltage. 4.6.1.1 Description of voltage measurement mode Voltage measurement mode is used with diode sensors or thermocouples. -
Page 70: Description Of Constant Current Measurement Mode
Handbook FUNCTIONAL DESCRIPTION Mercury iTC The sensor voltage is: Vsensor= Vref x ADCnorm/ADCgain Where: ADCnorm is the ADC reading normalised to the range 0 to ±1 V. ADCgain is the gain setting of the ADC. The temperature of the sensor to heater connection is measured for thermocouple correction. -
Page 71: Description Of Constant Voltage Measurement Mode
Handbook FUNCTIONAL DESCRIPTION Mercury iTC U13 and either U14 or U16 measure the voltage across the reference resistor and pass these feedback signals back to U10 and U15. This ensures that the voltage across the reference resistor is exactly equal to the difference between the output voltages of U24 and U25. - Page 72 Handbook FUNCTIONAL DESCRIPTION Mercury iTC The sensor and a reference resistor (either R44 or R45) are connected in series. Digital to analogue converters (DACs) U24 and U25 generate an upper and lower demand voltage. The upper voltage is buffered by U10 and applied to the upper end of the sensor resistor.
-
Page 73: Calibrating The Temperature Measurement Circuit
Handbook FUNCTIONAL DESCRIPTION Mercury iTC 4.6.1.4 Calibrating the temperature measurement circuit Figure 4-6 shows a block diagram of the temperature measurement circuit in calibration mode. Figure 4-6 Temperature measurement circuit calibration The calibration is performed using a ratiometric circuit configuration. In calibration mode, DACs U24 and U25 supply a differential calibration voltage to the input of ADC U12. -
Page 74: Heater Circuit
Handbook FUNCTIONAL DESCRIPTION Mercury iTC 4.6.2 Heater circuit Figure 4-7 shows a block diagram of the heater circuit. Figure 4-7 Block diagram of the heater circuit 4.6.2.1 Description of the heater circuit Microcontroller U24 outputs a demand signal to DAC U11. U11 converts this signal to a demand voltage for the heater output, which is equal to the desired heater voltage divided by 20. -
Page 75: Calibrating The Heater Circuit
Handbook FUNCTIONAL DESCRIPTION Mercury iTC The power for the linear amplifier is provided by a pulse-width modulator converter, controlled by U24. The output of this converter is filtered and passed to the linear amplifier via a current monitor. This current signal is passed back to U24, and also drives an overcurrent trip circuit. - Page 76 Handbook FUNCTIONAL DESCRIPTION Mercury iTC This page is intentionally blank. November 2011 59-UMC0071 Issue 01 Page 76 Original Instructions...
-
Page 77: Getting Started
Handbook GETTING STARTED Mercury iTC GETTING STARTED Ensure that you have read and understood the information in Chapter 1 before installing or operating this equipment. Checking the electrical supply CHECK THE SUPPLY VOLTAGE Check that the voltage supplied to the equipment is within the specified range. -
Page 78: Connecting Electrical Power
Handbook GETTING STARTED Mercury iTC Connecting electrical power Connect the equipment to an electrical supply, using an appropriate mains cable. In the EU, the mains supply cable must be rated for the maximum current rating of the equipment. The cable must meet the requirements of IEC227 or IEC245. Mains cables certified or approved by any recognised nation test house are regarded as meeting this requirement. -
Page 79: Connecting The Gpib (If Required)
Handbook GETTING STARTED Mercury iTC 5.3.2.4 Connecting the GPIB (if required) CABLE DISCONNECTION Do not connect or disconnect GPIB cables while the computer, or any of the instruments, are powered up. Equipment damage can result if this precaution is not observed. -
Page 80: Powering Up The Unit For The First Time
Handbook GETTING STARTED Mercury iTC Powering up the unit for the first time 5.4.1 Setting the date and time Switch the <1 0> switch on the rear panel of the unit so that the 1 is depressed. Press the <Power> button on the front of the unit. The button illuminates blue. -
Page 81: Configuring The Inputs
Handbook GETTING STARTED Mercury iTC 5.4.2 Configuring the inputs The home page shows six panels and four buttons. If the unit is unconfigured, all six panels will display 0.0000. Additional panels can be displayed by scrolling left or right. Tap once on a panel. The Channel Display Configuration page is displayed (see Section 3.2.4). -
Page 82: Configuring A Heater
Handbook GETTING STARTED Mercury iTC If two known temperatures are available it is possible to make small adjustments to the scale and offset of the standard curve to match a particular sensor. The process can be used with either PTC and NTC sensors. -
Page 83: Configuring The Heater Control Loop
Handbook GETTING STARTED Mercury iTC Tap the name of the required temperature sensor in the Sensor column. The device names are initially of the form BoardBN.DTSN. Where: Board= MB for Mother Board or DB for Daughter Board. BN= Board Number. -
Page 84: Configuring A Gas Valve
Handbook GETTING STARTED Mercury iTC If you selected Automatic PID operation, tap PID Table. The PID Table Editor page is displayed (see Section 3.2.11). Tap Load to load an existing PID table (see Section 3.2.17). Alternatively enter a new PID table on this page (see Section 12.2.7.2). -
Page 85: Configuring Automatic Control Of The Gas Valve
Handbook GETTING STARTED Mercury iTC 5.4.5.2 Configuring automatic control of the gas valve If Auto is selected in the Flow(%) field, tap Gas Cfg. The Gas Flow Configuration page opens. Tap HTT. Select a Heater Target Table to be used for controlling the valve. - Page 86 Handbook GETTING STARTED Mercury iTC This page is intentionally blank. November 2011 59-UMC0071 Issue 01 Page 86 Original Instructions...
-
Page 87: Basic Operating Instructions
Handbook BASIC OPERATING INSTRUCTIONS Mercury iTC BASIC OPERATING INSTRUCTIONS Configuring the LCD display Tap Settings on the Home page. The Settings tabs are displayed. Select the Display tab. Tap the Auto Dim Option field to turn the auto-dim feature on or off. See Section 4.1.1... -
Page 88: Programming A Sweep
Handbook BASIC OPERATING INSTRUCTIONS Mercury iTC A program can contain up to 32 ramps and 32 steps. Each ramp and step lasts for a programmable time period. Once a sweep has been programmed, it can be repeated as often as desired. It is also be retained in non-volatile memory when the iTC is switched off. -
Page 89: Stopping A Sweep
Handbook BASIC OPERATING INSTRUCTIONS Mercury iTC 6.3.5 Stopping a sweep Tap Control on the Home page. The Control Loop Configuration page is displayed. Select the required temperature-sensor in the Sensor field. Tap the Set (K) button until it displays Manual. The Set (K) field value is held at its present value. -
Page 90: To Remove A Trace From The Plot
Handbook BASIC OPERATING INSTRUCTIONS Mercury iTC To remove the X axis scale, tap once on the bottom of the X axis (see Figure 6-2). Figure 6-2 Signal Monitor Plot page with Y axis scale only 6.4.2 To remove a trace from the plot Tap Plot on the Home page. -
Page 91: Configuring The Rs232 Serial Interface (If Required)
Handbook BASIC OPERATING INSTRUCTIONS Mercury iTC Tap Apply to save the changes. 10 To enable the interface, see Section 6.5.5. 6.5.2 Configuring the RS232 serial interface (if required) Tap Settings on the Home page. Scroll to the RS232 tab. Enter the required baud rate. -
Page 92: Enabling Local Control Of The Itc
Handbook BASIC OPERATING INSTRUCTIONS Mercury iTC 6.5.6 Enabling local control of the iTC Tap Settings on the Home page. Tap the Remote Access field and select Local from the drop-down menu. Tap Apply to enable local control of the iTC. -
Page 93: Changing Control-Loop Parameters
Handbook BASIC OPERATING INSTRUCTIONS Mercury iTC Changing control-loop parameters 6.7.1 Entering PID parameters manually Tap Control on the Home page. Tap the PID field until it displays Manual. Tap the P field and enter a new proportional band value (in K), if required. Enter 0 for On/Off control. - Page 94 Handbook BASIC OPERATING INSTRUCTIONS Mercury iTC This page is intentionally blank. November 2011 59-UMC0071 Issue 01 Page 94 Original Instructions...
-
Page 95: Remote Operation
Handbook REMOTE OPERATION Mercury iTC REMOTE OPERATION The iTC can be remotely operated via any of the following interfaces: RS232 or ISOBUS GPIB (IEEE-488) Ethernet This allows a computer to interrogate the instrument and, if required, to take control of it. -
Page 96: Commands And Responses
Handbook REMOTE OPERATION Mercury iTC 7.2.1 Commands and responses Commands sent to the iTC consist of a single letter, optionally followed by a numeric parameter, terminated by a Carriage Return. All common operation commands are based on upper-case letters. Lower case letters are used for some of the more specialised commands. -
Page 97: Gpib Interface
Handbook REMOTE OPERATION Mercury iTC & (Ampersand) instructs an instrument to ignore any following ISOBUS control characters. This character is not used by the iTC. The command allows instruments that include @, $, & or ! characters in their command set to be used on ISOBUS. -
Page 98: Accepting Responses Via The Gpib
Handbook REMOTE OPERATION Mercury iTC 7.4.3 Accepting responses via the GPIB. Messages issued by the iTC on the GPIB consist by default of an ASCII character string, terminated by a Carriage Return. The instrument can be configured to send an additional Line Feed, if required, by sending a initial Q2 command after power-up. -
Page 99: Status Byte Update Rate
Handbook REMOTE OPERATION Mercury iTC 7.4.4.4 Status byte update rate The iTC updates the status byte every millisecond. If the status byte is read within 1 mS of reading data from the interface, the BAV and MAV bits may still be set. If these bits are found to be set immediately after reading data, the GPIB controller should read the status byte again to confirm if data is still remaining. -
Page 100: Compatibility With Ieee-488.2
REMOTE OPERATION Mercury iTC 7.4.9 Compatibility with IEEE-488.2 The Mercury iTC cryogenic environment controller supports IEEE-488.2. 7.4.10 Writing a reliable GPIB control program The GPIB interface in the iTC has been designed to be very reliable. However the GPIB control program must assume that data can be occasionally corrupted. The following sections describe features that must be built into the control program to ensure maximum reliability. -
Page 101: Preventive Maintenance
Handbook PREVENTIVE MAINTENANCE Mercury iTC PREVENTIVE MAINTENANCE The iTC requires minimal maintenance. It is recommended that the following maintenance tasks are performed every six months. Six-monthly maintenance Clean the touch-screen (see Section 8.1.1). Calibrate the temperature sensor boards (see Section 8.1.2). - Page 102 Handbook PREVENTIVE MAINTENANCE Mercury iTC This page is intentionally blank. November 2011 59-UMC0071 Issue 01 Page 102 Original Instructions...
-
Page 103: Troubleshooting
Handbook TROUBLESHOOTING Mercury iTC TROUBLESHOOTING Fault-finding features of the iTC 9.1.1 The alarm-logs The alarm-logs list alarms that have been raised, and the time that each alarm occurred. This is a useful tool if a fault occurs. For example the alarm-logs record if a particular temperature sensor is open-circuit or short-circuit. - Page 104 Handbook TROUBLESHOOTING Mercury iTC This page is intentionally blank. November 2011 59-UMC0071 Issue 01 Page 104 Original Instructions...
-
Page 105: Command Reference Guide
Handbook COMMAND REFERENCE GUIDE Mercury iTC COMMAND REFERENCE GUIDE 10.1 Nomenclature used in this section The following conventions are used in this document when listing SCPI commands: Capital letters designate a keyword that must be entered literally (e.g. SET). Capital letters in angle brackets designate a parameter that must be substituted by the required value (e.g. -
Page 106: Command Structure
Handbook COMMAND REFERENCE GUIDE Mercury iTC 10.3.2 Command structure The basic command structure is: <VERB>:<NOUN>:<NOUN> All commands generate an <INVALID> response if the command cannot be interpreted (see Section 10.3.5). 10.3.3 Verbs The interface controller can only issue two verbs: READ - A query command reading information on the specified noun. -
Page 107: System Commands
Handbook COMMAND REFERENCE GUIDE Mercury iTC A SIG is returned as a value, followed by the scale. Scale is of the form: n# - nano u# - micro m# - milli # - none #k - kilo #M - mega... -
Page 108: Addressing A Temperature Sensor
Handbook COMMAND REFERENCE GUIDE Mercury iTC To enter engineering mode, send the following command: SET:SYS:MODE:ENG:PASS:abc123 To exit engineering mode, send the following command: SET:SYS:MODE:NORM To change the system password, you must be in engineering mode. Then you can send an issue password command:... - Page 109 Handbook COMMAND REFERENCE GUIDE Mercury iTC TYPE Excitation type [UNIP | BIP | SOFT] Read/set Enumerated set Excitation magnitude Read/set Float value followed by a scale Calibration designator FILE Calibration file name Read/set Filename Interpolation type [LIN | SPL | LAGR] Read/set...
-
Page 110: Addressing A Heater Controller
Handbook COMMAND REFERENCE GUIDE Mercury iTC Example of reading a temperature sensor The following command reads the sensor voltage: READ:DEV:MB0 :SIG:VOLT? The sensor returns the following message: STAT:DEV:MB0 :SIG:VOLT:12.345:mV 10.3.4.3 Addressing a heater controller To address a heater controller, use the following structure: DEV:<UID>:HTR... - Page 111 Handbook COMMAND REFERENCE GUIDE Mercury iTC The configuration settings for a level meter sensor are: Level sensor designator Manufacturing designator HVER Hardware version Read only version number FVER Firmware version Read only version number SERL Serial number Read only alphanumeric...
-
Page 112: Addressing An Auxiliary I/O Daughter Board
Handbook COMMAND REFERENCE GUIDE Mercury iTC 10.3.4.5 Addressing an auxiliary I/O daughter board To address an auxiliary board, use the following structure: DEV:<UID>:AUX Where <UID> is a unique identifier that is allocated to each board, based on its SPI location. -
Page 113: Addressing A Control Loop
Handbook COMMAND REFERENCE GUIDE Mercury iTC 10.3.4.6 Addressing a control loop To address a control loop, you must specify the temperature sensor that is associated with the control loop: DEV:<UID>:TEMP:LOOP Where <UID> is a unique identifier that is allocated to each board, based on its SPI location. - Page 114 Handbook COMMAND REFERENCE GUIDE Mercury iTC This page is intentionally blank. November 2011 59-UMC0071 Issue 01 Page 114 Original Instructions...
-
Page 115: Technical Specifications
Handbook TECHNICAL SPECIFICATIONS Mercury iTC TECHNICAL SPECIFICATIONS This chapter lists the technical specifications of the iTC. 11.1 Physical specification Table 11-1 Physical specifications Item Specification Width 426 mm Depth 272 mm Height 131 mm Weight 6.5 kg 11.2 Electrical power supply... -
Page 116: Heater Outputs
Handbook TECHNICAL SPECIFICATIONS Mercury iTC The unit can accommodate silicon-diode sensors (constant current supply). The unit detects short-circuit inputs, open-circuit inputs, and inputs that are shorted to ground. The unit can store calibration files for sensors and can automatically set range-limits from the calibration file. -
Page 117: Electrical Isolation
Handbook TECHNICAL SPECIFICATIONS Mercury iTC 11.6 Electrical isolation Table 11-6 Electrical isolation specifications Item Specification Sensor terminals to chassis >50 VDC Heater terminals to chassis >50 VDC Communications 0 V to chassis >50 VDC Communications to sensor or heater >50 VDC The mains-supply to chassis conforms to EN61010 and UL/CSA standard. - Page 118 Handbook TECHNICAL SPECIFICATIONS Mercury iTC This page is intentionally blank. November 2011 59-UMC0071 Issue 01 Page 118 Original Instructions...
-
Page 119: Theory Of Control Loops
Handbook THEORY OF CONTROL LOOPS Mercury iTC THEORY OF CONTROL LOOPS This chapter describes the general principles of the control loops used in this unit. 12.1 General information on control loops The iTC uses control loops to control the heater and optional gas valve. -
Page 120: Open Loop Operation
Handbook THEORY OF CONTROL LOOPS Mercury iTC The criteria for good control are: Control accuracy The temperature of the sample must be as close as possible to the setpoint. Control stability Fluctuations above and below the setpoint temperature must be as small as possible. -
Page 121: Proportional Control
Handbook THEORY OF CONTROL LOOPS Mercury iTC A PID controller can be made to operate in On-Off mode by setting the proportional band (P) parameter to zero. 12.2.3 Proportional control A proportional control system allows the heater power to be continuously varied. This overcomes the oscillation problem produced by an on-off control system. -
Page 122: Proportional Control With Integral Action
Handbook THEORY OF CONTROL LOOPS Mercury iTC 12.2.4 Proportional control with integral action Adding an integrator into the proportional band control system can reduce the inherent temperature error to zero. The proportional band is set to a sufficiently large range to avoid oscillation. -
Page 123: Proportional Control With Integral And Derivative Action
Handbook THEORY OF CONTROL LOOPS Mercury iTC 12.2.5 Proportional control with integral and derivative action Adding derivative action to the proportional control loop can improve the control response. Derivative action monitors the rate of change of the measured temperature, and modifies the control output to minimise this rate of change. -
Page 124: Pid Tables
Mercury iTC 12.2.7 PID tables Two alternative methods can be used to provide PID parameters to a control loop in the Mercury iTC cryogenic environment controller: Manual PID The PID parameters are entered directly on the Control Loop Configuration page... -
Page 125: Theory Of Gas-Flow Control
Handbook THEORY OF CONTROL LOOPS Mercury iTC Tap the second cell in this row and enter the upper temperature for the first temperature range. 10 Tap the third cell in this row and enter the P parameter for this temperature range in 11 Tap the fourth cell in this row and enter the I parameter for this temperature range in minutes. -
Page 126: Heater Target Tables
Handbook THEORY OF CONTROL LOOPS Mercury iTC The control function is driven by two error signals: Temperature Error the difference between the temperature measured by the sensor and the temperature set-point. Heater Voltage Error the difference between the actual heater voltage delivered by the heater control loop and the target heater voltage. -
Page 127: Temperature Sensor Daughter Board
Handbook TEMPERATURE SENSOR DAUGHTER BOARD Mercury iTC TEMPERATURE SENSOR DAUGHTER BOARD This chapter describes the single and dual temperature sensor boards. 13.1 Overview of the temperature sensor board The unit can accept the following sensor types: Negative temperature coefficient (NTC) resistance ... -
Page 128: Connecting The Sensor
Handbook TEMPERATURE SENSOR DAUGHTER BOARD Mercury iTC Remove the screw that secures the blanking panel in the location where the board is to be fitted. Keep the screw. Figure 13-2 Daughter-board blanking-panel Using appropriate ESD precautions, fit the temperature board in the allocated expansion slot. -
Page 129: Heater Daughter Board
Handbook HEATER DAUGHTER BOARD Mercury iTC HEATER DAUGHTER BOARD This section describes the heater daughter-board. 14.1 Overview of the heater board The heater board contains a single heater output. A heater board must be associated with a temperature sensor board. -
Page 130: Connecting The Heater
Handbook HEATER DAUGHTER BOARD Mercury iTC Using appropriate ESD precautions, fit the heater board in the allocated expansion slot. Secure the board using the screw that was removed in step 6. Refit the board-clamp, using the two screws that were removed earlier. -
Page 131: Auxiliary I/O Daughter Board
Handbook AUXILIARY I/O DAUGHTER BOARD Mercury iTC AUXILIARY I/O DAUGHTER BOARD The auxiliary I/O board can be fitted in any expansion slot in the iTC. 15.1 Description of the auxiliary I/O board 15.1.1 Auxiliary I/O board functions The optional auxiliary board performs the following functions: It provides a stepper-motor drive and sense input. -
Page 132: Installing An Auxiliary I/O Board
Handbook AUXILIARY I/O DAUGHTER BOARD Mercury iTC 15.2 Installing an auxiliary I/O board 15.2.1 Fitting the board An auxiliary I/O board can be fitted in any expansion slot. Turn off electrical power to the iTC. Remove the electrical power connector from the back of the unit. -
Page 133: Connecting To The Auxiliary I/O Board
Handbook AUXILIARY I/O DAUGHTER BOARD Mercury iTC 15.2.2 Connecting to the auxiliary I/O board The pin connections for the auxiliary port are listed in Table 15-1. Table 15-1 Auxiliary port pin assignations Function Output Bit 0 (Stepper Motor) or Compressor Disable. - Page 134 Handbook AUXILIARY I/O DAUGHTER BOARD Mercury iTC This page is intentionally blank. November 2011 59-UMC0071 Issue 01 Page 134 Original Instructions...
-
Page 135: Level-Meter Daughter Board
Handbook LEVEL-METER DAUGHTER BOARD Mercury iTC LEVEL-METER DAUGHTER BOARD This chapter describes the level-meter daughter board. 16.1 Description of the level-meter board The level-meter board monitors the level of cryogen in a reservoir. The board can be used with liquid helium and liquid nitrogen systems. The level-meter raises an error if the cryogen level falls below a safe level. -
Page 136: Operation Of The Board With A Nitrogen-Level Probe
Fitting the board The level-meter board can be fitted in any expansion slot. Only one level meter board can be fitted in a Mercury iTC, because of power consumption limitations. Turn off electrical power to the iTC. Remove the electrical power connector from the back of the unit. -
Page 137: Connecting The Sensor
Handbook LEVEL-METER DAUGHTER BOARD Mercury iTC Remove the screw that secures the blanking panel in the location where the board is to be fitted. Keep the screw. Figure 16-2 Daughter-board blanking-panel Using appropriate ESD precautions, fit the level-meter board in the allocated expansion slot. -
Page 138: Configuring The Level-Meter Board
Handbook LEVEL-METER DAUGHTER BOARD Mercury iTC 16.3 Configuring the level-meter board If you are using the level-meter with liquid helium, see Section 16.3.1. If you are using the level-meter with liquid nitrogen, see Section 16.3.2. 16.3.1 Configuring a liquid-helium sensor Tap an unconfigured panel on the Home page. -
Page 139: Configuring A Liquid-Nitrogen Sensor
Handbook LEVEL-METER DAUGHTER BOARD Mercury iTC NOTE: Select Fast sampling when filling the reservoir. Return the sampling rate to Slow when the reservoir is full, to conserve helium. 16 If a pre-pulse is required, enter a value between 0 and 160 mA in the Pre-pulse Amplitude (mA) field. -
Page 140: Specification Of The Level-Meter Board
Handbook LEVEL-METER DAUGHTER BOARD Mercury iTC 13 If required, change the value displayed in the Pulse Counting Period (ms) field. 14 Tap Home to return to the Home page. 15 If required, access the Channel Display Configuration page and change the displayed value from Pulse to N2 Level. -
Page 141: Gpib Daughter Board
Handbook GPIB DAUGHTER BOARD Mercury iTC GPIB DAUGHTER BOARD 17.1 Description of the GPIB daughter board GPIB is a parallel interface that allows a single computer to control a number of instruments independently. The GPIB interface on the iTC conforms to the standard IEEE-488.1. -
Page 142: Connecting To A Gpib Board
Handbook GPIB DAUGHTER BOARD Mercury iTC Remove the screw that secures the blanking panel in the location where the board is to be fitted. Keep the screw. Figure 17-2 Daughter-board blanking-panel Using appropriate ESD precautions, fit the GPIB board in the GPIB expansion slot. -
Page 143: Glossary
Handbook GLOSSARY Mercury iTC GLOSSARY This glossary explains the acronyms, abbreviations and special terms used in this Instructions for Use Manual. The entries are presented in alphanumeric order. Original Instructions Page 143 November 2011 59-UMC0071 Issue 01... -
Page 144: Acronyms And Abbreviations
Handbook GLOSSARY Mercury iTC Acronyms and abbreviations Analogue to Digital Converter ASCII American Standard Code for Information Interchange Cold Junction Compensation Digital to Analogue Converter Data Circuit-terminating Equipment DHCP Dynamic Host Configuration Protocol Data Terminal Equipment EPROM Electrically Programmable Read-Only Memory... - Page 145 Handbook Mercury iTC This page is intentionally blank. November 2011 59-UMC0071 Issue 01 Page 145 Original Instructions...
- Page 146 Handbook Mercury iTC Technical support United Kingdom Europe Oxford Instruments NanoScience Oxford Instruments NanoScience Tubney Woods, Abingdon, Tubney Woods, Abingdon, Oxon, OX13 5QX Oxon, OX13 5QX Tel: +44(0)1865 393200 (sales) Tel: +44(0)1865 393200 (sales) Tel: +44(0)1865 393311 (support) Tel: +44(0)1865 393311 (support)
Need help?
Do you have a question about the Mercury iTC and is the answer not in the manual?
Questions and answers