Table of Contents
Advertisement
Quick Links
Advertisement
Table of Contents
Troubleshooting

Subscribe to Our Youtube Channel
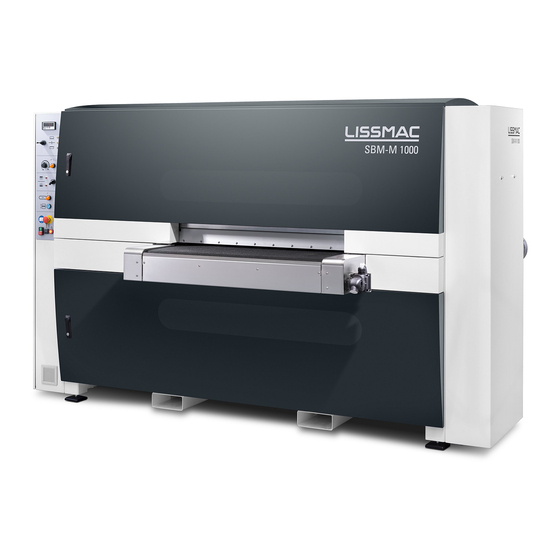
Related Manuals for Lissmac SBM-M 1000 S2 ALU MIX

Summary of Contents for Lissmac SBM-M 1000 S2 ALU MIX
- Page 1 METAL PROCESSING OPERATING MANUAL GRINDING MACHINE SBM-M 1000 S2 ALU MIX SBM-M 1500 S2 ALU MIX LISSMAC Maschinenbau GmbH Lanzstrasse 4 D-88410 Bad Wurzach Telefon +49 (0) 7564 / 307 - 0 Telefax +49 (0) 7564 / 307 - 500 lissmac@lissmac.com...
-
Page 3: Imprint
About this manual Imprint Operating manual for Grinding machine SBM-M 1000 S2 ALU MIX SBM-M 1500 S2 ALU MIX Issue date: 05-2017 Translation of the original operating manual Manufacturer: LISSMAC Maschinenbau GmbH Lanzstraße 4 D-88410 Bad Wurzach Telephone: +49 (0) 7564 / 307 - 0... -
Page 4: Table Of Contents
About this manual Table of Contents Imprint ......................3 Table of Contents ..................4 About this manual ................... 6 Target group ..................6 Additional documents ................ 6 Presentation of warnings..............7 ... - Page 5 About this manual 5.2.4 Hydraulic belt tensioner ............30 5.2.5 S-unit gear selection lever ..........31 5.2.6 Setting sheet thickness ............32 5.2.7 Turn on motors in the grinding units ........33 Processing material.................
-
Page 6: About This Manual
About this manual 1 About this manual Target group The operating manual is directed at the machine operator and the operating and maintenance personnel. This operating manual contains important information on how to operate the machine safely, properly and economically. Each person responsible for operating and maintenance work on the machine must have read and understood this operating manual. -
Page 7: Presentation Of Warnings
About this manual Presentation of warnings In this operating manual warnings are presented according to the following examples: SIGNAL WORD! Type and source of danger Consequences of non-compliance Actions to avert the danger The signal word next to the danger symbol indicates the degree of danger: This signal word signifies an extremely dangerous situation. -
Page 8: Safety
Safety 2 Safety Safety instructions The SBM-M 1000/1500 S2 ALU MIX grinding machine is constructed according to the state of the art and recognised technical safety rules. However, during its use, danger for persons and property damage can occur. The machine is to be used only for intended use in technically faultless condition and in observance of safety instructions. -
Page 9: Personnel Selection And Qualifications
Safety Personnel selection and qualifications Only authorised personnel of legal minimum age may work on the machine. Personnel who are being trained or orientated on the machine may only work on the machine under continuous supervision of an experienced person. ... -
Page 10: Maintenance, Service And Troubleshooting
Safety Maintenance, Service and Troubleshooting Adjustment, maintenance and service work may only be carried out by authorised technical personnel. Perform adjustment, maintenance and service work according to instructions in the operating manual. Keep the specified intervals for service work. ... -
Page 11: Safety Instructions For Special Types Of Dangers
Safety Safety instructions for special types of dangers 2.7.1 Electric power Work on the machine's electrical systems may only be carried out by electricians according to the rules of electronics. In case of problems with the electrical power supply, turn the machine off immediately. -
Page 12: Explosion Hazard
Safety 2.7.4 Explosion hazard 2.7.4.1 Description of explosion hazard The machining of aluminium produces flammable dust by grinding that, when mixed with air, can form a potentially explosive atmosphere. This also applies to the machining of steel and stainless steel. In a mixture of aluminium and steel dust, explosive gas can be produced from corrosion Moreover, there is always the possibility that contact between water (e.g. -
Page 13: Symbols On The Machine
Safety Symbols on the machine The following symbols are located on the machine and warn of dangers coming from the machine: Symbol Meaning This symbol on both conveyor belts indicates the danger that hands or body parts can be pulled in and sheared off. This symbol on the control cabinet indicates dangerous electrical voltage. -
Page 14: Explanation Of Labels On The Machine
Safety Explanation of labels on the machine The following labels are located on the machine and provide additional information. Symbol Meaning This symbol on the hydraulic tank indicates the hydraulic oil level. This symbol indicates the EMERGENCY STOP button. The symbol indicates the minimum length of the workpiece to be machined. -
Page 15: Product Description
Product description 3 Product description The SBM-M 1000/1500 S2 ALU MIX grinding machine is described below. Appropriate usage The SBM-M 1000/1500 S2 ALU MIX grinding machine is intended exclusively for the two-sided deburring and edge rounding of punch, laser, and fine plasma cut workpieces. Workpieces of 0.5 mm to 50 mm in thickness may be processed. -
Page 16: Technical Data
Product description Technical data The following specifications apply to the SBM-M 1000 S2 ALU MIX / SBM-M 1500 S2 ALU MIX grinding machine. SBM-M 1000 S2 SBM-M 1500 S2 ALU MIX ALU MIX Material throughput Automatic Automatic Aperture width 1000 mm 1500 mm Sheet thickness max. -
Page 17: Type Plate
Product description Type plate Abb. 1: Type plate Name of machine Machine number of the machine Connection values and weights The type plate is located on the left side of the back of the grinding machine. Grinding machine SBM-M 1000/1500 S2 ALU MIX... -
Page 18: Structure Sbm-M 1000/1500 S2 Alu Mix Grinding Machine
Product description Structure SBM-M 1000/1500 S2 ALU MIX grinding machine Abb. 2: Components of the machine, input side (front side of SBM-M S2 ALU MIX) Control panel with selection switches Upper device door Transport belt for workpiece input Safety flap Adjustable machine foot Support for transport with forklift Lower device door... - Page 19 Product description Abb. 3: Components of the machine, output side (back of SBM-M S2 ALU MIX) Upper device door Transport belt for workpiece outlet Main switch OFF/ON for entire machine EMERGENCY STOP switch for immediate shutdown of the entire machine Ventilation grate on switching cabinet Type plate Electrical connection...
-
Page 20: Machining Units
Product description Machining units Abb. 4: Machining unit, top Abrasive belt Transport belt for workpiece input Safety shutdown bar (the transport belt will stop as long as it is actuated) Abb. 5: Machining unit, bottom Safety shutdown bar (the transport belt will stop as long as it is actuated) Abrasive belt Grinding machine SBM-M 1000/1500 S2 ALU MIX... -
Page 21: Control Elements
Product description Control elements 3.6.1 Operating elements on the machine Abb. 6: Control and display elements (front side) Indicator lights - Grinding units Feed direction of conveyor belt for workpiece input S-unit selection switch Switch "Hydraulic belt tensioner, S-unit" Set up machine button (Machine operation with door open) EMERGENCY STOP Operating hours counter Indicator light: phase sequence incorrect... - Page 22 Product description WARNING Rotating parts Injury due to rotating hand wheels. Do not grasp rotating hand wheels during setup. Secure machine against unintended start. Abb. 7: Control elements of gear box (front side SBM-M 1000/1500 S2 ALU MIX) Hand wheel for moving bottom S-unit Hand wheel for adjusting sheet thickness.
-
Page 23: Function
Product description Function There are two machining units built into the grinding machine. The two edge rounding units (1) and (4) are each equipped with two abrasive belts that travel in opposite directions. They are suitable for the edge rounding (deburring) of workpieces cut by punching, laser, or fine plasma. -
Page 24: Safety Equipment
Product description Safety equipment The grinding machine has the following safety equipment: EMERGENCY STOP switch (1) on the front and (6) on the back of the machine for the immediate shutdown of the machine in case of emergency. The EMERGENCY STOP switches must be disengaged again after an emergency stop. -
Page 25: Preparation For Use
Preparation for use 4 Preparation for use Transporting the machine For transport of the machine by crane, there are two steel carriers fastened to the top of the machine with attachment points. To do this, it is necessary to unscrew the top cover (pos. 1), to screw in the two steel carriers (pos. 2) and to reattach the top cover (pos. -
Page 26: Storing The Machine
Preparation for use Storing the machine Disconnect the electrical connection to the grinding machine. Thoroughly clean all grinding dust and material residue from the grinding machine. Clean the dust extraction shafts using an industrial vacuum cleaner. Completely grease the grinding machine. ... -
Page 27: Operation
Operation 5 Operation Operation – overview The central functions of the machine are controlled using control elements on the front of the grinding machine. The following descriptions give an overview of the operating functions. 5.1.1 Control elements Abb. 11: Control elements Indicator lights - Grinding units Feed direction of conveyor belt for workpiece input S-unit selection switch... -
Page 28: Operation
Operation Operation 5.2.1 S-unit selection switch Abb. 12: S-unit selection switch S-unit top Both S-units S-unit bottom selection switch The S-unit selection switch (4) can be used to select a specific S-unit. Position (1): Here, the upper S-unit is selected. Position (2): In this position, both S-units are selected. -
Page 29: Wear Display
Operation 5.2.2 Wear display Abb. 13: Wear display Wear display on top S-unit Wear display on bottom S-unit The abrasive belts must be replaced at least when the upper (1) or lower (2) wear display on the S-units lights up (see Chapter 6). Brush units can no longer be advanced. -
Page 30: Hydraulic Belt Tensioner
Operation 5.2.4 Hydraulic belt tensioner Abb. 15: Hydraulic belt tensioner Rotary switch for hydraulic belt tensioner "Machine setup" button The belt tensioner of the S-unit can be operated with the button (1), and the belt will then automatically be correctly tensioned (see 6.2.1 and 6.2.3). Grinding machine SBM-M 1000/1500 S2 ALU MIX... -
Page 31: S-Unit Gear Selection Lever
Operation 5.2.5 S-unit gear selection lever When selecting the individual levels, the indicator lights on the grinding units (on the operating part) switch to the function belonging to that gear. Abb. 16: Gear selector lever S-unit bottom S-unit top and bottom together S-unit top Operational position / sheet thickness Here, the functions of the S-unit can be mechanically preselected. -
Page 32: Setting Sheet Thickness
Operation 5.2.6 Setting sheet thickness Before processing, the sheet thickness of the workpieces must be measured and adjusted on the machine. Abb. 18: Setting sheet thickness Display Joystick NOTE Workpieces remaining in the machine Damage to the machine. Ensure that no workpieces are in the machine. ... -
Page 33: Turn On Motors In The Grinding Units
Operation 5.2.7 Turn on motors in the grinding units Before turning on the motors, the following conditions must be checked: Acceptance of the workpieces at the output side of the machine is ensured. Contamination such as material residue and dust deposits are removed. All abrasive belts are checked for damage (visual inspection). -
Page 34: Processing Material
Operation Processing material Abb. 20: Processing material Pictogram on the machine Place sheets onto the conveyor belt as shown. To achieve even edge rounding, the sheets should be placed diagonally to the abrasive belt. NOTE Minimum dimensions of the workpiece Damage to the machine, the workpiece ... -
Page 35: Connecting The Extractor
Operation 5.4 Connecting the extractor WARNING In a mixture of aluminium and steel dust, explosive gas can be produced from corrosion. For each material change, the machine must be cleaned completely Fixed piping must be exchanged Remaining dust deposits must be removed from pipes Not intended use especially includes the machining of composite materials in which both aluminium and steel dust are simultaneously generated. -
Page 36: Fault" Lamp (See 3.4 Grinding Machine Structure) Lights
Operation Place the material switch (also see 3.6 Operating elements on the machine) on the front side of the machine to aluminium or steel. The cleaning interval of the machine is set automatically. The indicator lamp (see 3.4 Grinding machine assembly) for aluminium or steel must be illuminated. -
Page 37: Changing Abrasives
Operation Changing abrasives WARNING Accidental starting of the grinding motors during replacement of abrasives Severe injuries due to rotating abrasive belts. Turn off the main switch each time the S-unit is moved. Only entrust the work to authorized personnel. Replacing S-unit abrasive belt 5.7.1 Preparing to replace the abrasive belt... -
Page 38: Measuring Wear / Setting Wear Display To "Zero
Operation Measuring wear / setting wear display to "zero". Abb. 22: Mechanical wear display Wear display on bottom S-unit Hand lever to apply display of lower wear measurement Wear display on top S-unit Lever for wear display Base plate for upper abrasive belt Base plate for lower abrasive belt Both abrasive belts can be measured independently of one another. -
Page 39: Releasing/Removing The Tension On The S-Unit Abrasive Belt
Operation 5.8.1 Releasing/removing the tension on the S-unit abrasive belt The abrasive belts in the S-units are hydraulically released/tensioned; actuation is carried out from the operating unit. Abb. 23: Hydraulic belt tensioner Rotary switch for hydraulic belt tensioner "Machine setup" button ... -
Page 40: Place The Abrasive Belt On The S-Unit
Operation 5.8.2 Place the abrasive belt on the S-unit Abb. 25: Abrasive belt Back abrasive belts Front abrasive belt Replace the abrasive belts onto the pulleys according to their labels (S- unit, position, and operating direction). After replacing a grinding belt, always adjust the S-unit so that the wear display is on "Zero"... -
Page 41: Service/Repair
Service/Repair 6 Service/Repair Replacing S-unit drive belts To be able to replace the V-belts on the inner side of the S-units, the abrasive belts must first be removed; see Chapter 6.2. 6.1.1 Remove support bar Abb. 27: Remove support bar Support bar Screw fasteners ... -
Page 42: Installing The V-Belt
Service/Repair 6.1.3 Installing the V-belt NOTE Always replace the V-belts in pairs. If V-belts are replaced individually, secure drive is no longer possible. Abb. 29: Installing the V-belt Inner V-belt Outer V-belt Place both V-belts (1) and (2) onto the pulley. Grinding machine SBM-M 1000/1500 S2 ALU MIX... -
Page 43: Tensioning The V-Belts
Service/Repair 6.1.4 Tensioning the V-belts Abb. 30: Tensioning the V-belts Drive motor screw fasteners Counter nut Counter nut Drive motor V-belt pulley Turn counter nut (3) all the way back. Use counter nut (2) to tension the drive motor V-belt pulley (4) until the V- belt can still be pushed in about 1 cm on its longest segment. -
Page 44: Replacing The V-Belt On The Back Of The S-Unit
Service/Repair 6.1.6 Replacing the V-belt on the back of the S-unit NOTE Always replace the V-belts in pairs. If V-belts are replaced individually, secure drive is no longer possible. Abb. 32: Outer V-belt Drive motor Fastening nuts V-belts Fastening nuts Tensioning screw Counter nut Counter nut... -
Page 45: Tensioning The V-Belt On The Back Of The S-Unit
Service/Repair 6.1.7 Tensioning the V-belt on the back of the S-unit Abb. 33: Tensioning the V-belts Drive motor Fastening nuts V-belts Fastening nuts Tensioning screw Counter nut Counter nut Put new V-belt (3) into place. Turn counter nut (6) back. ... -
Page 46: Lubrication Points/ Hydraulic Oil
Service/Repair Lubrication points/ Hydraulic oil 6.2.1 Lubrication points, left rear Abb. 34: Left guide shaft lubrication point Upper left lubrication points (4x) Lower left lubrication points (2x) Lubrication points (1) and (2) according to the service schedule. 6.2.2 Lubrication points, right rear Abb. -
Page 47: Lubricating The Flanged Bearing Of The S-Unit
Service/Repair 6.2.3 Lubricating the flanged bearing of the S-unit Abb. 36: Lubricating the flanged bearing Lubrication nipple Lubricate the lubrication nipple (1) of the flanged bearing. Lubrication nipple (1) is also installed for lower S-unit. 6.2.4 Check hydraulic oil level NOTE If the hydraulic oil level is too low, the hydraulic belt tensioner for the S-unit cannot work correctly, and belt tension is not assured. -
Page 48: Cleaning
Service/Repair Cleaning WARNING Accidental starting of the grinding motors during cleaning Severe injuries due to rotating abrasive belts Disconnect electrical power to the machine; turn off main switch. Only entrust the work to authorized personnel. Do not use compressed air Abb. -
Page 49: Cleaning Interval
Service/Repair Cleaning interval The machine must be cleaned completely Machining of aluminium every eight hours (see 6.3) When machining aluminium, The machine must be cleaned completely the colour of the catch (siehe 6.3) boxes can no longer be seen The machine must be cleaned completely Material switch from steel (siehe 6.3) (stainless steel) to... -
Page 50: Service
Service 7 Service Service intervals The following service work must be performed regularly in the specified intervals. The intervals are shortened corresponding to multiple-shift operation. Service work Interval Clean interior of the machine and dust daily/once per shift collection box (see 6.3 and 6.4) each 8 hrs. -
Page 51: Troubleshooting
Service Troubleshooting If the machine is not working or is not working correctly, the following causes may pertain. Error Display/behaviour Cause Solution Indicator lamp »Phase Phase sequence of the power Turn phases sequence incorrect« is lit supply does not match that of the machine Motor overload switch has ... -
Page 52: Customer Service
Service Customer service If malfunctions occur which cannot be remedied by the customer themselves, contact the following customer service address: LISSMAC Maschinenbau GmbH Lanzstraße 4 D-88410 Bad Wurzach Telephone: +49 (0) 7564 / 307 - 0 Fax: + 49 (0) 7564 / 307 - 500 E-mail: lissmac@lissmac.com... -
Page 53: Wear Parts And Consumables
Wear parts and consumables 8 Wear parts and consumables SBM-M 1000/1500 S2 ALU MIX grinding machine Order number Wear part 825265 Abrasive belt -24KO-S1000 825266 Abrasive belt -40KO-S1000 825267 Abrasive belt -60KO-S1000 825268 Abrasive belt -120KO-S1000 825270 Abrasive belt -40SI-S1000 825269 Abrasive belt -60SI-S1000 825258... -
Page 54: Taking Out Of Operation And Disposal
Taking out of operation and disposal 9 Taking out of operation and disposal If the machine should be dismantled after the end of its service life, it must be properly disassembled and the individual parts delivered to recycling and disposal. The following parts of the machine contain environmentally hazardous substances: ... -
Page 55: Warranty Conditions
Warranty conditions 10 Warranty conditions The warranty for this machine is 12 months. For the following listed wear parts the warranty only applies if the wear is not caused by operation. Feed and drive elements, such as toothed racks, gears, pinions, spindles, spindle nuts, spindle bearing, cables, chains, chain wheels, belts ...
Need help?
Do you have a question about the SBM-M 1000 S2 ALU MIX and is the answer not in the manual?
Questions and answers