Table of Contents
Advertisement
Quick Links
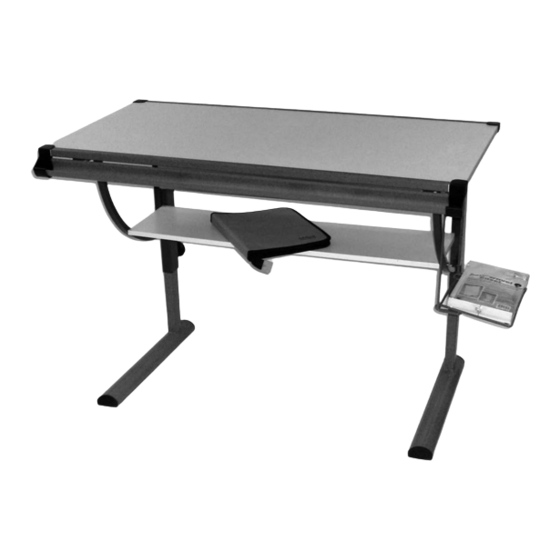
Assembly Instructions
U-DS1776R
IMPORTANT
If you have difficulty assembling your U-DS1776R Liberty Table
or need customer service assistance. Please call:
Martin Universal Design, Inc. Customer Service Hot Line at 1-313-895-0700.
If you need additional parts, it is not necessary to contact your dealer,
our Customer Service Rep. will forward them to you immediately.
Martin Universal Design, Inc. • Detroit, MI 48208 USA
Tel: 131-895-0700 • E-mail: custservMUD@aol.com
www.MartinUniversalDesign.com
Since 1853
August 08, RPI
Advertisement
Table of Contents

Subscribe to Our Youtube Channel
Related Manuals for Liberty U-DS1776R


Summary of Contents for Liberty U-DS1776R
- Page 1 Assembly Instructions U-DS1776R IMPORTANT If you have difficulty assembling your U-DS1776R Liberty Table or need customer service assistance. Please call: Martin Universal Design, Inc. Customer Service Hot Line at 1-313-895-0700. If you need additional parts, it is not necessary to contact your dealer, our Customer Service Rep.
- Page 2 Since 1853 Hardware Parts List 02 ea. M5 x 12 12 ea. M4 x 14 02 ea. M6 x 12 02 ea. M6 x 19 06 ea. M6 x 35 08 ea. M6 x 40 02 ea. 20 x 2.0 06 ea.
- Page 3 Parts List Since 1853 Base Foot 2 ea. Side Support 1 ea. Side Support 1 ea. Top Support 1 ea. Mod. Panel 1 ea. Shelf 1 ea. 1 ea. Side Shelf 1 ea. Pencil Trough 1 ea. August 08, RPI...
- Page 4 The Assembly of this table to be performed with two adult people. Part 2 STEP 1 Begin assembly of Liberty table by taking Zoom of each base (part 1) and slide parts 2 & 3 over the upright column of part 1. Secure with...
- Page 5 Assembly Since 1853 STEP 3 FIG 3 Zoom of This step involves attaching the Modesty Modesty Panel Panel (part 5) to the table base. attachment To do so you must use 2 ea. Cam Locks (part L). Insert the cam locks in the rear side of the Modesty Panel by placing them into the pre-drilled holes that can be found near each of the 4 corners.
- Page 6 Assembly Since 1853 STEP 5 Position of Tilt Attachment of Table Top Tilt Mechanism Mechanism (part 4) & Zoom of Tilt NOTE: Make sure Tilt Mechanism is on Mechanism attachment correct position as show in FIG 5. Begin by taking the Table Top Tilt Mechanism (Part O) and attaching it to the welded block with hole found at the center of the Top Support.
- Page 7 Assembly Since 1853 FIG 8 STEP 8 Attaching Base to Top To attach the Base to the top, you will need to position the end of the top rail of each base leg into the Base Bracket (part N) as indicated in the Zoom portion of FIG 8.
- Page 8 FIG 10. Before you use your table, double check ALL Bolts and screws to make sure all is secure. One done your NEW LIBERTY Table is ready to use. ENJOY! Martin Universal Design, Inc. • Detroit, MI 48208 USA Tel: 131-895-0700 •...
Need help?
Do you have a question about the U-DS1776R and is the answer not in the manual?
Questions and answers