
Related Manuals for Phoenix 2700-DH


Summary of Contents for Phoenix 2700-DH
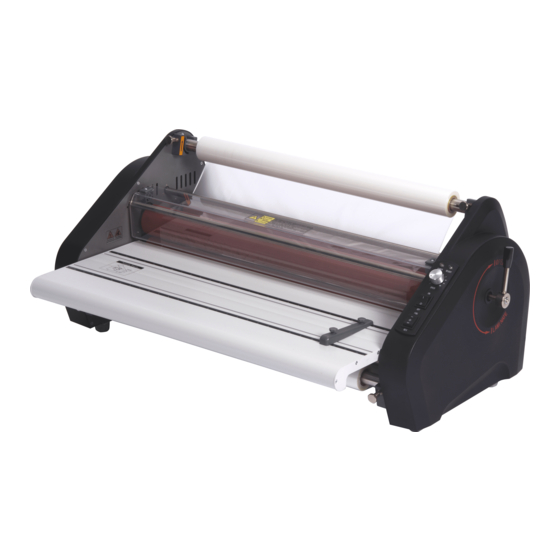
- Page 1 Phoenix 2700 DH July 2018 OPERATING MANUAL Please read this manual carefully before operating!
-
Page 2: Table Of Contents
Phoenix 2700 DH July 2018 Table of Contents Contents Page Introduction ………………………………………………………. Important Safety Instructions ……………………………………. Installation Safeguards …………………………………………… General Safeguards ………………………………………..... Operating Conditions ……………………………………………... Operating Precautions ……………………………………………. Installation ………………………………………………………... System Components ……………………………………………... Control Panel ……………………………………………………... Rear Power Panel …………………………………………………... -
Page 3: Introduction
July 2018 1. Introduction Thank you for choosing the Phoenix 2700 DH laminator. It has been designed and manufactured to provide years of continuous service. Please read this manual thoroughly before operating. Please inspect the box and the laminator for shipping damage. Damage should be brought to the attention of the delivering carrier immediately. - Page 4 Phoenix 2700 DH July 2018 • Contact an electrician should the power cord provided with the laminator not match the receptacles at your location. • Ensure that the voltages of the power supply you are using match the rated working voltages before operations.
-
Page 5: General Safeguards
Phoenix 2700 DH July 2018 4. General Safeguards • Keep hands, long hair, loose clothing, and articles such as neckties away from rollers to avoid entanglement and entrapment. The rollers have pinch points that can trap body parts or clothing and cause serious injury. -
Page 6: Operating Conditions
Phoenix 2700 DH July 2018 5. Operating Conditions • Environment requirements: Ambient temperature: 50⁰ F - 104⁰ F Humidity:30%—80%;ideal humidity:55% • Due to the static on film rolls, you should try to keep the environment clean. • Provide enough space around machine to ensure the safe and effective operation. -
Page 7: Installation
Phoenix 2700 DH July 2018 7. Installation 1. Lift machine straight up and out of the box. 2. Set machine on sturdy table or optional machine stand. 3. Remove plastic cover and operating manual. 4. Remove the feed tray and safety shield. -
Page 8: System Components
Phoenix 2700 DH July 2018 8. System Components 1. Left Side Cabinet Feed Table safety latch 2. Tension Adjustment 10. Safety Shield safety latch 3. Supply Roll Bracket 11. Safety Shield 4. Supply Shaft 12. Feed table 5. 2 ¼” Core adaptor 13. -
Page 9: Control Panel
Phoenix 2700 DH July 2018 9. Control Panel 1. Power Indicator 2. Ready Light 3. Speed Adjustment 4. On/ Off Switch 5. Forward/Reverse Switch 10. Rear Power Panel 1. Safety fuses are located on the Rear Power Panel. a. Hot Fuse - protects the heaters b. -
Page 10: Safety Shield
Phoenix 2700 DH July 2018 11. Safety Shield 1. Insert left side of shield with spring pin into positioning holes on left side frame. 2. Insert right side pin into positioning hole on right side frame. Lower safety shield onto side support pins. -
Page 11: Feed Table
Phoenix 2700 DH July 2018 12. Feed Table 1. Rotate Safety Shield to full upright position 2. Insert Feed table onto back two positioning pins on both side frames 3. Retract Feed table safety latch located under right side of table... - Page 12 Phoenix 2700 DH July 2018 Turn the main ON/Off switch on the front control panel to the ON position, the BLUE power indictor lamp on the control panel will illuminate solid. a. Three slow audible beeps from the circuit board indicates the heaters have been turned on b.
-
Page 13: Roller Cleaning Function
Phoenix 2700 DH July 2018 according to quality of output achieved. • Excess heat may damage the printed image or cause waves. Insufficient heat may result in delamination. • Thinner stocks can be run faster, and thicker stocks or heavy ink coverage should be run slower. -
Page 14: Motor Switch Safety Function
Phoenix 2700 DH July 2018 16. Motor Switch Safety Feature 1. Should the main ON/OFF switch be turned to OFF while the motor switch is in FWD position, the motor must be reset to resume operation. 2. To reset the motor, turn the main ON/OFF switch to the ON position, then turn the motor switch to OFF or “0”... - Page 15 Phoenix 2700 DH July 2018 c. Two - 2 ¼” core adaptors slid onto each supply shaft (See section #19 Using 2 ¼” core adaptors) Supply shaft 2 1/4” core clip 3. Determine whether your film is POLY IN or POLY OUT style a.
- Page 16 Phoenix 2700 DH July 2018 Shaft bracket Remove each supply shaft, while aligning the arrow on the shaft with the arrow on the machine side frame, slide the film roll onto the shafts with the film web coming off the bottom or the top of the roll depending on the poly direction of the film.
-
Page 17: Using 2 ¼" Film Core Adaptors
Phoenix 2700 DH July 2018 19. Using 2 ¼” Film core adaptors Place the supply shafts onto the shaft brackets with the arrows on the shaft matching the arrows on the left and right-side frames. Shaft bracket If using POLY-IN film: c. - Page 18 Phoenix 2700 DH July 2018 If using POLY-OUT film f. Select Four (4) 2 ¼” core adaptors g. Slide Two (2) core adaptors onto the TOP shaft with the core clips pointing toward the REAR of the machine when the clips are on TOP and the shafts are in place.
-
Page 19: Threading Film
Phoenix 2700 DH July 2018 20. Threading Film Raise the gap adjustment handle to the up OPEN position. Pull the top film web under the top idler bar and drape over the two heat rollers. Pull the bottom film web under the bottom idler bar, then up over the two rollers sticking it to the top film web. -
Page 20: Adjusting Brake Tension
Phoenix 2700 DH July 2018 Return the feed table into position and lock the safety interlock Return the safety shield into position and lock safety interlock Use the motor switch on the control panel to advance the film web through the front rollers and between the rear pull rollers, until the threading card can be cut from the web at the rear of the machine. -
Page 21: Troubleshooting
Phoenix 2700 DH July 2018 22. Troubleshooting Problems Causes Solutions 1. No power supply 1. Plug in power cord 2. Main power switch is OFF 2. Move power switch to ON positon Machine does not turn on 3. Blown motor fuse 3. -
Page 22: Specifications
Phoenix 2700 DH July 2018 23. Specifications Description Phoenix 2700 DH Laminating Width 27” Roller Diameter 2.5” Roller Gap 1/4” Temperature 284° F (fixed temperature) 20 – 25 min. Warmup Time Heating Method Quartz tube Laminating Speed 0 to 6 Ft/min... -
Page 23: Warranty
Warranty repair labor at no charge provided the labor is completed at one of our Authorized Locations. It is the responsibility of the original consumer purchaser to return the PHOENIX laminator to our Authorized Locations. For a list of Authorized Repair Locations, please contact your Dealer.
Need help?
Do you have a question about the 2700-DH and is the answer not in the manual?
Questions and answers