Table of Contents
Advertisement
Quick Links
Advertisement
Table of Contents

Subscribe to Our Youtube Channel
Related Manuals for AVM OVATION MP 6.3


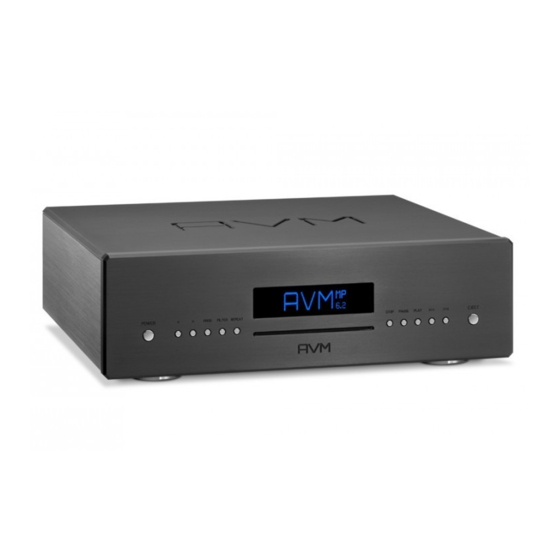
Summary of Contents for AVM OVATION MP 6.3
- Page 1 Operating instructions OVATION MP 6.3 OVATION MP 8.3...
- Page 3 Declaration of conformity (for EC only) We herewith confirm, that the unit to which this manual belongs fulfills the EC rules necessary to obtain the sign the necessary measurements were taken with positive results. AVM Audio Video Manufaktur GmbH Daimlerstraße 8 D-76316 Malsch Germany www.avm.audio...
- Page 4 OVATION Media Player in a comprehensive way and therefore ask you to take a little time to study this manual in detail. Please note: Since the range of functions of your OVATION MP 6.3 / 8.3 may be expanded by future software updates, it is in the nature of things that these instructions must also be supplemented.
-
Page 5: Table Of Contents
Table of contents Getting started ........................6 What’s in the box? ......................6 Control and operating elements ................... 6 Installation and cooling ....................7 Connection to mains ..................... 7 Mains phase indicator ....................8 Connection to a preamplifier or integrated amplifier ............ 8 Connection of digital sources .................. -
Page 6: Getting Started
1 Getting started 1.1 What’s in the box? • OVATION MP 6.3 / 8.3 Media Player • WiFi antenna • Power cord (in some countries) • Optional accessory: RC 9 remote control with docking station, power supply unit, USB charging cable CAUTION: After unpacking, please check the scope of delivery to ensure that all parts have been supplied and are undamaged. -
Page 7: Installation And Cooling
16 Analogue output left (XLR) 28 WiFi antenna socket 17 Analogue output right (XLR) 29 USB A digital input for storage media 30 Reset button 18 Analogue output right (Cinch/RCA) 31 Network port (LAN) 19 Analogue output left (Cinch/RCA) 32 Status LED 20 Digital output optical 33 Update button (Streaming module) 21 Digital output coaxial... -
Page 8: Mains Phase Indicator
1.4.1 Phase LED Especially with high end audio components, which are by nature very sensitive to mains hum, it is important to connect the mains phase correctly. The device is equipped with a Phase LED (38) on the rear panel for this purpose. To check the phase, switch on the unit with the power button (1) and have a look at the Phase LED (38). -
Page 9: Rc 9 Remote Control
Hotkeys. Details on how to use the Hotkey function of your RC 9 remote control can be found in a separate manual on our website at www.avm.audio. By pressing the Enter key on your RC 9 remote control again, the pairing process is completed. - Page 10 All AVM devices with integrated AVM X-STREAM Engine® are hot-pluggable. This means that setting up a wired network connection does not require the AVM device to be restarted or turned off and on again. Instead, a network cable (LAN cable) can be connected while the device is running and a network connection is established immediately.
- Page 11 ü To check on the network status, start the RC X App and select the AVM device. ü Call up the menu item Network info in Settings. In the Wireless section, you can check...
- Page 12 ü Your AVM device is now connected to your local wireless network (WLAN/WiFi) and ready for operation. ü To check on the network status, start the RC X App and select the AVM device. Call up the menu item Network info in Settings. In the Wireless section, you can check on the WLAN...
- Page 13 1.10.2.2 Setup via AirPlay configuration for iOS ü First switch off the AVM device completely using the mains switch on the rear panel (35) and wait a short moment until you switch it on again using the mains switch. ü As soon as your AVM device has completed the startup process and is in the general operating state, open the WLAN menu in the Settings of your iPhone or iPad.
- Page 14 ü To check on the network status, download the RC X App for iOS from the Apple App Store and install it on your iPhone or iPad. Then start the RC X App and select the AVM device from the start menu.
- Page 15 ü Switch off the AVM device completely using the mains switch on the rear panel (35) and wait a short moment until you switch it on again using the mains switch. ü Once your AVM device has completed the startup process and is in general operating mode, go to the Wireless &...
- Page 16 ü Start the RC X App and select the AVM device from the start menu. ü Call up the menu item Network assistant in the Settings and select WLAN connection. ü Use Scan to search for available wireless networks and select the wireless network you want to use as soon as it appears in the search results.
- Page 17 This one-time procedure is called Pairing and is described in section 1.8.1. A detailed description of the entire functionality of the RC 9 remote control can be found in a separate operating manual at www.avm.audio.
-
Page 18: Software & Firmware Updates
ü First, perform the Pairing procedure as described in section 1.8.1 and select the newly set up AVM device on the RC 9 using the Device Selection menu item. You can reach this menu item via the System Settings menu that you call up by pressing the Settings button (tool symbol) of the RC 9. -
Page 19: External Infrared Control
1.11.2 AVM X-STREAM Engine® Update via the RC 9 remote control ü Select the desired AVM device on the RC 9 using the menu item Device Selection. You can reach this menu item via the System menu, which you call up by pressing the Settings button (tool symbol) on the RC 9. -
Page 20: Basic Operation
2 Basic operation 2.1 First operation / self test When switching on for the first time, a so-called self-test is performed if the device has been completely disconnected from the power supply or switched off via the mains switch (35). The device checks the configuration and functionality of the installed components. -
Page 21: Cd Player
STATUS The current operating status (STOP, PLAY, PAUSE) is also shown in the upper part of the display (9). PROG In case of a currently active track programming both the currently playing track and the total number of programmed tracks is displayed on the left-hand side (for example PROG 2/17). In case the random play mode is activated, the currently playing track and the total number of programmed tracks are displayed on the left-hand side (for example RND 5/12). - Page 22 NOTE: If there is already a CD in the drive, the slot is blocked. If the CD is not readable or if a data CD or DVD is inserted by mistake, the DISC ERROR indicator will appear and the CD can be ejected by pressing the EJECT button (15).
- Page 23 2.4.6 Programing an individual playlist Press the PROG button (4) to enter the programming menu. In the upper left corner of the display, the title number (TRCK) of the title to be reprogrammed is shown, which can be selected with the two selection keys (2, 2). Below this, the length of this title is displayed (TIME= xx:xx).
-
Page 24: Source Selection
2.5 Source selection In addition to the integrated CD drive, the device is equipped with a large number of digital inputs that can be activated using the two option keys (2, 3). The current source is shown on the left side of the display (9) under SOURCE. Selecting additional sources such as Spotify Connect®, Apple AirPlay, TIDAL, QOBUZ, HIGHRESAUDIO, Webradio, Podcasts, Music Server or USB (STICK HDD) (29) is only possible using the optionally available RC 9 remote control or the free... -
Page 25: Usb B Digital Input
Bit (PCM) without the need to install an audio driver on your Mac. PC systems with Windows on the other hand require an additional driver, which is available for free download in the download area at www.avm.audio. When a digital signal is applied, the currently active data format (PCM or DSD) is shown in the lower left area of the display next to the sample rate. -
Page 26: Advanced Settings
3 Advanced Settings 3.1 Personal Setup The personal setup offers a range of settings to individualize tyour device according to your personal needs. To enter the personal setup menu, please switch off your device on the rear of the unit at the mains switch (35). Keep the PROG button pressed (4) while you switch on the unit again (35). - Page 27 in the right half the new name. The edited character is marked with an underscore. With the REPEAT button (6) you determine the position of the character to be changed, with the SKIP buttons (13, 14) you set the desired character. Short tapping switches to the next / previous letter.
-
Page 28: Reset (Factory Settings)
3.2 Reset (Factory Settings) The RESET option offers you the possibility to reset the device to its original factory settings and thus to its delivery state. To do this, first switch the device to standby mode using the power button (1) and then switch it off completely using the mains switch (35). Now keep both buttons REPEAT (6) and STOP (10) pressed while switching on the device with the mains switch (35). -
Page 29: Appendix
4 Appendix 4.1 Cleaning Surface and pressure of the housing are largely scratch-resistant. It can be cleaned with mild soapy water or a glass cleaner and a soft duster. ATTENTION: During cleaning, liquid must never be allowed to enter the interior of the housing. For safety reasons, the power cord should also be disconnected before damp wiping. -
Page 30: Conditions Of Warranty (Ec Only)
RC X App for iOS and Android, the integrated AVM X-STREAM Engine® remains in standby mode and is always ready for operation. Please note that the power consumption is not below 0.5 VA as usual, but increases to about 5.5 VA.
Need help?
Do you have a question about the OVATION MP 6.3 and is the answer not in the manual?
Questions and answers