Table of Contents
Advertisement
Advertisement
Table of Contents

Related Manuals for AVM OVATION SD 6.3


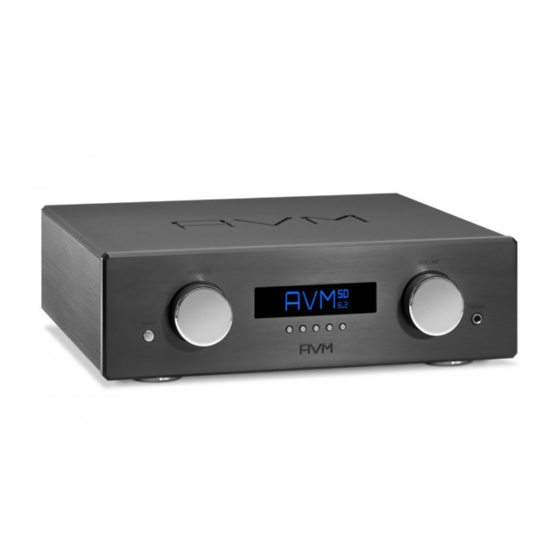
Summary of Contents for AVM OVATION SD 6.3
- Page 1 Operating instructions OVATION SD 6.3 OVATION SD 8.3...
- Page 3 Declaration of conformity (for EC only) We herewith confirm, that the unit to which this manual belongs fulfills the EC rules necessary to obtain the sign the necessary measurements were taken with positive results. AVM Audio Video Manufaktur GmbH Daimlerstraße 8 D-76316 Malsch Germany www.avm.audio...
- Page 4 Please note: Since the range of functions of your OVATION SD 6.3 / 8.3 may be expanded by future software updates, it is in the nature of things that these instructions must also be supplemented.
-
Page 5: Table Of Contents
Table of contents Getting started ........................6 What’s in the box? ......................6 Control and operating elements ................... 6 Installation and cooling ....................7 Connection to mains ..................... 7 Connecting digital sources ................... 8 Connecting analogue signal sources ................8 Connecting a recorder .................... -
Page 6: Getting Started
1 Getting started 1.1 What’s in the box? • OVATION SD 6.3 / 8.3 • WLAN antenna • Power cable • Optional accessory: RC 9 remote control with docking station, power supply unit, USB charging cable CAUTION: After unpacking, please check the scope of delivery to ensure that all parts have been supplied and are undamaged. -
Page 7: Installation And Cooling
Analog output left (XLR) 23 Digital input (Coaxial 2) Analog output right (XLR) 24 Digital input (Coaxial 1) 10 Analog output left (Cinch, Var) 25 Digital input (AES/EBU) 11 Analog output right (Cinch, Var) 26 WiFi antenna socket 12 Analog output left (Cinch, Fix) 27 USB A input 13 Analog output right (Cinch, Fix) 28 Network port (LAN) -
Page 8: Connecting Digital Sources
This process is also referred to as Pairing. In order to start the pairing process, please follow the instructions as described in section 1.8.1. A detailed description of the entire functionality of the optionally available RC 9 remote control can be found in a separate manual on our AVM website at www.avm.audio. 1.8.1 Pairing In order to control your device with a RC 9 remote control, both components need to be linked first. -
Page 9: Rc X App For Ios And Android
Hotkeys. Details on how to use the Hotkey function of your RC 9 remote control can be found in a separate manual on our website at www.avm.audio. By pressing the Enter key on your RC 9 remote control again, the pairing process is completed. - Page 10 All AVM devices with integrated AVM X-STREAM Engine® are hot-pluggable. This means that setting up a wired network connection does not require the AVM device to be restarted or turned off and on again. Instead, a network cable (LAN cable) can be connected while the device is running and a network connection is established immediately.
- Page 11 ü To check on the network status, start the RC X App and select the AVM device. ü Call up the menu item Network info in Settings. In the Wireless section, you can check WLAN configuration that been established. 1.10.2 Setting up a wireless WiFi connection To set up a wireless network connection (WLAN/WiFi) you have several options: ü...
- Page 12 ü Your AVM device is now connected to your local wireless network (WLAN/WiFi) and ready for operation. ü To check on the network status, start the RC X App and select the AVM device. Call up the menu item Network info in Settings. In the Wireless section, you can check on the WLAN...
- Page 13 WLAN function is enabled and your iPhone or iPad is connected to the desired WLAN. ü Select the AVM device you want to connect to your WLAN in the WLAN menu under the menu item SET UP NEW AIRPLAY SPEAKER. In the example below, the AVM device is listed as CS 6.3-00c440.
- Page 14 ü To check on the network status, download the RC X App for iOS from the Apple App Store and install it on your iPhone or iPad. Then start the RC X App and select the AVM device from the start menu.
- Page 15 ü Switch off the AVM device completely using the mains switch on the rear panel (32) and wait a short moment until you switch it on again using the mains switch. ü Once your AVM device has completed the startup process and is in general operating mode, go to the Wireless &...
- Page 16 ü Use Scan to search for available wireless networks and select the wireless network you want to use as soon as it appears in the search results. In the example below, the WLAN network is named FRITZ!Box. A WLAN network name is also called SSID. ü...
- Page 17 ü First, perform the Pairing procedure as described in section 1.8.1 and select the newly set up AVM device on the RC 9 using the Device Selection menu item. You can reach this menu item via the System Settings menu that you call up by pressing the Settings button (tool symbol) of the RC 9.
-
Page 18: Software & Firmware Updates
For maximum ease of use and to get the most out of your device, it is necessary to keep both the firmware of the integrated AVM X-STREAM Engine® and the RC X App up to date. The latest version of the RC X App can be downloaded from the... - Page 19 ü The device restarts to install the update. Do not switch off the device and wait until the update process is completely installed. The update process will be shown on the display of the device if necessary. ü Once the update process is complete, the device will reboot and be ready for use again. ü...
-
Page 20: Basic Operation
2 Basic operation 2.1 First operation / self test When switching on for the first time, a so-called self-test is performed if the device has been completely disconnected from the power supply or switched off via the mains switch (32). The device checks the configuration and functionality of the installed components. -
Page 21: Advanced Settings (Menu)
3 Advanced Settings (MENU) Your device offers a wealth of custom specific settings in its Advanced Settings menu. To enter the menu just tap on the button MENU. The button now changes to EXIT. A second tip on this menu button leads you to the normal operating mode. When the menu system is active, you can select the desired function using the menu buttons <... - Page 22 3.1.3 Set tone control Set tone control activates or deactivates the integrated sound settings menu which enables you to individually adjust the bass or treble level of a certain sound source or lets you choose from a range of available loudness curves. Set tone control can be bypassed (BYPASS) or activated (ACTIVE).
-
Page 23: Line Settings (Xlr, Rca)
3.1.3.3 Set bass Set the bass level between – 7 dB and + 7 dB. A global bass setting (see section above) is indicated on the display with GLOBAL, otherwise INDIVIDUAL. 3.2 Line Settings (XLR, RCA) 3.2.1 Set input attenuation Set input attenuation allows for an attenuation of 6 dB of the selected analog input (14-17) which corresponds to an electrical halving of the incoming level. -
Page 24: Personal Setup
Windows PC you will need to install an additional driver which is available for download on the respective product page at www.avm.audio. Please note that you need to select the HIGH RES mode in order to play back DSD64 or DSD128 files. - Page 25 3.4.1 Set volume limit With this menu item you can limit the maximum output volume up to 50%. This feature can be useful to avoid rapid volume jumps caused e.g., by accidental misuse of the volume control in the RC X App for iOS and Android. The default setting is 70% and is intended as a protection mechanism to protect other components in your system (e.g., speakers) and last but not least your ears from drastic volume jumps which can be triggered e.g., by accidentally operating the volume control of the RC X App for iOS and Android.
- Page 26 Personal Setup again. 3.4.9 Set standby mode To ensure your AVM device can be switched on at any time via the RC X App for iOS and Android, the integrated AVM X-STREAM Engine® remains in constant operational readiness when the net Standby mode (network standby) is selected.
-
Page 27: Reset (Factory Settings)
3.5 Reset (Factory Settings) The Reset option offers you the possibility to reset the device to its original factory settings. To perform a reset, first switch the device to standby mode using the on/off button (1) and then switch it off completely using the mains switch (32). Now keep the RESET button (30) pressed while switching on the device with the mains switch (30). -
Page 28: Appendix
4 Appendix 4.1 Cleaning Use a soft cloth and normal glass cleansing fluid. CAUTION Make sure that no fluid comes into the unit. Do not use scouring cleaners. They may damage the surface. 4.2 Troubleshooting Some putative defects are often caused by mistakes in operation. Sometimes other units connected to the amplifier can cause problems. -
Page 29: Conditions Of Warranty (Ec Only)
RC X App for iOS and Android, the integrated AVM X-STREAM Engine® remains in standby mode and is always ready for operation. Please note that the power consumption is not below 0.5 VA as usual, but increases to about 5.5 VA.
Need help?
Do you have a question about the OVATION SD 6.3 and is the answer not in the manual?
Questions and answers