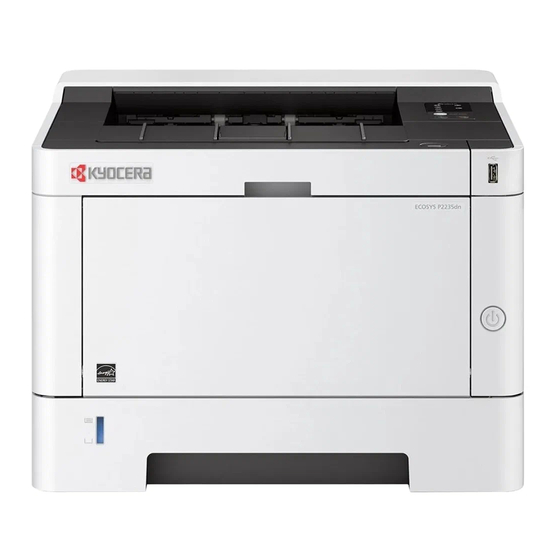
Kyocera ECOSYS P2235dw Frequently Asked Questions Manual
Hide thumbs
Also See for ECOSYS P2235dw:
- Service manual (358 pages) ,
- Operation manual (173 pages) ,
- First steps quick manual (28 pages)
Advertisement
Table of Contents
- 1 Table of Contents
- 2 My P2235Dw Displays "Check Toner/Low Toner
- 3 How Do I Check the Toner Level on My P2235Dw
- 4 How Do I Access the Command Center RX Webpage
- 5 Where Is the Serial Number Located for the P2235Dw
- 6 How Do I Install the Windows Print Driver for My P2235Dw
- 7 My P2235Dw Has Poor Image Quality
- 8 My P2235Dw Displays an Error Indication
- 9 My P2035Dw Does Not Turn on
- 10 My P2035Dw Has an Indicator that a Paper Jam Has Occurred
- 11 Setting the Connection by Using the Wi-Fi Setup Tool (Microsoft Windows)
- 12 When Trying to Access the Command Center Web Page on My P2235Dw It States, "Incorrect Login User Name or Password
- 13 How Can I Print Onto "Special Media" such as Envelopes or Labels on My P2235Dw
- 14 Installing the Apple os Print Driver
- Download this manual
Advertisement
Table of Contents

Related Manuals for Kyocera ECOSYS P2235dw


Summary of Contents for Kyocera ECOSYS P2235dw
- Page 1 Frequently Asked Questions ECOSYS P2235dw...
-
Page 2: Table Of Contents
ECOSYS M2040dw Table of Contents My P2235dw displays “Check toner/Low toner”. How do I check the Toner Level on my P2235dw? How do I access the Command Center RX webpage? Where is the Serial Number located for the P2235dw? How do I install the Windows Print Driver for my P2235dw? My P2235dw has poor image quality My P2235dw displays an error indication. -
Page 3: My P2235Dw Displays "Check Toner/Low Toner
ECOSYS M2040dw My P2235dw displays “Check toner/Low toner”. Check to ensure the toner is Genuine Kyocera Toner. You can do this by checking if the toner has the Kyocera Hologram on the toner bottle. 1. Remove the toner container and shake it, re-install the toner container. - Page 4 ECOSYS M2040dw front cover is closed all the way 2. Make sure the 3. Make sure the toner is installed in the printer correctly.
-
Page 5: How Do I Check The Toner Level On My P2235Dw
ECOSYS M2040dw How do I check the Toner Level on my P2235dw? The toner gauge can be found on the printer Status Page. Press the Go button for 4 seconds and release, a status page will be printed Check Toner Gauges at the bottom of the page. -
Page 6: How Do I Access The Command Center Rx Webpage
ECOSYS M2040dw How do I access the Command Center RX webpage? (Command Center is not available with USB Cable connected devices) Print the Status Page to get the TCP IP address for the printer. Press the [Menu] key > press the [▲] [▼] key to select [Report Print] > [►] key>select Print Status Page Look for the heading of Network on left column of the printed Status Page. -
Page 7: Where Is The Serial Number Located For The P2235Dw
ECOSYS M2040dw Where is the Serial Number located for the P2235dw? Open the Multi-Purpose Tray to find the Serial Number. It will be a white label that looks like a barcode. Note: The serial # is also located in the upper right corner on the previously printed status page. How do I install the Windows Print Driver for my P2235dw? Supported operating systems... - Page 8 ECOSYS M2040dw When the extraction completes, The Kyocera Product Library will open. Accept the License Agreement.
- Page 9 ECOSYS M2040dw Acknowledge the Energy Star Compliance notification by clicking OK. In the menu on the left select Express Install.
- Page 10 ECOSYS M2040dw In Express mode, the installer will search the network and USB connections for any Kyocera devices. Click on the printer to highlight it and click Install.
- Page 11 ECOSYS M2040dw Select Yes to allow the driver to report issues to Kyocera in the event of an issue. If you do not wish to allow the reporting, select No. The Product Library will start installing the selected driver and components.
- Page 12 ECOSYS M2040dw Once complete, select the check box to Print A Test Page. Please note that for Energy Star Compliance, Duplex is enabled by default.
-
Page 13: My P2235Dw Has Poor Image Quality
ECOSYS M2040dw My P2235dw has poor image quality To maintain quality, be sure to use genuine Kyocera toner. The use of non-genuine toner containers may cause failure. A label is affixed to our genuine supplies, as shown below. 1. Replace the paper with new paper. -
Page 14: My P2235Dw Displays An Error Indication
ECOSYS M2040dw My P2235dw displays an error indication. If an error occurs on the machine, the error message appears on the screen. (Refer to Operation Guide for help with troubleshooting). -
Page 15: My P2035Dw Does Not Turn On
ECOSYS M2040dw My P2035dw does not turn on. 1. Make sure to fully press in the white main power button located on the lower right side of the front of the printer. 2. Check that the power cord that came with the printer is fully inserted in the rear of the unit. 3. -
Page 16: My P2035Dw Has An Indicator That A Paper Jam Has Occurred
ECOSYS M2040dw My P2035dw has an indicator that a Paper Jam has occurred. Paper Jam at the MP Tray 1. Remove any jammed paper. Do not reuse jammed papers. If the paper tears during removal, be sure to remove any loose scraps of paper from inside the machine. Scraps of paper left in the machine could cause subsequent jamming. - Page 17 ECOSYS M2040dw 2. Remove all the paper. 3. Reload the paper in Multipurpose tray.
- Page 18 ECOSYS M2040dw Paper Jam at the Cassette 1 1. Pull Cassette 1 out toward you until it stops. 2. Remove any jammed paper. Do not reuse the jammed papers. If the paper tears during removal, be sure to remove any loose scraps of paper from inside the machine. Scraps of paper left in the device could cause subsequent jamming.
- Page 19 ECOSYS M2040dw 3. Push Cassette 1 back in. Paper Jam at Rear Cover 1. Open the Rear Cover 1.
- Page 20 ECOSYS M2040dw 2. Remove any jammed paper. Do not reuse the jammed papers. If the paper tears during removal, be sure to remove any loose scraps of paper from inside the machine. Scraps of paper left in the device could cause subsequent jamming.
- Page 21 ECOSYS M2040dw 5. Pull Cassette 1 out toward you. 6. Open feed cover 7. Remove any jammed paper.
- Page 22 ECOSYS M2040dw 8. Push feed cover back in. 9. Push cassette 1 back in. 10. Push and close the Rear Cover 1.
-
Page 23: Setting The Connection By Using The Wi-Fi Setup Tool (Microsoft Windows)
ECOSYS M2040dw Setting the Connection by Using the Wi-Fi Setup Tool (Microsoft Windows)”. To send the Wi-Fi settings configured in the Wi-Fi Setup Tool to the machine, connect the computer with the machine locally. The connection methods are wired connection via LAN cable and wireless LAN connection (Wi-Fi Direct). NOTE NOTE •... - Page 24 ECOSYS M2040dw Click [Accept] Select Maintenance. Wi-Fi Setup Tool > [OK]...
- Page 25 ECOSYS M2040dw Configure the settings. Select “Do not use WPS” Press next.
- Page 26 ECOSYS M2040dw Press next. Select LAN cable and press Next.
- Page 27 ECOSYS M2040dw Press Next. Select Easy setup and Press Next A list of available printers will be displayed, select your model and press Next.
- Page 28 ECOSYS M2040dw Enter Admin for User name and Admin for password. Select Use device settings. Press Next. Software will show connecting status.
- Page 29 ECOSYS M2040dw Select your Network Authentication type and enter Password in the Pre-Shared Key field. Press Next. Software will show connecting status.
- Page 30 ECOSYS M2040dw Setup Complete. NOTE Only one device can be added at a time using Wi-Fi setup tool. It may take some time to search for the device.
-
Page 31: When Trying To Access The Command Center Web Page On My P2235Dw It States, "Incorrect Login User Name Or Password
ECOSYS M2040dw When trying to access the Command Center web page on my P2235dw it states, “incorrect login User Name or Password”. The default login is Admin (capital A) for both the username and PW. If the issue persists, try a different browser. Once logged in you will see the available links listed on the left side of the page. -
Page 32: How Can I Print Onto "Special Media" Such As Envelopes Or Labels On My P2235Dw
ECOSYS M2040dw How can I print onto “Special Media” such as Envelopes or Labels on my P2235dw? For special media you must use the Multipurpose tray. Open the MP tray and load the desired media type. Next, the settings need to be configured on the device for the paper that was loaded. In order to make those changes, a utility called Configuration tool is required. - Page 33 ECOSYS M2040dw The Configuration tool will open. Select your device from the list of installed printers. Select Next, Select MP tray as Paper source, Envelope #10 as Paper size and Envelope as Media Type.
- Page 34 ECOSYS M2040dw After the printer has been configured, the media setting in the print driver must be set as well. Open the file to be printed then follow the steps below. Open your document Select File and select Print in the application Select your device from the “printer”...
-
Page 35: Installing The Apple Os Print Driver
ECOSYS M2040dw Installing the Apple OS print driver. The driver can be downloaded from our Public website. Go to kyoceradocumentsolutions.us. Select Support in upper right of page, select Download Center, then enter the model number and select model from list. The page will refresh and you will be presented with many driver files, The latest Mac installer will be at top. - Page 36 3 files. A package file, setup guide. and the uninstaller. We would recommend running the uninstaller first if you are having trouble printing or have issues with a previously installed Kyocera driver. The Setup guide also has install and setup instructions in case you need a visual help file. Double click on the package (.pkg) file to start the install.
- Page 37 ECOSYS M2040dw Next will be the read me notes, this contains information about what has been updated in this version and known issues. Select continue. Next up is license agreement, select continue and agree. This next screen describes how much space will be taken up by installer. At this point you can customize your install, select customize.
- Page 38 Here you will have the choice of turning off duplex by default, enabling Print option (for PCL and PDF output), Or enabling Kyocera Net Manager. Select install (1) Enter the Admin username and password for computer. And select install software.
- Page 39 ECOSYS M2040dw Install will continue, then select close. This will install the required files needed to configure the print driver.
- Page 40 That install put the printer files and PPDs where they need to go on the Apple computer. Now for the actual printer setup. First verify that your Kyocera device is powered on and connected to USB or network. Select the apple icon in upper left corner of computer screen, select System Preferences, then select Printers and Scanners.
- Page 41 IP, will allow you to enter a specific IP address for the device you’re connecting to. (this is the preferred and most common method of adding networked Kyocera Devices). Default. Select the default tab. All your network and USB connected devices should appear in the window. Select your device, at this point verify in the “Use”...
- Page 42 Press add and the printer will be added to the device list. IP, this is the most common and preferred method, Select the IP tab. Verify the Protocol is set to Line printer daemon/LPD, this is the recommended protocol for Kyocera printers.
- Page 43 ECOSYS M2040dw Enter the IP address of the desired printer, the queue will remain blank. If Generic Postscript printer is displayed in the Use box, It could be that you are not connecting to the correct printer or it is offline. Also it could mean that the driver files are not installed. Verify the correct model number with KDPL in parenthesis is in the “Use”...
- Page 44 ECOSYS M2040dw After any one of the previous install procedures it leads us to this screen. The printer has been installed. Here you can verify the PPD and the Options Press options and supplies, in the General tab you can change the name or location and check the version of the driver, In the Options tab you can change the installed options Supply levels will show current status of toner and waste toner.
- Page 45 ECOSYS M2040dw From this area you can also print a test page. Select open print queue, the print spooler dialog will open, from the top menu on computer select Printer then print test page. A test page will be sent to the printer.
- Page 46 Kyocera Document Solutions Inc. is a core company of Kyocera Corporation, a leading supplier of semiconductor packages, industrial and automotive components, electronic devices, solar power generating systems and mobile phones.
Need help?
Do you have a question about the ECOSYS P2235dw and is the answer not in the manual?
Questions and answers