Advertisement
Quick Links
R
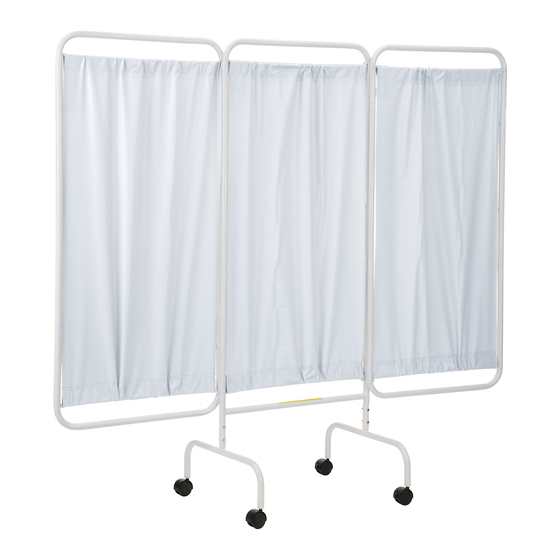
MODEL PSS-3C
Mobile Privacy Screen
· Never stand or ride on this product.
· Keep casters free of debris.
!
· Do not hang anything on this product.
· Use caution when rolling over uneven surface.
@
SALES
RBWIRE.COM
MODEL PSS-3
Stationary Privacy Screen
OR
HARDWARE INCLUDED
(800) 634-0555
ASSEMBLY INSTRUCTIONS
TOOLS REQUIRED:
(1) 9/16" wrench
STEP
1
If you ordered a Mobile Privacy Screen, determine where
you want the 2 locking casters positioned. With the 9/16"
wrench, screw casters into legs
If you ordered a Stationary Privacy Screen, place each
of the four crutch tips onto the ends of the leg feet.
STEP
2
Carefully lay the frame of the Privacy Screen down
onto the ground. Insert the leg tubes into the frame
and secure them with two 7/16" wrenches and
hardware provided.
NOTE: Save the extra panel rod end clip for future use.
STEP
3
Once legs are installed, stand the unit upright and
open the frame up so curtain panels can be installed.
(Not to scale)
x4 Casters
x6 Curtain rods
x4 Crutch tips
(2) 7/16" wrenches
1 person assembly
x4 Bolts
x13 End clips
RBWIRE.COM
x4 Nuts
Advertisement

Related Manuals for R&B Wire Products PSS-3C

Summary of Contents for R&B Wire Products PSS-3C
- Page 1 ASSEMBLY INSTRUCTIONS TOOLS REQUIRED: MODEL PSS-3 MODEL PSS-3C Stationary Privacy Screen (1) 9/16" wrench (2) 7/16" wrenches Mobile Privacy Screen 1 person assembly STEP If you ordered a Mobile Privacy Screen, determine where you want the 2 locking casters positioned. With the 9/16"...
- Page 2 ASSEMBLY INSTRUCTIONS MODEL PSS-3C or PSS-3 Standard 3-Panel Privacy Screen pg 2 STEP Take one curtain out of the 3-pack, along with one aluminum rod and 2 end clips. Slide the aluminum rod into the top pocket. Insert the thick end of each clip into each end of the rod.
Need help?
Do you have a question about the PSS-3C and is the answer not in the manual?
Questions and answers