
Subscribe to Our Youtube Channel
Related Manuals for Echogear EGAV1


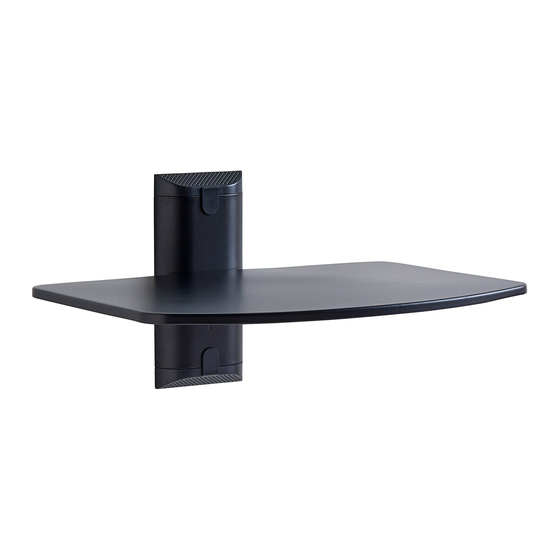
Summary of Contents for Echogear EGAV1
- Page 1 All manuals and user guides at all-guides.com #YourGearUpgraded SINGLE Shelf Model EGAV 1 INSTRUCTION MANUAL...
-
Page 2: Weight Restrictions
All manuals and user guides at all-guides.com IMPORTANT READ SAVE SAFETY INSTRUCTIONS. ENTIRE MANUAL PRIOR TO USE. These INSTRUCTIONS Yea, the boring stuff ... but read it, so you don’t jack things up! Please read through these instructions completely to be sure you’re comfortable with this easy install process. - Page 3 All manuals and user guides at all-guides.com Grab Your Tools Tape Pencil Phillips Level Electric Drill Measure Screwdriver "We won't tell Phil you borrowed it." Wood Stud Install Concrete Install Drywall Install 3/16 in. 3/8 in. 3/8 in. 3/8 in. 3/8 in.
-
Page 4: What's In The Box
All manuals and user guides at all-guides.com What’s in the Box WARNING: DON'T FEED TO CHILDREN — This product contains small items that could be a choking hazard if swallowed. Before starting assembly, verify all parts are included and undamaged. If any parts are missing or damaged, do not return the damaged item to your dealer;... - Page 5 All manuals and user guides at all-guides.com NOTE: Not all hardware included in this kit will be used. STUFF FOR STEP 2 End Caps M6x12 mm (Wall Plate) Shelf You're ready! LET’S DO THIS!
- Page 6 All manuals and user guides at all-guides.com STEP 1A Install the Wall Plate (For Wood Stud) STEP 1A.1 Find a Stud STEP 1A.2 Mark Holes "Keep it on the level" Verify stud edges with a stud fi nder ..and/or probe with an awl or a "favorite Stud center...
- Page 7 All manuals and user guides at all-guides.com STEP 1A.3 Drill Holes STEP 1A.4 Secure Wall Plate 2¾ in. (70 mm) If needed, use a 3/8 in. (10 mm) socket [thin-wall or 1/4 3/16 in. in. drive socket] (5 mm) Go to STEP 2 on PAGE 12...
- Page 8 All manuals and user guides at all-guides.com STEP 1B Install the Wall Plate (For DRYWALL) STEP 1B.1 Mark Holes STEP 1B.2 Drill Holes 1 in. (25 mm) 3/8 in. "Keep it on (10 mm) the level" "This is a wall ... you can't mount in thin air ...
- Page 9 All manuals and user guides at all-guides.com STEP 1B.3 Insert Anchors STEP 1B.4 Secure Wall Plate IMPORTANT: DO NOT use power tools for this step. "Had something hilarious here about pinching ... but HR tied our hands" Go to STEP 2 on PAGE 12...
- Page 10 All manuals and user guides at all-guides.com STEP 1C Install the Wall Plate (For CONCRETE) STEP 1C.1 Mark Holes STEP 1C.2 Drill Holes 3 in. (75 mm) "Keep it on the level" 3/8 in. (10 mm)
- Page 11 All manuals and user guides at all-guides.com STEP 1C.3 Insert Anchors STEP 1C.4 Secure Wall Plate If needed, use a 3/8 in. (10 mm) socket [thin-wall or 1/4 in. drive socket]...
- Page 12 All manuals and user guides at all-guides.com STEP 2 Attach Shelf to Wall Plate STEP 2.1 Insert End Caps...
- Page 13 All manuals and user guides at all-guides.com STEP 2.2 Attach Shelf Underneath...
- Page 14 All manuals and user guides at all-guides.com...
- Page 15 Milestone assumes no responsibility for accuracy, completeness or suffi ciency of the information contained in this document. ©2016 Milestone AV Technologies. All rights reserved. ECHOGEAR is a Milestone brand. ECHOGEAR and the ECHOGEAR logo are trademarks of Milestone.
- Page 16 All manuals and user guides at all-guides.com Confuzzled? Call the ECHOGEAR Team: 1-855-428-2490 helpmehelpyou@ECHOGEAR.com “Wanna show off your hard work? Share a picture of your completed project with #YourGearUpgraded. Who knows, it might not be as bad as you thought”...
Need help?
Do you have a question about the EGAV1 and is the answer not in the manual?
Questions and answers