Table of Contents
Advertisement
Quick Links
Advertisement
Table of Contents

Related Manuals for Primo Water RAVEN XR15


Summary of Contents for Primo Water RAVEN XR15
-
Page 2: Table Of Contents
TABLE OF CONTENTS TABLE OF CONTENTS ................. RAVEN-XR15 TECHNICAL DATA ............RAVEN-XR15 ROASTER DRAWINGS ............FRONT VIEW ................... LEFT SIDE VIEW ................REAR VIEW ..................RIGHT SIDE VIEW ................TOP VIEW ..................FRONT VIEW WITH CYCLONE ............. SAFETY INFORMATION ..............THINGS TO CONSIDER .............. -
Page 3: Raven-Xr15 Technical Data
raven-xr15 TECHNICAL DATA 1. Raven-Xr15 Roaster Technical Data This section contains a table, on the next pages, with technical data information applicable to both the Standard Raven-Xr15 and a Custom Raven-Xr15 roaster. Information in this table is subject to change. RAVEN-Xr15 Information Technical Data Green coffee capacity, min-max... -
Page 4: Raven-Xr15 Roaster Drawings
raven-xr15 Roaster Drawings 2. Raven-Xr15 Roaster Drawings This section contains drawing views with dimensions and component descriptions. These drawings are valuable for familiarization with the Raven-Xr15 roaster and for space and utility connection planning. Dimensions and some details are subject to change. These drawings each take a full page so the remainder of this page is intentionally blank. -
Page 5: Front View
Front view Scale 1:32... -
Page 6: Left Side View
Left side view Scale 1:32... -
Page 7: Rear View
Rear view Scale 1:32... -
Page 8: Right Side View
Right side view Scale 1:32... -
Page 9: Top View
Top view Scale 1:32... -
Page 10: Front View With Cyclone
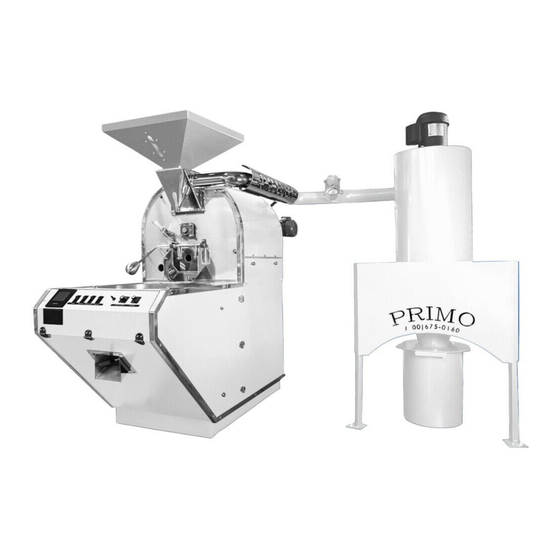
Front view with cyclone Scale 1:32 Roaster to Cyclone Connection Not Pictured Above*... -
Page 11: Safety Information
Safety information Prior to installing & operating your roaster please read the entire manual. If you see this symbol in the manual, make sure to read what follows because it is a caution for actions that can cause harm or damage to your machine and/or the operator. Death, injury, or property damage can be caused because of improper installation, adjustment, alteration, service, or maintenance. -
Page 12: Things To Consider
Things to consider i. Ease of movement ATTENTION: Prior to moving machine and/or cyclone make sure the roaster is turned off, unplugged, and the gas is disconnected/off. To move the roaster and/or cyclone the machine must be taken apart. 1. Remove exhaust arm by pulling it off via compression fittings and set aside. 2. -
Page 13: Pre-Installation
Pre-installation i. Receiving/Un-Crating ATTENTION: Hire a professional to install your roaster. Roaster: The roaster comes in a crate. Cut plastic walls off to expose roaster. *Be careful not to drop/slide the tool you are using to cut into the crate, on the roaster* Once all walls are taken off, cut the steel cord strapped over the cooling tray to the pallet. -
Page 14: Installation
Installation ATTENTION: Hire a professional to install your roaster. This manual must be read completely through prior to any installation. Check with local building authorities for their local codes & installation requirements prior to installation. i. Electrical ATTENTION: Use a licensed electrical company when installing the electrical on your Primo roaster. - Page 15 iv. Cyclone ATTENTION: When installing the cyclone to your roaster use a licensed contractor. The cyclone uses 6" ducting too vent. Consult your licensed contractor to ensure proper installation of duct work.
-
Page 16: Exhaust Ducting & General Information
Exhaust ducting & general information 1. Throughout the remainder of this document, the term exhaust ducting refers to the ducting that the customer, or their contractor/representative, select, acquire, and install. The exhaust ducting will connect to the applicable Primo Roasting provided equipment. -
Page 17: Exhaust Ducting, Hot Air - Roasters & Afterburners
Exhaust ducting, hot air - roasters & afterburners 1. The exhaust air from the roasting process is hot and contains oils and residues which are flammable. In the event of a ducting/flue fire, the internal duct temperatures can exceed 1000° F (538°C), which could cause nearby combustible materials to ignite. -
Page 18: Exhaust Ducting, Ambient Air -Loaders & Destoners
Exhaust ducting, ambient air -loaders & destoners DANGER DO NOT USE CLASS B OR SPIRAL-WRAP DUCTING FOR ROASTER OR AFTERBURNER DUCTING UNDER ANY CIRCUMSTANCES. DANGER Fires are caused by failure to maintain a clean roaster and its exhaust ducting system. Regular cleaning of the roaster and exhaust ducting will prevent the buildup of residues that could cause fire. -
Page 19: Operating Machine
Operating machine Primo Roasters have 3 or 4 switches depending on model. The switches in order from left to right: Ignition (IGN), Drum (DRUM), Cooler (COOLER), & Agitator (AGT). Every Primo Roaster is outfitted with a LCD screen. This LCD screen shows your current drum temperature, Temp 1 &... - Page 20 iii. Cooling Cooler/Agitator Primo Roasters are equipped with an agitator/cooler to cool down the roasted material. Before dropping roasted material into the cooler tray turn on the agitator and cooler switches (The Genesis-Xr3 & Ranger-Xr5 models do NOT have both switches). Once your material has cooled to the desired temp you can open the discharge gate to drop material into storage bin.
-
Page 21: Maintenance & Cleaning
Maintenance & cleaning i. Maintenance Schedule Changing Drum Depth 1. Make sure machine is shut-off. 2. Loosen the two set screws on the front bearing with a 3/32” HEX Key. 3. Use a rubber mallet to push the drum axle back to desired distance *Use rubber mallet as to not damage the machine. - Page 22 4. Inspect all ducting on roaster/cyclone for accumulation. If necessary clean and remove the accumulation prior to cleaning. 5. Check blower motor fan and if necessary, clean. Annual Cleaning 1. Check all visible bolts/screws and tighten/replace if necessary. 2. Have a professional chimney cleaner sweep clean the exhaust ducting.
-
Page 23: Additional Documents & Information
Additional documents & information The information in this document is intended to assist customers with purchasing and facility preparation decisions. Upon purchase of a Primo Roaster, additional documentation will be provided. It is important for customers to read these documents to ensure that the installation and operation phases are smooth and safe.
Need help?
Do you have a question about the RAVEN XR15 and is the answer not in the manual?
Questions and answers