Table of Contents
Advertisement
Quick Links
使用說明書
HOW TO USE
日立多門電冰箱
REFRIGERATOR-FREEZER
家庭用 For household use
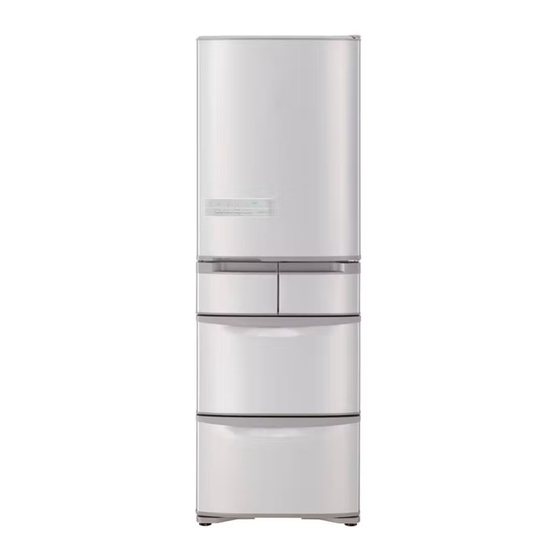
R-S42GS R-S42GH R-S42GHL
型號
Model
● 購買後初次使用時。
初次使用時,庫內冷卻可能需要約 4 小時至 24 小時以上。
● 請遵守可容納食物的高度及食品之間空開間隙儲放。
過分塞堵食物,會造成食品及袋子被門夾住關不緊,製冷效率低,不能製冰等。
● It takes time to cool for the first time.
It may take more than 4 〜 24 hours to fully cool.
● Make sure that no food protrudes beyond the storage height limit of
each compartment, and allow clearance between each food in each
compartment.
Otherwise, food and/or package may not be stored in each compartment properly, and as
a result, the door may not be closed completely. It may cause the refrigerator not to cool
sufficiently and/or not to make ice.
日本製
Made in Japan
5 doors
五門
10, 11 頁
Pg.44, 46
非常感謝您購買日立電冰箱。
此電冰箱僅供家庭使用,請勿使用於商業用途和儲
存食品以外的目的上。
請詳閱本使用說明書,以確保正確使用。
使用前請務必詳閱「安全上之注意事項」 。
請妥善保管本使用說明書與保証書,當將電冰箱交給
他人在別的場所使用時,以及交給回收工廠時,請
將本使用說明書隨電冰箱一同轉交。
Thank you very much for purchasing a Hitachi
Refrigerator.
This refrigerator is designed for home use only.
Do not use this refrigerator for the business use
and/or any purpose other than storing food.
Please read this operation manual carefully
and ensure you use the appliance correctly. In
particular, be sure to read the "Safety Suggestions"
section of this operation manual before use.
Please keep this operation manual along with your
guarantee card.
Hand over this operation manual together with the
refrigerator when the refrigerator is passed to a
third party and used in a different location, or when
it is sent to a recycling plant.
16, 18 頁
Pg.38, 39
Advertisement
Chapters
Table of Contents

Related Manuals for Hitachi R-S42GS


Summary of Contents for Hitachi R-S42GS
- Page 1 請詳閱本使用說明書,以確保正確使用。 使用前請務必詳閱「安全上之注意事項」 。 請妥善保管本使用說明書與保証書,當將電冰箱交給 他人在別的場所使用時,以及交給回收工廠時,請 將本使用說明書隨電冰箱一同轉交。 Thank you very much for purchasing a Hitachi Refrigerator. This refrigerator is designed for home use only. Do not use this refrigerator for the business use and/or any purpose other than storing food. Please read this operation manual carefully and ensure you use the appliance correctly.
- Page 2 節省能源的使用方法 Tips for using the refrigerator wisely for energy savings 1. 減少冰箱門的開閉,切勿時間過長 開閉次數多,冷氣向外流失,保冷效果差。 2. 切勿塞滿過多的食物 一旦塞滿過多的食物, 冷氣的流通循環不良, 不僅無法讓冰箱內均一冷卻, 而且還會消耗電力。存放食品時請適度地保留間隙。 3. 將熱的食物放冷之後再放入冰箱 將熱的食物放入冰箱時,冰箱內部的溫度升高,周邊食物的溫度也隨之升高。 4. 冰箱周邊應保留適當的間隙 若周邊無保留間隙時,冰箱無法散熱,而導致電力的浪費。 5. 更換受損的冰箱門墊圈 因受損後所產生的間隙可讓冷氣流失,而導致電力的浪費。將名片等夾在其間,若因無法夾緊而滑落,請更換冰箱門的墊圈。 1. Open or close a door less frequently and quickly. Frequent opening and closing leads to waste of energy. 2.
-
Page 3: Table Of Contents
目錄 使用之前 保養方法 目 安全上的注意事項 ......保養方法〈定期檢查〉 ......錄 確認事項 ..........電源插頭 / 冰箱背面 ・ 地板 / 箱門表面 ..各室的名稱 ・ 存放食物 ........ 各層架 ・ 置物架 ・ 置物盒 / 箱門密封墊 / 液汁承接處 ... 操作面板的功能 .......... 製冰機清潔 ..........事前準備 ..........給水槽 ............使用前的準備... -
Page 4: 確認事項
安全上的注意事項 請務必遵守 為了防止危害到使用者或其他人及造成財務上的損失,請務必遵守以下事項。 ■ 以下將以標示方式,區分及說明忽視標示內容而誤用 ■ 以下將以圖示標示方式,區分及說明應遵守內容的種 時所產生的危害與損失程度。 類。 (以下為圖示標示例) 此標示欄表示「可能會造成死亡或嚴 警告 此圖示標示為「禁止」內容(請勿執行之事項) 。 重人身傷害」 。 此標示欄表示「可能會發生人身傷害 注意 此圖示標示為 「強制」內容 (請務必執行之事項) 。 或財產損失之預測內容」 。 ■ 此冰箱使用可燃性的冷煤。以下的標示欄記載關於可燃性冷煤的注意事項。 此圖示標示為可燃性冷煤的注意事項。 R600a 警告 安裝時 ● 針對地震等天然災害做好防止翻倒處置。 ● 請勿設置於潮濕或會被水淋 ・ 避免因翻倒而受傷。 到的場所。 ・ 避免因電氣絕緣不良而引起觸 禁止淋濕... - Page 5 警告 電源及電源電線 安 全 ● 請勿用潮濕的手,拔除插頭。 ● 進行冰箱保養,請務必 上 ・ 會引起觸電。 拔掉插頭。 ● 本電器不能在沒有人員監督以 的 有觸電或受傷的危險。 禁止濕手 及指示之下,讓體力、知覺、 22 頁 注 ・ 請將插頭確實的從插座 以及精神不健全的人獨自操作 意 ( 包含小孩 ) 。並請注意以及隨時監督切勿 內拔出。 事 讓小孩玩耍本電器。 項 在一般使用的情況下 ● 請勿用水淋濕主體與箱內。 ● 請勿將含水容器放在冰箱上。 ・ 避免因電氣絕緣不足而引起 ・...
- Page 6 警告 R600a 關於冷媒(由於這是一種可燃性的氣體 R600a: 異丁烷,請注意以下的事項。 ) ● 除廠商建議方法外,不得使用機械工具或其它 ● 不可以螺絲等銳利物品刮傷冰 工具來加速除霜的過程。 箱本體。 由於使用可燃性的冷媒,當冷 ● 請勿在冰箱內部使用電器用品。 禁止 媒從冰箱內壁的配管外洩, 會 ・ 如冷媒外洩,電氣接點所產生的火花,會有起火. 有起火.爆炸的危險。 爆炸的危險。 ● 請勿損傷冰箱的冷卻 ● 安裝的時候,在周圍要離開一些 管路。 間隙,確保有足夠的散熱空間。 冷媒配管損壞時,請 10 頁 將冰箱遠離火源並避 若冷媒外洩的情況持續,會有起 免使用電器用品。 火.爆炸的危險。 配管損壞時,請儘快 ● 如需進行廢棄處理時,請聯絡經 將門窗打開,並與經銷商或日立技術中心聯絡。 銷商或環保署資源回收中心專 線,交給他們進行專業處理。...
- Page 7 注意 移動 • 搬運時 安 ● 請勿在容易刮傷的地板 ● 搬運時,請用手持手 全 小心! ! 上使用冰箱滑輪。 把搬運。 上 避免因滑輪而刮傷地板。 倘若沒有手持把手,可能 的 ・ 請在容易刮傷的地板上鋪 禁止 會因手滑而受傷。 � 注 ・ 請僱用 2 人以上手持手把 上保護板。 意 ● 請勿以吊車吊起手把部位。 搬運。 ● 請勿碰撞冰箱背面 ・ 側面。 ・ 搬運時請如圖示般將箱門朝上。 事 ・...
-
Page 8: 各室的名稱 ・ 存放食物
確認事項 各室的名稱 ・ 存放食物 冷藏室 冰溫室 12 頁 13 頁 約 2˚C~6˚C 約 -3˚C~0˚C 肉類 ・ 魚類等的生鮮食品 冷藏食品 Yo gur t Milk Vienna sausage 箱門置物架附近溫度會稍高。 製冰室 14 頁 約 -20˚C~-18˚C 收納自動製冰機所製造 的冰塊。 上層 ・ 下層冷凍室 蔬果保鮮室 18 頁 16 頁 約... -
Page 9: 操作面板的功能
操作面板的功能 請按操作部來切換各種設定。 告知之顯示 確 認 19 頁 減少電力消耗,啟動運轉時顯示燈亮燈 事 20 頁 項 操作面板按鍵鎖,上鎖時顯示燈亮燈 28 頁 告知異常時,顯示燈閃爍 15 頁 Water(給水) 當給水槽中的水減少時,顯示燈亮燈 ※ 為了更清楚說明,所有的顯示都呈燈亮的狀態。 顯 示 部 分 操 作 部 溫度設定 製冰設定 設定冷卻模式 設定冷藏庫各存放空間的 設定製冰模式 設定冷卻模式 溫度。 Quick (急速製冰) Energy Saving (節電) 15 頁... -
Page 10: 事前準備
事前準備 使用前的準備 設置 ● 堅固 ・ 水平的地板 地毯 ・ 榻榻米(日式草蓆地板) ・ 木板地 ・ 塑膠地板等恐怕會有變形 ・ 變色的可能,請墊( 1cm 厚)的板。 ● 避免陽光直射和高溫 ● 不潮濕 ・ 空氣流通的地方 這些可防止冷卻功率下降,避免電費增加。而且可抑制變色以及生 銹 。 ● 與其他的電器間隔一段距離 上方為 5cm 以上 防止對電視等造成雜音或影像不安定等情形。 ※ 為了保持良好冷卻效率,在周圍請空開充分的散熱空間。 ※ 本體側面的中央部分是比所表示的尺寸稍大。 設置時請確保充裕的空間。 ※ 背面可靠牆設置。 當察覺有震動音或濕氣較高時背面因結露而導致牆壁變色或髒汙時,... -
Page 11: 移動 ・ 搬運的事前準備 ( 搬家時 )
將電源插頭插入 設置後直接就可插上電源插頭。 請用獨立的插座。 (電源 220 〜 240V �額定電流 10A 以上) ● 請確認電源插頭及電線是否夾在冰箱背面及牆壁中間。為了防止電線發熱。 事 冰箱內開始冷卻 前 ● 根據冰箱周圍溫度、食品的存放方式不同,冰箱內充分冷卻約需要 4 小時。夏天天氣炎熱時,也有可能需要 24 小時以上。 準 在冰箱尚未充分冷卻前請勿將冰淇淋或未充分冷卻的食品、易受損的食品,放入冰箱。 備 23 頁 ● 初次使用自動製冰時,請操作自動製冰機的「製冰機清潔」 。 ● 自動進行連續的製冰運轉是必須在冰箱內充分冷卻之後才能開始。 ( 初次使用時,最初的結冰可能需要花 24 小時以上。 ) ● 若在有硫化氣體噴出的溫泉地區等設置時,可能有必要進行配管的防 銹 處理,請預先與經銷店洽商。 通知事項... -
Page 12: 冷藏室
冷藏室 冷藏室 冷氣吹出口 LED 庫內燈 可調式置物架 可調式層架上段 置物架 急速冷藏區 置物架 可調式層架中段 置蛋架 固定層架 可調式層架下段 容器置物架 冷藏室溫度感測器 冰溫室 敬請依照指示操作 ● 將含罐裝飲料或水份較多的食物放置在冷氣吹出口附近時,有可能因結凍而導致破裂的情形,請放置在棚架面前的置物架中。 ● 稍有熱度的食物請放置在急速冷藏區或可調式層架。若將食品放置太靠近溫度感測器時,冷藏室溫度會過低,而導致冷藏室內側 面板有結露的產生。 ● 收納含水份較多的食物或是有湯汁的食物時,冷藏室的壁面可能會有結露的情形。若您在意結露情形,請以保鮮膜包覆食物。 注意事項 ● 將麵包放入塑膠袋後放入冷藏室存放時,塑膠袋中可能會因結露而將麵包弄濕。 ● 請勿將箱門開得過大或靠在打開的箱門上等給箱門施加強力。冰箱門有可能會損壞。 調整層架及置物架的高度 配合食品或飲料的大小,層架及置物架的位置可以做適度的調整。 關於拆卸方式 ・ 安裝方式請參閱 26 頁 ■ 可調式層架 ( 上段 ・ 中段 ) ■... - Page 13 調節冷藏室溫度 按下 “ Fridge ” 按鍵,可以變更適當的溫度 按下按鈕時依下列的順序切換。 出廠時設定為「■■」 。 按下 約 2 ∼ 6˚C 比「■■」低 比「■■」高 約 1 ∼ 3˚C 約 1 ∼ 3˚C (出廠時) 冷 ※ 是在環境溫度 30˚C 、冷藏室與冷凍室都設定為「■■」 、不放食物、關著門、 藏 溫度穩定時的目標溫度。 室 通知事項 ● 通常請使用「■■」的位置。溫度因使用條件而有所變動。 21 頁 ● 調節更細微的溫度時 ●...
-
Page 14: 製冰方法
製冰室 製冰室 (自動製冰機) 操作部 給水槽 ( 容量約 1.0 公升 ) 製冰功能切換鍵 顯示 滿水線 給水線 製冰鍵 給水顯示燈 儲冰盒 滿冰線 自動製冰機 製冰盤 貯冰空間 製冰室 冰鏟 製冰方法 23 頁 初次製冰時、或是一星期以上沒有製冰時,請操作「製冰機清潔」 。 按下“ Ice Maker ” 顯示燈亮 通知事項 按鍵, 「 On 」顯示 下列的情形時,可能會延長製冰的所需時間。 燈亮 ・... -
Page 15: 急速製冰
急速製冰 製冰停止 按下“ Ice Maker ” 按下“ Ice Maker ” 顯示燈亮 按鍵, 「 Quick 」 按鍵, 「 Off 」顯示 顯示燈亮 顯示燈亮 燈亮 比「 On 」更縮短製冰時間。 將自動製冰功能停止時, 按下 按下 則無法製冰。 一次製冰約可製 8 個冰塊。 ※ 一星期以上「 Off 」時, 自動製冰機則需進行清潔。 約 7 小時「 Quick 」的運轉則自動停止,切換 23~25 頁... -
Page 16: 冷凍室
上層冷凍室 冷凍室 下層冷凍室 使用上層冷凍室 急速地冰凍將鮮味密封的急速冷凍機能。 17 頁 請使用於急速冷凍肉類或魚類時。 注意事項 ● 食品存放時請勿超過參考基準線。 參考基準線 收納食品 上層冷凍盒 (附鋁製托盤) 冷凍包裝、密封容器等 急速冷凍區 可當作小件冷凍食品的存放空間 上層冷凍盒 在短時間內冷凍肉類、 急速冷凍區 魚類時 使用下層冷凍室 內配 3 層冷凍盒,能夠充分地存放,整齊地收拾。 適於存放需長期保存的東西,容易融化的冰淇淋等。 收納食品 上層滑動盒 上層滑動盒 小件物品,冷凍食品等 中層滑動盒 下層冷凍盒 冷凍包裝,密封容器等 中層滑動盒 冷凍食品,麵包,冰淇淋等 下層冷凍盒 豎放儲存區 存放冷凍專用寶特瓶等 豎放儲存區 ●... -
Page 17: 調節冷凍室的溫度
調節冷凍室的溫度 按下“ Freezer ” 按鍵,可以變更適當的溫度 按下按鈕時依下列的順序切換。 出廠時設定為「■■」 。 按下 約 -20 ∼ -18˚C 比「■■」低 比「■■」高 約 2 ∼ 4˚C 約 2 ∼ 4˚C (出廠時) ( 低溫冷凍 ) ※ 是在環境溫度 30˚C 、冷藏室與冷凍室都設定為「■■」 、不放食物、關著門、 溫度穩定時的目標溫度。 通知事項 冷 ● 通常請使用「■■」的位置。溫度因使用條件而有所變動。 凍 21 頁 ●... -
Page 18: 使用上層滑動盒 ・ 下層置物盒
蔬果保鮮室 蔬果保鮮室 收納食品 用來放置蕃茄,檸檬等尚未用完的小型 上層滑動盒 上層滑動盒 蔬果 高麗菜或生菜等中大型的蔬果 下層置物盒 下層置物盒 可裝入 2L 保特瓶等 豎放儲存區 豎放儲存區 使用上層滑動盒 ・ 下層置物盒 冷氣不會直接吹著蔬果,溫和而確實加以冷卻。 這個時候要用保鮮膜包住蔬菜 ● 擔心大蔥 ・ 韭菜 ・ 蔥蒜等的氣味傳到別的食品上時 不用保鮮膜也能夠使蔬果的水分保持新鮮。 ● 儲存尚未用完的蔬菜或水果時 ● 蔬果儲量少的時候,或是已包裝的蔬菜多的時候 ● 介意蔬果保鮮室內的結露時 上層滑動盒 食品的高度 下層置物盒 注意事項 存放食物時不要超過存放箱的高度。 ● 如果冰箱門沒有關緊,冷凍狀況會不好,食品,置物盒會破損。 請勿將上層滑動盒卸除的狀態下使用。... -
Page 19: 節電」模式的設定
各種功能 「節電」模式的設定 設定成節電模式時,將各冷藏室的冷卻調弱,可達到省電目的。 開啟冷藏室門達 30 秒以上時,冷藏室的 LED 庫內燈的亮度會減弱,以節省電力。 此外,長時間沒有開關冰箱門時,冰箱內部會緩慢冷卻,可以更加抑制電力消耗。 顯示燈亮 按下“ Mode ”按鈕, 「 Energy Saving 」顯示 燈亮,即設定成「節電」模式。 按下按鈕則依下列順序切換顯示燈亮。 如果要停止「節電」模式時,請「 Energy Saving 」顯示熄滅。 按下 (出廠時) 「節電」模式 蔬 如果想要更省電時,請使用「節電」模式。 設定成「節電」模式時, 果 ● 各室的溫度設定,冷卻度調弱。 保 ● 如果冷藏室門的開啟時間過久 (30 秒以上 ) ,會將冷藏室的 LED 燈的亮度調暗以節省電源。 鮮... -
Page 20: 操作面板鎖定功能
各種功能 (續前頁) 操作面板鎖定功能 讓操作無效,是為了防止誤觸操作面板,及兒童玩弄冰箱而設計的功能。 ( 按鍵鎖 ) 的顯示燈亮燈時,即使按了其他的操作部也無法切換。 持續按住“ Freezer ” 3 秒 通知事項 以上,直到發出設定音為止 ●拔除電源插頭再插上插頭時,或停電後 按下 恢復供電時,有可能解除操作面板的 操作面板按鍵鎖可切換「開」或「關」 。 鎖定。 出廠時,設定成「關」 ( 熄滅 ) 的狀態。 ( 鎖定中 ) ( 解除鎖定 ) 操作面板按鍵鎖的設定 「開」 「關」 「 」顯示 燈亮 熄滅 嗶 − 設定音... -
Page 21: 溫度微調節 (冷藏室 ・ 冷凍室
(冷藏室 ・ 冷凍室) 溫度微調節 冷藏室和冷凍室的溫度設定可以更細分為 11 個階段。 開啟下層冷凍室門 持續按住“ Fridge ”按鍵 5 秒以上,直到發出嗶聲為止 按下 關閉下層冷凍室門 按下“ Fridge ”或“ Freezer ”按鍵,可調節各室的溫度。 各 按下按鍵,如下圖所示依序切換。 平常請使用在「■■」的位置。 種 熄滅 ) 顯示燈亮 顯示燈閃爍 功 能 ︵ 顯示 續 前 設定 更弱 弱 中 強 更強 頁... -
Page 22: 保養方法〈定期檢查
保養方法 〈定期檢查〉 警告 ● 清掃時,請一定要把電源插頭從插座拔掉。 ■ 發現骯髒時 ● 立即擦乾淨。看不到的部分也請一年清掃一次。 冰箱背面 ・ 地板 電源插頭 一年 1 〜 2 次 一年 1 〜 2 次 將電源插頭從插座拔掉 將遮蔽架往前拉出 卸下 附著在電源插頭上的灰塵擱置而不清掃 的話,會導致火災。 安裝時,從正面插入 檢查 使調整腳浮起離開 ・ 電線有損壞嗎? 地面,將冰箱往身 ・ 電源插頭發熱嗎? ※ 如果發現異常時,請與購買的販賣店聯繫。 前筆直地拖出 以逆時針方向 旋轉調整腳... -
Page 23: 製冰機清潔
● 請勿觸摸自動製冰機的機械部分。 警告 ( 當製冰盤旋轉時,會有受傷的危險 ) 製冰機清潔 初次使用時 自動製冰機一週以上沒有使用時 以水來沖洗製冰盤及給水管路。 準 操作前請確認以下事項 給水槽 備 ・ 裝水至滿水線 ・ 超過儲水槽的安裝位置, 正確的安裝。 儲冰盒��� ・ 有殘留冰塊時請清除 都確認完了之後請操作下一個步驟。 關閉所有的箱門 保 養 持續按住“ Ice Maker ”按鍵 5 秒以上, 閃爍 方 直到發出警示聲響為止 法 「 Quick 」 ・ 「 On 」 ・ 「 Off 」三個顯示閃爍,請在警示聲響了之後放開手指。 「製冰機清潔」便開始運作。... -
Page 24: 給水槽
保養方法 (續前頁) 給水槽 一週一次 取出給水槽,卸除水槽蓋 請依照水槽蓋上前方的箭頭指示方向拿起即可卸除。 水槽蓋 密封墊 盒子 淨水濾片 從水槽蓋取下密封墊圈及盒子 給水槽 盒子由旋轉方式卸下來。 從盒子取下淨水濾片 用手指扳著倒勾將淨水濾片從盒子裡取下來。 倒勾 以水清洗給水槽各零件 以柔軟的海綿等用水洗乾淨。 請不要使用洗潔劑等。 敬請依照指示操作 ●為了防止淨水濾網長黴及黏性物質,請讓濾網充分乾燥。 通知事項 ●更換的基準約 3 ∼ 4 年。 30 頁 將給水槽的各部零件組裝, 加入水之後再安裝 請從水槽蓋的後方插入,往箭頭方向關上。 通知事項 ● 礦泉水、井水、淨水器的水、冷開水等 ( 不含氯元素的水 ) ,比自來水容易產生水垢、黏性物質,請 3 天清潔一次。 ●... -
Page 25: 製冰盤
製冰盤 一年 1 〜 2 次 顯示燈亮 按下“ Ice Maker ”按鍵, 「 Off 」顯示燈亮 停止往製冰盤給水。 ※ 當「 Off 」閃爍時,約 1 分鐘待燈亮之後再進行以下操作。 按下 打開製冰室門,取出製冰盤 製冰盤 將扳手往橫的方向押。 拉出框架。 護蓋 ( ▲部 ) 往身前方向揭起 從框架裡取出製冰盤。 護蓋 扳手 框架 騰空製冰盤,用流水簡單沖洗。 請勿使用海綿 ・ 去污粉。 保 請勿刮傷表面。... -
Page 26: 卸除組件的方法 ・ 安裝的方法
卸除組件的方法 ・ 安裝的方法 注意事項 ● 卸除零件時,請先將放在零件上的食品移除。 ● 請勿拆除此處未說明的零件。 想要卸除說明書上沒有說明的零件來清潔等時,請向技術中心諮詢。 可調式層架上段 ・ 中段 把層架內側稍微 如圖示將棚架 讓其迴轉後 抬高,往前拉出。 直立。 拆除。 層架的扣勾 ( 左右 ) 上段 中段 安裝時,把層架插放到最內側之後,把層架內側稍微抬高並推進去。 (將層架的卡榫掛在最內側的配件上) 通知事項 直接把層架拉出有可能損傷箱門。 箱門置物架 一邊輕敲底部左右一邊提 高便可卸取。 咚咚 ( 牢固地固定 ) 注意事項 安裝時,請完全裝入到最底。 如安裝不牢,會掉落,可能導致人員受傷。 固定層架 可調式層架下段 往前拉出來、將右下... -
Page 27: 儲冰盒(製冰室) ・ 上層冷凍盒(上層冷凍室
・ 上層冷凍盒 儲冰盒 (製冰室) (上層冷凍室) 打開冰箱門,將置物盒朝前方抬起。 突起 安裝時,請將置物盒左右的突起,對準框架的方孔後安裝。 方孔 框架 中層滑動盒 ・ 下層冷凍盒 (下層冷凍室) 打開門後,拉出中層滑動盒。 向上取出下層冷凍盒。 注意事項 ● 請勿拆下上層滑動盒。 上層滑動盒 下層冷凍盒 扣勾 框架 中層滑動盒 安裝冷凍盒時,請將下層冷凍盒左右突出的部分向門框兩旁的洞插入固定。 卸 請將中層滑動盒兩旁的止動裝置插入下層冷凍盒的外側。 除 組 上層滑動盒 ・ 下層置物盒 (蔬果保鮮室) 件 的 將箱門往跟前全部拉出, 將箱門稍微往上扳後,再慢 下層的置物盒朝身體方 方 如圖將上層滑動盒往上拉。 慢向外拉開,讓箱門傾斜。... -
Page 28: 遇到問題時
遇到問題時 在委託修理之前,請再次檢查以下幾點。狀況仍然不好的時候,請聯絡所購買的經銷店或敝公司技術中心。 這種情況下 請確認 請依照這樣做。就是這樣的理由。 初 設置後至完全冷卻需要 24 小時。請將存放的食品間 次 不冷 設置後是否未達 24 小時? 保留間隙,並儘量減少開閉次數,耐心等待。此外, 使 夏天或食品大量存放時,至完全冷卻需更多時間。 用 剛設置後,因冰箱未完全冷卻,到可以製冰需要 24 時 無法製冰 設置後是否未達 24 小時? 小時以上。請將存放的食品間保留間隙,並儘量減 少開閉次數,耐心等待。 操 是否顯示部 顯示亮燈? 作 20 頁 請解除操作面板鎖定設定。 操作部設定為鎖定。 面 操作部不起反應 板 冷藏室門開著嗎? 請關閉後再操作。 是否顯示部的「... -
Page 29: 結霜 ・ 結露
這種情況下 請確認 請依照這樣做。就是這樣的理由。 關閉抽屜或冰箱門時,請確實確認是否夾到食品或 冰箱門或抽屜是否沒完全關緊? 包裝袋,請確實關緊。 冰箱內及抽屜框架上 當冰箱門開閉時,可能因空氣中含的水分變成霜、冰, 結霜 ・ 結露 ・ 冰 − − − − − 凝結在冷凍室的壁面或零件上。請盡量迅速開關箱門, 以及減少開關的次數。此時請以乾布將霜、露水擦拭。 下雨天等室內濕度高的時候會結露。 冰箱周圍的溼度是否過高? 此時請以乾布將露水擦拭。 結 冰箱的外側結露 溫度設定為「■■■」時,冰箱門表面可能會有結 霜 是否溫度設定在「■■■」? 露情形。請將溫度設定為「■■」 。 ・ 請以乾布擦拭露水。 結 冰箱門的開關次數頻繁時,或冰 露 箱周圍溫度高時,壁面會起霧, 在冷氣出風口附近會凝結露水。 冷藏室中凝結露水 是否長時間開啟冰箱門,或冰箱門開啟頻繁? 並不是故障。此時請以乾布擦拭。 凝結露水... - Page 30 遇到問題時 (續前頁) 這種情況下 請確認 請依照這樣做。就是這樣的理由。 箱 性能上沒有問題,可以照舊使用,不過介意的話, 門 箱門高低不平衡箱門 設置的地點是否呈水平? 以 試試調整左右的調整腳。 10 頁 高 及 歪斜 低 冰箱本體傾斜的時候,請鋪上 1cm 以上厚的堅固的板子。 是否由於地板材質太軟加上儲放物的重量使冰箱腳下沉? 歪 不 斜 是因為進入了冰箱內的空氣忽然受到冷卻,氣壓一 平 關上門之後再立刻打開 衡 是否冰箱門長時間開啟著? 時變低。 時感到吃力 冰箱門請勿長時間開啟,以短時間開閉的方式拿取食物。 冰 為了讓冷卻裝置運作時所產生的熱氣向外排而會發熱。 箱 電冰箱的側面發熱 發 − − − − − 剛安裝後或是夏季,可能會有...
- Page 31 CONTENTS BEFORE USE MAINTENANCE SAFETY SUGGESTIONS ........ MAINTENANCE (REGULAR CHECK) ..... LEARN NAME & FUNCTION OF EACH PART ... Power plug/The back/floor of the refrigerator/Surface of door ... Name of each compartment/Food stored ....Each shelf/pocket/case/Door gaskets/Liquid receivers ... Functions of the Control Panel ......... Ice Maker Cleaning ..........
-
Page 32: Safety Suggestions
SAFETY SUGGESTIONS Ensure to follow these precautions When using this appliance, failure to follow safety precautions may result in personal harm, harm to other people, and also damage to property. ■ The following pictographs categorize and explain the level ■ How the suggestions should be taken are of possible harm on damage that may occur from ignoring indicated and categorized by the following suggestions resulting in missing the appliances. - Page 33 WARNING Handling the power and power cable ● Be sure to unplug the ● Do not insert or remove the power plug before power plug with wet hands. ・ This may result in electric shock. maintaining the ● This appliance is not intended for use refrigerator.
- Page 34 WARNING R600a Concerning the refrigerant (Be careful of the following related to the use of flammable gas.) ● Do not use mechanical devices or other ● Do not scratch or damage means to accelerate the defrosting the main body of the process, other than those recommended refrigerator with a sharp by the manufacturer.
- Page 35 CAUTION When moving the refrigerator ● Do not move the refrigerator ● Use the carrying handle when carrying it. by using its wheels as it may Your hands may slip resulting in injury damage the floor. if you hold the refrigerator at other ・...
-
Page 36: Learn Name & Function Of Each Part
LEARN NAME & FUNCTION OF EACH PART Name of each compartment/Food stored Refrigerator compartment Chill room Pg.40 Pg.41 About 2˚C ~ 6˚C About -3˚C ~ 0˚C Refrigerating food Fresh foods such as meat, fi sh and seafood The vacuum and the platinum catalyst help prevent a reduction in freshness. Yo gur t Milk Vienna... -
Page 37: Functions Of The Control Panel
Functions of the Control Panel Push the button to change the settings, if necessary. Providing information It will turn on while it is working in “ eco ” mode. Pg.47 It will turn on while the Control Panel is locked. Pg.48 Blink indicating any trouble. -
Page 38: Before Use
BEFORE USE Preparation before use Please arrange it as shown below ● The floor should be sturdy and flat. Lay a board with 1cm thickness on the floor if the refrigerator is installed on the carpet, tatami mat, flooring or PVC sheet flooring which may be hollow or discolor. -
Page 39: Transporting Your Refrigerator (Transport For Moving)
Plug the power cord. It is not a problem to plug in the power cord soon after installing the refrigerator. Use a wall outlet exclusively when connecting the power cord. (Alternating current 220 - 240V, rated 10A or more) ● Check that the power plug or the cord is not wedged between the back of the refrigerator and the wall in order to prevent the cord from getting hot. Cooling inside the refrigerator starts. -
Page 40: Refrigerator Compartment
REFRIGERATOR COMPARTMENT Refrigerator Compartment Cold Air Blowout Port LED lamp Height adjustable pockets Height adjustable Pocket upper shelf Quick cooling corner Pocket Height adjustable middle shelf Egg stand Fixed shelf Height adjustable lower shelf Double door pockets Refrigerator Compartment Chill room Temperature Sensor Request ●... -
Page 41: Adjusting Temperature In A Refrigerator Compartment
Adjusting temperature in a refrigerator compartment Push “ Fridge ” button to set the temperature as you like. Each time you Push the button, the corresponding indicator lamp changes in the order shown below: The temperature is set to “■■” before shipping. Push it About 2 〜... -
Page 42: Ice Compartment (Automatic Ice Maker)
Ice Compartment ICE COMPARTMENT (AUTOMATIC ICE MAKER) Control Panel Water Supply Container Ice Making buttons (Approx. 1.0 L) Display Container- Add water line full line Ice Making “ Water Supply ” button indicator lamp Ice Case Add ice line AUTOMATIC ICE MAKER Ice Tray Ice Storage Space Ice Compartment... -
Page 43: Quick Ice Making
Quick Ice Making Stop Ice Making Push “ Ice Maker ” Push “ Ice Maker ” Light ON button to turn on button to turn on Light ON “ Quick ” indicator “ Off ” indicator lamp. lamp. Push it Push it Ice cubes are made in a shorter time than that Stop the Automatic Ice Maker and make no ice. -
Page 44: Freezer Compartment
FREEZER COMPARTMENT Upper Freezer Lower Freezer Using the Upper Freezer With Quick Freezing System, all the moisture, natural nutrients and good flavor in the foods are preserved in an instant. Pg.45 It is recommended to use this compartment when freezing meat and/or fish quickly. Upper limit line ●... -
Page 45: Adjust The Temperature Of The Freezer Compartment
Adjust the temperature of the freezeer compartment Push the “ Freezer ” button to set the temperature as you like. Each time you Push the button, the corresponding indicator lamp changes in the order shown below: The temperature is set to “■■” before shipping. Push it About -20 〜... -
Page 46: Vegetable Compartment
VEGETABLE COMPARTMENT Vegetable Compartment Stored foods Half-used vegetables or small vegetables such Upper Case as tomato, lemon. Upper Case Medium and large vegetables such as cabbage, Lower Case lettuces. Lower Case Tall Storage 2L PET bottles can be Compartment stored Lower Case Using the Lower and Upper Cases Stored vegetables are not exposed to cold air... -
Page 47: Various Functions
VARIOUS FUNCTIONS Setting “ Energy Saving ” mode Setting the “ Energy Saving ” mode reduces the ability to cool each compartment for energy savings. Likewise, when the door of the Vegetable Compartment is left open for 30 seconds or more, the LED light in the compartment has reduced brightness for energy savings. -
Page 48: Locking The Control Panel
VARIOUS FUNCTIONS (CONTINUED) Locking the Control Panel Disenabling operations can prevent erroneous operations or misuse by children. When this indicator lamp (Lock of the Control Panel) is illuminated, any other portion of the Control Panel will not be activated by touching it. Press down “... -
Page 49: Fine Adjustment Of The Temperature (Refrigerator Compartment / Freezer Compartment)
Fine adjustment of the temperature (Refrigerator Compartment / Freezer Compartment) Temperature settings for Refrigerator and Freezer Compartments can be more finely adjusted by 11 levels. Open the door of the Lower Freezer Compartment. Press down “ Fridge ” button for 5 seconds or more until 1 beep is heard. -
Page 50: Maintenance (Regular Check)
MAINTENANCE (REGULAR CHECK) ● Make sure to unplug the power plug when maintaining the refrigerator. Warning ■ When dirt is found ● Wipe off it immediately. It is recommended to clean the hidden places once a year. Power plug The back/floor of the refrigerator Once or twice a year Once or twice a year Unplug the power cord from... -
Page 51: Ice Maker Cleaning
● Do not place your hand in the mechanical section Warning of the automatic ice maker. (Rotation of the ice tray may cause injury.) Ice Maker Cleaning When using for the first time When not used for more than one week Wash the Ice Tray or water paths with water. -
Page 52: Water Supply Container
MAINTENANCE (CONTINUED) Water supply container Once a week Remove the water supply container, and then the lid. Take up the near side of the lid toward in the direction of the arrow, and then remove it. Gasket Case Water filter Remove the gasket from the lid and then the case. -
Page 53: Ice Tray
Ice tray Once or twice a year Light ON Push “ Ice Maker ” button to turn on “ Off ” indicator lamp. It stops water supply to the ice tray. ※ When “ Off ” indicator lamp blinks, wait for about 1 minute for it to turn on, and then follow the next steps. -
Page 54: How To Remove/Attach Parts
● Before removing parts, take out all the foods on the parts. ● Do not remove parts except the ones listed here. Please contact with a Hitachi customer service centre for cleaning such parts after removing them. Height adjustable upper and middle shelf... -
Page 55: Ice Case (Ice Compartment)・Upper Freezer Case (Upper Freezer)
・Upper Freezer case Ice Case (Ice Compartment) (Upper Freezer) Open the door and lift up the case toward you. Projection To mount the case, insert the right and left projections of the case into the rectangular holes. Rectangular hole Frame Slide case, Lower freezer case (Lower Freezer) Draw the door fully, and draw the Slide case... -
Page 56: Troubleshooting
TROUBLESHOOTING Check the following points before asking repair. Contact your dealer or our customer center if the problem still exists after checking them. When this happens Check Item Action and Reasons Cooling may take more than 24 hours at installation. Place food at appropriate Not cooled well. -
Page 57: Frost And/Or Dew Occur
When this happens Check Item Action and Reasons Check that any food or package caught in the door, and then close it Was the door or the drawer not temporarily shut completely? Frost, dew or ice adheres to completely. When a door is opened or closed, water in the air may cling to the walls the inside of the refrigerator or parts in the Freezer in the form of frost or ice. -
Page 58: Door Is Not In A Horizontal State
TROUBLESHOOTING (CONTINUED) When this happens Check Item Action and Reasons This does not affect the refrigerator performance. Adjust the refrigerator Is the installation site level? Door is not in a horizontal adjustable mount to keep it level if you want to correct it. Pg.38 state. -
Page 59: 有關碳氫化合物的冰箱/可容納的食品重量
● Hydrocarbons are flammable. The coolants are sealed in the coolant circuitry, and with normal operation they will not leak, but should the circuitry be damaged, refrain from using flames or other electrical products, and open windows for ventilation. After that, please contact the dealer or Hitachi customer service centre. Storable weight 可容納的食品重量... - Page 60 AFTER-SALES SERVICE 關於售後服務 Please contact the following Hitachi Service Centre if power cord is damaged or service is required. If some malfunction occurs during operation, unplug the power plug immediately and contact the service centre to have the refrigerator repaired.
Need help?
Do you have a question about the R-S42GS and is the answer not in the manual?
Questions and answers
there are frozen icicles around trays at freezer compartments. why is that so when all was well till now.??
Frozen icicles around the trays in the freezer compartment of the Hitachi R-S42GS may occur due to water in the grooves of the ice tray freezing and sticking to the ice cubes. This does not indicate any malfunction.
This answer is automatically generated