Table of Contents
Advertisement
Quick Links
Water Technologies & Solutions
IMPORTANT NOTICE
For more detailed instructions, download the Sievers 860
Laboratory TOC Analyzer Operation and Maintenance
Manual from our website.
Installation Instructions
Step 1
Unpack and inspect the Analyzer.
Step 2
Complete the identification records.
Step 3
Select A Location for the Analyzer. Refer to the System
Specifications chart.
Place the Analyzer on a clean, unobstructed surface that can
accommodate the Analyzer's dimensions and weight; for details refer to
the "System Specifications." For proper heat dissipation, ensure that
16 cm (6.3 in) is available at the rear and on both sides of the Analyzer.
The Analyzer is designed to be operated right-side up, resting on the
rubber feet.
Avoid direct sunlight and extreme temperatures; operating at elevated
temperatures (greater than 40 ºC) prevents proper operation, and
operating at low temperatures (10 ºC) can cause errors in the
measurements.
Step 4
Connect the compressed gas.
Attach the Analyzer to a source of dry, oil-free gas that contains less than
1 ppb CO
, and which is pressurized from 30 to 50 psig (207 to 345 kPa).
2
The preferred gas is purified air. Nitrogen is also a suitable gas if the IC is
less than 1 ppm.
Refer to the "Warnings" section for important information about the
use of compressed gas.
1.
Locate the 1/8" OD tubing with 1/8" SwageLok fitting for gas inlet
line, 3 meters long, in the accessories kit.
Figure 1 - Inlet and Outlet Ports on Back of Analyzer
www.sieversinstruments.com
USB Port
Ethernet Port
Gas Inlet Port
Power Switch
Power Cord Receptacle
Liquid Waste Outlet Port
Gas Liquid Waste Outlet Port
© 2018 SUEZ. All Rights Reserved.
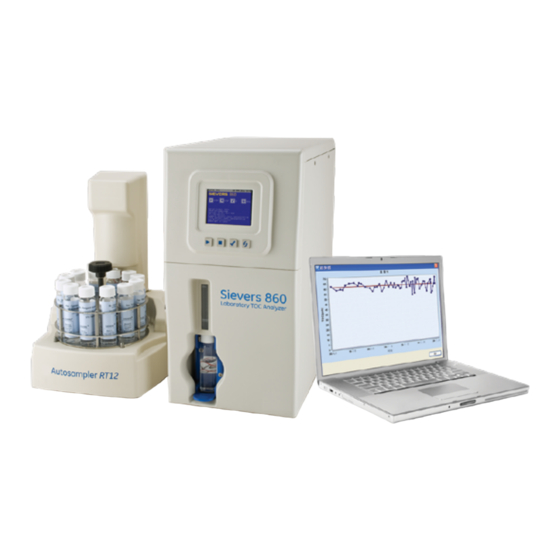
Sievers 860 Laboratory
TOC Analyzer
and Sievers Autosampler RT12
Quick Start Guide
Warnings
The vial sparging assembly contains a sharp needle designed to
pierce the septa of sample vials. Do not put fingers or inappropriate
objects into the vial sparging assembly.
To avoid false TOC readings and possible damage to the Analyzer,
always make sure the DI water cartridge is filled before starting analysis.
The Sievers 860 Laboratory TOC Analyzer is not designed to sample
in on-line mode from a pressurized water source.
The waste stream from the Analyzer is acidic and must be disposed of
according to local regulations.
Secure all gas cylinders to an immovable structure or permanent wall.
Wear eye protection when using compressed gases to avoid possible
eye injury.
If the Analyzer is used with compressed gases, the pressure of the
gas at the gas inlet must not exceed 200 psig (1379 kPa). Use only
CO
-free air or nitrogen. Use only regulators designed for use with the
2
selected gas. Store compressed gases in accordance with all safety
codes.
Before connecting the Sievers Autosampler RT12 to the Analyzer,
or disconnecting the Austosampler from the Analyzer, always stop TOC
measurements/protocols, and turn Off power to the Analyzer.
Do NOT manually rotate the sample rack while the Sievers
Autosampler RT12 is connected to the Analyzer, even when the Analyzer
is NOT powered.
Do not use the Sievers Autosampler RT12 to sample flammable
liquids. The Sievers Autosampler RT12 should not be in contact with
flammable liquids, nor be used near flammable liquids.
The Sievers Autosampler RT12 sample needle is sharp. Avoid
contacting the needle assembly during analysis, and use caution when
handling the needle assembly when the needle is at rest.
Avoid the possibility of the Autosampler needle hitting the
sample rack and damaging the needle during the alignment
process. Make sure to align the Autosampler needle by small
increments (we suggest by one), and test the new alignment position.
Any operation requiring access to the inside of the Analyzer, including
installation of maintenance items, could result in injury. To avoid potentially
dangerous shock, turn off power and, if possible, disconnect from the
power supply before opening the Analyzer.
The UV lamp contains mercury and may be considered hazardous
material in your local area. Dispose of these items in accordance with
federal, state, or local government regulations.
Should the UV lamp become broken or damaged it should be handled
in accordance with your organization's toxic waste handling procedure
and disposed of in accordance with federal, state, or local government
regulations.
See page 5 of this document for additional important warnings information and
product specifications.
1
ENGLISH
DQS 79000-03 EN Rev. A
Advertisement
Table of Contents

Subscribe to Our Youtube Channel
Related Manuals for Suez Sievers 860


Summary of Contents for Suez Sievers 860
- Page 1 Select a location for the Analyzer. Refer to the System Specifications chart. The Sievers 860 Laboratory TOC Analyzer is not designed to sample in on-line mode from a pressurized water source. Place the Analyzer on a clean, unobstructed surface that can The waste stream from the Analyzer is acidic and must be disposed of accommodate the Analyzer’s dimensions and weight;...
- Page 2 "B" Fitting "D" Fitting Step 8 Install the DataPlus Software. Refer to the Sievers 860 Laboratory TOC Analyzer Operation and Maintenance Manual for complete details. Step 8 A Run the DataPlus Software installation program on Figure 4 - Remove John Guest Fitting the computer.
- Page 3 Use a 1/4" open-end wrench to then turn Step 10 Connect the Sieveres Autosampler RT12 (optional). the nut 1/8 turn past finger-tight. Do NOT For complete instructions, refer to the Sievers 860 Analyzer's Operation over-tighten the fitting. and Maintenance Manual. Step 10 E Place the vial port lift in the Unpack and inspect the Sievers Autosampler RT12.
- Page 4 Note: The Autosampler does not have a On the Autosampler tab, in the Manual Test area, click the Home separate On/Off switch, but is powered button. After the rack has homed to vial position 1, click the Needle directly through this connection to the Down button.
- Page 5 This is a Safety Class I product. It must be must be attached to a grounded power source. If this instrument is used in a manner not specified by SUEZ, the protection provided by the instrument may be impaired. Always stop analysis before turning off or unplugging the Analyzer.
Need help?
Do you have a question about the Sievers 860 and is the answer not in the manual?
Questions and answers