Pioneer PD-F1009 Operating Instructions Manual
Hide thumbs
Also See for PD-F1009:
- Operating instructions manual (20 pages) ,
- Service manual (61 pages) ,
- Operating instructions manual (124 pages)
Table of Contents
Advertisement
Quick Links
Advertisement
Table of Contents

Related Manuals for Pioneer PD-F1009


Summary of Contents for Pioneer PD-F1009
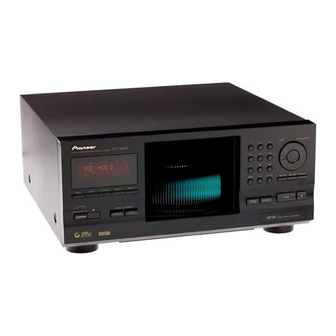
- Page 1 FILE-TYPE COMPACT DISC PLAYER PD-F1009 Operating Instructions...
- Page 2 WARNING: IM PORTANT NOTICE TO PREVENT FIRE OR SHOCK HAZARD, DO NOT EXPOSE THIS APPLIANCE TO RAIN OR M OISTURE. The serial number for this equipment is located on the rear panel. Please w rite this serial number on your enclosed w arranty card and keep it in a secure area.
-
Page 3: Table Of Contents
Consult the dealer or an experienced radio/TV technician for help. Information to User Alteration or modifications carried out w ithout appropriate authorization may invalidate the user's right to operate the equipment. Thank you for buying this Pioneer product. [For Canadian model] Please read through these operating instructions so you... -
Page 4: Before You Use The Player
M any handy functions for taking maximum advantage of the changer The PD-F1009 is equipped w ith three listening m odes (ALL, SINGLE and CUSTOM ) w ith 5 custom files, as w ell as a direct button for even greater operability. What's m ore, a jog dial on the m ain unit m akes it even easier to select discs and so on. -
Page 5: Cautions Regarding Handling
The player's pickup lens should not become dirty in normal use, but if for some reason it should malfunction due to soiling, consult your nearest PIONEER authorized service center. Lens cleaners for CD players are commercially available, but special care should be exercised in their use since some may cause damage to the lens. -
Page 6: Connections
Connect the LINE OUT jacks of this unit to the input jacks (CD or AUX) of the amplifier. M ake sure that the w hite plugs are When a Pioneer stereo amplifier bearing the Î mark is used, connected to the left (L) jacks and the red plugs to the right (R) connect the CONTROL IN jack on the rear panel of the CD player jacks. -
Page 7: Nam Es Of Parts
NAM ES OF PARTS FRONT PANEL DISPLAY button & Digit buttons REPEAT button Jog dial PROGRAM button ENTER CLEAR button Hood Track/M anual search button M ODE button (reverse direction) (41) ◊Û¿X,??/ F I L E –T Y P E C O M P A C T D I S C P L A Y E R D I S C P U S H E N T E R D I S C... - Page 8 NAM ES OF PARTS REM OTE CONTROL UNIT 1 HI-LITE button & 2 STANDBY/ON button 3 M ODE button 4 REPEAT button 5 Digit buttons HI-LITE PREVIOUS BEST 6 DISC button 7 Fast forw ard (¡) button REPEAT M ODE PROGRAM CLEAR 8 Fast reverse (1) button...
-
Page 9: How To Load The Discs
HOW TO LOAD THE DISCS (Be sure to read this before operation) Loading discs into the rack Press OPEN/ CLOSE. O P E N / C L O S E The hood w ill close. • You can load up to 300 discs in the rack. When the hood closes, the rack is The numbers marked on the rack are used as the disc numbers. -
Page 10: Basic Operations
BASIC OPERATIONS • You can also use the remote control. Digit buttons HI-LITE PREVIOUS BEST REPEAT M ODE PROGRAM CLEAR Digit buttons M ODE D I S C P U S H E N T E R DISPLAY M ODE 41 / ¡¢... -
Page 11: Playing A Disc That Is Not Loaded In The Rack
BASIC OPERATIONS Jog dial DISPLAY D I S C P U S H E N T E R ENTER DISC TRACK D I S C T R A C K DISC(–/ +) R A N D O M M O D E C L E A R P R O G R A M R E P E A T... -
Page 12: Various Operations
VARIOUS OPERATIONS Digit buttons DISPLAY CLEAR REPEAT M ODE PROGRAM CLEAR M ODE D I S C P U S H E N T E R DISPLAY CLEAR DISPLAY Digit buttons D I S C T R A C K M ODE M O D E C L E A R... -
Page 13: To Repeat Playback
VARIOUS OPERATIONS REPEAT HI-LITE PREVIOUS BEST BEST D I S C P U S H E N T E R REPEAT M ODE PROGRAM CLEAR REPEAT DISPLAY D I S C T R A C K M O D E C L E A R P R O G R A M R E P E A T... -
Page 14: To Find Out W Hich Discs You've Listened To Recently
VARIOUS OPERATIONS HI-LITE PREVIOUS BEST PREVIOUS REPEAT M ODE PROGRAM CLEAR D I S C P U S H E N T E R DISPLAY D I S C T R A C K RANDOM R A N D O M M O D E C L E A R P R O G R A M... -
Page 15: To Program Tracks/Discs In A Desired Order
VARIOUS OPERATIONS REPEAT M ODE PROGRAM CLEAR CLEAR DISPLAY D I S C P U S H E N T E R CLEAR D I S C T R A C K M O D E C L E A R P R O G R A M R E P E A T D I S P L A Y... -
Page 16: To Scan Quickly Through Tracks On A Disc
VARIOUS OPERATIONS HI-LITE HI-LITE PREVIOUS BEST REPEAT M ODE PROGRAM CLEAR DISPLAY DISC TRACK – DISC ¡ ¢ RAN DOM To scan quickly through tracks on a <Programming a pause (remote control only)> disc (HI-LITE scan) (Pause program) If you press 8 at step , you can program a pause. -
Page 17: To Use The Display Button
VARIOUS OPERATIONS DISPLAY HI-LITE PREVIOUS BEST REPEAT M ODE PROGRAM CLEAR D I S C P U S H E N T E R DISPLAY DISPLAY D I S C T R A C K M O D E C L E A R P R O G R A M R E P E A T D I S P L A Y... -
Page 18: Troubleshooting
. Sometimes the trouble may lie in another component. Investigate the other components and electrical appliances being used. If the trouble cannot be rectified even after exercising the checks listed below, ask your nearest PIONEER authorized service center or your dealer to carry out repair w ork. -
Page 19: Specifications
3. Input/ Output terminal give you an electrical shock. Check the pow er cord once in a w hile. Audio line output When you find it damaged, ask your nearest PIONEER authorized Control input/output jacks service center or your dealer for a replacement. - Page 20 To cancel the POWER ON DEM O display mode, press any button. Should this product require service in the U.S.A. and you w ish to locate the nearest Pioneer Authorized Independent Service Company, or if you w ish to purchase replacement parts, operating instructions, service m anuals, or accessories, please call the num ber show n below.
Need help?
Do you have a question about the PD-F1009 and is the answer not in the manual?
Questions and answers