Table of Contents
Advertisement
Advertisement
Table of Contents

Subscribe to Our Youtube Channel
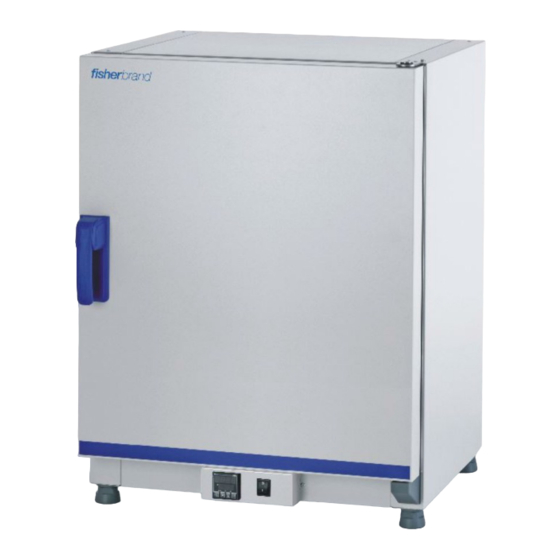
Related Manuals for Fisher Scientific Fisher Sei 60L Gravty

Summary of Contents for Fisher Scientific Fisher Sei 60L Gravty
- Page 2 This document is not part of any sales contract between Thermo Fisher Scientific and a purchaser. This document shall in no way govern or modify any Terms and Conditions of Sale, which Terms and Conditions of Sale shall govern all...
-
Page 3: Table Of Contents
Chapter 1 Table of Contents ..............................1 Chapter 2 Safety Notes................................1 Basic Operating Precautions............................1 Operational Safety Rules .............................2 Warranty..................................2 Explanation of Safety Information and Symbols ......................3 Safety Notes and Symbols Used Throughout These Operating Instructions ..............3 Additional Symbols for Safety Information ........................3 Symbols on the Oven..............................4 Intended use of the device ............................5 Correct Use................................5... - Page 4 Preparing the Work Space............................20 Installation or Removal of the Support Rails (forced air oven only) ................21 Installing and Uninstalling the Air Baffles........................21 Commissioning, general............................23 Installing the Shelf Support Brackets........................23 Installing the Wire-mesh Shelves...........................23 Leveling the ovens..............................24 Mains Connection..............................24 Connection to the Power Supply Source.........................25 Electrical Requirements to be Met when Operating the Ovens in the European Union: ...........25 Chapter 7 Operation................................27...
- Page 5 Chapter 15 Spare Parts and Accessories ..........................51 Chapter 16 Device Log................................53 Fisherbrand 50145736 | 3...
- Page 6 50145736 Fisherbrand...
- Page 7 Figure 3-1 Oven dimensions and required clearances ...................... 12 Figure 3-2 Lift Points ..............................13 Figure 4-1. Gravity Convection Oven Front View....................... 15 Figure 4-2. Gravity Convection Oven Rear View ....................... 16 Figure 4-3. Sensor Mounting Location..........................17 Figure 4-4. Shelf System - Gravity Convection Oven......................18 Figure 5-1.
- Page 8 50145736 Fisherbrand...
-
Page 9: Chapter 1 Table Of Contents
Keep these operating instructions close to the oven so that safety instructions and important information are always accessible. Should you encounter problems that are not detailed adequately in these operating instructions, please contact Thermo Fisher Scientific immediately for your own safety. Fisherbrand 50145736 | 1... -
Page 10: Safety Notes
Fisherbrand oven. Warranty Fisher Scientific warrants the operational safety and functions of the Fisherbrand ovens only under the condition that: the oven is operated and serviced exclusively in accordance with its intended purpose and as ... -
Page 11: Explanation Of Safety Information And Symbols
Safety Notes | Chapter 1 Explanation of Safety Information and Symbols Safety Notes and Symbols Used Throughout These Operating Instructions Indicates a hazardous situation which, if not avoided, will result in death or serious injuries. Indicates a hazardous situation which, if not avoided, could result in death or serious injuries. -
Page 12: Symbols On The Oven
Chapter 1 | Safety Notes Electric shock! Hot surfaces! Fire hazard! Explosion hazard! Suffocation hazard! Danger of tipping Symbols on the Oven Observe operating instructions Mark of conformity USA/Canada 50145736 Fisherbrand... -
Page 13: Intended Use Of The Device
Safety Notes | Chapter 1 Intended use of the device Correct Use Fisherbrand ovens are laboratory devices for heating applications, equipped with precision temperature control. They are designed for heat treating samples or materials at operating temperatures between 50 °C (122 °F) and 250 °C (482 °F), including - for example, drying, aging, analyzing, decomposing, burn-in, oxidizing, reducing, and preheating. - Page 14 Chapter 1 | Safety Notes 50145736 Fisherbrand...
-
Page 15: Chapter 3 Delivery Of The Oven
Packaging Fisherbrand ovens are delivered in a rugged packaging box. All packaging materials can be separated and are reusable: Packaging materials Packaging carton: Recycled paper Foam elements: Styrofoam (CFC-free) Pallet: Chemically untreated wood Packaging film: Polyethylene Packaging ribbons: Polypropylene Acceptance Inspection After the oven has been delivered, check the delivery immediately for: completeness, ... -
Page 16: Scope Of Supply
Chapter 2 | Delivery of the Oven Scope of Supply Ovens Quantity of components supplied (pieces) Gravity Convection Ovens Wire-mesh shelf Shelf support Power cord Operating manual Summarized Safety Instructions (SSI) 50145736 Fisherbrand... -
Page 17: Chapter 4 Installation
Built-in units of incubators can, heating and drying ovens must be operated with an air exhaust system and exhaust hose (only original Fisher Scientific accessory should be used). For safety reasons, the installation space should be made of non-combustible materials, according to DIN 4102. - Page 18 Chapter 3 | Installation Mark hot exhaust air piping with appropriate hot surface warning signs or restrict access to such piping altogether to avoid the risk of injury through contact with hot surfaces. Fig. 2 Fig. 1 The oven must only be operated in a location that meets all of the ambient condition requirements listed below: Draft-free and dry indoor location.
-
Page 19: Intermediate Storage
Installation | Chapter 3 Place the oven on a floor stand (option; to be ordered separately), never on the lab floor. Consider installing one dedicated upstream circuit breaker per oven to avoid multiple device failures in case of an electrical fault. Intermediate Storage When the oven is placed in intermediate storage, which is permissible for a maximum of four weeks, make sure that the ambient temperature is between 20 °C to 60 °C (68 °F to 140 °F) and... -
Page 20: Oven Dimensions And Clearances
Chapter 3 | Installation Oven Dimensions and Clearances Figure 3-1 Oven dimensions and required clearances Table 3-1 Oven Dimensions Type A (mm/inch B (mm/inch) C (mm/inch D (mm/inch) Fisher Sci 60L Gravty Oven 120 V 530 / 20.8 565 / 25.2 720 / 28.3 540 / 21.3 Fisher Sci 100L Gravty Oven 120 V... -
Page 21: Transport
Installation | Chapter 3 Transport For transport, do not lift the oven using the doors or components attached to the oven as lift points. Figure 3-2 Lift Points Heavy loads! Lift with care! To avoid injury through physical strain, such as strain traumata and slipped discs, do not attempt to lift the oven alone! To avoid injury through dropped loads, be sure to wear Personal Protection Equipment, such as safety shoes, when lifting the oven. - Page 22 Separate and move each device one by one, then restack them. Fisher Scientific accepts no responsibility or liability whatsoever with regard to stacked third party devices; this is at the user’s own risk.
-
Page 23: Gravity Convection Oven Overview
This section describes Fisherbrand ovens for standard laboratory applications. Gravity Convection Oven Overview Gravity convection ovens come equipped with the following features: high-precision work space temperature control, adjustable in steps one degree up to 250 °C/482 °F; a mechanically-operated damper for venting the work space, equipped with an external slider ... -
Page 24: Product Description
Chapter 4 | Product Description [12] Support rail for wire mesh shelf [13] Door seal [14] Door bearing [15] Temperature sensor [16] Exhaust air tube Figure 4-2. Gravity Convection Oven Rear View Spacer Door bearing Mechanical air inlet slider Electronics compartment Leveling foot Mains supply Safety Devices... -
Page 25: Sensing And Control System
Product Description | Chapter 4 Sensing and Control System The PT 100-type sensor for the control of the work space temperature and for the thermal protection [1] is mounted in the top panel of the work space compartment. Figure 4-3. Sensor Mounting Location The work space temperature sensor provides the inputs to the oven’s built-in controller, which continuously compares the measured values to the user-specified set value and adjusts the... -
Page 26: Work Space Components
Chapter 4 | Product Description Work Space Components Inner Chamber All components of the work space are made of corrosion-resistant galvanized steel and have an absolutely smooth and easy-to-clean surface. Any embossings have a large radius. Shelf System The oven is supplied with two wire-mesh shelves. The shelf support rails have an alternating pattern of oblong and round perforations spaced evenly at 30 mm, allowing the shelf support brackets to be inserted without any room for error, yet in a very flexible way to accommodate different heights of sample containers. -
Page 27: Chapter 6 Start-Up
Installing the Shelf System The installation of the shelf system does not require any tools. The support rails are secured in place by spring action. Once the shelf support brackets have been inserted into the rails, the wire-mesh shelves can be simply pushed onto their support hooks to complete the installation. NOTE The support rails of the floor stand ovens cannot be removed. -
Page 28: Installing The Shelving
Chapter 5 | Start-up Installing the Shelving The illustrations below show the placement of the shelf system elements. Retaining spring Air baffle, lateral Shelf support Wire-mesh shelf Air baffle, bottom Figure 5-2. Gravity Convection Oven - Installing the Shelving Preparing the Work Space The following work space components should be checked for cleanliness and cleaned prior to use: shelf support brackets,... -
Page 29: Installation Or Removal Of The Support Rails (Forced Air Oven Only)
Start-up | Chapter 5 Installation or Removal of the Support Rails (forced air oven only) Figure 5-3. Support Rail Installation The embossings at [2] and [5] act as lateral guides for the support rails, while the embossings at [1] and [6] secure the support rails in place. For the support rails to install correctly the retaining spring [3] must be facing upwards. - Page 30 Chapter 5 | Start-up 1. Loosen the two screws [1] in the bottom panel, then remove the entire bottom panel by lifting it out of its two embossings. Figure 5-5. Bottom Panel Removed 2. Grab the two retaining springs [1] at their tabs and pull them downwards out of the embossings, then pull off the lateral air baffle.
-
Page 31: Commissioning, General
Start-up | Chapter 5 Commissioning, general Installing the Shelf Support Brackets 1. Insert the shelf support brackets [3] into the perforations [1] of the support rail and air baffle and tilt them downwards. 2. Make sure that the two vertical elements [2] of the shelf support bracket butt against the support rail and air baffle. -
Page 32: Leveling The Ovens
Chapter 5 | Start-up 1. Push the wire-mesh shelf onto the shelf support brackets with the tilt protection devices [1] facing the rear panel of the oven. The tilt protection devices [1] also serve as guides for the wire-mesh shelves. 2. -
Page 33: Connection To The Power Supply Source
Start-up | Chapter 5 Connection to the Power Supply Source 1. Before connecting the oven to the power source, check to see if the power supply voltage corresponds with the specifications on the nameplate on the front of the oven. If the voltage (V) and current (A) ratings given are not as required, do not connect the oven to the power source! 2. - Page 34 Chapter 5 | Start-up 50145736 Fisherbrand...
-
Page 35: Chapter 7 Operation
Preparing the Oven The oven must not be released for operation before all major start-up activities have been completed (see “Start-up” on page 19). Device Check Prior to starting operation, the following oven components must be checked for their correct function: The door seal in the front frame must not be damaged. - Page 36 Chapter 6 | Operation 4. Load the work space with samples. Risk of overloading Overloading may damage the shelves or cause the shelves and/or the oven to tilt when the shelves are being drawn out, ultimately destroying the samples. To avoid overloading the oven or its shelving be sure to observe the sample weight limits specified in See “Technical Data”...
-
Page 37: Overview
Overview Fisherbrand gravity convection ovens come with a front panel mounted control unit consisting of a multi-functional display, four control buttons, and an on/off button. The four control buttons interact with the display window to let users access all of the user control functions and adjustments of the oven. -
Page 38: Chapter 8 Handling And Control
Chapter 7 | Handling and Control ON: Controller output power up For internal use only For internal use only Down button Up button Function button (scroll button) Operator mode This mode is entered at power on. NOTE All configuration mode and Setup mode parameters must be set as required before starting normal operations. -
Page 39: Calibration Of The Reference Sensor
Handling and Control | Chapter 7 Calibration of the reference sensor The temperature measurement for calibration is performed with a reference sensor placed in the center of the inner chamber. After placing the reference sensor in the chamber wait at least 2 hours until the temperature is stabilized. In operator mode the temperature offset can be adjusted. - Page 40 Chapter 7 | Handling and Control 50145736 Fisherbrand...
-
Page 41: Shutting The Oven Down
This chapter provides instructions for shutting the oven down for prolonged periods of time, that is, at least for several days in a row. Shutting the Oven Down 1. Remove the containers with the samples and all accessories from the work space. 2. -
Page 42: Shut-Down
Chapter 8 | Shut-down 50145736 Fisherbrand... -
Page 43: Chapter 10 Cleaning And Disinfection
Cleaning Incompatible cleaners Some oven components are made of plastics. Solvents may attack plastics. Strong acids or alkaline solutions may cause embrittlement of plastics. Please consult the manufacturer or his agent if there is any doubt about the compatibility of decontamination or cleaning agents. Moisture-sensitive components Do not spray cleaning agent onto the control panel and the control box at the rear of the oven. -
Page 44: Preparing The Manual Wipe/Spray Disinfection
Chapter 9 | Cleaning and Disinfection Alcoholic disinfectants! Disinfectants having an alcohol content of more than 10% may form, in combination with air, easily combustible and explosive gas mixtures. When using such disinfectants, avoid open flames or exposure to excessive heat during the entire disinfection process! Use such disinfectants only in adequately ventilated rooms. -
Page 45: Predisinfection
Cleaning and Disinfection | Chapter 9 Health hazard The surfaces of the work space may be contaminated. Contact with contaminated cleaning liquids may cause infections. Disinfectants may contain harmful substances. When cleaning and disinfecting, always observe the safety instructions and hygiene guidelines! •... - Page 46 Chapter 9 | Cleaning and Disinfection 50145736 Fisherbrand...
-
Page 47: Chapter 11 Maintenance
To avoid major malfunctions of the oven and associated safety hazards that may result in death, serious injuries, or damage to the oven and other equipment, use spare parts approved by Thermo Fisher Scientific only. Third-party spares without approval void the limited warranty. -
Page 48: Service Intervals
Have the oven inspected and serviced by an authorized Technical Service agent. NOTE Service contract Thermo Fisher Scientific offer a product-specific service contract comprising all necessary tests and service work. Preparing Temperature Calibration To determine the exact measured value of the oven’s integral temperature sensor, a temperature comparison measurement must be performed every three months. -
Page 49: Replacing The Door Seal
Maintenance | Chapter 10 Replacing the Door Seal The door seal of the outer door is located in the retaining slot. The door seal should be inspected for any signs embrittlement every six months when the oven has been used at maximum temperatures of up to 250 °C / 482 °F. - Page 50 Chapter 10 | Maintenance Material returned without an RMA number will be refused. Contamination hazard The oven may have been used for treating and processing infectious substances, which may have caused contamination of the oven and its components. Prior to return shipment, it is therefore mandatory that all oven components be properly decontaminated.
-
Page 51: Overview Of Materials Used
Contamination hazard The oven may have been used for treating and processing infectious substances, which may have caused contamination of the oven and its components. Prior to disposal, it is therefore mandatory that all oven components be properly decontaminated. Clean the oven components thoroughly, then disinfect or decontaminate them (depending on application). -
Page 52: Disposal
Chapter 11 | Disposal 50145736 Fisherbrand... - Page 53 The table below lists the error messages that may appear in the control panel display window and provides instructions for clearing such alarms. Parameter Upper Display Lower Display Description Alarm Normal Fisherbrand ovens incorporate a variety of safety features. An alarm LED indicates that the unit temperature is 5°C above setpoint.
-
Page 54: Chapter 13 Error Codes
Chapter 12 | Error Codes 50145736 Fisherbrand... -
Page 55: Chapter 14 Technical Data
The technical data are valid only for an empty device equipped with three shelves, a spray-painted outer enclosure and a power line voltage 120 V 60 Hz (Table 1) or 230 V 50/60 Hz (Table 2). Options may have an impact on the specified performance. Table 1. - Page 56 Chapter 13 | Technical Data Table 1. Technical Data - Gravity Convection Ovens 120 V Fisher Sci Fisher Sci Fisher Sci Parameter Unit 60L Gravty 100L Gravty 180L Gravty Oven Oven Oven Power line frequency Power line voltage +/- 10 % IP protection system IP 20 Protection class...
- Page 57 Technical Data | Chapter 13 Table 2. Technical Data - Gravity Convection Ovens 230 V Fisherbrand Fisherbrand Fisherbrand Parameter Unit 65L Oven 105L Oven 176L Oven Process Work Space Atmosphere °C/°F 50/122 50/122 50/122 Min. °C/°F 250/482 250/482 250/482 Max. Temperature deviation from set value at 150 °C (302 °F), spa- ±4.5 / ±5.5 / ±4.5...
- Page 58 Chapter 13 | Technical Data Table 2. Technical Data - Gravity Convection Ovens 230 V Fisherbrand Fisherbrand Fisherbrand Parameter Unit 65L Oven 105L Oven 176L Oven Device fusing 2 x 16 Environmental conditions Min. ambient temperature °C/°F 18/65 Max. ambient temperature °C/°F 32/90 Max.
- Page 59 Material No. Description 150145852 Stainless steel perforated shelf for 60L/65L gravity convection ovens, including 2 shelf supports 150145853 Stainless steel perforated shelf for 100L/105L gravity convection ovens, including 2 shelf supports 150145854 Stainless steel perforated shelf for 176L/180L gravity convection ovens, including 2 shelf supports 150145846 Wire mesh shelf for 60L/65L gravity convection ovens, including 2 shelf supports...
- Page 60 Chapter 14 | Spare Parts and Accessories 50145736 Fisherbrand...
- Page 61 Oven type: Part number: Serial number: Service number: Location Operator’s note: Work carried out Notes Date Signature Fisherbrand 50145736 | 53...
- Page 62 Chapter 15 | Device Log 50145736 Fisherbrand...
- Page 63 Austria: +43(0)800-20 88 40 Belgium: +32 (0)56 260 260 Denmark: +45 70 27 99 20 Germany: +49 (0)2304 9325 Ireland: +353 (0)1 885 5854 Italy: +39 02 950 59 478 Finland: +358 (0)9 8027 6280 France: +33 (0)3 88 67 14 14 Netherlands: +31 (0)20 487 70 00 Norway: +47 22 95 59 59 Portugal: +351 21 425 33 50...
Need help?
Do you have a question about the Fisher Sei 60L Gravty and is the answer not in the manual?
Questions and answers