
Related Manuals for ChatterBox FRS X2

Summary of Contents for ChatterBox FRS X2
- Page 1 T h e P e r s o n ~ t o ~ P e r s o n S p o r t s C o m m u n i c a t i o n S y s t e m O W N E R S M A N U A L...
-
Page 3: Table Of Contents
Contents Feature Highlights Unpacking and Inspecting Initial Set-Up Features Operation Power On/Off Vox Sensitivity Channel Select Volume Level Select Talk Group Beep On/Off Select Key Lock On/Off Select Scan Power Save Level Select Intercom Monitor Audio-In Jack AUX-In Jack Battery Indicator Optional Accessories Headset Installation Main Unit Installation... -
Page 4: Feature Highlights
Feature Highlights Thank you on your recent purchase of the ChatterBox model FRS X2. The FRS X2 is a micro size 14 channel portable FM transceiver constructed with a microprocessor controlled, temperature compensated Phase Locked Loop (PLL) frequency synthesizer. The radio features a double conversion receiv- er and a direct FM transmitter modulator. -
Page 5: Unpacking And Inspecting
Unpacking and Inspecting Check that all contents are in good order. If any parts of the equipment has been damaged in transit or is missing please contact our customer service department immediately at (562) 407-2188. 1. FM transceiver unit 2. Stereo headset and microphone 3. -
Page 6: Initial Set-Up
14 hr. full charge. To reduce the risk of damage to the battery do not use any other charger except the one supplied with the FRS X2. Please note the battery should have a full charge before the unit is stored for a long period of time. -
Page 7: Features
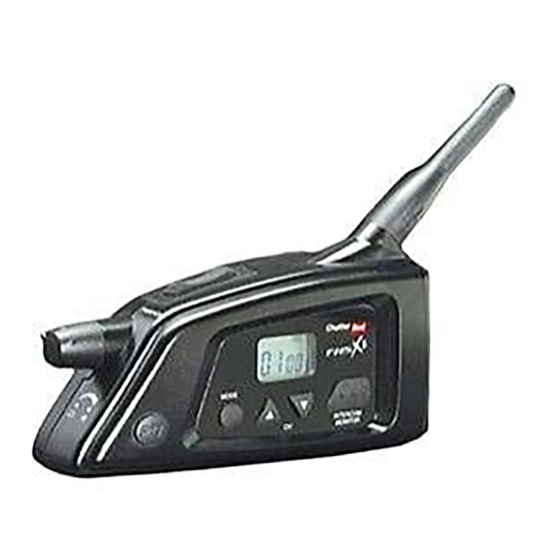
Features: BUILT-IN RECHARGEABLE Ni-MH BATTERY 14. FIXED LOW PROFILE ANTENNA 1. LARGE ILLUMINATED LCD DISPLAY TOUGH WATER RESISTANT CASING 13. AUDIO INPUT 8. / 9. VOLUME ADJUSTMENT portable radio, CD, MP3 etc. 12. AUXILIARY INPUT cellular phone* 7. POWER ON/OFF VOX ADJUSTMENT 11. - Page 8 1. Illuminated LCD (Liquid Crystal Display) 2. PTT (Push-to-Talk Button)/Enter Hold down to transmit and release to receive. Allows you to set different functions. 3. Mode button Press to change modes. Allows you to program different functions. 4. Up button To select the channel and option in mode operation.
-
Page 9: Operation
Operation Power On/Off Turn the VOX sensitivity dial clockwise to turn the unit on. The radio will emit a tone to let you know the unit is on. Turn the VOX sensitivity dial counterclockwise to turn the unit off. The radio will emit a tone to let you know the unit is off. -
Page 10: Volume Level Select
Volume Level Select Choose the desired volume level with the Up/Down button. Then press the PTT button to enter. Talk Group Press the Mode button once, while the number is blinking choose the desired “talk group” by pressing Up/Down button. Then press the PTT button to enter. -
Page 11: Intercom
Intercom Press the Intercom button for 3 seconds to switch to intercom mode. You will then hear a chime letting you know that the intercom has been activated. Press the same button again to cancel and start regular transmission. Monitor Press the Intercom button to listen in on a channel for weak signals. -
Page 12: Optional Accessories
Call Cord Connect your cellular phone (Call for applications.) Rechargeable Ni-MH Battery Internal replacement battery. External Battery Pack Belt mounted battery pack (4 alkaline batteries.) 12 Volt Power Filter Cord Connect your ChatterBox FRS X2 to a 12 Volt battery. -
Page 13: Headset Installation
Headset Installation 1. For the open face headset, use the plastic tie clip to secure the windsock. For the full face headset, microphone covers come pre- installed. 2. Helmets without speaker pockets. Attach the foam covers to the speakers respectively (Drawing 1). Attach the hard velcro disk to the back of the speakers (Drawing 2). -
Page 14: Main Unit Installation
Main Unit Installation Fasten the mounting bracket snugly to the bottom left side of the helmet with the bolts supplied. Make sure the rubber pad is placed between the outer mounting bracket and the outer shell of the hel- met. Then align the mounting bracket with the grooves on the back side of the main unit. -
Page 15: How To Transmit And Receive
VOX FUNCTION The VOX adjustment knob on the front of your ChatterBox® is the single most important control on the unit. When set on “Hi” (high) the micro- phone will easily pick up a normal speaking voice. Never begin riding with the VOX set on “Hi”. -
Page 16: Vox Adjustment Instruction Sheet
A. With the helmet off, turn the VOX knob to the “Hi” (high) sensitivity position. B. Place the helmet on your head (with the ChatterBox® fully installed). C. Speak into the microphone in a normal voice. You should hear your voice in the speakers. -
Page 17: Trouble Shooting
Trouble Shooting Problem 1. Cutting out during transmission. Solution 1. Adjust the mic sensitivity to a higher setting (clockwise) or speak louder. Solution 1. Position the mic directly in front of your lips. Problem 2. Not receiving. Solution 2. Adjust the mic sensitivity to a lower setting (counter clockwise). -
Page 18: Technical Specification
Technical Specifications General 1. Frequency range 462.550 MHz– 462.725 MHz 2. Modulation type 8KOF3E (FM) 3. Channel capacity 14 channels 4. Channel spacing 12.5KHz 5. Power supply DC 4.8V; Ni-Mh rechargeable pack 6. Current drain Transmitter (0.5W); <600mA (Ni-MH rechargeable pack) Receiver (0.5 W);... - Page 19 In no event will ChatterBox be liable to the buyer for any damages, including special, incidental, indirect, or consequential. CAUTION...
- Page 20 The Person ~ to ~ Person Sports Communication System ChatterBox USA 16918 Edwards Rd. Cerritos, CA 90703 Tel: 562-407-2188 Fax: 562-802-3151 www.hjc-chatterbox.com...
Need help?
Do you have a question about the FRS X2 and is the answer not in the manual?
Questions and answers