
Related Manuals for FY-TECH FY-2H


Summary of Contents for FY-TECH FY-2H
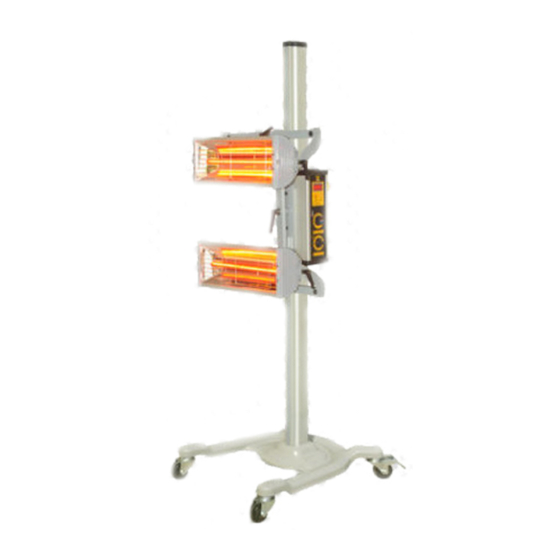
- Page 1 Instruction Manual FY-2H Our equipment is approved by the following car manufacturers (China)
-
Page 2: Table Of Contents
Contents 1. Precautions 2. Specifications 3. Installation 4. Controls 5. Operation 6. Troubleshooting 1) Troubleshooting 2) Lamp Tube Replacement 7. Circuit Diagram... -
Page 3: Precautions
1. Precaution 1. Read this manual carefully before installing or servicing this equipment. 2. This equipment is designed for paint drying applications. Adjust correct temperature and check minimum safe distance from heat source when using. Improper servicing can cause paint surface damage. 3. -
Page 4: Specifications
2. Specifications FY-2H Model Input Power Source Single Phase 220V 50/60Hz Input Power (W) 2 × 1000 Curing Area (mm) 1200 × 1000 Temperature (°C) 35 - 80 Time Setting 0 - 60 mins Adjustable Light Intensity (%) 10 - 100... -
Page 5: Installation
3. Installation The shortwave infrared curing lamp is divided into 3 parts (a base, a frame and a cassette) 1) Installation of the base: a. Open the packing of the base. b. Install the four wheels on the base and tighten up the screws. Usually, the wheels with brakes are mounted on the rear of the base. -
Page 6: Controls
4. Controls AC220V-240V 50/60Hz POWER CONTROL SYSTEM TIME CONTROL SYSTEM Power Adjustment Time Adjustment Page 4... -
Page 7: Operation
5. Operation Connect electricity supply. Make sure that the supply cable is at least 4mm at 220V Note: Make sure that the facility supply voltage and frequency are the same as shown on the equipment name plate. Connect to power supply AC 220V. Switch on the equipment. The LED display will show the normal voltage as 220V. -
Page 8: Troubleshooting
6. Troubleshooting 1) Troubleshooting CAUSE SOLUTION PROBLEM 1) Lamp tube damaged 1) Check lamp tube Lamp tube does not work 2) Lamp not plugged in 2) Check connections 3) SCR damaged 3) Check SCR Lamp tube lights all the time 1) SRC damaged 1) Check SCR 1) Flat wire unplugged in... -
Page 9: Lamp Tube Replacement
6. Troubleshooting 2) Lamp Tube Replacement 1. Prepare cassette for replacement. 2. Remove the grille of cassette. 3. Remove the plates on both ends of the cassette. 4. Remove the fixed plates from both ends of the cassette. 5. Loosen fixed screws and remove connections. -
Page 10: Circuit Diagram
8. Circuit Diagram A LAM P A C 2 20V Ov er-C urrent P rote c tion S w itc h P ow e r S w it c h B LAM P P ow er S w itc h Temperature Regulation TIM ER Page 8...
Need help?
Do you have a question about the FY-2H and is the answer not in the manual?
Questions and answers