Table of Contents
Advertisement
Quick Links
CLOUDBOX USER MANUAL
CLICK HERE TO ACCESS AN UP-TO-DATE ONLINE VERSION
of this document. Online User Manuals feature easy navigation, expandable illustrations, and
search capability.
INTRODUCTION
CloudBox User Manual
The LaCie CloudBox is a great solution for storing and backing up data. As a
local network device with ample storage, you can keep your important files
on its disk drive. For added security, all data stored on the CloudBox is
automatically backed up to your Online Backup account each day. This
manual will help you to configure and administer the CloudBox on your
network.
1
Advertisement
Table of Contents

Related Manuals for LaCie CloudBox


Summary of Contents for LaCie CloudBox
- Page 1 INTRODUCTION The LaCie CloudBox is a great solution for storing and backing up data. As a local network device with ample storage, you can keep your important files on its disk drive. For added security, all data stored on the CloudBox is automatically backed up to your Online Backup account each day.
- Page 2 WHAT IS A CLOUDBOX ONLINE BACKUP? With local storage and online backup, your data is now secure on two fronts. Files stored on the LaCie CloudBox are safe on your local network if you experience problems with your computer’s hard drive or operating system.
-
Page 3: Minimum System Requirements
Web browsers: Internet Explorer® 7.0 and Safari® 3.0 Important note: In almost all instances, the use of the LaCie CloudBox should not incur additional fees from an Internet Service Provider. Please note that under no circumstances will LaCie be held responsible for any indirect or additional charges from an Internet Service Provider or any other company that provides a portal to the Internet. -
Page 4: Box Content
Ethernet cable Quick Install Guide Utilities CD-ROM with LaCie Network Assistant, LaCie Backup Assistant, and the User Manual Leaflet with the One Year Online Backup Contract and device ID numbers Important info: Please save your packaging. In the event that the drive should need to be repaired or serviced, it must be returned in its original packaging. -
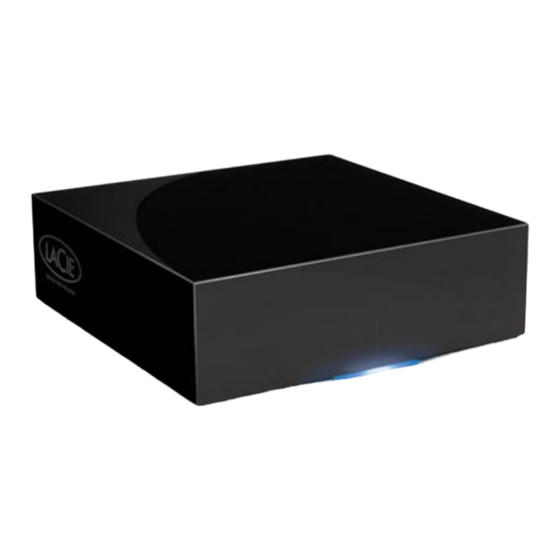
Page 5: Front View
VIEWS OF THE DRIVES Front View LED activity light Rear View Power button Power supply Gigabit Ethernet CloudBox User Manual... - Page 6 CloudBox User Manual...
-
Page 7: Led Behavior
Note: You may also power down the CloudBox via the Dashboard. CONNECTING TO YOUR NETWORK This chapter explains how to connect the CloudBox to your network. Please note that your network must have access to the Internet for the CloudBox installation, setup, and general use. - Page 8 Ethernet is the most widely used local area network (LAN) technology. A Gigabit (Gb) Ethernet cable is included with your LaCie device to connect it to a network. Please note that the images in the table below may not reflect the precise cable or connector positions of your LaCie device or router.
-
Page 9: Step 1 - Ethernet And Power
STEP 1 - Ethernet and Power Connect the Ethernet cable to the Ethernet port on the back of the LaCie CloudBox. Connect the other end of the Ethernet cable into an available Ethernet port on your router, switch, or hub. - Page 10 Press the power button on the back of the CloudBox. The drive is ready to be accessed once the blue LED has stopped blinking. Please be patient while the CloudBox starts for the first time. CloudBox User Manual...
- Page 11 Important info: Please make certain that your switch or router supports DHCP. The Setup Wizard cannot run in a network that does not support DHCP. You may adjust the IP settings on your CloudBox once the Setup Wizard is complete.
- Page 12 STEP 2 - LaCie Network Assistant Once installed, LaCie Network Assistant will appear in your system tray (Windows) or in the menu bar (Mac). LaCie Network Assistant - Windows LaCie Network Assistant - Mac LaCie Network Assistant will automatically search for LaCie storage devices on your network. When a new device is found, the icon will blink.
- Page 13 Mac Users: Select LaCie Network Assistant in your Applications folder. The LaCie Network Assistant icon will appear in the menu bar. Click on the icon in the system tray (Windows) or menu bar (Mac) and select CloudBox > Web Access… LaCie Network Assistant - Windows...
- Page 14 LaCie Network Assistant - Mac CloudBox User Manual...
- Page 15 Please note your Username and Password on paper for future reference since the information cannot be recovered. An administrator may add up to nine more users to the CloudBox to store and backup data. Further, the administrator can revise or remove users. While user names may be edited at any time, the administrator Username remains the same once it is created during the Setup Wizard.
- Page 16 Important note: The Username and Password entered during the Setup act as the default login for the CloudBox administrator. For security reasons, they cannot be recovered. Therefore, LaCie highly recommends that you mark your Username and Password on paper. Keep the information in a safe, convenient location so that you can easily recall your Username and Password.
- Page 17 CloudBox User Manual...
- Page 18 CloudBox User Manual...
- Page 19 CloudBox User Manual...
- Page 20 CloudBox User Manual...
- Page 21 CloudBox User Manual...
- Page 22 CloudBox User Manual...
- Page 23 CloudBox User Manual...
- Page 24 CloudBox User Manual...
- Page 25 CloudBox User Manual...
- Page 26 CloudBox User Manual...
- Page 27 CloudBox User Manual...
- Page 28 CloudBox User Manual...
- Page 29 CloudBox User Manual...
- Page 30 CloudBox User Manual...
- Page 31 CloudBox User Manual...
- Page 32 CloudBox User Manual...
- Page 33 CloudBox User Manual...
- Page 34 CloudBox User Manual...
- Page 35 CloudBox User Manual...
- Page 36 CloudBox User Manual...
- Page 37 CloudBox User Manual...
- Page 38 CloudBox User Manual...
- Page 39 CloudBox User Manual...
- Page 40 CloudBox User Manual...
- Page 41 CloudBox User Manual...
- Page 42 CloudBox User Manual...
- Page 43 CloudBox User Manual...
- Page 44 CloudBox User Manual...
- Page 45 CloudBox User Manual...
- Page 46 CloudBox User Manual...
- Page 47 CloudBox User Manual...
- Page 48 CloudBox User Manual...
- Page 49 CloudBox User Manual...
- Page 50 CloudBox User Manual...
- Page 51 CloudBox User Manual...
- Page 52 CloudBox User Manual...
- Page 53 Please make certain that your switch or router supports DHCP. You may adjust the IP settings on your CloudBox once the Setup Wizard is complete. Standard DHCP Network: The Setup Wizard will begin to configure the CloudBox on your network. Click NEXT.
- Page 54 Proxy Server: If the CloudBox cannot connect to the Internet, the Setup will ask for a proxy server. Enter the proxy server IP address and the password (if necessary). Click NEXT. Enter your contract number in the Setup Wizard. Click NEXT.
- Page 55 LaCie recommends renewing your Online Backup contract each year. In keeping your Online Backup contract up to date, you can continue to enjoy secure updates to your private account. The Home page on the CloudBox Dashboard lets you know how many days remain before the contract expiration date. You will also receive an email one month before the expiration date as a friendly reminder.
-
Page 56: Accessing And Transferring Files
ACCESSING AND TRANSFERRING FILES ABOUT USER FOLDERS The LaCie CloudBox creates a separate folder for each user. The user can copy important data to his folder for local and online backup. For example: the person who runs the Setup Wizard decides upon the Username “admin”. A corresponding folder called “admin”... - Page 57 LaCie Network Assistant - Windows LaCie Network Assistant - Mac Enter your Login and Password. Windows: A network window will open with all the user folders created on the CloudBox. Double-click on your user folder to enter your Login and Password. CloudBox User Manual...
- Page 58 Mac: A prompt will ask for your Name and Password. Enter your CloudBox Login and Password. If the user folder does not open in a Finder window, navigate to Shared > CloudBox. A prompt will ask how you wish to log on, as a Guest or a Registered User. Select Registered User to enter the CloudBox Name (Username) and Password.
- Page 59 From the LaCie Network Assistant menu, select Configuration Window…. Click the Volumes tab. If you wish to map password-protected user folders, click the Authentication button. A prompt will ask for your username and password. CloudBox User Manual...
- Page 60 Next to the user folder you wish to map, click the check box under the column Auto Mount. Windows: The user folder will mount in My Computer/Computer automatically when the computer detects the CloudBox on the network. CloudBox User Manual...
- Page 61 Mac: The user folder icon will appear in your Finder when the computer detects the CloudBox on the network. Map User Folders Via the Operating System Windows XP, Vista, and Windows 7 Users From an Explorer window in Windows XP, select Tools > Map Network Drive.
- Page 62 You now have access to your user folder from an Explorer window. Mac Users Open a new Finder window. In the SHARED section on the left, click on CloudBox (or, the new name of your device) > [User Folder]. Choose Connect As…...
- Page 63 Copy and paste folders and files directly into it. Backup Solutions for Windows and Mac The CloudBox supports most automated backup solutions for Windows. For example, you may use the CloudBox as the target disk for Windows Backup and Restore.
- Page 64 Run LaCie Backup Assistant on the included Utilities CD-ROM to install professional versions of Genie Timeline for Windows or Intego for Mac. Both offer excellent backup options for your CloudBox. Genie Timeline Professional - Windows CloudBox User Manual...
- Page 65 Intego Backup Manager Pro - Mac With the CloudBox, your local system backups enjoy an added level of security since they are automatically backed up online. ADMINISTERING YOUR LACIE CLOUDBOX The LaCie CloudBox features an easy-to-use administration tool called the Dashboard. You can access the Dashboard via LaCie Network Assistant or directly in your Web browser.
- Page 66 CloudBox User Manual...
-
Page 67: Dashboard: Accessing
DASHBOARD: ACCESSING There are two ways to access the Dashboard: LaCie Network Assistant - Click on the LaCie Network Assistant icon in the system tray (Windows) or menu bar (Mac) and select CloudBox > Web Access… Internet Browser - Open your Internet browser and type your CloudBox’s machine name (by default, CloudBox) or IP address in the browser’s URL (Web address) field. - Page 68 > Configuration Window… > [CloudBox or the name you have given the device]. The LaCie CloudBox login page will open in a new browser window or tab. If your browser is not open, LaCie Network Assistant will open it for you.
- Page 69 CloudBox User Manual...
- Page 70 CloudBox User Manual...
- Page 71 CloudBox User Manual...
- Page 72 ’ CloudBox User Manual...
- Page 73 CloudBox User Manual...
- Page 74 CloudBox User Manual...
- Page 75 CloudBox User Manual...
- Page 76 CloudBox User Manual...
- Page 77 Technical note: Only password hints are sent via email. The password itself should be easy to recover once the hint is received. CloudBox User Manual...
-
Page 78: Dashboard: Home Page
DASHBOARD: HOME PAGE The Home page provides the following information: a. The amount of storage used on the CloudBox internal hard drive. b. Online Backup Status. c. Choose a Selective restore to PC or a Full restore on the Box. See... - Page 79 Click the “i” icon to see the backup progress window. b. Click STOP THE BACKUP to cancel the backup in progress. CloudBox User Manual...
-
Page 80: Dashboard: Navigation
To minimize a widget, click the X next to its title. To expand a minimized widget, drag its icon over an expanded widget, which replaces it. To rearrange widgets, drag the minimized widget icon or the expanded widget’s heading onto the place of another widget. CloudBox User Manual... -
Page 81: Dashboard: Logging Out
DASHBOARD: LOGGING OUT To log out of the Dashboard or restart/shutdown the CloudBox, click the Shutdown Options button in the upper right-hand corner of any Dashboard page. If you are not restarting or shutting down the CloudBox, LaCie recommends logging out for security reasons. -
Page 82: Dashboard: General Settings
The administrator can use this page to modify some of the CloudBox’s general parameters. To make changes, click on the selection to view a prompt for additional choices. For example, click on the Machine Name Cloudbox to open the field that permits you to type a new name. - Page 83 CloudBox User Manual...
-
Page 84: Dashboard: Users
Usage: If you have set a quota for a user, the amount of space used will be indicated as a percentage. Quota: Set the limit that a user may store on the CloudBox. For example, a user may be assigned 10GB of storage space for his data. -
Page 85: Deleting A User
A quota for disk usage. The number value is in gigabytes (GB). For example, enter “5” means that the user may only use up to 5 GB of storage on the CloudBox. Click the green check sign on the right to create the user account. -
Page 86: Editing A User
CloudBox. Proxy Configuration: The CloudBox may be used with a network that includes a proxy server for Internet access. Select the checkbox next to Enable proxy in order to enter the IP address and port number for the proxy server. -
Page 87: Account Information
DASHBOARD: CLOUDBOX SETTINGS This page provides Online Backup account information and the CloudBox health status via three tabs: General, Diagnosis, and History. General - Backup Time and Bandwidth Account Information Important Info: Click on the words or asterisks of the settings you wish to change. - Page 88 CloudBox User Manual...
- Page 89 Click BACKUP NOW to initiate an immediate backup. Select the time of day for the CloudBox online backup by clicking the selection next to Online backup start time. LaCie recommends choosing a time of day when your network is less active.
- Page 90 You have the option to choose transfer rates for your CloudBox uploads and downloads. Please consider the amount of bandwidth that the CloudBox will use before making any changes. To initiate a change, click on the settings next to Download limit and Upload limit.
- Page 91 By default, the CloudBox online backup will ignore hidden files used by Mac OS X. To backup these files, you may click on No next to Ignore hidden Mac files. Select Yes to skip Mac OS hidden files. CloudBox User Manual...
- Page 92 Your First Online Backup Depending upon the amount of data stored on the CloudBox, your initial online backup may require some time. Please do not be alarmed if the backup takes many hours or several days. All online backups occur in the background, leaving you free to operate your computer or workstation.
- Page 93 Diagnosis: Drive Status Use this tab to see if the CloudBox is experiencing any errors. The status is color coded for easy identification of potential problems. See the table below. Click RELOAD to receive updates on the status. CloudBox User Manual...
- Page 94 *Wait for a minute before clicking RELOAD. *If the problem persists, try rebooting the Error (Red) The CloudBox is not connected to the Internet. CloudBox. *If the above options do not resolve the issue, try to restore the CloudBox to factory settings.
- Page 95 Click on the words Done, Failed, or In progress to see the log. A fourth option, Partial, indicates that the backup was successful but skipped unsupported files. CloudBox User Manual...
-
Page 96: Dashboard: Support
The support page will allow you to access the system log and set up email alerts. Version: The level of firmware currently being used by the CloudBox. System log: Click the Download button to save the CloudBox log to your computer. The system log is helpful when speaking with Technical Support. -
Page 97: Restore To Factory Settings
Expiration date warning Backup failed Logs: CloudBox warnings sent via email are also listed in the Alerts box. To clear the alerts box, click the Trash can icon on the right. AUTO-Update: See Update Method 1: AUTO-Update for further information. -
Page 98: Update Product Software
CloudBox Dashboard Support page to begin the update. Updating your CloudBox should not erase your configuration or data. a. Click the screwdriver and wrench icon to set the time that the CloudBox searches for firmware updates. b. Manually search for an update:... - Page 99 IPConf Support is not active if the button reads Activate. Go to LaCie Network Assistant > Configuration to select your product from the list on the left. Click on the Update your NAS button. Enter your administrator username and password.
- Page 100 Selective Restore: Browse your online backup history to restore individual files. This option allows for greater control in choosing only the files that you need. You can log onto your online account via the CloudBox Online Restore application to browse the last 10 complete backups for specific files.
- Page 101 Download the CloudBox Online Restore application at http://cloudbox.lacie.com from any computer with an Internet connection. The CloudBox Online Restore application is compatible with Windows or Mac. Once it is available on your computer: Launch the application Enter your Contract ID, Username, and Password. Click Login.
-
Page 102: Selective Restore
SELECTIVE RESTORE To begin a Selective Restore, launch the CloudBox Online Restore application to select Browse. You will be directed to your online backup account. Select one or more files and click Restore at the top of the application window. You can download the files directly to your computer. - Page 103 CloudBox User Manual...
- Page 104 Important info: The Dashboard Home page has Selective restore on PC to link you directly to http://cloudbox.lacie.com. Once at the site, you can download the CloudBox Online Restore application to your computer. If you have already downloaded the application, you can launch it to view and restore data.
-
Page 105: Full Restore
If you wish to restore a small portion of your data from an online backup, a Selective Restore offers more flexibility to choose specific files than a Full Restore. However, if you have to replace your CloudBox due to theft or technical problems or your data is corrupt or lost, a Full Restore can restore one of your last 10 backups directly to the device. - Page 106 Full Restore - Dashboard Choosing a Full Restore from the Dashboard will automatically restore the last successful backup. If you wish to select an earlier backup point, please see the instructions for a Full Restore using the CloudBox Online Restore application.
- Page 107 You may choose another destination such as your internal hard drive or external storage. Choose the Backup Point that you wish to use for the Full Restore then click the RESTORE button. The entirety of the selected backup will be restored to the target location. CloudBox User Manual...
-
Page 108: Getting Help
Yes. All data is encrypted using 128-bit AES (Advanced Encryption Standard) Is my data encrypted? before it is uploaded to your Online Backup. GETTING HELP If you are having problems with your LaCie product, consult the table below for a list of available resources. Order Source Description Location... -
Page 109: Software Updates
SYSTEM LOG The system log allows you to review the type, date, time, source, and event ID of activities on the LaCie . Additionally, if you ever need help from LaCie technical support, the log will be important. For more information, refer to chapter Dashboard:Support. -
Page 110: Troubleshooting Topics
Q: Is the LED on the front of the device flickering for an inordinate period of time? A: If the LED is flickering or will not turn on, the power supply may be defective. Please contact your LaCie reseller or LaCie Customer Support. - Page 111 To get the IP address, run LaCie Network Assistant, which is located on the LaCie Storage Utilities CD-ROM. If no DHCP server detected, the product will run APIPA to assign itself an IP address. Q: Is the IP address properly set?
-
Page 112: Health And Safety Precautions
II). Do not expose the LaCie product to temperatures outside the range of 5º C to 30º C (41º F to 86º F); or to operational humidity beyond 10-80%, non-condensing, or non-operating humidity beyond 5-90%, non-condensing. -
Page 113: Warranty Information
LaCie (“LaCie”) warrants, to the original purchaser, that this equipment shall be free of defects in materials and workmanship for a period of one (1), two (2), three (3), or five (5) years, depending on the model, from LaCie's date of original shipment when the equipment is used normally and is properly serviced when needed. If you discover a defect covered by the warranty set forth above, your sole and exclusive remedy will be for LaCie, in its sole discretion to (i) repair or replace the product at no charge to you;... - Page 114 The customer must pay all transportation costs for a returned product. The product will need to be returned to LaCie within the country of original retail purchase. This warranty applies only to hardware products; LaCie software, media, and manuals are licensed and warranted pursuant to separate written agreement.
- Page 115 Any loss, corruption or destruction of data while using a LaCie drive is the sole responsibility of the user, and under no circumstances will LaCie be held liable for the recovery or restoration of this data. To help prevent the loss of your data, LaCie highly recommends that you keep TWO copies of your data;...
-
Page 116: Service Doa
Within the 15 calendar days of purchase, should you experience an issue with your new LaCie product, we ask you to return the product to the place where it was originally bought. You will be required to give a proof of purchase. -
Page 117: Federal Communication Commission Interference Statement
The material in this document is for information only and subject to change without notice. While reasonable efforts have been made in the preparation of this document to assure its accuracy, LaCie assumes no liability resulting from errors or omissions in this document, or from the use of the information contained herein. LaCie reserves the right to make changes or revisions in the product design or the product manual without reservation and without obligation to notify any person of such revisions and changes. -
Page 118: Canada Compliance Statement
LICENCES AND FREE SOFTWARE Your LaCie product ships with copyrighted software that are licensed under the GPL, AFL, Apache, Apple, BSD, GNU LGPL, MIT, OpenLDAP, OpenSSL, PHP, Python, and Creative Common. It also includes free software, the source code for which can be downloaded from the LaCie website: www.lacie.com/support/... -
Page 119: Japan Compliance Statement
This is a Class B product based on the standard of the Voluntary Control Council for Interference from Information Technology Equipment (VCCI). If this is used near a radio/TV receiver, it may cause radio interference. Install the equipment according to the manual. This statement does not apply to the LaCie CloudBox.
Need help?
Do you have a question about the CloudBox and is the answer not in the manual?
Questions and answers
does lacie record e mails