Advertisement
Quick Links
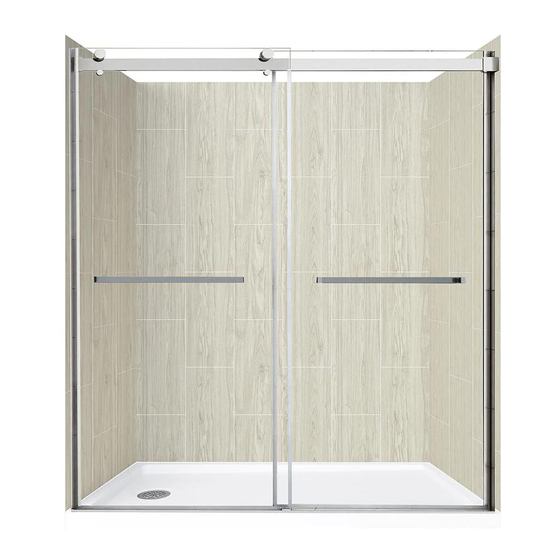
LAGOON
by
COPY THE MODEL NUMBER FOR YOU RECORDS HERE #
LEFT HAND INSTALL
Please visit us on YouTube and view our shower door installation videos.
One may be available for your installation. www.youtube.com/foremostgroups.
Toll Free Customer Assistance
Monday-Friday, 9:00 a.m. To 5:30 p.m. EST
6241 Northwind Parkway, Hobart, IN USA 46342
www.ForemostBath.com
2020 Foremost Groups,Inc.
C
DOUBLE ROLLER
SHOWER & TUB DOOR
READ THE INSTRUCTIONS CAREFULLY
Familiarize yourself with all the parts as shown in the exploded
view. The exploded view will also provide a helpful reference
when relating to the location of the various parts and how
they are mounted.
1-888-620-3667
1-888-256-7551
5970 Chedworth Way, Unit B, MIssissauga, Ontario, Canada L5R 4G5
www.ForemostCanada.com
RIGHT HAND INSTALL
US Customers
Canada Customers
Advertisement

Subscribe to Our Youtube Channel
Related Manuals for Foremost LAGOON


Summary of Contents for Foremost LAGOON
- Page 1 One may be available for your installation. www.youtube.com/foremostgroups. 1-888-620-3667 Toll Free Customer Assistance US Customers 1-888-256-7551 Monday-Friday, 9:00 a.m. To 5:30 p.m. EST Canada Customers 6241 Northwind Parkway, Hobart, IN USA 46342 5970 Chedworth Way, Unit B, MIssissauga, Ontario, Canada L5R 4G5 www.ForemostBath.com www.ForemostCanada.com 2020 Foremost Groups,Inc.
- Page 2 1 1/4” Pan Head Screw (8 pcs) 1 1/4” Flat Head Screw (8 pcs) - 1 -...
-
Page 3: Parts List
PARTS LIST 180°Magnet Seal (2 pcs) 1 1/4” Pan Head Screw (8 pcs) Towel Bar (2 pcs) Wall Anchor (16 pcs) Aluminum Wall Channel (2 pcs) Inner oor (1 pc) Top Rail (1 pc) Double Roller (2 pcs) Roller (2 pcs) Anti-Jumper (2 pcs) Rail Wall Bracket Assembly (2 pcs) 1 1/4”... - Page 4 CHOOSE WHETHER YOU ARE INSTALLING LEFT OR RIGHT SHOWER DOOR Determine which assembly configuration you need to follow based on the location of the shower head as viewed from the outside of the shower. Left hand shower head must use Left Hand Assembly and right hand shower head must use Right Hand Assembly to insure a water tight finished installation.
- Page 5 INSTALLATION PROCEDURE / STEP 2 1. Install door guide (19) at the middle of tray. 2. Position door guide as shown in the drawings and mark holes making certain it is positioned straight and square. 3. Drill hole with 1/8 (3mm) drill bit. 4.
- Page 6 INSTALLATION PROCEDURE / STEP 3 1. Outside distance between rail wall bracket assembly (7) and door guide(19) should be 1 . 2. Remove top plates from both rail wall bracket assemblies (7). 3. Measure straight up the wall to a point 3 ½ less than the overall height of the enclosure (Distance C in the table below) and mark it.
- Page 7 INSTALLATION PROCEDURE / STEP 4 1. Depending on your overall opening, you may not have to cut your top rail. Use the table below to determine your situation and cut the rail as shown in the diagram if necessary. 2. Insert top rail into brackets with the slot to the inside of the shower and use a level to ensure top rail is level, adjusting the brackets if necessary.
- Page 8 INSTALLATION PROCEDURE / STEP 5 1. Install threshold gasket (17) on the bottom of inner door panel (3). 2. Trim water-retaining gasket (18) down 4 ¾ from the top as shown in the diagram below. 3. Install water-retaining gasket (18) on inner glass. RIGHT HAND ASSEMBLY LEFT HAND ASSEMBLY - 7 -...
- Page 9 INSTALLATION PROCEDURE / STEP 6 1. Use the enclosed spanner to disassemble both double rollers (10) and then slide the rollers into the slot in the back of the top rail (9). LEFT HAND ASSEMBLY RIGHT HAND ASSEMBLY 0 10 - 8 -...
- Page 10 INSTALLATION PROCEDURE / STEP 7 1. While tilting inner glass door panel (3) back into the shower slightly, insert it into the inner slot of the bottom panel guide (19). 2. Insert the hexagonal nuts into the holes in the top of the inner glass panel (3), line them up with the threaded rod in the double rollers and (using the spanner provided) secure in place.
- Page 11 INSTALLATION PROCEDURE / STEP 8 1. Adjust the rollers so that the panel meets the wall evenly from top to bottom. 2. Attach 180° magnet seal (2) to inner door (3) magnetic seal using the magnetic attraction (if they repel, flip 180° magnet seal (2) upside down) and slide on the aluminum wall channel (1) temporarily.
- Page 12 INSTALLATION PROCEDURE / STEP 9 1. Install roller (11) on outer door (13), then tighten with spanner. 2. Install threshold gasket (17) at the bottom of outer door (13). 3. Cut 4 ¾ (120 mm) notch in top of water retaining gasket (18) as shown in drawing #3. 4.
- Page 13 INSTALLATION PROCEDURE / STEP 10 Set outer door (13) on top rail taking care to slide the panel bottom into the outer channel of the bottom panel guide (19). LEFT HAND ASSEMBLY RIGHT HAND ASSEMBLY H=Product Height H=Product Height - 12 -...
- Page 14 INSTALLATION PROCEDURE / STEP 11 1. Use a level on the top of outer door (13) to ensure it is level and then install anti-jumper (12). 2. Install towel bars (5) on inner and outer door panels. RIGHT HAND ASSEMBLY LEFT HAND ASSEMBLY - 13 -...
- Page 15 INSTALLATION PROCEDURE / STEP 12 1. Adjust the rollers so that the panel meets the wall evenly from top to bottom. 2. Attach 180° magnet seal (2) to outer door (13) magnetic seal using the magnetic attraction (if they repel, flip 180° magnet seal (2) upside down) and slide on the aluminum wall channel (1) temporarily.
- Page 16 INSTALLATION PROCEDURE / STEP 13 1. Measure distance from wall on each side to main body of the panel guide. Deduct ½ from this dimension and cut threshold (16) to size. Repeat this process for the other side. 2. Install threshold (16) and threshold cover (15). 3.
- Page 17 INSTALLATION PROCEDURE / STEP 14 Caulk the entire outside edge where the aluminum wall channels (1), threshold (16) and panel guide (19) meet the walls and threshold and then keep the entire area dry for a minimum of 24 hours while the caulk cures. RIGHT HAND ASSEMBLY LEFT HAND ASSEMBLY - 16 -...
- Page 18 WARRANTY INFORMATION PLEASE DO NOT DISCARD Thank you for your purchase of a shower door from Foremost® Groups, Inc. In order to be eligible for product warranty, please register your base on our website within two (2) weeks of installation.
Need help?
Do you have a question about the LAGOON and is the answer not in the manual?
Questions and answers