Advertisement
Advertisement

Related Manuals for Ampere Deluxe

Summary of Contents for Ampere Deluxe
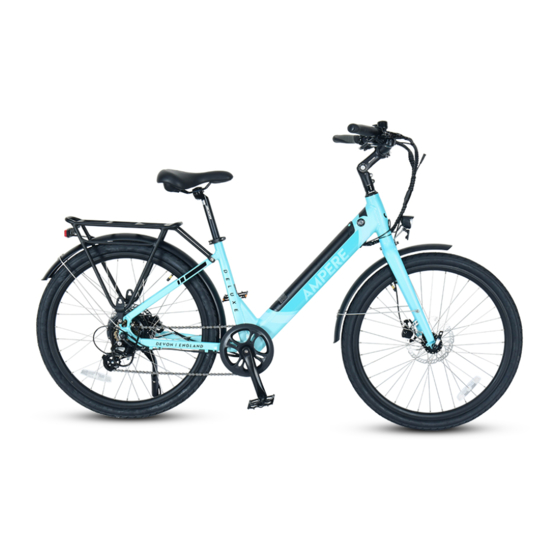
- Page 1 User Manual Deluxe / Hilux www.ampereelectric.co.uk...
-
Page 2: Table Of Contents
Table of Contents 1. Warranty terms 2. Included in the box 3. Assembly 4. Register your warranty 5. Charging the battery 6. LCD display – how to use your e-bike controls 7. Care and maintenance 8. Modifications This manual should be considered a permanent part of the electric bike toolkit and should be passed on to the next owner. -
Page 3: Warranty Terms
Note: At our discretion we may decide to issue a full refund instead of providing a repair or replacement. Faulty goods notified to us AFTER 14 days and within the warranty period are to be returned to Ampere at the expense and risk of the customer. The customer should arrange their own shipping back to Ampere and ensure that any parcel sent to us is adequately insured. -
Page 4: Included In The Box
Included in the Box Electric Bike Tool Kit Charger Manual Pedals Battery Keys www.ampereelectric.co.uk... -
Page 5: Assembly
Assembly Your e-bike comes 85% assembled. To complete the assembly the handlebars, front wheel, pedals, saddle and seat post will need to be attached. To do this, instructions with diagrams are set out in this section. If you are having difficulty assembling the e-bike, please call your retailer for assistance. Further help is available on our website where we publish FAQs or call our customer service team on 07877950433. - Page 6 To complete, adjust the position of the handlebars and tighten the bolts in the order set out in the picture below. Please note the Deluxe model has only 2 bolts to tighten. Connect the wires by colour. All the electronic wires should be connected already. If, however, they have become disconnected the wires should be reconnected according to colour.
- Page 7 Attaching the front wheel Loosen the pin through the middle of the wheel to allow you to place the fork onto it. Make sure the brake disc is properly inserted into the brake caliper. Tighten the nut and hold the lever in an upright position as shown in the picture below. Once tight push the lever in to secure the wheel.
- Page 8 The right pedal is attached on the same side as the chain. Make sure you check the pedals are tight and secure before riding. Attaching the seat Screw the seat onto the seat post. Slide the saddle post into the seat tube. Align the seat with the frame to make sure it is straight.
- Page 9 Regular checks Please check that:- the quick release clamping lever on the seat post is secure. the brakes are working correctly. the tyre pressure is correct – If the tyres need pumping up, attach a bike pump to the valve (shown in the photo below) and inflate to 40 –...
-
Page 10: Register Your Warranty
Register your warranty To register your warranty, go to www.ampereelectric.co.uk/register-warranty/ or scan the QR code below. To register your warranty, you will need to know your frame serial number and battery serial number. The frame serial number is located on the front of the frame behind your front light, as shown in the picture below. -
Page 11: Charging The Battery
The e-bike is supplied with a removable, rechargeable lithium-ion battery. Only use the charger provided or an official charger supplied by Ampere. The charging port is located on the bottom left side of the battery as it sits in the frame, next to the keyhole. -
Page 12: Lcd Display - How To Use Your E-Bike Controls
LCD display – How to use your e-bike controls Battery indicator Mode Speed PAS level Units Walk assist Distance Time Units Trip On/Off, Mode and Enter Power increase or up Power decrease or down Warning – Do not disconnect the display if the e-bike is turned on. It is advisable to protect the display in wet conditions. - Page 13 Walk Assist To start the walk assist mode press and hold the button. This will propel the e-bike forward at 4mph without pedalling. This will automatically stop when you release the button. Do not use this feature whilst sat on the e-bike. This will damage the motor and void your warranty. Front light and Display light To turn your front light and LCD display light on Press and hold the button.
- Page 14 Settings Setting 1 – Km/h / Mph units Once the e-bike is turned on Press the button together. This will take you into the settings menu. The first setting is the speed units, to change the units from km/h to mph press the button so the mph is now showing instead of Km/h then press the button to save and move to the next menu setting.
-
Page 15: Care And Maintenance
4. Charge your battery on a flat solid surface in an area that allows airflow. 5. Do not cover the battery or charger whilst charging. 6. Only use a charger supplied by Ampere. Modifications Do not attempt to modify, repair or replace any of the electrical parts on your e-bike. This will invalidate your warranty. - Page 16 User Manual Deluxe / Hilux www.ampereelectric.co.uk www.ampereelectric.co.uk...
Need help?
Do you have a question about the Deluxe and is the answer not in the manual?
Questions and answers
What should be the tyre pressure in PSI
The recommended tyre pressure for the Ampere Deluxe is 120 PSI.
This answer is automatically generated