
Subscribe to Our Youtube Channel
Related Manuals for AVGO NPF0Z

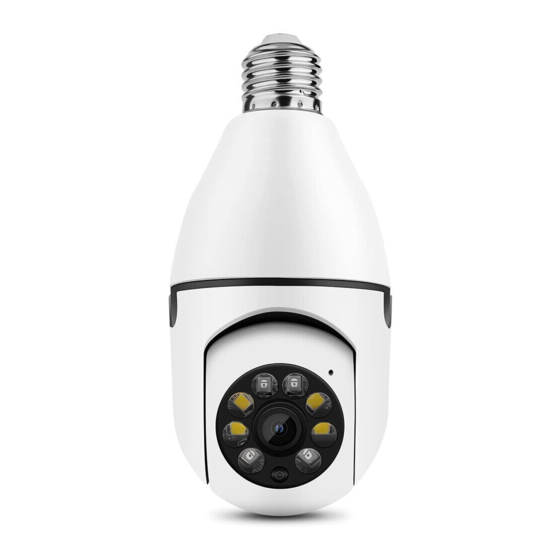
Summary of Contents for AVGO NPF0Z
- Page 1 AVGO 1080p IP Wi-Fi Mini Outdoor Security Camera - HOUSEHOLD USE ONLY PRODUCT CODE: NPF0Z...
- Page 2 Made In China...
-
Page 3: Software Download
1. Software download ① Go to www.eyecloud.so to download the APP. ② Search Eyecloud in APP Store, Google store etc. 2. Register ① For Android/IOS APP, click on "Register", create a user name and password,then click“Submit”to finish register. ② Also support the third party account login( no need to register) -
Page 4: Add Cameras To The Network
3. Add cameras to the network Note: If it failed to add the camera by the ‘Scan QR code’, please choose the method in the ‘Others’ to add the camera. ① Please power on the camera, and use network cable to connect camera with the router LAN port, make sure the router yellow indicator is flashing ②... - Page 5 power supply and network cable to the router first.
- Page 6 3.1 Scan QR Code There are two ways to connect an outdoor camera to a mobile APP: “Scan QR code” and "Others" only. Both ways can go to next page “Add Device”.
- Page 7 If no QR code can be found on the body of the device, please choose the 'Others ' to add the camera.
- Page 8 ① Search in LAN Click “ Search in LAN”,you will hear the App says: Please connect the network cable with camera and your router, confirm the RJ45 port in yellow light is flashing. Note: Make sure your network cable is connected with camera and router before doing this step.
- Page 9 Click on "Search in LAN", you can find all the available cameras in the same router with the smart phone. If added successfully, the camera can be added via the same way by other users(with different account).(Note:Cameras that has been added successfully in this account will not be searched again).
- Page 10 After search camera UID succeed,click “Add it”. binding page will pop up after about30 seconds,if it does not pop up, then please return to the Add camera page, select the "Manually add" method to add the camera...
- Page 11 ② Manually add a camera: Click the lower light corner “Others”, click “IP Camera”, then go to next page “Add Device”, you will see “ Manually add”.
- Page 12 After select "Manually add", please input camera's UID(15 digits, can be found on the label stick to the camera's body), then put in the camera’s password 888888 to bind the camera.
- Page 14 Note: After the camera has been added successful, if you want to make the camera work in WiFi mode, please follow the steps below: ① In the home page of the APP, click in the top right corner of the camera→ choose Parameter Settings→ WiFi Setting, select the WiFi that the smartphone/tablet is connecting to, then input the WiFi password, click on “done”...
- Page 15 Unplug the network cable, the camera will reboot automatically… Note: If setup failed, please refer to the network cable connection method or change a router to setup again.
-
Page 16: Change The Password
4. Change the password For the sake of security enhancement, the camera’s password will be forced to be change after it being added for the first time. Method: On the homepage of the APP, click the Play button, create a new password and take down it according to the prompt, click "submit", the new password will take effect after about 10 seconds. - Page 18 5. Remote Access...
- Page 19 To remote access the camera, both the phone and the camera need to be well connected to the network and the Internet. Then we open the APP and can view the camera directly, no additional setup required.
-
Page 20: Parameter Settings Of Cameras
Parameter settings of cameras In the home page of the APP, click the in the top right corner, then go to "Parameter Settings", you will get the following menus: ① Camera Setting: You can see the camera's basic information, set up the wireless connection, modify password, upgrade firmware, reboot and delete the camera. - Page 21 Q:How to reset the camera to factory default setting? A: Hold the reset button for about 10 seconds to reset camera. Camera’s default password: 888888 (To improve the security, it is highly recommended that you modify the password of the camera). Q: Any tips for WiFi connection? A : Camera support only 2.4G frequency signal, and 802.11b/g/n WiFi network.
- Page 22 ③ Reset the camera back to factory setting; ④ Upgrade the camera to the latest firmware. Q:What to do if camera’s picture is blurred? A : ① Login the camera's web interface, adjust the picture quality to HD mode; ② Clean the camera lens with a cotton swab. This equipment has been tested and found to comply with the limit for a Class B digital device, pursuant to Part 15 of the FCC Rules.
- Page 23 Reorient or relocate the receiving antenna. Increase the separation between the equipment and receiver. Connect the equipment into an outlet on a circuit different from that to which the receiver is connected Consult the dealer or an experienced radio/TV technician for help. Changes or modifications not expressly approved by the party responsible for compliance with the FCC Rules could void the user's authority to operate this equipment.
- Page 24 Bluestem brands,inc. 7075 Flying Cloud Drive,Eden Prairie,MN 55344 Office: (952) 656.3742...
Need help?
Do you have a question about the NPF0Z and is the answer not in the manual?
Questions and answers