Table of Contents
Advertisement
All products are trademarks of Nostalgia Products LLC.
Farberware is a registered trademark of Farberware Licensing Company, LLC
Worldwide design & utility patented or patents pending.
Manufactured and sold pursuant to a license from Farberware Licensing Company,
© 2021 Nostalgia Products LLC.
LLC © 2020 Farberware Licensing Company, LLC. All rights reserved.
www.nostalgiaproducts.com
(rev. 06/30/21 MD)
(rev. 06/30/21 WL)
Advertisement
Table of Contents

Related Manuals for Farberware FMG13SS


Summary of Contents for Farberware FMG13SS
- Page 1 Farberware is a registered trademark of Farberware Licensing Company, LLC Worldwide design & utility patented or patents pending. Manufactured and sold pursuant to a license from Farberware Licensing Company, © 2021 Nostalgia Products LLC. LLC © 2020 Farberware Licensing Company, LLC. All rights reserved.
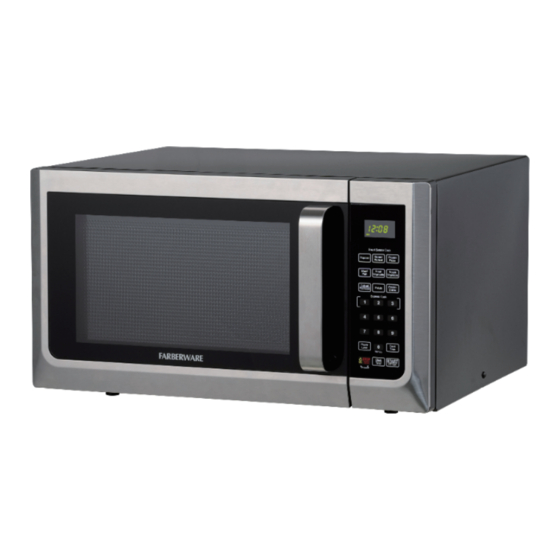
- Page 2 1.3 Cu. Ft. Sensor Microwave Oven 1.3 Cu. Pies. Horno de Microondas Micro-ondes de 1.3 pi. cu. Instruction Manual Manual de Instrucciones Manuel d'utilisation...
-
Page 4: Table Of Contents
Visit www.nostalgiaproducts.com for more products. CONTENTS SAFETY ......... . 2 IMPORTANT SAFEGUARDS . -
Page 5: Important Safeguards
IMPORTANT SAFEGUARDS A person who has not read and understood all operating and safety instructions understand this Instruction Manual before operating or cleaning this appliance. When using electrical appliances, basic safety precautions should always be followed, including: Read all instructions before operating this appliance. DO NOT TOUCH the hot surfaces. - Page 6 Use this appliance only for its intended use as described in this manual. Do not designed to heat, cook or dry food. It is not designed for industrial or laboratory use. Do not cover or block any openings on the appliance. PRECAUTIONS TO AVOID POSSIBLE EXPOSURE TO EXCESSIVE MICROWAVE ENERGY: Do not attempt to operate this oven with the door open;...
-
Page 7: Introduction
120V AC even if a voltage adapter, transformer, or converter is in use. SAVE THESE INSTRUCTIONS! INTRODUCTION Thank you for purchasing the FARBERWARE 1.3 CU. FT. SENSOR COOKING MICROWAVE OVEN! This smart humidity sensor microwave oven has 8 sensor menu buttons, 30 seconds or... -
Page 8: Grounding The Unit
GROUNDING THE UNIT This appliance must be grounded. This microwave oven is equipped with a cord having a grounding wire with a grounding plug. It must be plugged into a wall receptacle that is properly installed and grounded in accordance with the National Electrical Code and local codes and ordinances. -
Page 9: Parts & Assembly
PARTS & ASSEMBLY Your MICROWAVE OVEN is fully assembled. Before using, remove all packing materials from inside the oven. Check the oven for any damage, such as misaligned or bent door, damaged door seals and sealing surfaces, broken or loose door hinges and latches and dents inside the oven or on the door. -
Page 10: Program Settings
CONTROL PANEL & PROGRAM SETTINGS CONTROL PANEL • Auto Menu: Popcorn • Defrost by time/weight • Sensor Menus: Potato, Meat/Fish, Frozen Pizza, Fresh/Frozen Vegetable, Sensor Reheat, Frozen Entree • Kitchen Timer/Clock • Start/+30 Seconds • Memory • Lock/unlock • Stop/cancel/ECO mode... -
Page 11: How To Operate
HOW TO OPERATE CHOOSING A LOCATION Select a level surface that provides enough open space for intake/outlet vents. A minimum of 3 inches (7.5 cm) is required between the oven and any adjacent walls. One side must be open. Leave a minimum clearance of 12 inches (30cm) above the oven. Do not remove the legs from the bottom of the oven. - Page 12 MICROWAVE COOKING In standby mode, press "TIME COOK" button once. Use number buttons to set cooking time. The longest time is 99 minutes and 99 seconds. Press "POWER LEVEL" button once, PL10 will display. Press number buttons to insert power level. Touch "START/+30 SEC."...
- Page 13 AUTO MENU POPCORN Touch "POPCORN" to choose popcorn menu. Touch "POPCORN" repeatedly to choose the weight (1.75, 3 or 3.5 oz.). Touch "START/+30 SEC." to start cooking. SENSOR MENUS In standby mode, put the food in the oven, press the menu key. Sensor menus includes "FROZEN PIZZA, "MEAT", "FISH", "FROZEN ENTREE", "SENSOR REHEAT", "FROZEN VEGETABLE", "FRESH VEGETABLE"...
- Page 14 NOTE: When using sensor cook menus to reheat or cook foods, you should do this in order to get the best results: a. The room temperature should not be over 35 ℃. b. The weight of food should be over 4oz(110g). c.
-
Page 15: Helpful Tips
HELPFUL TIPS CAROUSEL ROTATION If the Glass Carousel inside of your microwave oven makes noise during cooking or does not seem to be rotating properly, stop the cooking process immediately by pressing the STOP/CLEAR button and make sure that: A) The Glass Carousel is properly aligned on the Carousel Wheel and Hub. B) There is no excess food or debris lodged underneath the Glass Carousel. -
Page 16: Cleaning & Maintenance
Limited Use: Aluminum foil — Use narrow strips of foil to prevent overcooking of exposed areas. Using too much foil can damage your oven, so be careful. You should keep distance of 1 inch (2.54cm) between aluminum foil and cavity. Ceramic, porcelain, and stoneware—... -
Page 17: Returns & Warranty
SHOULD YOUR UNIT NOT WORK OR IF DAMAGED WHEN YOU FIRST TAKE IT OUT OF THE BOX, PLEASE RETURN IT TO THE PLACE OF PURCHASE IMMEDIATELY. 1.3 Cu. Ft. Sensor Microwave / FMG13SS Should you have any questions, please contact us via email or at the customer service number listed below between the hours of 8:00 AM and 5:00 PM, Monday through Friday, Central Standard Time.
Need help?
Do you have a question about the FMG13SS and is the answer not in the manual?
Questions and answers
FMG13SS Microwave not heating up
The Farberware FMG13SS microwave may not be heating up due to several possible reasons:
1. Incorrect Power Level Setting – Ensure that the power level is set correctly. Press the "POWER LEVEL" button and select an appropriate level using the number buttons.
2. Faulty Cooking Time Input – Make sure the cooking time is properly set using the "TIME COOK" button and number pad.
3. Door Not Properly Closed – The microwave will not operate if the door is not securely closed.
4. Blown Fuse or Tripped Circuit Breaker – Check if the microwave is receiving power and that the outlet is functioning.
5. Defective Magnetron – If the microwave runs but does not heat, the magnetron (which generates microwaves) may be faulty.
6. Use of Improper Cookware – Ensure that cookware is microwave-safe and does not contain metal.
If none of these resolve the issue, the microwave may need professional repair.
This answer is automatically generated
Turntable turns but is jerking. Coupler is good and it is sitting on the coupler properly. Help please