Barnett Engineering ProTalk Cv3 Installation & Operation Manual
Hide thumbs
Also See for ProTalk Cv3:
- Installation & operation manual (45 pages) ,
- Replacement instructions (3 pages) ,
- Installation instructions manual (6 pages)

Subscribe to Our Youtube Channel
Related Manuals for Barnett Engineering ProTalk Cv3

Summary of Contents for Barnett Engineering ProTalk Cv3
- Page 1 Installation & Operation Manual January 2011 Rev. 2.0 215, 7710 5 St. S.E. Phone: (403) 255-9544 Calgary, Alberta, Canada Fax: (403) 259-2343 T2H 2L9 www.barnett-engg.com e-mail: sales@barnett-engg.com...
-
Page 3: Table Of Contents
TABLE OF CONTENTS 1. INTRODUCTION................1 2. BEFORE YOU BEGIN................ 2 3. POWER REQUIREMENTS ............... 3 4. INSTALLATION ................. 4 ................5 IRING NPUTS ................. 7 IRING UTPUTS 5. PROGRAMMING ................8 A PC..............8 ROGRAMMING ............9 ROGRAMMING ANDSET ............ -
Page 5: Introduction
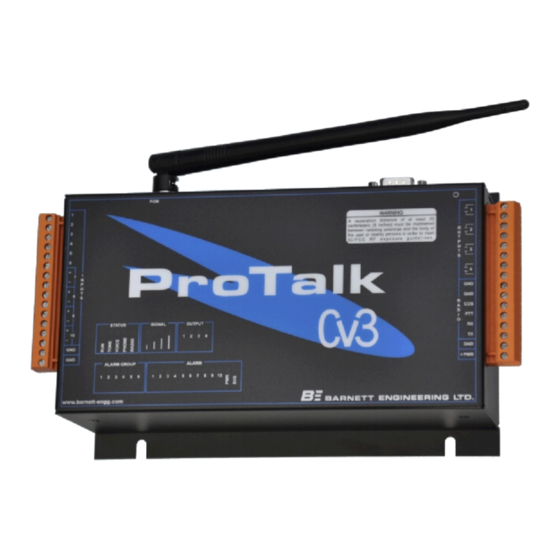
PAGE 1 1. INTRODUCTION The ProTalk Cv3, model B1277, is a device used to monitor alarms at an unattended site and report alarm conditions over a cellular network and/or a two-way radio or public address system. It is compatible with many temperature, humidity, and fluid level sensors as well as smoke, fire, intrusion, and other discrete sensors. -
Page 6: Before You Begin
PAGE 2 BEFORE YOU BEGIN 2. BEFORE YOU BEGIN The Cv3 is an alarm reporting unit with an embedded CDMA transceiver. Included with this device are the following: • 16 pin terminal block for wiring alarm inputs • 16 pin terminal block for wiring alarm outputs/radio/power •... -
Page 7: Power Requirements
POWER REQUIREMENTS PAGE 3 3. POWER REQUIREMENTS The Cv3 requires a DC power supply voltage between +12 to +24 Volts. This supply should be capable of delivering up to 1 Amp of current. Connect your DC power source to the Ground (GND) and Positive (PWR) terminals on the terminal block. -
Page 8: Installation
PAGE 4 INSTALLATION 4. INSTALLATION The B1277 Cv3 should be installed in a clean, dry location suitable for electronic equipment. Caution: Power and antenna cables should be connected only after the installation is complete. In order to communicate with neighbouring cellphone towers, you will need to attach an antenna to the Cv3. -
Page 9: Wiring Your Inputs
INSTALLATION PAGE 5 Wiring Your Inputs Connections The Cv3 has ten inputs for connection to customer alarm signals. Each input can be independently programmed to accept either a digital or analog signal. Refer to Figure 1 for details of the connector pinouts. Figure 1 Alarm Input Connections Contacts and Other Digital Alarm Inputs When programmed for digital operation, the high (or open) state is... - Page 10 PAGE 6 INSTALLATION advance. Shift select is used with a two position switch that selects one of two shifts. Shift advance is used with a pushbutton switch that advances the shift with each activation. Temperature and Other Analog Alarm Inputs All ten inputs can be programmed for monitoring analog voltage signals.
-
Page 11: Wiring Your Outputs
INSTALLATION PAGE 7 Wiring Your Outputs Refer to Figure 2 for details of output pinouts Figure 2 Output Connections The four output relays can be programmed for either remote control or to indicate internal status of the Cv3. Internal status can be programmed as ‘new alarm present’, ‘any alarm present’, a pulsed output when an acknowledgement is received or as a system alarm. -
Page 12: Programming
Simply double click the BE shortcut on your desktop or follow your start menu to All Programs and select Barnett Engineering. This will open up a generic folder containing information for all of our products. You will find the Cv3 Configuration Software in the B1277 Cv3 folder. -
Page 13: Programming Witha Handset
PROGRAMMING PAGE 9 Programming With A Handset The B1277 is capable of recording voice messages and limited programming using a TouchTone telephone; either locally through the programming port or remotely by calling in to the unit. Local Programming A standard RJ11 Telephone jack has been provided. This port accepts a standard TouchTone telephone set and is used to record voices or perform basic, programming tasks. -
Page 14: Handset Programming Codes
PAGE 10 PROGRAMMING Handset Programming Codes The codes used in the main programming menu are given as a summary below. If no keys are pressed for five seconds, the Cv3 will announce the menu choices. Voices (page 11) Directories (page 12) General Site Configuration (page 14) Input Configuration (page 16) Output Configuration (page 22) - Page 15 PROGRAMMING PAGE 11 Voices Cv3: "Program Voice" Cv3: "Enter Voice Code" You: Playback or record voices for Site Name (then Groups 1 to 6, if used) Playback or record voices for Alarm inputs Playback or record voices for Relay outputs Erase all voices Exit to Main Menu Exit to Main Menu...
- Page 16 PAGE 12 PROGRAMMING Directories Cv3: "Program Directory" Cv3: "Directory Line 1 is…" "Enter Group Number" You: Group 1 Group 2 • • • Group 6 Exit to Main Menu Exit to Main Menu Directory Line Refer to the command list that follows for the available directory entries.
- Page 17 PROGRAMMING PAGE 13 Directory Commands Directory programming requires you to enter a sequence of digits that corresponds to a directory line in the PC programming. All of the commands that would appear on that line have to be entered with one string ending in .
- Page 18 PAGE 14 PROGRAMMING General Configuration Cv3: "Program Site" Cv3: "Dial Control is . . ." You: Enter new value (0 = off, 1 = on) Exit to Main Menu Next setting Cv3: "Acknowledge Request is . . ." You: Enter new value (0 = off, 1 = on) Exit to Main Menu Next setting Cv3: "Acknowledge Timer is .
- Page 19 PROGRAMMING PAGE 15 Cv3: "Start Auto Report at . . ." You: Enter hour and minute of first auto report time 0 = not used 4 digit time (eg. 0830) hours = 01 to 23 minutes = 00, 15, 30. or 45 Exit to Main Menu Next setting Cv3: "Report Every .
- Page 20 PAGE 16 PROGRAMMING Input Configuration Cv3: "Program Input" Cv3: "Enter Input Number" You: Select Input 1 • • • Select Input 12 Exit to Main Menu Select Next Input Cv3: "Input N Sensor is . . ." You: 1, Digital input 2, Watchdog input 3, Interval input 4, Totalizer input...
- Page 21 PROGRAMMING PAGE 17 Cv3: "Alarm Format is . . . " You: Enter new value 0 = non latching 1 = latched Exit to Main Menu Next setting Menu items for Accumulator Inputs are: Cv3: "Input N Is . . ." You: Enter new value 0 = disabled...
- Page 22 PAGE 18 PROGRAMMING 0 = disabled 1 = enabled 1 to 6 = new group member Exit to Main Menu Next setting Cv3: "Input Level is . . ." You: Enter new value 1 = normally high or transition to low 2 = normally low or transition to high 3 = either transition Exit to Main Menu...
- Page 23 PROGRAMMING PAGE 19 3 = xx.yyy (speaks two point three) 4 = x.yyyy (speaks one point four) Exit to Main Menu Next setting Cv3: "DTMF OFF Code is . . ." You: Enter new reset code Exit to Main Menu Next setting Menu items for Watchdog Inputs are: Cv3: "Input N Is .
- Page 24 PAGE 20 PROGRAMMING Cv3: "Alarm Format is . . . " You: Enter new value 0 = non latching 1 = latched Exit to Main Menu Next setting Menu items for Intruder Inputs are: Cv3: "Input N Is . . ." You: Enter new value 0 = disabled...
- Page 25 PROGRAMMING PAGE 21 Menu items for 5 Volt, 30 Volt, and Current Analog Input Sensors are: Cv3: "Input N Is . . ." You: Enter new value 0 = disabled 1 = enabled 1 to 6 = new group member Exit to Main Menu Next setting Cv3: "Setpoint High is .
- Page 26 PAGE 22 PROGRAMMING Output Configuration Cv3: "Program Output" Cv3: "Output N Type is . . ." You: Manual On/Off Relay Manual Timed Relay Automatic Relay Relay 1 = New Alarm Indicator Relay 2 = Any Alarm indicator Relay 3 = Acknowledge Received Indicator Relay 4 = Error Condition Indicator Exit to Main Menu Next setting for this input...
- Page 27 PROGRAMMING PAGE 23 Exit to Main Menu Next setting Cv3: "DTMF On Code is . . ." You: Enter new code Erase On Code Exit to Main Menu Next setting Cv3: "DTMF Off Code is . . ." You: Enter new code Erase Off Code Exit to Main Menu Next setting...
- Page 28 PAGE 24 PROGRAMMING You: Enter a new value 0 = NO contacts 1 = NC contacts Exit to Main Menu Next setting Cv3: "Output Scale is . . ." You: Enter new value 1 = seconds 2 = minutes Exit to I/O Configuration Next Setting Cv3: "Output Time is .
- Page 29 PROGRAMMING PAGE 25 Group Configuration Cv3: "Program Group" Cv3: "Group Count is . . ." You: Enter new value (0 or 1 to 6) Exit to Main Menu Next Setting Cv3: "Group N" Cv3: "Acknowledge Code is . . ." You: Enter a new DTMF code Exit to Main Menu...
- Page 30 PAGE 26 PROGRAMMING Radio Configuration Cv3: "Program Radio" Cv3: "Radio Squelch Code is . . ." You: Enter a new value (1 = busy open, 2 = busy when grounded, 0 = disabled) Exit to Main Menu Next setting Cv3: "Radio Warmup is . . . seconds" You: Enter a new value (0 to 65535, 10 msec steps) Exit to Main Menu...
- Page 31 PROGRAMMING PAGE 27 Reset Database Cv3: "Empty Program" Cv3: "Alert, Enter Octo Three One Star Star " You: Confirm Exit to Main Menu. Exit to Main Menu. Cv3: "Program is Empty"...
- Page 32 PAGE 28 PROGRAMMING Cellular Module Status Cv3: "Interrogate Phone" Cv3: "Signal Strength is . . ." 0 to 15; 3=poor, 6=good You: Exit to Main Menu. Next item. Cv3: "PRL is . . ." + PRL You: Exit to Main Menu. Next item.
- Page 33 PROGRAMMING PAGE 29 Cellphone Programming The B1277 contains a CDMA based module that is pre-configured at the factory except for the assigned Mobile Number. This program code will allow reading the Serial Number (ESN) from the device and then writing the Mobile Identification Number (MIN) and Mobile Directory Number (MDN) to it as assigned it by the carrier.
- Page 34 PAGE 30 PROGRAMMING Query Version Cv3: "Serial Number is . . ." You: Exit to Main Menu You: Next Cv3: "Hardware version is . . ." You: Exit to Main Menu You: Next Cv3: "Firmware version is . . ." You: Exit to Main Menu You:...
-
Page 35: Testing The Installation
TESTING THE INSTALLATION PAGE 31 6. TESTING THE INSTALLATION It is advisable to test the strength of the cellular network signal as well as the operation of the directories when installing the Cv3. If the signal strength is low, additional measures may be required to ensure reliable operation. -
Page 36: Operations
PAGE 32 OPERATIONS 7. OPERATIONS This chapter gives a detailed description of exactly how the Cv3 will operate after the start-up programming has been completed. Parameters which may be altered are pointed out, with reference to the appropriate Program Code section. Alarm Sequence When the B1277 detects an alarm condition, it dials the first telephone number stored in the directory. - Page 37 OPERATIONS PAGE 33 After one hour, the B1277 will check the alarm inputs again, and if the same alarm is still present, it will begin the reporting cycle as if it were a new alarm. To acknowledge the B1277 locally, configure an input as an Acknowledge Input (Sensor 10) and activate it.
- Page 38 PAGE 34 OPERATIONS Figure 3 Status Indicators The indicators are grouped into 5 sections. 1. ALARM GROUP (6, one for each group) If the group is disabled: If the group is enabled: No alarms in the group Green Group alarms are unacknowledged Flashing Red Group alarms are acknowledged Solid Red...
- Page 39 OPERATIONS PAGE 35 3. STATUS (5 defined) During startup initialization or upgrading Flashing Red During program mode (PC or handset) Solid Red Operating No low power modes selected Flashing Green Low power mode in effect Normal conditions Short Green Flash Error condition Short Red Flash Tone...
- Page 40 PAGE 36 OPERATIONS When the Cv3 is disconnected from the primary power source and operating from the internal battery, pressing the power switch continuously for 5 seconds will cause the unit to power down. Normal operation will be restored when primary power is restored.
-
Page 41: Specifications
SPECIFICATIONS PAGE 37 8. SPECIFICATIONS Physical: 10” wide x 5.6″ high x 3″ deep Steel, powder coated matte black Mounting ears for panel installation Environmental: -30°C to + 60°C, 95% humidity, non-condensing Power: Plug-in screw terminal block connection Internally fused at 1.85A +9 to +30 VDC, negative ground Optional internal battery backup: 1.4 Ahr 12 volt battery... - Page 42 PAGE 38 SPECIFICATIONS Cellphone: SMA female antenna connector CDMA cellphone Radio Port: Plug-in screw terminal block connection TX audio: 600 ohms, single ended, capacitor coupled Adjustable between 0 dBm and -20 dBm RX audio 600 ohms, single ended, capacitor coupled Adjustable between 0 dBm and -20 dBm Program Ports: Telset:...
-
Page 43: Technical Drawings
TECHNICAL DRAWINGS PAGE 39 9. TECHNICAL DRAWINGS Unit Dimensions... -
Page 44: Wiring Inputs
PAGE 40 TECHNICAL DRAWINGS Wiring Inputs Digital connection – Inputs 1 through 6 Digital connection – Inputs 7 through 10 Analog Connection – DC Voltage – Inputs 1 through 6... - Page 45 TECHNICAL DRAWINGS PAGE 41 Analog Connection – DC Voltage – Inputs 7 through 10 Analog Connection – DC Current – Inputs 7 through 10...
-
Page 46: Glossary
0 to +5 VDC. Carrier Operated Squelch – an output from a radio that indicates the receiver squelch is open. This signal is used by the ProTalk Cv3 to determine when the radio system is busy where it should delay making an announcement. - Page 47 GLOSSARY PAGE 43 Dial Control – a function that, when enabled, delays alarm annunciation until the recipient of the call speaks into the phone. (eg. “Hello”) Digital Input – an input type that, when asserted, generates an alarm condition. This input type may be configured as asserted by grounding the input terminal, opening the input terminal, or providing a voltage to the input terminal that crosses a 2VDC threshold.
- Page 48 PAGE 44 GLOSSARY Intrusion Input – an input type that provides a time delay and the ability to enable (arm) and disable (disarm) an alarm using a DTMF code. An alarm condition detected on this input remains until the disarm code is received.
-
Page 49: Product Support
PRODUCT SUPPORT PAGE 45 11. PRODUCT SUPPORT Thank you for choosing the ProTalk Cv3 from Barnett Engineering Ltd. Technical Support Technical Support for your ProTalk Cv3 is available as follows: Network & Billing Support If you have any questions related to network connectivity or your wireless account, please contact your local service representative. -
Page 50: Warranty Statement
Barnett Engineering Ltd. shall either replace or repair the defective part or parts of equipment or replace the equipment or refund the purchase price at Barnett Engineering Ltd. 's option after return of such equipment by buyer to Barnett Engineering Ltd.
Need help?
Do you have a question about the ProTalk Cv3 and is the answer not in the manual?
Questions and answers