
Related Manuals for TEC BlowerDoor Standard


Summary of Contents for TEC BlowerDoor Standard
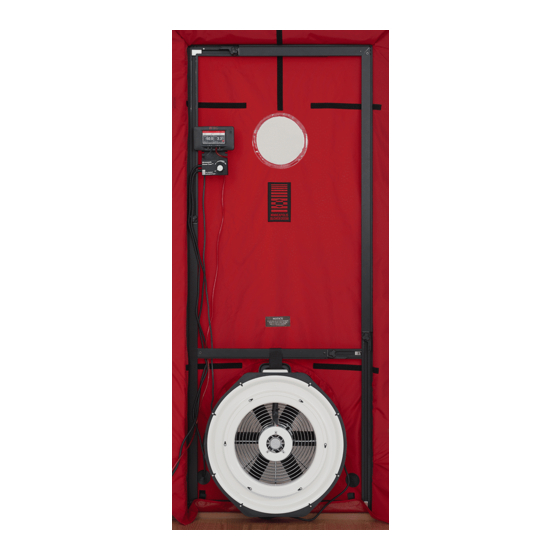
- Page 1 BlowerDoor Standard Minneapolis BlowerDoor Model 4.1 with DG-1000 TECTITE Express version 5.1...
- Page 2 THE ENERGY CONSERVATORY Minneapolis BlowerDoor manufactured by The Energy Conservatory, Minneapolis, MN, USA Sole Agency for Europe, Springe-Eldagsen, Germany Copyrighted and published by BlowerDoor GmbH MessSysteme für Luftdichtheit Zum Energie- und Umweltzentrum 1 D-31832 Springe-Eldagsen Phone +49 5044 975-40 +49 5044 975-44 info@blowerdoor.com www.blowerdoor.com All rights reserved.
-
Page 3: Table Of Contents
2.3.3 Installing the DG-1000 using Ethernet port ............23 2.3.4 Testing whether TECTITE Express recognizes the DG-1000 ........26 Components of the BlowerDoor Standard Measurement System ........... 29 Measuring fan and speed controller ..................29 DG-1000 ..........................30 3.2.1 Overview of the DG-1000 ..................31 3.2.2... - Page 4 Semi-automated Measurement ................58 Creating a test report ......................60 Detailed Test Report ......................61 Test Graph..........................62 Creating a PDF File of the Test Reports ................62 Putting Business Name and Logo on the Reports ..............63 January 2022 BlowerDoor Standard...
- Page 5 Touch screen – use and care ....................80 Maintenance ......................... 80 BlowerDoor Fan ........................81 Calibration parameters for Models 4 and 4.1 ............... 81 Calibration..........................82 Range of ring ......................... 82 Maintenance ......................... 83 Testing the motor position ....................83 BlowerDoor Standard January 2022...
- Page 6 Cleaning the fan ........................84 Fan Speed Controller ......................85 Replacing the fuse ......................... 85 Appendix C: Expansion Capabilities of the BlowerDoor Measurement System ........ 88 Our Service Offer ......................... 94 Guarantee ........................... 96 EC-Declaration of Conformity ....................... 98 January 2022 BlowerDoor Standard...
-
Page 7: Safety Instructions
• The motor is thermally protected and if you experience a motor shut down, be sure to turn off the fan speed controller so that the fan does not restart unexpectedly after the motor cools down. BlowerDoor Standard January 2022... - Page 8 • Equipment safety measures may be compromised if the BlowerDoor system is used in a manner other than recommended in this document, and the BlowerDoor system operation manual. January 2022 BlowerDoor Standard...
-
Page 9: Introduction: The Blowerdoor Standard Measurement System
(3 m each)] green (3 m), outside transparent (10 m)] Digital pressure gauge DG-1000 Fig. 1.1: Recommanded set-up of the BlowerDoor standard Measurement System with pressure gauge DG-1000 → (here: WiFi connection); see details Chap. 2.3.2.1 and Chap. 4. -
Page 10: Overview: Setup With Digital Communication Via Usb Connection
Set of tubes [capture outside pressure, inside red and blue (3 m each)] green (3 m), outside transparent (10 m)] Fig. 1.2: Set-up of the BlowerDoor standard Measurement System with USB connection between pressure gauge → DG-1000 and laptop computer; see details Chap. -
Page 11: Applications
1 Introduction: The BlowerDoor Standard Measurement System Applications The BlowerDoor measurement system is a diagnostic tool used to assess the airtightness of buildings. Typical uses: • Assessing airtightness respectively air permeability in new buildings and comparing the results with legal requirements such as the Energy Conservation Act •... -
Page 12: Installation
DG-1000 (→ Chap. 2.3) in addition to the TECTITE Express software. The software installation is performed in the following steps: • After the software download, double-click the file “TECTITE Express Version Setup.exe”. to start the installation. • Follow the instructions of the installation program. January 2022 BlowerDoor Standard... -
Page 13: Installing The Dg-1000
2 Installation The installation of TECTITE Express is followed by the installation of the TEC PDF Writer necessary for providing a printable protocol of the measurement. After installation TECTITE Express can be started by clicking the icon on the desktop. - Page 14 Bluetooth communication is intended only for connection with TEC apps installed on Android or iOS devices. For an overview of all DG-1000 connections please see Chap. 3.2.1. January 2022...
-
Page 15: Installing The Dg-1000 Using Usb-C Port
Fig. 2.2 when the home screen appears (shown below). • To enable the USB-C port on the DG-1000 gauge touch “Settings” on the home screen. Fig. 2.3 BlowerDoor Standard January 2022... - Page 16 • Connect the DG-1000 to your laptop via the USB-C interface using a USB data cable (USB 2.0 or higher). • The appropriate device driver software is searched for on the Internet and installed. Fig. 2.6 January 2022 BlowerDoor Standard...
-
Page 17: Wireless Connection Of The Dg-1000 (Wifi)
Network Configuration screen of the gauge will update to say “Connected.” Fig. 2.7 TEC software installed on the laptop computer will now be able to detect the DG-1000 and create a communication link. 2.3.2 Wireless connection of the DG-1000 (WiFi) The DG-1000’s built-in WiFi module can be configured to create and broadcast a wireless network that... - Page 18 Select “Network Configuration”. Fig. 2.10 • Select “WiFi (Create Network)” from the Network Configuration options. • The DG-1000 will begin broadcasting a secured wireless network with the following settings SSID: DG1000-(serial number of gauge) Password: dg1000pw Fig. 2.11 January 2022 BlowerDoor Standard...
- Page 19 DG-1000’s wireless network. The DG-1000 must be on, in order for the WiFi network to be visible on your laptop. TEC software installed on the computer or mobile device should now be able to detect the gauge and create a communication link.
-
Page 20: Connection To An Existing Wifi Network
DG-1000 is booted. The bootup process may take some seconds to complete, and the gauge is ready to be used Fig. 2.16 when the home screen appears (shown below). January 2022 BlowerDoor Standard... - Page 21 To enable WiFi (Join Network) touch “Settings” on the home screen. Fig. 2.17 • Select “Network Configuration”. Fig. 2.18 • Select “WiFi (Join Network)”. Then touch “Select WiFi Network”. The DG-1000 starts searching for networks. Fig. 2.19 BlowerDoor Standard January 2022...
- Page 22 USB-A port on the gauge and enter the info using the external keyboard. Fig. 2.22 The DG-1000 does not have an option for entering a username, so WiFi networks that require a username can’t be connected to by the DG-1000. January 2022 BlowerDoor Standard...
-
Page 23: Installing The Dg-1000 Using Ethernet Port
The status on the Mode screen will say “Joined” if the DG-1000 was able to connect. Fig. 2.23 Once the DG-1000 joins a wireless network, the gauge can be accessed using TEC software, if the computer or mobile device running the software is also connected to the same network. 2.3.3... - Page 24 Fig. 2.24 complete, and the gauge is ready to be used when the home screen appears (shown below). • To enable Ethernet connection touch “Settings” on the home screen. Fig. 2.25 • Select “Network Configuration”. Fig. 2.26 January 2022 BlowerDoor Standard...
- Page 25 Connect the computer to the same router, using either an additional Ethernet cable, or through a wireless connection. Once this connection is made, TEC software installed on the computer should be able to detect the DG-1000 and create a communication link. Ethernet cables can be up to 100 meter long and still provide a robust communication link.
-
Page 26: Testing Whether Tectite Express Recognizes The Dg-1000
Method). TECTITE Express will automatically begin to scan for a pressure gauge. Fig. 2.29 A green status bar indicates that the DG-1000 has been installed correctly and is recognized by TECTITE Express. DG-1000 is now fully remote controlled by TECTITE Express. January 2022 BlowerDoor Standard... - Page 27 In addition, if you are using DG-1000’s build-in WiFi module and your laptop is connected to the WiFi network, the scan will show all the device connected through this wireless network. Wireless communication is only enabled when AUTO SELECT is checked. BlowerDoor Standard January 2022...
- Page 28 Primary Device. • If you uncheck AUTO SELECT, you may specify a Primary COM Port (COM 1 through COM 256). This is only possible with a cable connection! January 2022 BlowerDoor Standard...
-
Page 29: Components Of The Blowerdoor Standard Measurement System
3 Components of the BlowerDoor Standard Measurement System Components of the BlowerDoor Standard Measurement System Portable BlowerDoor equipment The measuring fan, the adjustable mounting frame (in the grey transport bag), the differential pressure gauge DG-1000 in a padded bag as well as the accessory bag. - Page 30 3 Components of the BlowerDoor Standard Measurement System BlowerDoor speed controller The speed controller is mounted on the gauge board. Fig. 3.3 DG-1000 Differential pressure and flow gauge DG 1000 for automatic, semi-automatic and manual BlowerDoor measurement in padded bag with •...
-
Page 31: Overview Of The Dg-1000
3 Components of the BlowerDoor Standard Measurement System 3.2.1 Overview of the DG-1000 USB charging USB-C port for indicator light data cable and charger (amber) USB indicator Power indicator Ethernet USB-A port light (green) light (green) port (for keyboard or mouse) -
Page 32: Mounting Frame And Panel
3 Components of the BlowerDoor Standard Measurement System semi-automated) series of measurements to determine air flow at negative and positive pressures. • The DG-1000 can control the fan to maintain a building pressure (cruise feature) without being connected to a computer. In addition to custom defined pressure differences, pressure difference of 50 Pa (for leakage detection), 25 Pa, 75 Pa, 0 Pa and +0 Pa are preset. -
Page 33: Installing The Blowerdoor Measurement System
A power supply of 220-240 V is required (electrical outlet or power cable from cable reel to worksite power distribution). Fig. 4.1 To prepare the building, close all external doors and windows, open all internal doors, and apply temporary seals if necessary. BlowerDoor Standard January 2022... -
Page 34: Installing The Tubing For Measuring Outside Pressure
The four external braces are joined with button catches (push down on the button, connect the bars, and release the button so that it locks into position). Fig. 4.3 January 2022 BlowerDoor Standard... - Page 35 After the braces have been adjusted, retighten the knobs. To leave enough space for installing the panel, do not fully adjust the frame to the door opening. Leave about one finger’s width of space. Fig. 4.5 BlowerDoor Standard January 2022...
- Page 36 When installing the frame, make sure that the tube is not jammed between the frame of the door and the BlowerDoor frame. Fig. 4.7 January 2022 BlowerDoor Standard...
- Page 37 Repeat on the other side. To adjust the frame width, use the same method on the top and bottom horizontal braces. Fig. 4.8 Finally, engage all four clamping levers. This tightly secures the frame in the doorway. Fig. 4.9 BlowerDoor Standard January 2022...
- Page 38 You can test the stability of the frame by pulling on the cross bars. If the frame moves, tighten it further. If the power supply is located outside of the building, run the power cable from the cable reel through the fan opening in the panel. Fig. 4.11 January 2022 BlowerDoor Standard...
-
Page 39: Installing The Blowerdoor Fan, Flow Rings, And Speed Controller
The Velcro strap on the cross bar directly above the opening in the panel holds the fan in place. Pull the strap through the handle on the fan and secure it. Fig. 4.13 Begin the test with flow rings A, B and C installed. Fig. 4.14 BlowerDoor Standard January 2022... - Page 40 Insert the correct ring face-up (identifying letter facing up and the flow nozzle pointing into the fan) and retighten the fastener clips. Fig. 4.15 View of fan inlet – open fan, flow rings A, B, and C Fig. 4.16 January 2022 BlowerDoor Standard...
- Page 41 Before connecting the speed controller to the fan, make sure the switch on the controller is set to “off” and that the control knob is turned completely to the left (minimum). Fig. 4.19 BlowerDoor Standard January 2022...
-
Page 42: Connecting Tubing To Fan And Nylon Panel
For determining the flow of the fan when using open fan and flow rings A, B, and C, connect the red tubing to the port marked in red on the fan electrical box. The blue tubing should be connected to the port marked in blue. Fig. 4.22 January 2022 BlowerDoor Standard... -
Page 43: Connecting The Pressure Gauge Dg-1000
To view the current battery level, turn on and boot up the DG-1000 and touch the battery icon. A pop-up will appear at the bottom of the screen indicating the battery level. For details see Appendix B.1. Fig. 4.24 BlowerDoor Standard January 2022... -
Page 44: Connecting The Dg-1000 To The Fan Speed Controller
• Ethernet port (middle) for connection to a router • Fan control jack for linking fan control cable to speed controller Fig. 4.27 Note: If TECTITE Express does not recognize the DG-1000, see Chap. 2.3.4. January 2022 BlowerDoor Standard... -
Page 45: Connecting The Tubing To The Dg-1000
Channel A (input). Face the open end of this tubing away from the air turbulence. Note: DG-1000 has a tubing assistant app for various measuring tasks. To do this, open the tubing assistant via the start screen. Fig. 4.29 BlowerDoor Standard January 2022... -
Page 46: Overview Of The Negative Pressure Test And Positive Pressure Test
(at red label) Blue tubing connect to fan (at blue label) Fig. 4.30 If flow ring D or E is used, the red tubing should be connected to ring D instead of to the fan. January 2022 BlowerDoor Standard... -
Page 47: Overview Of The Positive Pressure Test / Pressurization Measurement
Channel A on the DG-1000 and place the end of the tube into a flow-reduced area. Fig. 4.31 If flow ring D or E is used, the red tubing should be connected to ring D instead of to the fan. BlowerDoor Standard January 2022... -
Page 48: Computer-Controlled Tests With Tectite Express
The main window of TECTITE Express is explained in detail below: Opening TECTITE Express Once the program has been installed, click the TECTITE Express icon on the desktop to open. Fig. 5.2 TECTITE Express start-up screen After clicking the icon, the start-up screen appears. Fig. 5.3 January 2022 BlowerDoor Standard... - Page 49 New Tests will save the selected Test Standard so that it will be applied to all future new tests. Fig. 5.5 Equipment Information Use this window to select the fan model and enter its serial number. Fig. 5.6 BlowerDoor Standard January 2022...
- Page 50 Fig. 5.7 Comments window This window is for additional notes such as placement of the BlowerDoor Measurement System, temporary seals, building condition at the time of the test, and large leaks. Fig. 5.8 January 2022 BlowerDoor Standard...
- Page 51 (For further information, see also Section 5.2.2.) EN ISO 9972 data entry window Enter all data pertaining to the measurement standards. For data entry in accordance to EN 13829, see Fig. 5.11. Fig. 5.10 BlowerDoor Standard January 2022...
- Page 52 If the status bar is grey, check if the gauge is switched on, if the cables are connected correctly, or if the WiFi-connection has been established. Make sure that the Bluetooth function of the computer is turned off. January 2022 BlowerDoor Standard...
-
Page 53: Leakage Detection At Constant Negative Pressure With Tectite Express
Fig. 5.13 Keeping the building pressure differential at 50 Pa Hitting the Cruise button instructs TECTITE Express to run the BlowerDoor fan automatically at a constant pressure differential until the Stop Cruise button is hit. Fig. 5.14 BlowerDoor Standard January 2022... - Page 54 If the air change rate n is not displayed, the building volume has not been entered, or the Fig. 5.16 building pressure is less than 40 Pa. To deactivate the large display, deselect the menu item Options/Display Large Meters. January 2022 BlowerDoor Standard...
-
Page 55: Taking A Series Of Measurements With Tectite Express
Temperature – indoor and outdoor – and barometric pressure values must be entered prior to starting the measurement. After measurement, this data can be changed in the Test Graph by clicking on Edit Environmental Data. Fig. 5.18 BlowerDoor Standard January 2022... - Page 56 By clicking in the previous Test Graph window on a data point will bring up a Data Point Selected window which lists the measured parameters for the data point, and includes a data point deletion option. Fig. 5.20 January 2022 BlowerDoor Standard...
- Page 57 Saving, viewing, and printing results Under File you can • Save the test current results • Print the test report (For further information, see also Chap. 6) • Preview the test report with all important data Fig. 5.22 BlowerDoor Standard January 2022...
-
Page 58: Semi-Automated Measurement
BlowerDoor fan. In a semi-automated test, just Samples per Station and Building High Pressure Limit (Pa) can be adjusted from the Auto Test Parameters. Fig. 5.23 January 2022 BlowerDoor Standard... - Page 59 If the cursor is stable then press the button Sample to collect the data for this target pressure. Fig. 5.25 For more detailed information on the respective screens, notes, and warnings a Help button is provided for each screen. BlowerDoor Standard January 2022...
-
Page 60: Creating A Test Report
The printing and preview functions within TECTITE Express utilize the printer drivers and configuration options currently installed in your computer. Fig. 6.1 Note: The report format is dependent on the Test Standard selected in the Test Settings screen. January 2022 BlowerDoor Standard... -
Page 61: Detailed Test Report
6 Creating a test report Detailed Test Report The detailed Test Report contains a complete listing of the building data, test data, test results, as well as any comments input into the Comment screen. Fig. 6.2 BlowerDoor Standard January 2022... -
Page 62: Test Graph
PDF File option, and then enter the name and location of the file to be saved in the file save window that appears. Once created, these files can be viewed on any computer that has PDF viewing software installed. January 2022 BlowerDoor Standard... -
Page 63: Putting Business Name And Logo On The Reports
In the Select Logo File window which appears, find and select the desired image file from your computer. TECTITE Express allows you to choose the following file types for a logo image: bmp, jpg, tif, and emf. Fig. 6.5 BlowerDoor Standard January 2022... -
Page 64: Leakage Detection Using The Dg-1000'S Cruise Control (Without Laptop)
Remote controlling the DG-1000 via TECTITE Express or via a mobile device with the app TEG-Gauge is also possible. The app is available free of charge at the Apple App Store and at the Google Play Store. January 2022 BlowerDoor Standard... -
Page 65: Conducting The Test
DG-1000 is booted. The bootup process may take some seconds to complete, and the gauge is ready to be used when the home screen appears (shown below). Fig. 7.2 • Touch “Gauge” to start Gauge App. BlowerDoor Standard January 2022... - Page 66 • On the DG-1000, the fan model and the flow ring configuration must be set accordingly. • To change, touch the currently displayed fan model or ring at the bottom of the right cell. Fig. 7.5 January 2022 BlowerDoor Standard...
- Page 67 • Use the arrow to return to gauge screen. Fig. 7.6 Turning on the speed controller Turn on the speed controller switch only when the knob is turned all the way to the left. Fig. 7.7 BlowerDoor Standard January 2022...
- Page 68 The display of the play icon changes to an and a red stop icon appears in the lower right corner of the screen. Fig. 7.9 A pop-up at the bottom of the screen indicates for a brief moment “cruise started”. January 2022 BlowerDoor Standard...
- Page 69 The red stop icon will appear on all screens within the Gauge app during cruise, so the fan can be stopped from any screen within the Gauge app. If the Home screen is opened during cruise, the fan will automatically stop! BlowerDoor Standard January 2022...
-
Page 70: Notes On The Dg-1000 Display
7.2.3 Input of building area and building volume To enter the building reference values, open the „Settings“ menu at gauge app by touching the gear icon Fig. 7.11 January 2022 BlowerDoor Standard... - Page 71 Repeat the test with the next smallest ring. Make sure the fan is off before changing the ring. Possible causes: • The building envelope is very tight. BlowerDoor Standard January 2022...
- Page 72 (= pre-set measurement time interval). Fig. 7.13 Channel B shows “Polarity” If “Polarity” appears in the right display, the pressure tubes on channel B are probably interchanged. Please check the connections (see section 4.5.4 and section 4.6). January 2022 BlowerDoor Standard...
-
Page 73: Appendix A: Technical Data
0° to +50° C, 10-90% R.H. (non-condensing) Fan Weight: 15 kg Dimensions: (L x W x H) 61 x 60 x 25 cm Noise Emission: At a distance of 1 m < 80 dB (on average 60 dB) BlowerDoor Standard January 2022... -
Page 74: Digital Pressure Gauge Dg-1000
(L x H) 480 x 272 pixels, 9.5 x 5.3 cm, capacitive touch screen Display Backlight: User adjustable (default 40%) Time Averaging: 1 second, 5 second, 10 second or long-term average (continuous update) Operating Temperature Range 5.5° C to 46° C Storage Temperature Range: -20° C to 60° C January 2022 BlowerDoor Standard... -
Page 75: Software Tectite Express
(L x W x H) 177 x 107 x 36 mm Weight: approx. 445 g Compatibility: Compatible with all TEC devices Stand-alone: Cruise control for one-point measurement: Automatically maintains a building pressure differential of 0, 25, 50, 75 Pa or customer defined pressure differential. -
Page 76: Blowerdoor Mounting Frame And Blowerdoor Panel
BlowerDoor Mounting Frame standard size (adjustable) Material: Extruded aluminum Minimum and maximum width: 0.71 m to 1.14 m Minimum and maximum height: 1.32 m to 2.43 m Seal: EPDM flexible gasket BlowerDoor Panel Material Nylon with built-in vinyl window January 2022 BlowerDoor Standard... -
Page 77: Appendix B: Calibration, Maintenance, And Care
“Install” button. Follow the instructions. Please ensure sufficient battery capacity of the DG-1000 for a smooth update! After successful installation, touch “Power off” or Fig. 8.2 “Reboot” to complete the update process. BlowerDoor Standard January 2022... -
Page 78: Calibration
• If a liquid gets inside the pressure ports, contact the BlowerDoor GmbH. • Do not attempt to dry any of the electrical connectors with a Q-Tip or similar item. January 2022 BlowerDoor Standard... -
Page 79: Lithium Ion Battery (Rechargeable)
All batteries self-discharge over time. The manufacturer recommends charging the batteries for a few hours once every three months using the included charger regardless of battery level. Batteries should be charged in temperatures between 9° C and 32° C. BlowerDoor Standard January 2022... -
Page 80: Touch Screen - Use And Care
Do not use the gauge when the batteries should be replaced (measurements may be inaccurate). • Do not expose the gauge to excessive pressure. Note: It is easy to slam the gauge in doors during tests. January 2022 BlowerDoor Standard... -
Page 81: Blowerdoor Fan
1.204 kg/m³. This corresponds to an air density under ambient conditions of 20° C and 101325 Pa. The adjustment is based on the CGSB regulation CAN/CG-SB-149.10-M86. This measurement does not include the actual airflow through the fan. BlowerDoor Standard January 2022... -
Page 82: Calibration
The fan is calibrated to a pressure differential of up to 80 Pa, but can be calibrated to differentials of up to 100 Pa. To do this, the data points must lie on the line of best fit. January 2022 BlowerDoor Standard... -
Page 83: Maintenance
(without rings) to motor: 9.5 mm to 15.9 mm. 9.5 to 15.9 mm Fig. 8.5 Fig. 8.6 If the permissible distance is exceeded, the fan must be sent to our offices for calibration and repairs. BlowerDoor Standard January 2022... -
Page 84: Testing The Flow Sensor
Note: Keep the air intake free of obstacles. Keep the inlet area of the fan free of all obstacles For a controlled regulation, the inlet area of the BlowerDoor fan must be free of all obstacles. January 2022 BlowerDoor Standard... -
Page 85: Fan Speed Controller
CAUTION – HAZARDOUS VOLTAGES INSIDE MODEL 4 SPEED CONTROLLER. UNPLUG POWER CORD FROM AC POWER MAINS OUTLET BEFORE SERVICING SPEED CONTROLLER. Replacement Fuse Specification: 5 Amp, 250 VAC, 5 X 20 mm, FAST acting, approved by VDE/UL. BlowerDoor Standard January 2022... - Page 86 Replace the four screws. With each screw, align the screw in its hole perpendicular to the end plate. Rotate the screw counterclockwise about one full turn until the threads drop into place. • Tighten each screw and verify that each screw is tight. January 2022 BlowerDoor Standard...
- Page 87 Reconnect the controller power cord to the AC power mains outlet. • Turn ON the controller Power Switch. • Adjust speed control knob from minimum to half speed and verify fan operation. • Resume normal use of speed controller. BlowerDoor Standard January 2022...
-
Page 88: Appendix C: Expansion Capabilities Of The Blowerdoor Measurement System
Cable with jack plugs (2 pcs) Set of tubes [connection fan – DG-1000, Set of tubes [capture outside pressure, inside red and blue (3 m)] (2 pcs) green (3 m), outside transparent (10 m)] Fig. 9.1 January 2022 BlowerDoor Standard... - Page 89 Cable with jack plugs (3 pcs) additional upper/middle cross bar Set of tubes [capture outside pressure, inside Set of tubes [connection fan – DG-1000, green (3 m), outside transparent (10 m)] red and blue (3 m)] (3 pcs) Fig. 9.2 BlowerDoor Standard January 2022...
- Page 90 Cable with jack plugs (3 pcs) red and blue (3 m)] (3 pcs) Set of tubes [capture outside pressure, inside Ethernet cord (2 pcs) [connection DG-1000 – green (3 m), outside transparent (10 m)] router (2 m)] Fig. 9.3 January 2022 BlowerDoor Standard...
- Page 91 9 Cable with jack plugs (3 pcs) openings 10 Set of tubes [capture outside pressure, inside 5 Set of tubes [connection fan – DG-1000, green (3 m), outside transparent (10 m)] red and blue (3 m)] (3 pcs) Fig. 9.4 BlowerDoor Standard January 2022...
- Page 92 /middle cross bar (2 pcs) Set of tubes [capture outside pressure, inside Set of tubes [connection fan – DG-1000, green (3 m), outside transparent (10 m)] red and blue (3 m)] (6 pcs) Fig. 9.5 January 2022 BlowerDoor Standard...
- Page 93 Appendix C: Expansion Capabilities of the BlowerDoor Measurement System Set-up possibility of BlowerDoor MultipleFan (12 fans) Fig. 9.6 BlowerDoor Standard January 2022...
-
Page 94: Our Service Offer
As a BlowerDoor testing team, your listing in our online database is free of charge. Contact us at info@blowerdoor.com if you would like an address entry, including a link to your email address and website in our directory of BlowerDoor test providers. January 2022 BlowerDoor Standard... - Page 95 Technical Support Should you have unexpected technical problems while conducting BlowerDoor measurements, our tech support team is available free of charge during our office hours at the following number: +49 (0) 5044/975-57 (chargeable call to German landline). BlowerDoor Standard January 2022...
-
Page 96: Guarantee
Guarantee Object of the guarantee: BlowerDoor Standard, BlowerDoor MiniFan and BlowerDoor MultipleFan System Besides the guarantee set forth in the law, BlowerDoor GmbH offers you a total of four years of guarantee for the complete BlowerDoor Measurement System (BlowerDoor fan including low flow rings and fan cover, DG-1000, mounting frame and nylon panel, speed controller, tube set, and accessory bag). - Page 97 The costs and risk of loss or damage on the way to or from the point where the claims under guarantee are received are borne by the respective shipping party. BlowerDoor Standard January 2022...
-
Page 98: Ec-Declaration Of Conformity
Electrical Equipment for Measurement, Control, and Laboratory Use: EC-Low Voltage Directive 2006/95/EC EN 61010-1:2010 EC-EMC Directive 2004/108/EC EN 61326-1:2006; Part 1 EN 61326-2-1:2005-12; Part 2-1 EN 61000-3-3:2008 EN 61000-4-5 EN 61000-4-2 EN 61000-4-6 EN 61000-4-3 EN 61000-4-11 EN 61000-4-4 EN 61000-3-2:2006; A1:2009; A2:2009 January 2022 BlowerDoor Standard... - Page 99 TUV SUD America, Minneapolis MN EC-EMC-Directive 2004/108/EC: International Certification Services, Glencoe MN European Representative: BlowerDoor GmbH MessSysteme für Luftdichtheit Zum Energie- und Umweltzentrum 1 D-31832 Springe Germany Gary D. Nelson, President The Energy Conservatory August 13, 2012 BlowerDoor Standard January 2022...
- Page 100 EC-Low Voltage Directive 2014/35/EU EN 61010-1:2010 EC-EMC Directive 2004/108/EC EN 61326-1:2013 EN 55011:2009 + A1:2010 EN 61000-4-5:2006 EN 61000-4-2:2009 EN 61000-4-6:2009 EN 61000-4-3:2006 + A1:2008 + A2:2010 EN 61000-4-8:2010 EN 61000-4-4:2004 + AC:2006 + A1:2010 EN 61000-4-11:2004 January 2022 BlowerDoor Standard...
- Page 101 TUV SUD America, Minneapolis MN EC-EMC-Directive 2004/108/EC: TUV SUD America, Minneapolis MN European Representative: BlowerDoor GmbH MessSysteme für Luftdichtheit Zum Energie- und Umweltzentrum 1 D-31832 Springe Germany Gary D. Nelson, President The Energy Conservatory May 31, 2017 BlowerDoor Standard January 2022...
- Page 102 © BlowerDoor GmbH / 2022 BlowerDoor GmbH MessSysteme für Luftdichtheit Zum Energie- und Umweltzentrum 1 D-31832 Springe-Eldagsen • • Phone +49 5044 975-40 Fax +49 5044 975-44 info@blowerdoor.com www.blowerdoor.com • • •...
Need help?
Do you have a question about the BlowerDoor Standard and is the answer not in the manual?
Questions and answers