Table of Contents
Advertisement
Quick Links
Section
4. Parts Diagram ............................................................. 4
5. Pre-Installation Requirements ..................................... 5
10. Installation Review .................................................... 13
11. Troubleshooting Guide .............................................. 14
Technical Manual
Table of Contents
System Description .............................. 2
®
Equipment Available ............................. 3
®
Equipment Packing Lists ...................... 3
®
System Installation .......................... 6 - 8
®
Installation .............. 5
®
System ................... 9 - 12
®
System ........ 13
®
Page
Advertisement
Table of Contents

Subscribe to Our Youtube Channel
Summary of Contents for BETCO Fastdraw
-
Page 1: Table Of Contents
® 7. FASTDRAW System Installation ......6 - 8 ® 8. Operating the FASTDRAW System ....9 - 12 ® 9. Guidelines for Using the FASTDRAW System ..13 ® 10. Installation Review ............ 13 11. Troubleshooting Guide ..........14... -
Page 2: Fastdraw System Description
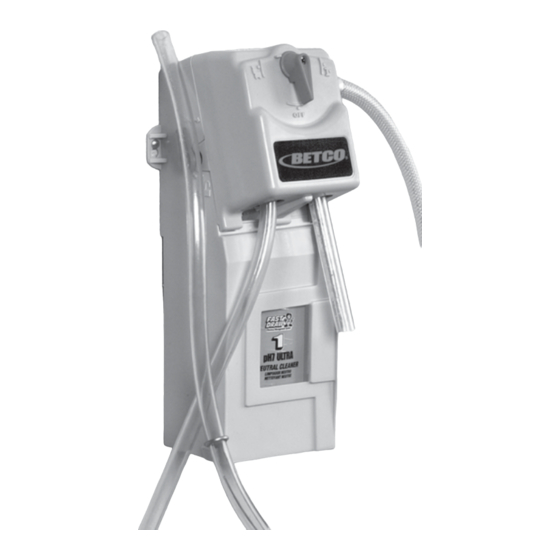
System Description ® FASTDRAW is a result of countless end user surveys. Our customers asked for a system that was easy to install, easy to use, and easy to maintain while providing the most accurate dilutions. Of course, the price had to be affordable also. The design features allow for maximum productivity and performance: •... -
Page 3: Fastdraw Equipment Available
• Simple mounting instructions. • Filled spray bottles can easily hang on bottom shelf. #90052-00 Mobility Adaptor – sold separately • Easily mounts onto the back of the FASTDRAW dispenser. • Can clip onto any maid’s cart for mobile dilution control. 3. FASTDRAW Equipment Packing Lists ®... -
Page 4: Parts Diagram
Section 2. Parts Diagram 4 GPM "ACTION GAP" WHITE 1 GPM GREEN 1 GPM GREEN OPTIONAL AIR GAP 4 GPM PROPORTIONERS WHITE AIR GAP ONLY # ITEM # Description: # ITEM # Description: 98303-00 Housing 98314-00 1 GPM Proportioner Assembly - Green 98299-00 1 GPM Air Gap Proportioner - Green 98304-00... -
Page 5: Pre-Installation Requirements
• Use water supply lines from tap water outlets with a minimum of 20 PSI, not to exceed 80 PSI, and water temperature must not exceed 100°F. • When using the FASTDRAW Rack (Item #91044-00), be sure the surface can sustain a 20 lb. load. -
Page 6: Fastdraw System Installation
7. FASTDRAW System Installation ® Step 1: Mounting the Proportioner to the Wall 1. Find the appropriate hole pattern for your installation. NOTE: If the dispenser is being hung with the internal hole patterns, you must remove the cover. To remove the dispenser cover, first remove the screw on the front lever with a Phillips screwdriver. - Page 7 7. FASTDRAW System Installation ® (continued) Step 1: Mounting the Proportioner to the Wall (continued) 4. Connect the supplied 6’ braided water supply hose to the right side of the dispenser and the water line. Tighten both connections by hand. Mount the water supply line to the wall with proper clamps to avoid damaging the dis- penser.
- Page 8 Tighten the screws to secure the rack to the wall. 6. Hold the FASTDRAW refill bottle by the handle and place it into the rack; the handle and the FASTDRAW number should be facing you. Insert up to 4 products into the FASTDRAW Rack.
-
Page 9: Operating The Fastdraw System
8. Operating the FASTDRAW System ® 1. Make sure the water supply is connected to the unit and turned on. 2. Each product sleeve matches the product color. Find the appropriate product for your cleaning task. 3. Remove the cap from the bottle. - Page 10 8. Operating the FASTDRAW System ® (continued) Filling Mop Buckets 1. Place the long hose into the container to be filled. 2. Rotate the front lever to the mop bucket icon on the left. 3. When the container is filled, return the lever to the OFF position.
- Page 11 8. Operating the FASTDRAW System ® (continued) Filling Spray Bottles 1. Place the empty spray bottle onto the short hose on the right side of the dispenser. Rotate the front lever to the spray bottle icon on the right. 3. When the bottle is filled, return the front lever to the OFF...
- Page 12 8. Operating the FASTDRAW System ® (continued) To Dispense Water Only 1. Place the long hose into the container to be filled. 2. With the concentrate bottle out of the dispenser and the water supply connected and turned on, rotate the front lever to the mop bucket icon on the left.
-
Page 13: Guidelines For Using The Fastdraw ® System
• Always reassemble equipment according to instruction procedures. Be sure all components are firmly screwed or latched into position. • Use of any other products through the FASTDRAW System, other than products manufactured by Betco Corporation, will void all warranties and may prevent the system from operating properly. -
Page 14: Troubleshooting Guide
11. Troubleshooting Guide Product or chemical does not dispense. 1. Make sure the water is on. 2. Make sure the water inlet hose is not kinked or crimped. Only water is being dispensed. 1. Make sure there is product in the concentrate bottle. 2. - Page 16 ©2014 Betco Corporation All Rights Reserved. 1001 Brown Avenue Toledo, Ohio 43607-0127 Item #91070-92 rev. 02/2014...

Need help?
Do you have a question about the Fastdraw and is the answer not in the manual?
Questions and answers