Advertisement
Quick Links
Advertisement

Related Manuals for Garlando Toorx ERX 400

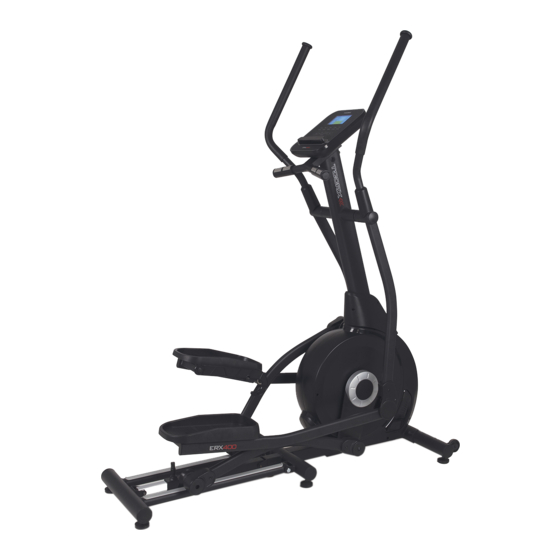
Summary of Contents for Garlando Toorx ERX 400
- Page 1 INSTRUCTION...
-
Page 2: Exploded Diagram
EXPLODED DIAGRAM 36 37 11 12 11 12 91 71 91 71 100 101 11 12 73 72... -
Page 3: Parts List
PARTS LIST Description Qty. Description Qty. Computer Bolt M8*40*15*S5 Handle pulse Wire Adapter Arc Washer d8*Φ20*2*R16 Handle pulse plate 1 Handle pulse plate 2 Handlebar Cover ST3*25*Φ5.6 Spacer Φ32*3.3 Bolt Spacer Φ50*Φ28*20 Washer d4 Rubber Spacer Φ30*Φ20*10 Screws M4 Middle handlebar 39L/R Swing bar L/R End cap ф25*16... - Page 4 Nylon Nut M6*H6*S10 Wave Washer Magnet Tension spring Bolt M8*12*Φ10*5.5*S5 Belt Plate Washer d12*Φ17*0.5 Belt 67L/R Cover L/R Idler rod Bolt ST4*10*Φ6 Washer d6*Φ12*1.2 69L/R Chain Cover Washer d12 Bolt ST4.2*16*Φ8 Magnetic board Join Washer d6*Φ16*1.5 Tension spring Bolt ST4*13*Φ8 Magnet Small cover on crank cover Magnetic plate shaft...
-
Page 5: Hardware Package
HARDWARE PACKAGE #11 M8*20*S5 6PCS #12 d8 4PCS #14 d8*Φ20*2*R30 2PCS #16 M8*70*25*S5 1PC #17 M8*H7.5*S13 5PCS #19 ST4.2*19*Φ8 3PCS #24 M8*73*20*H5 2PCS #25 M8*H16*S13 2PCS #32 M8*40*15*S5 4PCS #34 d8*Φ20*2*R16 4PCS #112 d8*Φ16*1.5 3PCS... - Page 6 ASSEMBLY INSTRUCTIONS STEP 1: #11 M8*20*S5 2PCS #12 d8 2PCS #16 M8*70*25*S5 1PC #17 M8*H7.5*S13 1PC #19 ST4.2*19*Φ8 3PCS #112 d8*Φ16*1.5 3PCS A. Connect trunk wire 1(10) on handlebar post join(15) and trunk wire 2(80) on main frame(20) well, then insert to Handlebar post join(15) . B.
- Page 7 STEP 2: #12 d8 2PCS #14 d8*Φ20*2*R30 2PCS #24 M8*73*20*H5 2PCS #25 M8*H16*S13 2PCS Attach the front stabilizer(21) on main frame(20) with bolts(24), arc washer(14), spring washers(12) and nuts(25) by spanner(A).
- Page 8 STEP 3: Connect computer wire(1a) and handle pulse wire(2) well; Connect computer wire(1b) and truck wire 1(10) well. Take out screws(7) washers(6) from computer(1), then secure computer(1) on middle handlebar(8) by spanner(A).
- Page 9 STEP 4: #32 M8*40*15*S5 4PCS #17 M8*H7.5*S13 4PCS #34 d8*Φ20*2*R16 4PCS A. Fix handlebar cover(31) on L/R handlebar(30L/R) . B. Attach L/R handlebar(30L/R) into L/R swing bar(39L/R) using bolts(32), arc washers(34), nylon nuts(17) by wrench(B).
- Page 10 STEP 5: #11 M8*20*S5 4PCS Secure L/R pedal (47L/R) on L/R pedal arm join (46L/R) using 4 bolts(11) by wrench(B).
- Page 11 STEP 6: When use this product, please insert adapter line(33) to power hole on the front of main frame(20), then plug the adapter(33) into an outlet. Attention: Cut off the power source when don't use it long time .
-
Page 12: Moving The Machine
MOVING THE MACHINE: To move the machine, lift up the rear handlebar of m ain frame(20) until the transportation wheels(22) on the front stabilizer(21) touch the ground. With the wheels on the ground, you can transport the bike to the desired location with ease. ADJUSTING THE BALANCE:... - Page 13 Folding Machine: When no use, lift up the left and right pedal arm join(46L/R), and hung the hooks(120) to the left and right side s of handbar post joint(15). Then pull out the knob(117) to fold the rail(111).
- Page 14 MOTORIZED COMPUTER OPERATION MANUAL 1. Program: 21 programs as following A: 1 Manual Program B: 10 Preset Program Profile ( PROGRAM: P1-P10) P1: ROLLING P2:VALLEY P3: FATBURN P4:RAMP P5:MOUNTAIN...
- Page 15 P6: INTERVAL P7:CARDIO P8:ENDURANCE P9:SLOPE P10:RALLY C: 1 Watt Control Program ( WATT PRO: P16) D: 4 Heart Rate Control Program: ( PULSE PRO: P17-P20) 55%H.R, 75%H.R, 95%H.R and TARGET H.R E: 5 User Setting Programs: CUSTOM1 to CUSTOM5 (P 11 ~ P15) 1.
- Page 16 1. ENTER: 1. ENTER: ● In "stop" mode, press ENTER button to enter into program selection and setting value which flash in related window. A: When you choose the program, press Enter to confirm the one you like. B: When in setting, press ENTER to confirm the value that you would like to preset.
- Page 17 B. Press ENTER button to confirm the selected program and enter time setting window. C. The time will flash, and then press UP, DOWN button to set up your desired time. Press ENTER to confirm the value. D. The distance will flash, and then press UP, DOWN button to set up the desired distance value.
- Page 18 desired calories to be consumed. Press ENTER to confirm the value. F. The age will flash, and then press UP, DOWN button to set the user's age. Press ENTER to confirm the value. G. When the target heart rate control program flash, the computer will display the user's target heart rate according to user's age.
- Page 19 B. Press RECOVERY to enter the pulse recovery test and the computer program will enter the stop status. C. Keep pulse detecting. D. Time will count down from 60 seconds to 0 second. E. When time reaches 0, the test result (F1 -F6) appears on the display. F1=Excellent F2=Good F3=Fair F4=below average...
- Page 20 PULSE: showing the exercise heart rate value. Range: 60~ 240BPM(beat per minute) 1,If the computer have wireless puls e receive , Please exactitude use wireless pulse shoot. 2,If the compute wireless pulse and holds pulse Use at the same time , Computer Have the initiative to show holds pulse.
- Page 21 GARLANDO SPA Via Regione Piemonte, 32 - Zona Industriale D1 15068 - Pozzolo Formigaro (AL) - Italy www.toorx.it - info@toorx.it...
Need help?
Do you have a question about the Toorx ERX 400 and is the answer not in the manual?
Questions and answers