Table of Contents
Advertisement
Quick Links
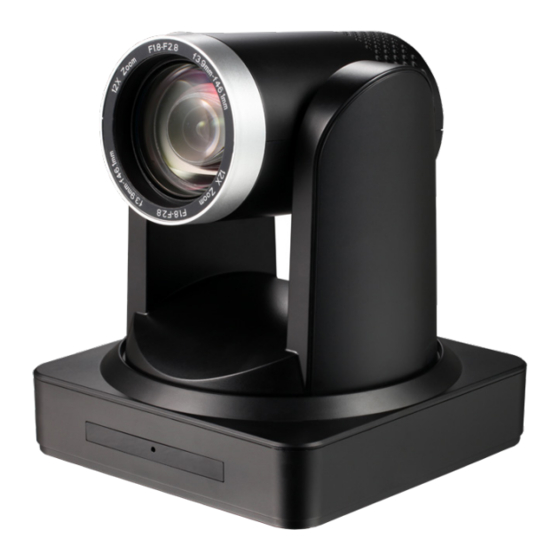
PTZ Camera with HDBaseT Output
AT-HDVS-CAM-HDBT-BK and AT-HDVS-CAM-HDBT-WH
The Atlona AT-HDVS-CAM-HDBT is an enterprise-grade PTZ camera designed for use in
video conferencing and other applications such as lecture capture and distance learning. It
features an HDBaseT output for extending video, power, and camera control over distances up
to 330 feet (100 meters). The HDVS-CAM-HDBT is ideal for remotely interfacing into HDBaseT
equipped switchers and extenders, for use with a video conferencing codec, lecture capture
appliance, or PC equipped for video capture. Camera control over HDBaseT or TCP/IP facilitates
remote integration into AV control systems. The HDVS-CAM-HDBT delivers high performance,
professional-quality imaging with video resolutions up to 1080p @ 60 Hz, as well as fast and
accurate auto-focusing, and a fast yet quiet pan and tilt mechanism. Also available is H.264 or
H.265 streaming over IP with support for RTMP and RTSP protocols. This PTZ camera is ideal for
large meeting spaces, classrooms, training rooms, and many other environments. The HDVS-
CAM-HDBT is available in black or white.
Package Contents
1 x AT-HDVS-CAM-HDBT-BK or
AT-HDVS-CAM-HDBT-WH
1 x Wall mounting plate
1 x 1/4-20 UNC screw
1 x IR Remote Control
AT-HDVS-CAM-HDBT-BK / AT-HDVS-CAM-HDBT-WH
1 x USB A cable
1 x VISCA to RS-232 DB-9 adapter
2 x AAA battery
1 x Installation Guide
1
Installation Guide
Advertisement
Table of Contents

Related Manuals for Panduit Atlona AT-HDVS-CAM-HDBT-BK


Summary of Contents for Panduit Atlona AT-HDVS-CAM-HDBT-BK
- Page 1 Installation Guide AT-HDVS-CAM-HDBT-BK / AT-HDVS-CAM-HDBT-WH PTZ Camera with HDBaseT Output AT-HDVS-CAM-HDBT-BK and AT-HDVS-CAM-HDBT-WH The Atlona AT-HDVS-CAM-HDBT is an enterprise-grade PTZ camera designed for use in video conferencing and other applications such as lecture capture and distance learning. It features an HDBaseT output for extending video, power, and camera control over distances up to 330 feet (100 meters).
-
Page 2: Panel Descriptions
Installation Guide AT-HDVS-CAM-HDBT-BK / AT-HDVS-CAM-HDBT-WH Panel Descriptions RS-232 AUDIO HDBaseT OUT DC 12V AT-HDVS-CAM-HDBT-BK RS-232 Connect included VISCA to RS-232 Connect to a network switch to control adapter here to control the camera with a the unit via TCP/IP or webGUI. third party software or hardware controller. -
Page 3: Mounting Instructions
Installation Guide AT-HDVS-CAM-HDBT-BK / AT-HDVS-CAM-HDBT-WH Mounting Instructions The AT-HDVS-CAM-HDBT has two installation options, wall mount (included) and ceiling mount (purchased separately). Wall Mount Installation The install the AT-HDVS-CAM-HDBT, 4 M6 swelling bolts, 1 1/4-20 UNC screw, 4 M6 nuts and shims, the included wall mount bracket, and the AT-HDVS-CAM-HDBT are required. - Page 4 Installation Guide AT-HDVS-CAM-HDBT-BK / AT-HDVS-CAM-HDBT-WH Ceiling Mount Installation NOTE: The ceiling mount is sold separately. Refer to https://atlona.com/product/at-hdvs-cam-cmnt/. Position part A at the desired position on the ceiling / surface. Attach part A to the ceiling / surface by positioning screws (not provided) through the arc-shaped holes (1), as required. Attach part B to the bottom of the AT-HDVS-CAM-HDBT using the included 1/4-20 UNC screw.
- Page 5 Installation Guide AT-HDVS-CAM-HDBT-BK / AT-HDVS-CAM-HDBT-WH Ceiling Mount installation (Legacy Mount) To install the AT-HDVS-CAM-HDBT, 4 PA3X30 self-tapping screws, 4 PM3X6 screws, 4 screw stoppers, 1 1/4-20 UNC screw, the optional ceiling upper and lower covering plates, and the AT- HDVS-CAM-HDBT are required. Install the 4 screw stoppers in the ceiling.
-
Page 6: Installation
Installation Guide AT-HDVS-CAM-HDBT-BK / AT-HDVS-CAM-HDBT-WH Installation Connect an Ethernet cable from the network to the LAN port on the back of the AT-HDVS- CAM-HDBT. Connect a compatible PoE HDBaseT receiver or switcher, such as the AT-OME-RX11 or AT- OME-PS62, to the HDBaseT OUT port on the AT-HDVS-CAM-HDBT. OPTIONAL: Connect an 3.5 mm mini-stereo cable from an audio source to the AUDIO IN port on the camera. -
Page 7: Web Server
Installation Guide AT-HDVS-CAM-HDBT-BK / AT-HDVS-CAM-HDBT-WH Web Server The AT-HDVS-CAM-HDBT includes a built-in web server, which allows easy management and control of all features. Follow the instructions below to access the web server. Power the AT-HDVS-CAM-HDBT by connecting a category cable (CAT-5e or better) from the HDBaseT OUT port to a compatible receiver unit. - Page 8 Installation Guide AT-HDVS-CAM-HDBT-BK / AT-HDVS-CAM-HDBT-WH IR Remote The AT-HDVS-CAM-HDBT comes with an IR remote control for full control of the camera and use of the OSD menu. See the user manual for full information on the remote buttons, OSD, and presets.
-
Page 9: Troubleshooting
Installation Guide AT-HDVS-CAM-HDBT-BK / AT-HDVS-CAM-HDBT-WH Troubleshooting Problem Cause Solution Why can I not get any Camera lens is covered, • Remove the camera lens picture from my camera? category cable is faulty, cover from the unit. or the PC is not set up to •... - Page 10 Installation Guide AT-HDVS-CAM-HDBT-BK / AT-HDVS-CAM-HDBT-WH Notes...
- Page 11 Installation Guide AT-HDVS-CAM-HDBT-BK / AT-HDVS-CAM-HDBT-WH Notes...
-
Page 12: Warranty
Installation Guide AT-HDVS-CAM-HDBT-BK / AT-HDVS-CAM-HDBT-WH Warranty To view the product warranty, use the following link or QR code: https://atlona.com/warranty/. English Declaration of Conformity The English version can be found under the resources tab at: https://atlona.com/product/hdvs-cam-hdbt/. Chinese Declaration of Conformity 中国RoHS合格声明 由SKU列出於: https://atlona.com/about-us/china-rohs/.
Need help?
Do you have a question about the Atlona AT-HDVS-CAM-HDBT-BK and is the answer not in the manual?
Questions and answers