Table of Contents
Advertisement
Quick Links
Advertisement
Table of Contents

Related Manuals for SKYEINTELLIGENCE Orbit


Summary of Contents for SKYEINTELLIGENCE Orbit
- Page 1 Orbit User Manual Orbit User Manual V1.0 Model ORBTX2...
-
Page 2: Table Of Contents
Contents Package Contents Video Tutorial Drone Drone Introduction Flight mode Flight Status indicator Propellers Battery Tracker Tracker overview Introduction On/Off Switch Indictor Charging Using the Tracker Skye+ App Download the Skye+ App App Main Screen Play Buttons/Icons... - Page 3 Connecting Skye+ App with the Drone via Wi-Fi Gallery Social Community Firmware Upgrade Powering off the Drone Flight Flight Restrictions & No-fly zones Fight Environment Requirements Preflight Preparations Powering On/Off Connecting to Mobile Devices Digital Compass Calibration One-click Takeoff/Landing Flight by Skye+ app Auto-follow Mode Photography/Video Recording One-click Return...
- Page 4 Appendix FCC Compliance IC Compliance Safety Warnings WEEE Directive...
-
Page 5: Video Tutorial
9. 《Orbit Quick Start Guide》 10. 《Orbit Intelligent flight Battery Safety Guidelines》 Before you fly, please read 《Orbit User Manual》 、 《Skye Orbit Disclaimer and Operation Guidance》 、 《Orbit Quick Start Guide》 and《Orbit Intelligent flight Battery Safety Guidelines 》 for detailed product information and operation guidelines. -
Page 6: Drone
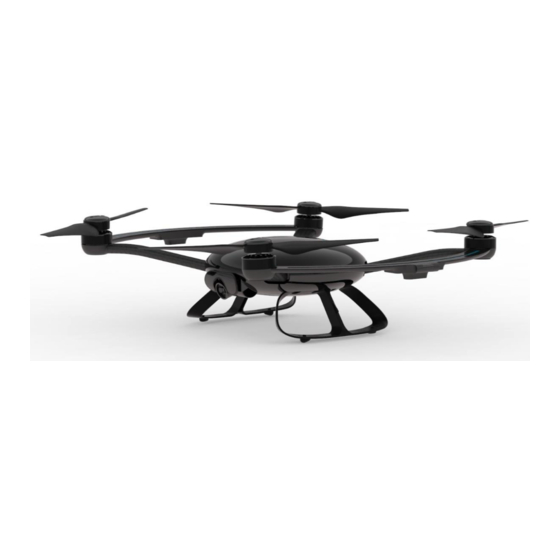
Drone This chapter introduces the main functionalities and features of the drone together with propeller installation and intelligent battery operation guidelines. -
Page 7: Propellers
APP mode:Control the drone with Skye+ app RC mode:Control the drone with remote controller. Drone Status Indicators To indicate the on/off status, Orbit drone is equipped with one breathe light on the top of the body, and another two light bands located at both sides. Propellers Orbit drone propellers measure 9.5inches,... - Page 8 Attaching the Propellers: Mount the propellers with black propeller screw threads to the motors with black dots. Mount the propellers with white propeller screw threads to the motors without black dots. Press the propeller down onto the mounting plate and rotate in the lock direction until it is secured in its position, use one hand to fasten the propeller and another to hold the motor.
-
Page 9: Battery
Battery Introduction Intelligent flight battery, dedicated for Orbit drone, has a capacity of 5100mAh, a voltage of 11.4V and balance management functionality. Intelligent flight battery contains newly designed high performance cells, and an advanced battery management system to supply abundant electric power. Intelligent flight batter must only be charged by a Skye official charger. - Page 10 Install/Remove Battery Open the back cover of the drone and push the battery into the matching slot (two clicks on each side to securely lock the battery in place) To remove,pull the battery while holding the two side clips. 1. When operated under low temperature(-10 ~-5 ) ,battery capacity reduces significantly and the flight time is severely reduced as a result.
- Page 11 Discharging Slow discharging : install the battery and switch on the drone, then stationary discharging is triggered and continues to discharge the battery lower than 30% capacity. Remaining capacity can be read from APP. It is not recommended to turn on the motor to discharge.
-
Page 12: Tracker
Tracker This chapter introduces functions, features and use of tracker... -
Page 13: Tracker Overview
Tracker Overview Skye tracker is a hand-held device which serves as data transmitter. Short range data transmission is implemented for certain compatible receivers chosen by users. Tracker Introduction [1] Skye logo [2] Charging port [3] Power button [4] Tracker base [5] Wrist Band [6] Indicator [7] Charging Indicator... - Page 14 When switched on,4 LED lights shows the number of effective GPS satellites. It is recommended to operate when the number of effective satellites is greater than 4。 Effective # of GPS Light(●indicates ON ◎Indicates Off) satellites ≥16 ● ● ● ●...
-
Page 15: Charging
Charging Tracker is powered by a rechargeable battery with duration 2h. To charge tracker, connect charging port with Skye charger. Red indicator shows charging in progress; blue indicator shows charging completed. A full charge takes 1.5h, and please unplug the charger once charged. How to use tracker Wear User needs to wear the tracking for tracking... -
Page 16: Skye+ App
Skye+ App This section introduces the four tabs of the Skye+ app... -
Page 17: Download The Skye+ App
Download the Skye+ App To operate the drone, users must first download the Skye+ iOS app. Scan the following QR code or enter https://itunes.apple.com/us/app/skye+/id1116011347 in your browser to download the app in Apple Store: Users can also search for our company “Skye Intelligence” in Apple Store to find the Skye+ app. -
Page 18: Play
[1] Drone connection light [2] Drone connection state [3] Enter flight control screen [4] Power off the drone [5] Drone control tab [6] Media gallery tab [7] Social tab [8] Me tab PLAY In the “Play” screen, users can perform One-Click Take-off, routine flight controls, One- Click Landing, Auto-Follow Recording and Camera Settings for the drone;... -
Page 19: Buttons/Icons
[1] Back to main screen [13] Drone battery indicator [2] Settings [14] One-Click Take-Off/Landing [3] Map [15] Flight speed indicator [4] Tracker signal indicator [16] Flight altitude indicator [5] Wi-Fi connection indicator [17] Tracker distance indicator [6] Drone signal indicator [18] Drone battery progress bar [7] Photo/Video switch [19] Flight direction buttons... - Page 20 Choose between Mode 1, Mode 2, or Mode 3 for the virtual joysticks, Joystick Setting customize based personal preferences. Choose between a fixed or a moving virtual joystick. Joystick Sensitivity Also, select the sensitivity level of the joystick from Low, Medium, to High. Click on “SSID”...
- Page 21 Click on “Start” to start Digital-Compass Calibration. Digital-Compass Calibration Click on “Remote control pairing” to start pairing. Remote Control Settings Click [3] to display Map. “ ” indicates the drone’s current location, “ ” shows the current position of your mobile device. Click [7] to switch between Photo/Video modes.
- Page 22 Click [8] to display camera settings. Settings App Screenshot Functions Tap on Resolution “Resolution” to choose between “Sports” and “HD” setting. Set the output Quality quality to “High”, “Middle” or “Low”. 点 击 “ISO” 可 选 择 “AUTO” 、 “200” 、 “400”...
- Page 23 Reset all Tap on “Reset all” to reset all camera values. Click [9] to take photos or record videos. : Click on this button to take photo. :Click on this button to start/end video recording. Click [10] and [19] to control the orientation/direction/altitude of the drone. (The Joystick is set to Mode 2 by default) Button App Symbol...
-
Page 24: Connecting Skye+ App With The Drone Via Wi-Fi
Tap on to turn drone clockwise. Click on [14] to begin One-Click Take-off/Landing. : Click on this button to begin One-Click Take-off. : Click on this button to begin One-Click Landing. Slide [21] up and down to adjust Gimbal pitch angle ranging from -30°~-70° Connecting Skye+ App with the Drone via Wi-Fi After powering on the drone, go the the “Settings ->... - Page 25 Features App Screenshot Explanation When connected with the drone, tap on upper left corner of the “Gallery” browse through the saved photos and videos. Photo/Video Browsing Select a video in the SD card. While it’s playing, users can slide the progress bar below to set a starting and an ending point to cut a clip of max.
- Page 26 browsing When Photo/Video list in the SD card, tap on to multi- Photo/Video select items, and tap on Download and Deletion to download; or tap to delete. When opening a video in the Gallery, users can edit and compile multiple clips together.
-
Page 27: Social Community
When opening a photo in the Gallery, users can edit the photo by applying different filter to it. Photo Editing and Saving After clicking “Save” button, the video will be saved into the app’s folder on your mobile device, users can also share the video to a social network of their choice. -
Page 28: Firmware Upgrade
Firmware Upgrade Go to “Me->Firmware Updates -> Download updates” to download the latest firmware, and click “Install” to update after download is complete. Users can “Clear old packages” to remove past packages. Powering Off the Drone Once connected to the drone, users can tap on in the main screen of the Skye+ app to power it off. -
Page 29: Flight
Flight Once drone is successfully assembled, please read this manual carefully. Please test-fly the drone in open area following the instructions here within or under the guidance of a professional. Please familiarize yourself with necessary flying techniques by practicing adequately before flying regularly or operating in Auto-Follow mode. -
Page 30: Flight Restrictions & No-Fly Zones
Please read “Skye Disclaimer and Safety Instructions” prior to operation Flight Restrictions & No-Fly Zones Flight Restrictions Skye+ app direct control range < 50m Max. remote control range: 200m Tracker operation range: 5m~20m No-Fly Zones No-Fly zones include airports and other flight-restricted areas. Flight Environment Requirements 1. -
Page 31: Preflight Preparations
Preflight Preparations 1. Make sure the smart battery, remote control, tracker and your mobile device are adequately charged . 2. Make sure propellers are installed correctly. Please refer to the propeller installation section of this manual . 3. Make sure the Skye+ app on your mobile device is running correctly . Make sure electric motors are functioning properly after the drone is powered Make sure Gimbal is functioning properly after the drone is powered on. -
Page 32: Digital Compass Calibration
Manually: After landing, long-press your palm on the upper lid for 10 secs. The drone is turned off after the blue indicator light blinks 3 times. Connecting the drone with your mobile device 1. Turn on the device, make sure the blue indicator light is on. 2. - Page 33 Steps 1. Power on the device properly. 2. Go you the Skye+ app, and enter the flight control screen by tapping on the “Play” button. A calibration reminder dialog will show up, tap on “Yes” to start(If you are flying at the same location where calibration has been done before, the system will record campus data, reminder dialog is then skipped).
-
Page 34: One-Click Takeoff/Landing
When to re-calibrate? 1. The flight location is far from the previous location where it’s last calibrated . 2. Mechanical structure of the drone has been modified. 3. The drone exhibits severe drifting behaviors, and cannot fly in straight line . One-Click Take-Off/Landing Take-off 1. -
Page 35: Flight By Skye+ App
automatically execute landing again . _______________________________________________________________________________ 1. Uneven grounds can lead to unstable takeoff, and possible flight accidents . 2. Takeoff and Landing should be carried out in open area, the users should keep adequate safe distance from the drone . _______________________________________________________________________________ Flight by the Skye+ app By using the Skye+ app, you can conduct basic short-range flights. -
Page 36: Auto-Follow Mode
Pitch controls whether to fly forward or backward: Tap on to tilt forward, and fly forward. Tap on to tilt backward, and fly backward. Roll (Aileron) controls whether to fly leftward or rightward: Tap on to tilt leftward, and fly to the left. Tap on to tilt rightward, and fly to the right. -
Page 37: Photography/Video Recording
draw a closed-shape that encompasses the target as illustrated below. Selection fails if the resulting rectangle is red, whereas selection succeeds if it’s Green. The tighter the resulting rectangle encompasses the target, the better. You can repeat the selection process multiple times, and tap on “YES” to confirm, and then the drone goes into auto-follow mode. -
Page 38: One-Click Return
_______________________________________________________________________________ Photo mode Video mode Shutter/Start recording End Recording ______________________________________________________________________________ Photography/Video Recording during regular flight mode When the drone is being operated by the app in regular flight mode, users can select photo mode and press the shutter button to take photos at any time. Users can switch to video mode, and press the shutter button to start recording, and press it again to end recording. -
Page 39: Failsafe Hovering
situations due to battery outage. When the drone battery is below 15%, the drone will land by itself. Users can read the drone battery level in the Skye+ app; when below 30%, the drone battery indicator in the app will turn red; when below 20%, the indicator will turn red, and the app will sound the alarm;... - Page 40 Stopping the Motors After landing, push the throttle down , and then push both sticks to the outer corners . Motors will stop immediately. Release both sticks once motors stop. ② ① _______________________________________________________________________________ Basic Flight Steps 1. Place drone upright on an even ground, with the rear end facing the user . 2.
- Page 42 A: Yes, just pass her/him/it the tracker. Q: Are Skye Orbit and the tracker waterproof? A: The Orbit is not waterproof but it works in light rain. The tracker is rainproof but doesn't work underwater. Q: How about the device compatibility of Skye+ app? A: The Skye+ app is currently compatible with mobile devices running IOS 8.0 or higher.
-
Page 43: Appendix
Appendix... -
Page 44: Fcc Compliance
FCC Compliance This device complies with part 15 of the FCC Rules. Operation is subject to the following two conditions: (1) This device may not cause harmful interference, and (2) This device must accept any interference received, including interference that may cause undesired operation. -
Page 45: Ic Compliance
IC Compliance IC RSS warning This device complies with Industry Canada licence-exempt RSS standard (s). Operation is subject to the following two conditions: (1) this device may not cause interference, and (2) this device must accept any interference, including interference that may cause undesired operation of the device. Le présent areil est conforme aux CNR d'Industrie Canada licables aux areils radio exempts de licence. -
Page 46: Safety Warnings
Safety Warnings WEEE Directive Correct Disposal of this product. This marking indicates that this product should not be disposed with other household wastes throughtout the EU. To prevent possible harm to the environment or human health from uncontrolled waste disposal, recycle it responsibly to promote the sustainable reuse of material resources.
Need help?
Do you have a question about the Orbit and is the answer not in the manual?
Questions and answers