Table of Contents
Advertisement
Quick Links
Advertisement
Table of Contents

Related Manuals for Soniclear HA2


Summary of Contents for Soniclear HA2
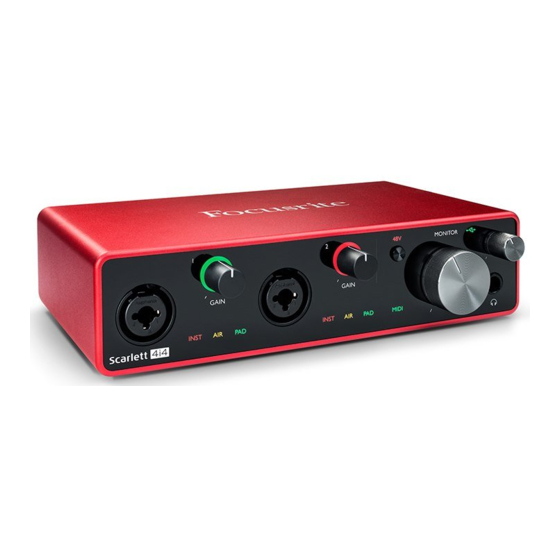
- Page 1 HA2 Hybrid Audio Kit with the Focusrite 4i4 OPERATION GUIDE...
- Page 2 About This Manual This manual covers the installation and usage of the SoniClear Hybrid 4 Audio Kit, based on the Focusrite 4i4. This kit is designed for use with all SoniClear digital recording software products. Revision Date: 12/11/21 Printed in the United States.
-
Page 3: Table Of Contents
Contents HA2 Operation .............................. 5 Overview ............................... 5 Using Microphones ..........................6 Adjusting Windows App Playback Volume ..................6 Adjusting Remote Participant Volume ....................6 Listening using Headphones ......................... 7 Listening using Speakers ........................8 Using a Backup Recorder ........................8 Playback from Windows Software ....................... - Page 4 Expose Windows Channels ......................... 29 Windows Sound Settings ........................30 Default Playback Device ........................30 Default Recording Device ........................31 SoniClear Software Preferences......................32 Overview ............................. 32 Recording Options Tab - Sound Quality ..................... 32 Hardware Tab – Audio Device Selection.................... 34 Transcriber Live Software Preferences ....................
-
Page 5: Ha2 Operation
HA2 Operation Overview The SoniClear HA2 Hybrid Audio Kit uses the Focusrite 4i4 USB audio interface to make it easy to record in-person meetings, computer-based teleconferences, and hybrid meetings with high audio quality. It will work with any conferencing software, such as Zoom, Cisco WebEx, or Microsoft Teams. It also works with softphone programs, such as 8x8 Work, Vonage, and Avaya. -
Page 6: Using Microphones
Using Microphones When working in-person, plug in one or two microphones and locate them in the meeting room to pick up all the participants. When working remotely, use one microphone and place it close to where you are sitting without being in the way of your work. The Samson C02 microphone option has a very directional pickup pattern, so it does not need to be right in front of your mouth. -
Page 7: Listening Using Headphones
Listening using Headphones There is a headphone jack on the front of the 4i4 interface for listening to participants and monitoring audio from SoniClear. Plug the monitor headphone into the Headphone jack. A ¼” to 3.5mm adapter is... -
Page 8: Listening Using Speakers
included for headphones that use a 3.5mm plug. Adjust the headphone loudness using the level knob above the jack. Listening using Speakers If you want to listen to remote participants without headphones. a speaker can be attached to the Focusrite. The large “MONITOR” knob is provided for controlling the level of the speaker. Using a Backup Recorder You can use a backup recorder placed in front of the monitor speaker so that it picks up the local and remote participants from the built-in recorder microphone. -
Page 9: Resetting All Controls
Resetting All Controls If any of the required Focusrite 4i4 settings are accidentally changed, the default settings can be restored with the following steps: Left click on in the “Windows System Tray”. This is the little up-arrow icon in the lower right corner of the computer screen (next to the Time and Date): Then left click on the Focusrite control icon This will display the list of options for controlling the Focusrite interface. - Page 10 Click on the File pulldown menu and select “Load Snapshot” to open the preset selection dialog. Select the file HA2Kit_Focusrite_4i4_RevD.ff (or preset file saved specifically for your preferred configuration). This may be stored in the SoniClear program directory (C:\Program Files (x86)\SoniClear97) or some other location where it has been saved when setting up the HA2 kit.
-
Page 11: Focusrite 4I4 Loopback Kit Installation
The Focusrite 4i4 is powered from the USB connection. Microphone Connections The HA2 Hybrid Kit can be configured with one or two microphones, or with a noise cancelling headset. Connect at least one microphone or a headset to the 4i4 microphone input. This microphone or headset is... -
Page 12: Speaker Connection
An audio loopback circuit is set up using ¼” TRS cables. The microphones, readback audio, and playback audio, are sent to the headphones and SoniClear for recording from the Line Inputs on the back of the 4i4. Connect the two analog ¼” TRS cables on the back of the 4i4 interface:... - Page 14 Loopback Cables...
- Page 15 Close up of ¼” TRS Loopback Cables...
- Page 16 Close up of XLR Microphone and Headphone Connection...
- Page 17 Close up of Noise Cancelling Headset Kit Option...
-
Page 18: Focusrite 4I4 Software Installation
The Focusrite 4i4 requires configuration for compatibility with SoniClear. A default set of presets for use with SoniClear may be located in the SoniClear program directory (C:\Program Files (x86)\SoniClear97). If the presets are not available in the program directory, they can be downloaded from the SoniClear website: https://download.soniclear.com/ha2/... - Page 19 Then left click on the Focusrite control icon This will display the list of options for controlling the Focusrite 4i4. Select “Mixing / Routing” to display the Focusrite control panel:...
-
Page 20: Saving Presets
Then save these customized settings in a custom preset file for future use. It is important to save these customized presets so that the SoniClear user can restore the correct settings, in case they press one of the setting buttons by accident. -
Page 21: Focusrite 4I4 Manual Configuration
Focusrite 4i4 Manual Configuration The loopback mixer is configured properly after the supplied presets have been loaded, following the instructions above. To manually configure the settings without the presets, open the Focusrite 4i4 Mixing / Routing control panel and then follow the instructions provided in this section of the Operation Guide. Overview To goal is to make it possible to use one setup for three applications: •... -
Page 22: Mixer Settings
This will display the list of options for controlling the Focusrite interface, which are explained in the following instructions. Mixer Settings Open the Focusrite 4i4 Mixer control panel from the Focusrite menu in the Windows System Tray by selecting the “Mixing / Routing” control panel. There are three mixers to configure: •... -
Page 23: Monitor Outputs 1-2
Mic 1-2 Mute Line-In 3-4 (Stereo Mix for Recording and Monitoring) Mute Playback 1-2 (SoniClear and Windows App Playback) Playback 3-4 (Conference Call Participants Audio) Mute Button Stereo Button Mix Output Volume set to maximum (“0” at top of slider). -
Page 24: Analogue Outputs 3-4
Analogue Outputs 3-4 This mix contains all the audio being recorded in SoniClear. The Analogue 3-4 mix is sent to the Line- Out 3-4 jacks. The signal from these outputs are physically connected back to the 4i4 using the Analogue 3-4 inputs. -
Page 25: Loopback
The Loopback mix is an internal, software-based loopback channel that provides the “Mix-Minus” signal of the audio to be sent to the remote participants. Mic 1-2 Line-In 3-4 (Stereo Mix for Recording and Monitoring) Mute Playback 1-2 (SoniClear and Windows App Playback) Playback 3-4 (Conference Call Participants Audio) Mute Mute Button Stereo Button... -
Page 26: Hardware Input Settings
Hardware Input Settings While in the Focusrite Mixing / Routing Control panel, click on the Input Settings button (in the top middle of the panel). This will open the hardware settings buttons to adjust the input signal hardware behavior. Set these as follows: Analogue 1 and 2 Line - On Air - Off... -
Page 27: Additional Settings
Additional Settings While in the Focusrite Mixing / Routing Control panel, click on the Settings gear button (at the top left of the control panel). This will display several additional driver hardware controls. Set these control options as follows: Sample Rate = 44.1 kHz Internal Clock Retain 48V = Enable... -
Page 28: Focusrite Driver Settings
Focusrite Driver Settings In addition to the mixer settings, the driver settings must be configured from the Focusrite control panels. Access the control panels by clicking on the system tray up-arrow icon, then left click on the Focusrite icon Streaming Settings Select the “Scarlett 4i4 (3 Gen) settings”... -
Page 29: Expose Windows Channels
Expose Windows Channels Select the “Expose / Hide Windows Channels” option from the Focusrite control icon in the system tray. This will display the Windows driver channels control panel. Enable (check) all inputs and outputs shown. -
Page 30: Windows Sound Settings
Windows Sound Settings Default Playback Device Select the “Windows Sound Panel” option from the Focusrite control icon in the system tray. This will display the Windows Playback settings control panel: Set the Focusrite 4i4 Playback 1-2 audio to be the default playback device for Windows by selecting the Focusrite Usb Audio device and click the Set Default button. -
Page 31: Default Recording Device
Default Recording Device Set the Windows Sound Recording defaults by clicking on the Recording tab of the Sound panel: Set the internal microphone device as the default recording device for Windows programs by clicking on that driver and then clicking the Set Default button. -
Page 32: Soniclear Software Preferences
SoniClear Software Preferences Overview The SoniClear software preferences must be configured to work with the Focusrite 4i4 interface. To do this, start SoniClear and select Edit/Preferences from the pulldown menu. The recordings created with this configuration will have the following channels:... -
Page 34: Hardware Tab - Audio Device Selection
Hardware Tab – Audio Device Selection Select the Hardware tab and modify the settings according to the following instructions. - Page 35 Recording Device Setup The Recording Device Selection side of the Hardware tab controls the usage of the sound cards in the computer during recording. Default Recording Device This is the sound card input for recording the stereo mix of all the participants. It should be set to “Analogue 3 + 4”.
- Page 36 Click on the Edit button next to the “First Recording Array Device” field to display the setup dialog for the individual microphone channels. This set of options controls how the individual inputs are recorded separately in SoniClear. Set each of the recording array devices to the corresponding stereo pair device in the 4i4. Only the first Recording Array Device is used for recording the two microphone independently: 1.
- Page 37 Advanced Playback Options These options control how playback is processed. These fields should only be changed in the event of problems with playback using the default settings. Consult SoniClear support for assistance. Monitor Delay Monitor Delay should be set to the default of 3 seconds.
-
Page 38: Transcriber Live Software Preferences
Transcriber Live Software Preferences When Transcriber Live is used with SoniClear Court Recorder 9, the Focusrite 4i4 headphone can be used to monitor audio, and readbacks can be played so that the readback audio is heard by the teleconference participants. -
Page 39: Hardware Tab - Audio Device Selection
Advanced Playback Options These options control how playback is processed. These fields should only be changed in the event of problems with playback using the default settings. Consult SoniClear support for assistance if this happens. Monitor Delay Monitor Delay should be set to the default of 3 seconds. -
Page 40: Zoom Conferencing Software Configuration
Zoom Conferencing Software Configuration The Zoom conferencing application must be manually set to the correct configuration to work with the Focusrite 4i4 interface. Set the Speaker device to “Playback 3 + 4”. Set the Microphone device to “Loopback L + R”. -
Page 41: Gotomeeting Conferencing Software Configuration
GoToMeeting Conferencing Software Configuration The GoToMeeting conferencing application must be manually set to the correct configuration to work with the Focusrite 4i4 interface. Set the Microphone device to “Loopback L + R”. Set the Speaker device to “Playback 3 + 4”. -
Page 42: Teams Conferencing Software Configuration
Teams Conferencing Software Configuration The Microsoft Teams conferencing application must be manually set to the correct configuration to work with the Focusrite 4i4 interface. Set the Speaker device to “Playback 3 + 4”. Set the Microphone device to “Loopback L + R”. -
Page 43: Webex Conferencing Software Configuration
WebEx Conferencing Software Configuration The Cisco WebEx conferencing application must be manually set to the correct configuration to work with the Focusrite 4i4 interface. Set the Speaker device to “Playback 3 + 4”. Set the Microphone device to “Loopback L + R”. -
Page 44: Other Communication Software Configuration
4i4 monitoring headphones. The playback audio will also be recorded in SoniClear. A typical application would be to play a video file on the computer for conference participants to hear.
Need help?
Do you have a question about the HA2 and is the answer not in the manual?
Questions and answers