
Related Manuals for Banana Pi BPI-M2


Summary of Contents for Banana Pi BPI-M2
- Page 1 Banana PI M2 User Manual SinoVoip CO.,LTD Banana PI BPI-M2 User Manual <Version: V2.0 > www.sinovoip.com.cn www.banana-pi.com...
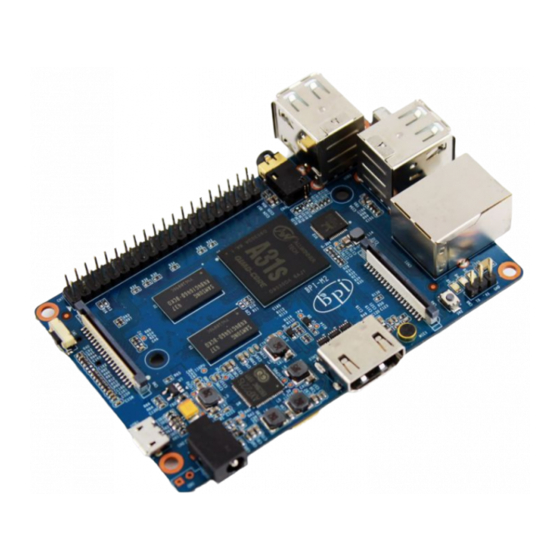
- Page 2 Banana PI BPI-M2with Gigabit ethernet port, It can run with Android 4.4 smoothly. The size of Banana PI BPI-M2 same as banana pi M1, it can easily run with the game it support 1080P high definition video output, the GPIO compatible with Raspberry Pi...
- Page 3 Banana PI M2 User Manual Hardware Specification of Banana pi BPI-M2 A31S ARM Cortex-A7 A31S ARM Cortex-A7 quad-core,256 KB L1 cache 1 MB L2 cache PowerVR SGX544MP2 · Comply with OpenGL ES 2.0, OpenCL 1.x, DX 9_3 SDRAM 1GB DDR3 (shared with GPU)
-
Page 4: Use Method
Banana PI M2 User Manual Interface: Use method Step 1: Get what you need www.sinovoip.com.cn www.banana-pi.com... -
Page 5: Wifi(Optional)
Banana PI M2 User Manual First time to enjoy your Banana Pi, you need at least the accessories in the table below. Item Minimum recommended specification & notes Minimum size 4Gb; class 4 (the class indicates how fast the card is). - Page 6 Step3: Prepare your SD card for the Banana Pi M2 In order to enjoy your Banana Pi M2, you will need to install an Operating System (OS) onto an SD card. Instructions below will teach you how to write an OS image to your SD card under Windows and Linux.
- Page 7 Banana PI M2 User Manual Download the a SD card format tool such as SD Formatter from https://www.sdcard.org/downloads/formatter_4/eula_windows/ Unzip the download file and run the setup.exe to install the tool on your machine. In the "Options" menu, set "FORMAT TYPE" option to QUICK, "FORMAT SIZE ADJUSTMENT"...
- Page 8 Banana PI M2 User Manual vii. Run mkfs –t vfat /dev/sdx command to format the entire SD card as FAT. (x should be replaced according to your SD card node) 3. Download the OS image from Download district. 4. Unzip the download file to get the OS image.
- Page 9 SD card. Wait patiently to successfully complete writing. Step4: Set up your Banana Pi M2 According to the set up diagram below, you can easily set up your Banana Pi. 1. Insert the written-image SD card that to the SD card spot on the left side edge of the underside of the board.
- Page 10 Banana PI M2 User Manual If all goes well, the Banana Pi will boot in a few minutes. The screen will display the OS GUI. Step5: Shut down your Banana Pi M2 www.sinovoip.com.cn www.banana-pi.com...
- Page 11 Banana PI M2 User Manual You can use the GUI to shut down the Banana Pi safely. Also you can run the command in the terminal: sudo halt sudo shutdown –h. This will shut down the PI safely, (just use the power key to turn off might damage the SD-cards file system).
- Page 12 Banana PI M2 User Manual GPIO specification Banana Pi 40-pin GPIO Banana Pi has a 40-pin GPIO header that matches that of the Model B+ Raspberry Pi. Following is the Banana Pi GPIO Pinout: www.sinovoip.com.cn www.banana-pi.com...
- Page 13 Banana PI M2 User Manual GPIO Pin Name Default Function Function2:GPIO CN7-P01 VCC-3V3 CN7-P02 VCC-DC CN7-P03 TWI2-SDA PH19 CN7-P04 VCC-DC CN7-P05 TWI2-SCK PH18 CN7-P06 CN7-P07 PWM1-P CN7-P08 UART5_TX CN7-P09 CN7-P10 UART5_RX CN7-P11 UART2_RX CN7-P12 PWM1-N PH10 CN7-P13 UART2_TX CN7-P14 CN7-P15...
- Page 14 Banana PI M2 User Manual CN7-P39 CN7-P40 1WIRE CSI Camera Connector specification: CSI Camera Connector The CSI Camera Connector is a 40-pin FPC connector which can connect external camera module with proper signal pin mappings. The pin definitions of the CSI interface are shown as below. This is marked on the Banana Pi board as “CN6″.
- Page 15 The LVDS Connector is a 40-pin FPC connector which can connect external LCD panel (LVDS) and touch screen (I2C) module as well. The pin definitions of this connector are shown as below. This is marked on the Banana Pi board as “CN9″.
- Page 16 LCD0-D16 PD16 UART specification: The header CON4 is the UART interface. For developers of Banana Pi, this is an easy way to get the UART console output to check the system status and log message. CN8 Pin Name Default Function...
Need help?
Do you have a question about the BPI-M2 and is the answer not in the manual?
Questions and answers