Page 1
Phone : (770) 282 8686 Warranty Registration and Inquiry For product warranty registration, TOTO U.S.A. Inc. recommends On-Line Warranty Registration. Please visit our web site http://www.totousa.com. If you have questions regarding warranty policy or coverage, please contact TOTO U.S.A. Inc., Customer Service Department, 1155 Southern Road, Morrow, GA 30260 (888) 295 - 8134 or (678) 466 - 1300 when calling from outside of U.S.A.
Page 2
SW574 type SW573 type ■ Thank you for your recent purchase of the TOTO Washlet. Please read the enclosed information to ensure the safe use of your product. ■ Be sure to read this Instruction Manual before using your product and keep it in a safe place for future reference.
Page 3
What functions are available on your product? The model name and part number are indicated on the bottom side of the toilet lid. The available functions vary according to the model. Model WASHLET Ref. SW584 type SW574 type Functions Part No. SW583 type SW573 type Page...
Page 11
Safety Precautions (Continued) Grounding Instructions This product should be grounded. In the event of an electrical short circuit, grounding reduces the risk of electric shock by providing an escape wire for the electrical current. This product is equipped with a cord having a grounding wire with a grounding plug. The plug must be plugged into an outlet that is properly installed and grounded.
Operational Precautions ■ For prevention of malfunctions ■ For prevention of damage ● Do not block the body sensor or the remote control ● Wipe plastic areas such as the main unit and remote transmitter or receiver. control with a soft, wet cloth. <About the Body Sensors>...
Parts Names Main display POWER LED Toilet lid cushion CLEAN indicator ENERGY SAVER LED SEAT LED Model name, part no., etc. Toilet lid Water supply hose Warm air dryer door Wand door Water supply valve Wand Seat switch (Built-in) Water drain lever Heated seat Power plug Power cord...
Page 14
Right rear of main unit Right side of main unit Remote control receiver Removal button Deodorizer vent Deodorizing filter Toilet lid and toilet seat underside Toilet seat cushions Body sensor A Body sensor B (SW584 type, SW583 type only)
Preparation Using the Product for the First Time 1. Insert the battery. Remove the remote control When the remote control is locked to from the hanger. prevent theft Remove the screw from the remote control fi xture. (Side view) Remote control Wall Hanger Hanger...
Page 16
2. Turn on the power. 3. Open the water supply valve. Insert the power plug. Fully open the water supply valve. • The wand extends and then retracts. Check that the POWER LED on the main display is lit up. •...
Basic Operations Opening and closing [SEAT OPEN/CLOSE] Opens and closes the toilet seat. (SW584 type, SW583 type only) Stopping [STOP] Stops the operation. Washing [SOFT REAR] Washes your rear with mild water pressure. [REAR] Washes your rear. * The mode changes between [SOFT REAR] (Flickering) and [REAR] (Lit) each time the button is pressed.
Page 18
Functions that operate when a button is pressed during "REAR", "SOFT REAR", "FRONT" or "WIDE FRONT" washing. [OSCILLATING] The wand moves back and forth to wash your rear thoroughly. The setting changes between "ON" and "OFF" each time the button is pressed. You can use this function whenever you feel like it.
Page 19
Basic Operations About the Menu Screen This section is an overview of the settings that can be configured with the remote control. See the corresponding pages for the detailed descriptions. • • The setting features vary according to the model. •...
Page 20
Level 1 Level 2 Level 3 CLEANING WAND CLEANING MODE ON/OFF AUTO OPEN/CLOSE 1. AUTO OPEN/CLOSE ENERGY SAVER 2. AUTO CLOSE WAITING TIME 1. AUTO ENERGY 90SEC SAVER 3. AUTO OPEN WAITING TIME 2. TIMER SAVER 15SEC Menu Screen 4. SEAT/LID MENU 1.
Automatic Functions Convenience Features Approaching Sitting Standing up Various automatic functions are available, such as a toilet lid that opens and closes automatically. Operation under the initial • • settings is described below. When using the toilet seat Toilet lid opens Toilet lid closes ( About 90 seconds after Opening the toilet lid...
Page 22
Moving away Changing Note settings When the room temperature • • reaches about 86 °F (30 °C) or higher, the sensor may not detect properly. (Open and Auto setting ON/OFF • • close manually.) Time until closing • • When the toilet lid is closed with (➝...
Automatic Functions Cleaning Features "EWATER+" is used automatically to clean the wand and toilet bowl. Approaching Sitting Standing up Deodorizer stops DEODORIZER (After about 2 minutes) Starts the deodorizer Cleans the wand automatically Clean the wand ( After about 25 seconds, automatically with the wand extends and "EWATER+"...
Page 24
Supports cleaning. ■ INDICATOR ■ BOWL LIGHT Lights to show that the "clean" Lights to show that auto bowl cleaning functions are operating. and auto wand cleaning are operating. Changing Note settings If dirt adheres... DEODORIZER • • ON/OFF ■ If dirt adheres to the wand (➝...
Temperature Adjustment Warm Water/Toilet Seat/Drying to select the Press [TEMP]. temperature you want to set. TEMPERATURE TEMPERATURE SETTING SETTING WATER WATER SEAT SEAT DRYER DRYER TEMPERATURE SETTING WATER SEAT DRYER TEMPERATURE SETTING WATER SEAT TEMPERATURE SETTING DRYER WATER Remote control SEAT display panel DRYER...
Page 26
to select the temperature level. TEMPERATURE SETTING WATER SEAT DRYER Warm water High temperature To turn the temperature "OFF", press until "OFF" is indicated. • • Toilet seat High temperature To turn the temperature "OFF", press until "OFF" is indicated. •...
Energy-Saver Features Type You can save energy by turning the toilet seat heater to a low temperature (or turning the heater "OFF") during periods when the toilet will be used infrequently. Energy-Saver Status Type Situation Main Display When energy-saver When the energy-saver You want to save is set...
Page 28
Toilet seat heater Example: Used infrequently from 9 pm to 6 am Set temperature Low temperature Low temperature Example: Set from 8 am to 5 pm Set temperature Set temperature Example: When auto energy-saver and timer energy-saver are used together Set temperature Set temperature Low temperature...
Page 29
Energy-Saver Features How to Set Press [MENU]. to select "ENERGY Auto energy- SAVER" and then press saver [ENTER]. MENU 1. CLEANING 2. ENERGY SAVER 3. AUTO FUNCTION 4. OTHER SETTING TEMPERATURE SETTING WATER Remote control SEAT display panel DRYER Timer energy- DIRECTIONAL saver Select keys...
Page 30
to select ENERGY SAVER "AUTO ENERGY 1. AUTO ENERGY SAVER". SAVER to select ENERGY SAVER "ON" and then AUTO ENERGY 1. AUTO ENERGY press [ENTER]. SAVER SAVER (To return ➝ Example: To save energy from 1 am to 7 am (for 6 hours) Perform the operation at the start time for timer energy-saver (1 am).
Maintenance Power plug Power Plug Do not use a dry cloth (Perform monthly) or toilet paper on plastic parts. (May cause damage.) Dry cloth Wet cloth Disconnect the power plug and wipe it with a dry cloth. Toilet Lid Deodorizing Filter Insert the power plug.
Main Unit/Deodorizing Filter Deodorizing Filter Main Unit (Perform monthly) (Perform monthly) <If you notice odors> Unplug the power plug. Remove the deodorizing Wet cloth Toilet paper, etc. fi lter. (May cause damage.) • Hold the knob and pull outward. Unplug the power plug. •...
Maintenance Gap between the Main Unit and the Toilet Bowl Gap between the Main Unit and the Toilet Bowl (Perform monthly) You can remove the main unit to clean the top of the toilet bowl and the bottom of the main unit. Soft cloth soaked in water Toilet paper, etc.
Gap between the Main Unit and the Toilet Lid Between the main unit and the toilet lid (Perform monthly) The toilet lid can be removed for thorough cleaning. Soft cloth soaked in water Toilet paper, etc. (May cause damage.) Unplug the power plug. Removing and Reinstalling Hold with Remove the toilet lid, and...
Maintenance Wand Wand (Perform monthly) <If you notice dirt> Soft cloth soaked in water Toilet paper, etc. (May cause damage.) Extend the wand. 1. Remove the remote control from the hanger, and press [MENU] on the backside. (Page 14) 2. Use to select "CLEANING"...
Water Filter Drain Valve Water Filter Drain Valve (Perform once every 6 months) <If you think the water pressure has weakened> Close the water supply valve. Remove the water fi lter drain valve. (Page 51) • The water supply stops. •...
Changing Settings Setting List Various settings can be configured to make the Washlet more convenient and user-friendly for you and your family. Setting Types AUTO OPEN/CLOSE AUTO CLOSE WAITING TIME TEMPERATURE AUTO SETTING WATER AUTO OPEN WAITING OPEN/CLOSE TIME SEAT DRYER SEAT/LID DIRECTIONAL...
Page 38
Applicable Setting Ref. Available Settings Models Page Set whether or not to open the toilet lid • • ON/OFF automatically Page 38 Change the amount of time before the • • 90SEC/25SEC lid/seat closes automatically. SW584 type, Change the amount of time before the •...
Page 39
Changing Settings AUTO OPEN/CLOSE Press [MENU]. Set whether or not to open the toilet lid automatically AUTO MENU select "AUTO OPEN/ 1. CLEANING FUNCTIONS" 2. ENERGY CLOSE SAVER and then press 3. AUTO FUNCTIONS [ENTER]. 4. OTHER SETTING AUTO FUNCTIONS Change the time period select "AUTO till automatic closing...
Page 40
to select AUTO OPEN/CLOSE "AUTO OPEN/ 1. AUTO CLOSE". OPEN/CLOSE to select AUTO AUTO OPEN/CLOSE "ON" or "OFF" OPEN/CLOSE 1. AUTO and then press OPEN/CLOSE [ENTER]. (To return ➝ to select AUTO OPEN/CLOSE "AUTO CLOSE 1. AUTO WAITING TIME". OPEN/CLOSE 2.
Page 41
Changing Settings AUTO OPEN/CLOSE Press [MENU]. Change the time period till automatic opening MENU (After closing manually.) select "AUTO AUTO OPEN 1. CLEANING FUNCTIONS" 2. ENERGY WAITING SAVER and then press 3. AUTO FUNCTIONS TIME [ENTER]. 4. OTHER SETTING AUTO FUNCTIONS select "AUTO 1.
Page 42
to select AUTO OPEN/CLOSE "AUTO OPEN 2. AUTO CLOSE WAITING TIME". WAITING TIME 90 SEC 3. AUTO OPEN WAITING TIME 15 SEC to select AUTO OPEN/CLOSE "15SEC", "30SEC" AUTO OPEN 2. AUTO CLOSE or "90SEC" WAITING TIME WAITING TIME 90 SEC 30 SEC 3.
Page 43
Changing Settings CLEANING Press [MENU]. Set whether or not to clean the wand automatically AUTO MENU WAND select "AUTO 1. CLEANING FUNCTIONS" CLEANING 2. ENERGY SAVER and then press 3. AUTO FUNCTIONS [ENTER]. 4. OTHER SETTING to select AUTO FUNCTIONS Set whether or not to "CLEANING"...
Page 44
to select CLEANING "AUTO WAND 1. AUTO WAND CLEANING". CLEANING to select CLEANING AUTO WAND "ON" or "OFF" CLEANING 1. AUTO WAND and then press CLEANING [ENTER]. (To return ➝ to select CLEANING "AUTO BOWL 1. AUTO WAND CLEANING". CLEANING 2.
Page 45
Changing Settings LIGHT Press [MENU]. Set whether or not to use the soft light SOFT MENU select "AUTO LIGHT 1. CLEANING FUNCTIONS" 2. ENERGY SAVER and then press 3. AUTO FUNCTIONS [ENTER]. 4. OTHER SETTING AUTO FUNCTIONS Set whether or not to select "LIGHT"...
Page 46
to select LIGHT "SOFT LIGHT". 1. SOFT LIGHT to select LIGHT "ON" or "OFF" SOFT LIGHT 1. SOFT LIGHT and then press [ENTER]. (To return ➝ to select LIGHT "BOWL LIGHT". 1. SOFT LIGHT 2. BOWL LIGHT to select LIGHT "ON"...
Page 47
Changing Settings OTHER SETTINGS Press [MENU]. Set whether or not to make a beep sound BEEP MENU to select 1. CLEANING "OTHER 2. ENERGY SAVER SETTINGS" 3. AUTO FUNCTIONS and then 4. OTHER press SETTINGS [ENTER]. Set whether or not to use the setting lock SETTING LOCK...
Page 48
to select OTHER SETTINGS "BEEP". 1 BEEP to select OTHER SETTINGS "ON" or "OFF" BEEP 1 BEEP and then press [ENTER]. (To return ➝ to select OTHER SETTINGS "SETTING LOCK". 1 BEEP 2. SETTING LOCK to select OTHER SETTINGS "ON" or "OFF" SETTING LOCK 1 BEEP and then press...
What to Do? If you cannot operate with the remote control ■ Operation is also possible using the buttons on the Washlet control panel. ● The batteries may have worn out. Replace the batteries. Washlet control panel This button cannot be used.
Freeze Damage Prevention In preparation for freezing conditions, such as in wintertime, take measures to prevent freezing. Attention! ● Do not use the energy-saver feature if there is a risk of the product being exposed to freezing temperatures. (The product may be damaged.) ●...
What to Do? Long Periods of Disuse If you will be absent from home for a long time in the winter, be sure to drain the water to prevent freezing. Also, if the toilet is in a location you will not visit for a long time, drain the water. (The water in the tank may become contaminated and cause skin inflammation or other problems.) How to drain the water Drain the water from the toilet tank.
Troubleshooting First, try the actions described on pages 51 to 55. If the problem persists, CAUTION consult with the installer, the seller, or the contact referred on the back cover of this manual. If a water leak occurs, close the water supply If the CLEAN indicator no longer lights up...
Page 53
Troubleshooting Rear and Front Washing Ref. Trouble Please check Page ● Can you operate with the Washlet control panel? (Check while sitting on the toilet seat.) ➞Check "Is the remote control working?" ● When the temperature is low, it takes time for the wand to come out after the remote control button is pressed because the water must be warmed up first.
Page 54
Warm Air Drying Ref. Trouble Please check Page The dryer temperature ● Is the dryer temperature set to low level? is low. ● Does the seat switch have difficulty detecting? Stops in the middle of ➞Sit back on the toilet seat. If you get up slightly from the seat, or sit forward on the seat, the seating switch may temporarily stop detecting your use.
Page 55
Troubleshooting Toilet Seat and Toilet Lid (AUTO OPEN/CLOSE) For SW584 type, SW583 type only. Ref. Trouble Please check Page The toilet lid and toilet ● Are the settings configured to open the toilet lid and toilet seat at the same seat open at the same time? time.
Page 56
Energy-Saver Ref. Trouble Please check Page The timer energy- ● Did you replace the remote control batteries? saver feature is not When the batteries are discharged, the settings may be erased. • • working. ➞Reconfigure the settings. The auto energy- ●...
(W390 mm, D480 mm, H99 mm) Approx. 11.2 lb Approx. 10.1 lb Approx. 10.8 lb Approx. 9.7 lb Weight (Approx. 5.1 kg) (Approx. 4.6 kg) (Approx. 4.9 kg) (Approx. 4.4 kg) * Temperature around the warm air outlet measured by TOTO.
Need help?
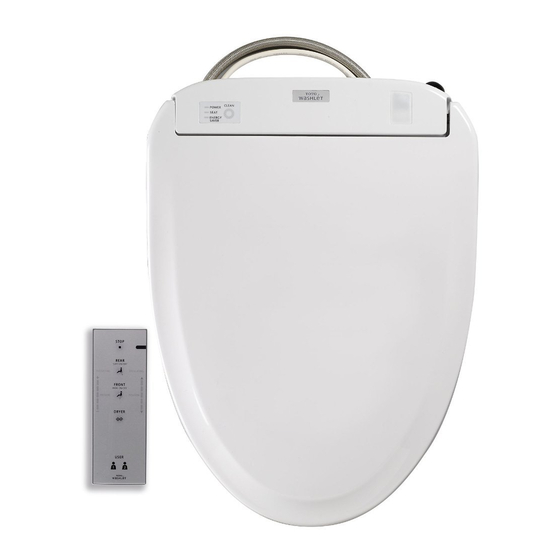
Do you have a question about the WASHLET SW584 and is the answer not in the manual?
Questions and answers