Advertisement
Quick Links
© 2022, The Chamberlain Group LLC | All Rights Reserved | Tous droits réservés | Todos los derechos reservados
Compatible with:
Smart Garage
TM
Control
myQ Garage
All versions of:
All versions of:
• MYQ-G0401
• MYQ-G0201
• 821LMC
• 821LM
myQ
®
Smart Garage
TM
Hub
All versions of:
• MYQ-G0301
• 821LMB
NOTE: Your Hub has the capacity to program two Door Sensors.
This Sensor can either be added to a second Garage Door Opener
or replace an existing inoperable Door Sensor.
TO ADD A NEW DOOR SENSOR TO A SECOND
GARAGE DOOR OPENER GO TO THE myQ APP
TO REPLACE AN EXISTING DOOR SENSOR
1
. If the current Door Sensor is still operating and connected
to a Garage Door Opener, press the test button on the
existing Door Sensor. The Hub beeps one time if the
current Door Sensor is door 1 or beeps twice if door 2.
2
. If the current Door Sensor does not work and you have
two Door Sensors connected to the Hub, press the test
button on the other Door Sensor. The Hub will beep once
if the other Door Sensor is door 1 or beep twice if door
2. You will need to select the other button on the Hub for
your new Door Sensor.
3
Remove the pull tab from the new Door Sensor to
.
activate the battery.
4
. On the Hub, press the button for door 1 or 2, depending
on the information from steps 1 and 2 above. A solid
amber LED light will appear.
5
. On the new Door Sensor, press and release the
Test button. The Hub will flash and beep indicating
successful programming.
6.
Mount Door Sensor (instructions to the right).
7
. In the myQ app, check that you can open and close your
garage door to confirm successful programming.
TEST DOOR SENSOR BATTERY
Test your Door Sensor every 6 months or if the myQ system is not working as expected.
Press and release the test button on the Door Sensor, the LED on the Door Sensor should
blink and the Hub should beep. Wait 5 seconds, then repeat this test 5 more times
(wait 5 seconds between each test). If the LED doesn't blink or the Hub doesn't beep with
each press, replace the battery in the Door Sensor.
Replacement Part: K010A0056 Door Sensor 3V Battery, CR2450.
NOTICE: This device complies with Part 15 of the FCC rules and Industry Canada's license-exempt RSSs. Operation is subject to the following two conditions: (1) this device may not cause harmful interference, and (2)
this device must accept any interference received, including interference that may cause undesired operation.
Any changes or modifications not expressly approved by the party responsible for compliance could void the user's authority to operate the equipment.
This device must be installed to ensure a minimum 20 cm (8 in.) distance is maintained between users/bystanders and device. This device has been tested and found to comply with the limits for a Class B digital
device, pursuant to part 15 of the FCC rules and Industry Canada ICES standard. These limits are designed to provide reasonable protection against harmful interference in a residential installation. This equipment
generates, uses and can radiate radio frequency energy and, if not installed and used in accordance with the instructions, may cause harmful interference to radio communications. However, there is no guarantee
that interference will not occur in a particular installation. If this equipment does cause harmful interference to radio or television reception, which can be determined by turning the equipment off and on, the user is
encouraged to try to correct the interference by one or more of the following measures:
• Reorient or relocate the receiving antenna.
• Increase the separation between the equipment and receiver.
• Connect the equipment into an outlet on a circuit different from that to which the receiver
is connected.
• Consult the dealer or an experienced radio/TV technician for help.
114-5736-000
SMART GARAGE™ CONTROL DOOR SENSOR QUICK START GUIDE
ALL VERSIONS OF: MYQ-G0402 AND 821LMC-SENSOR
®
To reduce the risk of SEVERE INJURY to persons:
•
DO NOT enable the Smart Garage Control if operating either one-piece or swinging doors. Enable
this device with sectional doors ONLY.
If using the Smart Garage Control with residential door openers, the Control must be used
only with door openers manufactured after 1993 that use photoelectric sensors located
near the bottom of the door track that do not change the state of those photoelectric
sensors to a low power mode.
WARNING: This product can expose you to chemicals including lead, which are known
to the State of California to cause cancer or birth defects or other reproductive harm. For
more information go to www.P65Warnings.ca.gov
Door 1
Door 2
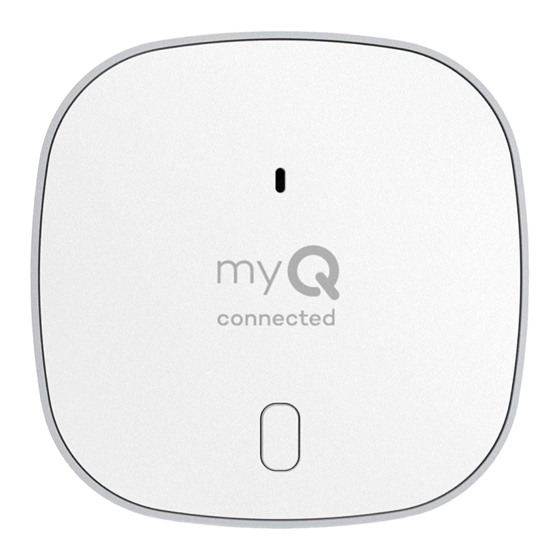
HUB
LED
Pull Tab
Test
MOUNT DOOR SENSOR
Button
DOOR SENSOR
Install the new Door Sensor (top facing up) with the included fastening strips (A.)
or optional screws (B.) to a clean, dry area on top panel of garage door as shown.
A.
Chamberlain.com/smart-garage-control/manual
One Year Limited Warranty:
The Chamberlain Group LLC warrants to the first consumer purchaser of this product that it is free
from defect in materials and/or workmanship for a period of 1 year from the date of purchase.
SMART GARAGE
CONTROL HUB
Amber LED
OR
Hook
and Loop
Adhesive
B.
Strips
Pry with coin
LiftMaster.com/smart-garage-control/manual
PRODUCT HELP
Advertisement

Related Manuals for Chamberlain MYQ-G0402


Summary of Contents for Chamberlain MYQ-G0402
- Page 1 1 year from the date of purchase. • Consult the dealer or an experienced radio/TV technician for help. © 2022, The Chamberlain Group LLC | All Rights Reserved | Tous droits réservés | Todos los derechos reservados 114-5736-000...
- Page 2 • Connectez l’équipement à une prise située sur un circuit différent de celui auquel le récepteur est connecté. The Chamberlain Group LLC garantit au premier acheteur individuel de ce produit qu’il est exempt de • Conectar el equipo en un tomacorriente en un circuito diferente de donde esté conectado el receptor.