Advertisement
Quick Links
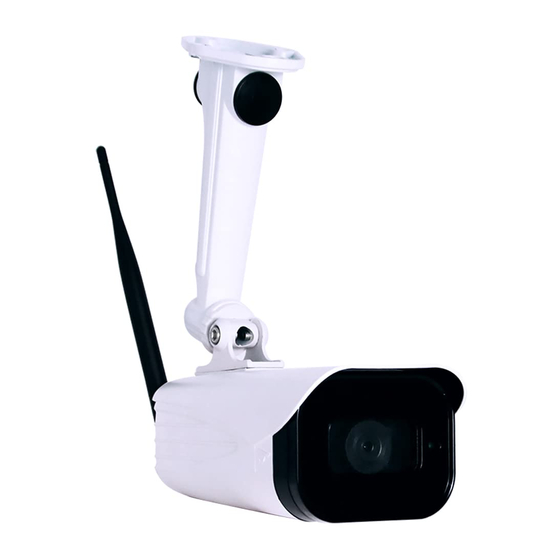
User Manual of the WiFi Surveillance Camera
Built-in Relay Switch (Model: TC186)
1. Specifications
Pixel and resolution: 2M pixel (1080P)
Network connection: WiFi or Ethernet Cable
Sensor and lens: CMOS, 6mm
Night vision mode: ICR infrared filter type
Night vision distance: 15m
Working mode: Toggle or Self-hold Selectable
Maximum capacity of the Relay Contact: 10A/250VAC 10A/30VDC
2. Installation of the APP
You can search "LinkCraft" in Google Play or iOS APP store to download & install the
APP.
3. Installation of the Micro SD card
The camera supports an optional Micro SD card which storage could be up to
maximum 128GB. You can install the Micro SD card to recording the monitoring video
in the local card. You can find 4 screws on the bottom cover. Loosen the 4 screws and
you'll find a card slot. Insert the Micro SD card into the card slot and then fix the little
plate back to the bottom cover to complete installation.
NOTE: The Micro SD card will record the monitor video after about 5 minutes when it's
installed into the camera at the first time.
C030328
1
VER21a
Advertisement

Related Manuals for Topens TC186

Summary of Contents for Topens TC186
- Page 1 User Manual of the WiFi Surveillance Camera Built-in Relay Switch (Model: TC186) 1. Specifications Pixel and resolution: 2M pixel (1080P) Network connection: WiFi or Ethernet Cable Sensor and lens: CMOS, 6mm Night vision mode: ICR infrared filter type ...
- Page 2 4. Wire connection with the Gate/Garage Door Opener You can connect the BLUE wire and the YELLOW&GREEN wire to the exit or push button terminals of the control board (no matter the polarity) to activate the gate opener.
- Page 3 5. Wire connection with the Automatic Industrial Equipment by controlling the power supply directly You can connect the YELLOW&GREEN wire (COM) to the LIVE LINE (or positive electrode of power input) and connect the BLUE wire (NO) to LIVE (or positive) power supply terminal of the equipment respectively.
- Page 4 6. Wire connection with the Automatic Industrial Equipment with remote control terminals You can connect the BLUE wire and the YELLOW&GREEN wire to the wired remote control terminals of the equipment to control it via the camera. 7. Check the WiFi signal before adding the camera to your phone...
- Page 5 8. How to Add the Camera to the Android Phone NOTE 1: The camera can access the network via WiFi or Ethernet cable. The configuration steps are the same as the WiFi when using the Ethernet cable. You can input any WiFi name and password when configuring it with the Ethernet cable.
- Page 6 NOTE 1: The APP will recognize the Country Code of the SIM card of your phone. There is no need to input the Country Code when registering. 8.2 Ensure there is a WiFi network is available for your phone & the WiFi camera and the phone has been accessed into the WiFi network before configuring.
- Page 7 8.3 Power on the camera. Indicator will flash RED and GREEN light alternately slowly (1 second/once). Use a sharp tool to press and hold the SET button for more than 2 seconds until the indicator RED and GREEN light alternately quickly (0.5 second/once) and then release.
- Page 8 8.6 Click “BACK” function button of the phone to return to the “LinkCraft” APP once the WLAN network switch back to the WiFi network which you intend to use for the camera. And the APP will display a dialog box of “Binding is successful”.
- Page 9 8.7 Click “OK” to jump to the camera display interface after the binding is successful. After waiting for a few seconds, the “online” status will turn to “Connected” which indicates that the camera is properly connected to the network. You can’t touch the device to get into the main control interface until the status turns to “Connected”.
- Page 10 9. How to Add the Camera to the iOS Phone 9.1 Register a user account and login into the APP refer to step 7.1 and ensure your phone has been connected to a valid WiFi network similar as step 7.2. 9.2 Power on the camera.
- Page 11 in the APP. After waiting for a few seconds, the status will turn to “connected”, now you can get into the main control interface to control it. Go back to the LinkCraft APP to input the WiFi password...
- Page 13 10. How to Use the Camera to Activate the Gate Opener & the Industrial Equipment with Remote Control Terminals NOTE: Please ensure the camera has been connected to the gate opener or the equipment as Chapter 4 or 6 wiring diagram before activating the gate opener.
- Page 14 11. How to Use the Camera to Control the Power Supply of the Industrial Equipment Directly 11.1 Click the camera to enter the monitor display and control interface when the status displays “Connected” (Refer to step 9.1). 11.2 You can press the timer setting icon on the main control interface to set the working mode of the switch to self-hold mode (The switch will hold the status once you press down the control button).
- Page 15 Enable/disable the timer directly Click SAVE if you make any change 12. How to Share the Camera with Other Users 12.1 You can share the camera to any other person. The person which you intend to share the camera should install the APP and register a user account. Click on the top left corner of the APP's main interface to enter my circle settings and add a friend account.
- Page 16 12.2 After the addition is completed, return to the main interface of the APP. Click the setting iron to get into the enable/disable sharing interface. You can tick the user account which you want to share. The account which has been shared should wait for about 1 minute before entering the APP to operate.
- Page 17 10: Video playback if there is a Mini SD card installed in the camera. 11: View the photo and video which you take with the NO. 4 and NO.5 function of the camera in your local device (mobile phone) 10 11...
- Page 18 TOPENS Website www.topens.com Any question, please do not hesitate to contact us: E-mail: support@topens.com Kindly include your Product Model, Purchasing Date & Site, Order #, and your contact information. All your concerns will be replied within 24 hours. Tel: +86 (571) 8908 0213 (China)
Need help?
Do you have a question about the TC186 and is the answer not in the manual?
Questions and answers