Sign In
Upload
Download
Table of Contents
Contents
Add to my manuals
Delete from my manuals
Share
URL of this page:
HTML Link:
Bookmark this page
Add
Manual will be automatically added to "My Manuals"
Print this page
×
Bookmark added
×
Added to my manuals
Manuals
Brands
Fröling Manuals
Pellet stove
7
Installation instructions manual
Fröling 7 Installation Instructions Manual
Hide thumbs
1
Table Of Contents
2
3
4
5
6
7
8
9
10
11
12
13
14
15
16
17
18
19
20
21
22
23
24
25
26
27
28
29
30
31
32
33
34
35
36
page
of
36
Go
/
36
Contents
Table of Contents
Bookmarks
Table of Contents
Table of Contents
General
Safety
Hazard Levels of Warnings
Permitted Uses
Permitted Fuels
Qualification of Assembly Staff
Personal Protective Equipment for Assembly Staff
Qualification of Operating Staff
Protective Equipment for Operating Staff
Technology
Overview of the Bag Silo Types
Measurements: Bag Silo Types 7 - 20
Measurements: Bag Silo Types 30 - 50
Capacity
Shaker (Optional)
Dimensions
Assembly
General Information for Installation Room
Materials Supplied
Fitting the Bag Silo Frame
Fitting the Filling Pipe
Filling Pipes for Low Rooms
Fitting the Suction Probe
Install Hose Lines
Assembly Information for Hose Lines
Shaker (Optional)
Fitting the Shaker
Wiring the Shaker
Activating the Shaker in the Software
Functions
Final Check
Operation
Notes on First Filling
Before Filling
Filling Process
Residual Pellets in the Bag Silo
Bag Silo Without Shaker
Bag Silo with Shaker
Cleaning
Recurrent Check
Correcting any Cloth Shifts
Advertisement
Quick Links
Download this manual
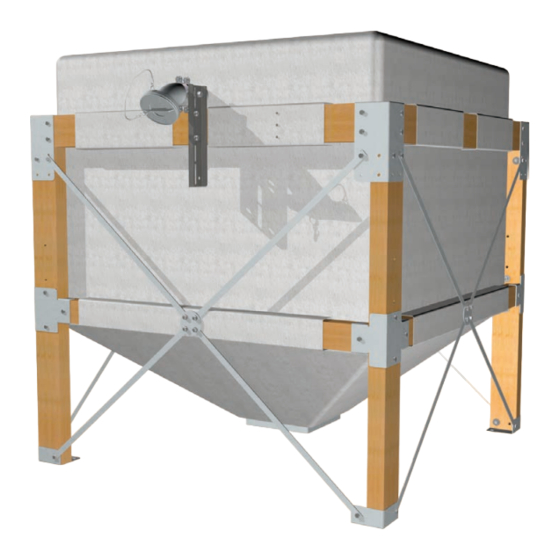
Installation instructions
Pellet bag silo type 7 - type 50
Translation of original German version of installation instructions for technicians.
Read and follow all instructions and safety instructions.
All errors and omissions excepted.
M1400822_en | Edition 15/02/2022
Table of
Contents
Previous
Page
Next
Page
1
2
3
4
5
Advertisement
Table of Contents
Need help?
Do you have a question about the 7 and is the answer not in the manual?
Ask a question
Questions and answers
Related Manuals for Fröling 7
Pellet stove Fröling S1 Turbo Hydraulic Schematics
(24 pages)
This manual is also suitable for:
8
9
10
20
30
40
...
Show all
50
Type 7
Type 8
Type 9
Type 10
Type 20
Type 30
Type 40
Type 50
Table of Contents
Print
Rename the bookmark
Delete bookmark?
Delete from my manuals?
Login
Sign In
OR
Sign in with Facebook
Sign in with Google
Upload manual
Upload from disk
Upload from URL


Need help?
Do you have a question about the 7 and is the answer not in the manual?
Questions and answers