
Summary of Contents for Hoelzle D14330
- Page 1 Operating Instructions 5.6" HD Digital LCD Color Monitor Please read this manual thoroughly before operating the unit, and keep it for future reference. V1.0...
-
Page 2: Table Of Contents
Contents 1. Precautions....................... 1 2. Features........................3 3. Technical Specifications..................3 4. Accessories.......................4 5. Parts Identification....................5 6. Remote Control Operation..................6 7. Basic Operation......................8 8. Menu........................10 (1) PICTURE......................10 (2) OPTION......................10 (3) SYSTEM......................11 (4) AUTO-SCAN....................11 (5) SCALE......................12 9. -
Page 3: Precautions
1. Precautions Storage and Keeping Do not expose the monitor to excessive heat or cold. The storage temperature of this device is -30~+80℃, and the operating temperature is -20~+70℃. The humidity is Rh90%. Never use this device near a bathtub, wash basin, kitchen, damp basement, swimming pool or similar places. - Page 4 Maintenance Remove all the cable connections from the monitor before cleaning the unit. Use a mild household detergent and clean the unit with a slightly damp, soft cloth. Never use strong solvents such as thinner or benzine, as they might damage the finish of the device.
-
Page 5: Features
2. Features TFT LCD monitor with wide angle view and high resolution display. Picture image may be adjusted for Horizontal, Vertical, Mirror and Normal viewing. Select from 8 languages for user operation. Automatic back lighting for automatic brightness control. Full-function remote control. Multiple video formats available:1080P30/1080P25/720P30/720P25/PAL/NTSC. -
Page 6: Accessories
4. Accessories Center mount bracket U- support bracket Angle adjustment screws Sun shield AV and power supply adapter cable IR Remote control Flush mount(optional) Special Notice ! Accessory supply may be different for different application. -
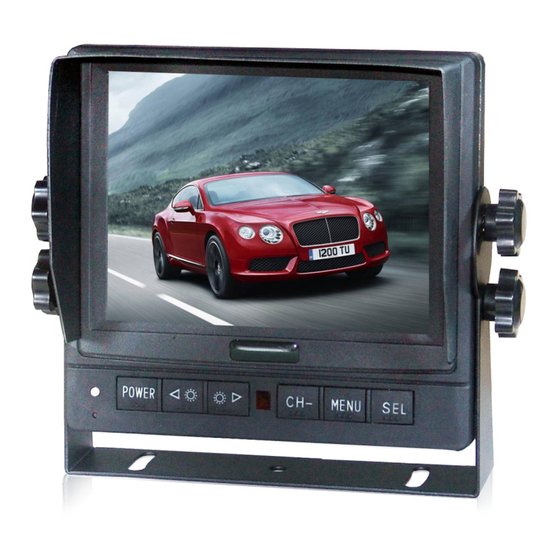
Page 7: Parts Identification
5. Parts Identification Digital color LCD screen Power indicator CAM1 / CAM2 / CAM3 selector Automatic brightness control sensor Menu Power switch Brightness decrease Setting selection down Brightness increase Remote control sensor U- support bracket Loudspeaker U-Support bracket installation Support attaching piece Video, Audio, Power and Trigger input... -
Page 8: Remote Control Operation
6. Remote Control Operation Power Switch Horizontal Flip Vertical Flip Setting Selection Up More Brightness Less Brightness Menu Setting Selection Down CALL LANGUAG Notice Notice Please align the remote control with the infrared-receiving window on the monitor to operate. Never disassemble the remote control or allow it to drop, or become wet. Press the control buttons firmly. - Page 9 POWER (Power Switch): Press to turn on/off the monitor. (Horizontal Turning of Picture): Press to turn picture horizontally. (Vertical Turning of Picture): Press to turn picture vertically. CH+ (Setting Selection Up): Press to select the upper setting ...
-
Page 10: Basic Operation
7. Basic Operation Installation of Base Support: ① Adjust monitor level by sliding the support to the desired height. ② Adjust the angle of the monitor and tighten the knob on the center mounting bracket. Support attaching piece Knob Knob Installation of U-support bracket: ... - Page 11 Black 13 pin male Black 13 pin female Cameras White 4 pin male for Camera 1. Blue 4 pin male for Camera 2. Brown 4 pin male for Camera 3. Single red wire to positive power supply of DC:10-32V. Single black wire to GND. Single white wire to positive power wire of Camera 1.
-
Page 12: Menu
8. Menu Press Menu to display the following options and settings: 1. PICTURE 2. OPTION 3. SYSTEM 4. AUTO SCAN 5. SCALE (1) PICTURE BRIGHTNESS,CONTRAST,COLOR,VOLUME options will display on the screen as illustrated below: Press to select BRIGHTNESS. PICTURE BRIGHTNESS CONTRAST COLOR... -
Page 13: System
(3) SYSTEM LANGUAGE,RESOLUTION,BLUE BLACK,AUTO DIM functions will display on the screen as illustrated below: Press to select LANGUAGE. SYSTEM LANGUAGE ENGLISH RESOLUTION AUTO BLUE-BLACK AUTO-DIM Press to select English, Deutsch, Français,Español,Português,Italiano, Nederlands or Русский options. Press to select RESOLUTION. Press to select AUTO/1080P30/1080P25/720P30/720P25/PAL/NTSC options. -
Page 14: Scale
(5) SCALE CAM1,CAM2,CAM3,CAM1-SCALE,CAM2-SCALE,CAM3-SCALE options display on the screen as illustrated below: Press to select CAM1. SCALE CAM1 CAM2 CAM3 CAM1-SCALE CAM2-SCALE CAM3-SCALE Press to select ON/OFF. Press to select CAM1-SCALE. Press to adjust the PARK LINE position as below: Press to move the PARK LINE to LEFT or RIGHT. -
Page 15: Troubleshooting
9. Troubleshooting The Symptoms described below do not necessarily mean a failure within the display. Please check the following items before you initiate request for repair. Symptom Possible Causes / Solutions Improper connection of automobile adapter. Use of No picture un- authorized power supply.
Need help?
Do you have a question about the D14330 and is the answer not in the manual?
Questions and answers